| From: PeteA
|
|
|
|
|
|
|
| Date: 22-Feb-11 |
|
Looking for plans/ideas for homemade cresting jigs.
|
|
| From: Buzz
|
|
|
|
|
|
|
| Date: 24-Feb-11 |
|

|
|
| From: oldgoat
|
|
|
|
|
|
|
| Date: 24-Feb-11 |
|
I used to have an old sewing machine motor with foot pedal and everything, carried it from one duty station to the next with my household goods for years thinking someday I might use it for something, was thinking more about building flyrods then, wonder if I still have it somewhere, would work great for something like this.
|
|
| From: Selden Slider
|
|
|
|
|
|
|
| Date: 24-Feb-11 |
|
Oldgoat, I built surf fods that way for years. Now I have a professional set up. I don't think the foot peddle is a good idea for a cresting jig. Too fast and too variable. The above pic shows a reostat (dimmer) suitch that would be much better. When cresting you must maintain a constant speed. A foot peddle is not the best choice for consistancy. Frank
|
|
| From: dire wolf
|
|
|
|
|
|
|
| Date: 24-Feb-11 |
|
I built a dandy cresing rig using a 6"x30" board. Used a standoff conduit support clamp to attach a smallAC/DC variable/reversible drill to the board on one end ..The drill was worthless for anything else...:)
Drilled holes in the board so I can drop a pin down and activate the drill's trigger for a proper RPM which is less that 150 RPM.
The point-tapered end of the arrow gets chucked up in the drill via a piece of rubber gas tubing that allows one to tweak the arrow alignment so all spins truely.
The arrow rests on the other end close to the nock taper on a small felt covered VEE block. Little block attached to the board upon which I place a piece of tape with the cresting scheme I'm going to do.
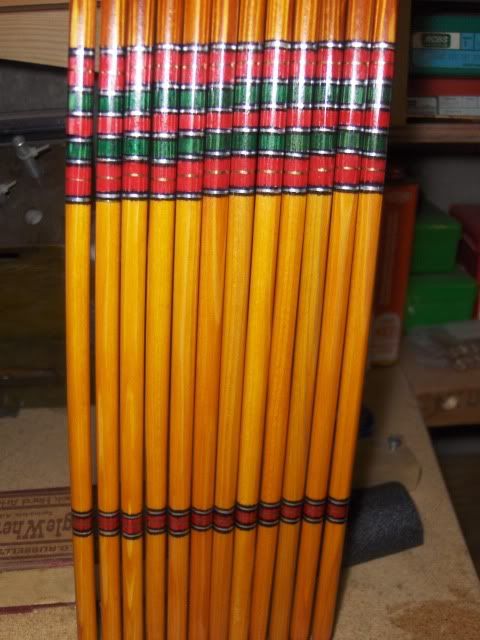
Arrow spins away from the paint brush. Shafts are usually dipped, sometimes capped too.. before cresting.AND heat-hand straightened. Straight woods crest much better than those thast aren't..:)
After cresting is dry then overcoat dip for entire arrow and go on to nock, point, fletch. I use quality acrylic paints with some small variety of good artist's brushes and the paint is slightly thinned to flow nicely. It is a fun process if you plan and execute well and are not in a hurry.Important that each line or badn dries before you crest the next line or band right next to it.I usually do the colored bands first, then the thing lines dividing each last.
Jim
|
|
| From: JB
|
|
|
|
|
|
|
| Date: 24-Feb-11 |
|
Buzz, can you give us a little info on what the motor is and what holds/grips the arrow?
Thanks
|
|
|
|
| From: Stumpkiller
|
|
|
|
|
|
|
| Date: 24-Feb-11 |
|
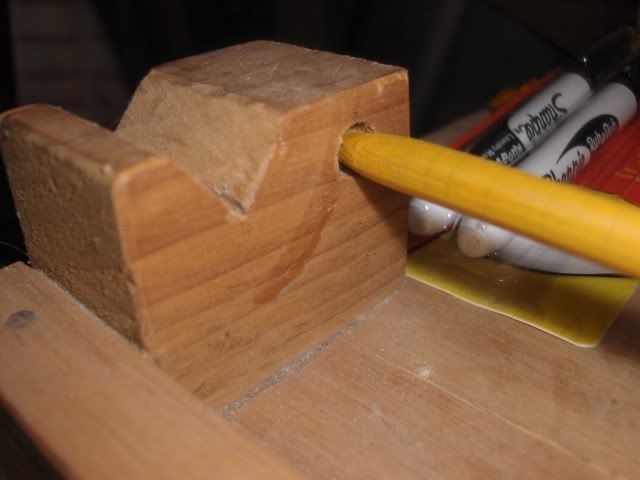
Fancy.
Mine relies on twirling the shaft with my left hand.
It's a piece of 3/4" plywood with a block at each end. One has two "v"s on top and the other one "v" and a 3/8" hole.
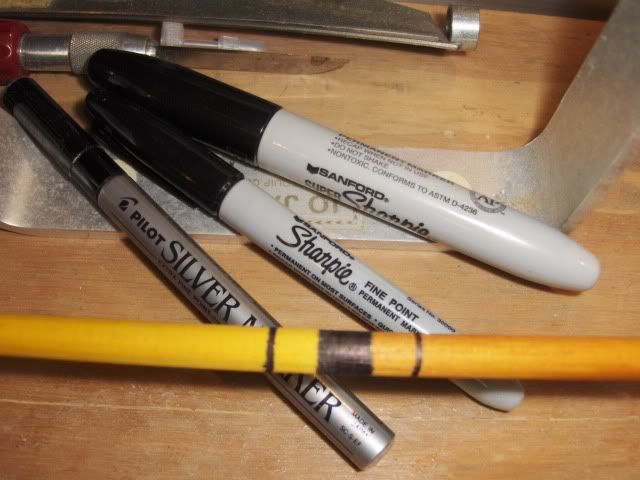
I use Sharpie markers and Pilot metallic ink markers.

|
|
| From: Stu Miller
|
|
|
|
|
|
|
| Date: 24-Feb-11 |
|

I started out also with a simple motor and a "V" block set at first using silicone tubing as an arrow chuck. That works well unless you plan to do a lot of arrows per year.
When I wore that first design out I built the wacky contraption you see here in the photo. This one utilizes an old fan motor I had laying around and mostly scrap oak trim pieces. I also wanted something that was more adjustable and that would support the shaft on a series of bearings that takes out nearly all of the wobble of an wood shaft that is not straight. The bearings are simple shateboard wheel bearings and the "belt is an o-ring from an old shop vac. The motor has a three speed switch, but honestly I only use the lowest speed. I have been using this one for nearly two years straight now and it is still working well. I keep telling Dan that if I can break this one I will buy one of his SpinRites!
I think that with homemade cresters there is no limit to what will work so just let you creativity flow and don't be afraid to experiment and try something different/unusual!
-Stu
|
|
| From: Stumpkiller
|
|
|
|
|
|
|
| Date: 24-Feb-11 |
|
Wow! That's a MIL SPEC cresting lathe!
The old Bohning cresting lathe is pretty sure-fire, as well. ;-)
PS - take a #2 pencil and a wobbly wood shaft and hold the pencil lightly over it as the shaft spins to "tick" the high spots. That's where you heat & push down with your straightening tool(s) after pulling the shaft off the lathe.
|
|
| From: sadie jones
|
|
|
|
|
|
|
| Date: 24-Feb-11 |
|
stumpkiller-my set-up is nearly identical to yours. made outta scrap wood laying about the shop. and i use the sharpie paint pens. but man, you got a much better hand than i for sure. i really love the sharpie paint pens tho there are a few colors not quite true. i have found the red to be more pink. but krylon also makes a very limited number of paint pens and their red is right on. thanks
|
|
| From: PeteA
|
|
|
|
|
|
|
| Date: 24-Feb-11 |
|
Thanks Guys, All great looking designs. Looks like I've got to start rummaging around the garage and kitchen, got my eye on the blender, hand mixer and an electric pencil sharpener!
|
|
| From: Snag
|

|
|
|
|
|
|
| Date: 24-Feb-11 |
|
Stu, there goes that engineer's brain coming up with stuff again! haha Very nice design. Looks like you got it all figured out. My brain doesn't work that way, when it works, so I have the SpinRite.
|
|
| From: Slewfoot62
|
|
|
|
|
|
|
| Date: 24-Feb-11 |
|
First - Stu as the young man at work says - YOU HAVE MAD SKILLS -Second- I went to a sewing machine shop and told the lady what I wanted and she had a pile of junk machines people didnt fix and she gave me a junk sewing machine with a good motor.
|
|
| From: Dan In MI
|
|
|
|
|
|
|
| Date: 24-Feb-11 |
|
I would show my homemade one, but some people would call it a protoype. ;-)
Stu, I still like yours, (a LOT) but I want sooooooo bad to apply a couple tweaks to it. I also have questions about your bearings. I used bearings for quite a while, but they tended to leave "tracks." Have you found a way around that?
|
|
| From: 4FINGER
|
|
|
|
|
|
|
| Date: 26-Feb-11 |
|

OK...This suckers UGLY!!!!lol...BUT...it works well! Old motor from a thrift store, speed controller, and a collett made out of stuff from the hardware store...scrap wood and an aluminum stabilizer bar for my shaky hands, haha...total cost was around 10 bucks but that was like 15 yrs ago. Cool cresters Folks!...4finger
|
|
| From: Tradbh
|
|
|
|
|
|
|
| Date: 26-Feb-11 |
|
I made mine from an old house desk fan 2 speed motor In the late 50`s. You can tell, the motor is painted torqouise! Rubber tubing chuck, and a seperate movable "V" block. I was about 12 when I made it and I am still using it. I updated it in the `80`s with a reostat switch so I could slow it down a bit more.Before that I just slowed it down with a finger!
|
|
| From: stringboy
|
|
|
|
|
|
|
| Date: 26-Feb-11 |
|
find old sears dryers,they have a rubber roller set up for supporting the drum that comes with a verticle post that attaches to a flat plate with 2 screw holes.way better that turning on a flat pad that will scratch the finish.they are not that expensive either
|
|
If you have already registered, please sign in now
For new registrations Click Here
|
|
|
|