| From: beardedone
|
|
|
|
|
|
|
| Date: 06-Mar-19 |
|
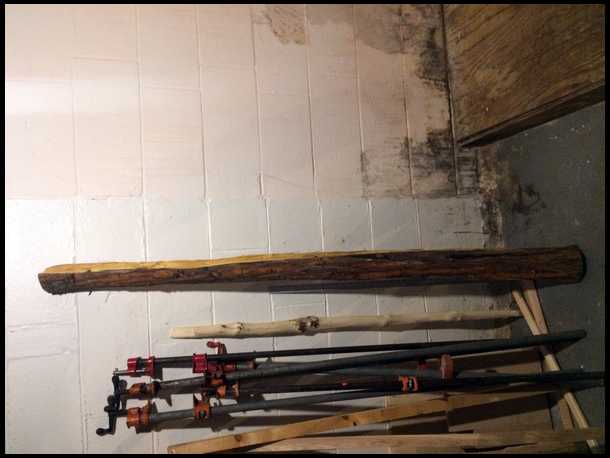
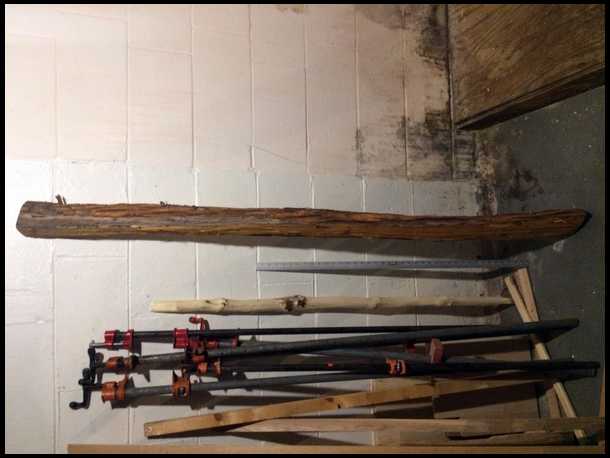
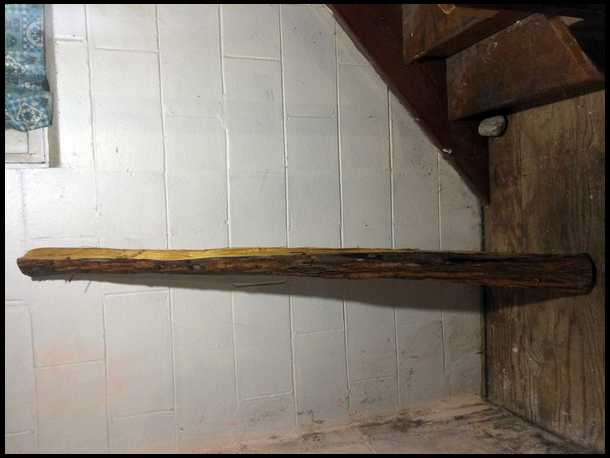
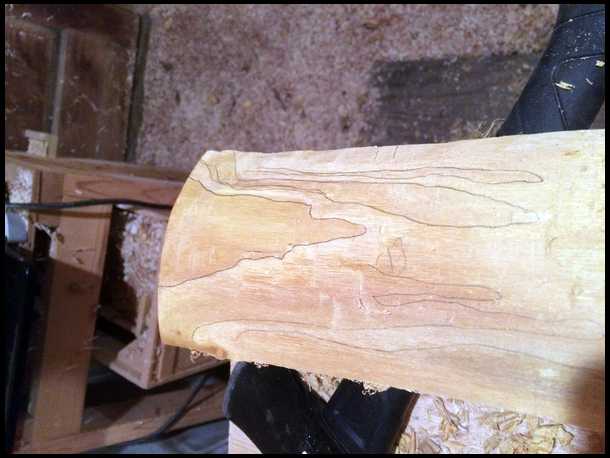
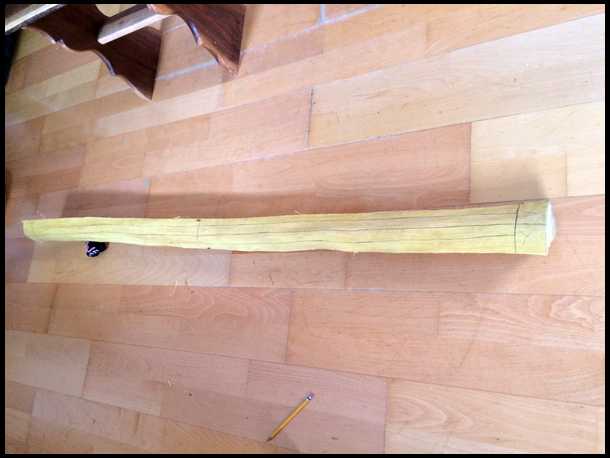
I will post two pictures. I have an osage stave with twisted grain. My question is about following the crown of the stave, should I follow the crown the twist will be significant. Would you rather follow the crown, or carve as much of the twist out as possible? Is this something where you’d want to bring the thickness down as is and steam bend? Any advice greatly appreciated, really hoping to be able to use this stave. The photos online did not look so severe
|
|
| From: beardedone
|
|
|
|
|
|
|
| Date: 06-Mar-19 |
|
I will take better photos is lighting is too bad to see properly
|
|
|
|
| From: pete w
|
|
|
|
|
|
|
| Date: 06-Mar-19 |
|
I would chase it to a good ring , do a rough layout, then reduce the thickness , and heat/steam straighten it, then continue to build a bow.
|
|
| From: badger
|
|
|
|
|
|
|
| Date: 07-Mar-19 |
|
If you carve that out it will likley break, The twist will easily come out when you put in on a cawl and heat it. I am working on one now almost identical.
|
|
| From: Jeff Durnell
|

|
|
|
|
|
|
| Date: 07-Mar-19 |
|
Yep, steam it and correct it. Chase a ring, to one above the ring you'll use for the bow's back. Two coats of shellac on the back. Use a pencil to run a 'centerline' down the stave by following the grain. Make the whole thing 2" wide, with the use of that pencil line. Leave plenty of wood thickness for handle and dips, but thin the limbs to 3/4". Steam for an hour or a little more. Then straighten, overcorrecting just slightly if possible.
|
|
| From: Bjrogg
|
|
|
|
|
|
|
| Date: 07-Mar-19 |
|
All good advice. Don't forget to reseal back with a coat or two after chasing a ring . You can get drying checks overnight. If you haven't made a straightening caul and plan on continuing to make bows, you might consider making one.
Bjrogg
|
|
| From: George Tsoukalas
|
|
|
|
|
|
|
| Date: 07-Mar-19 |
|
I don't see much twist. Always follow the lateral or vertical grain.
If I feel I have to correct it tis is how I do it.
http://traditionalarchery101.com/fixtwist.html
Jawge
|
|
| From: beardedone
|
|
|
|
|
|
|
| Date: 07-Mar-19 |
|
Can someone post a picture of a straightening caul? Two blocks of wood with bow limb clamped in between? Or a full length form caul?
|
|
| From: Eric Krewson
|
|
|
|
|
|
|
| Date: 07-Mar-19 |
|
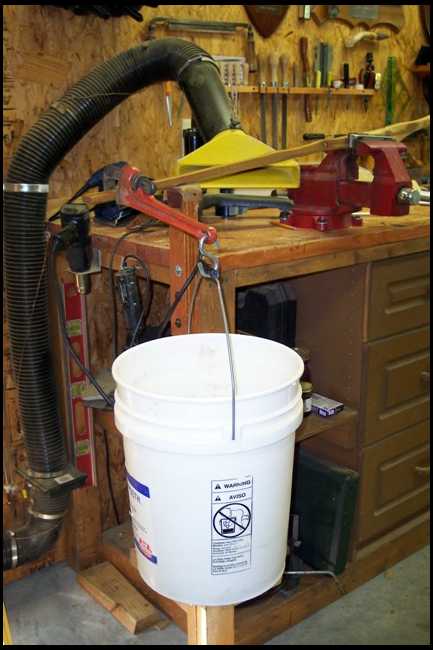
Good advice above, I use dry heat for twist removal on dry staves. Like was mentioned lay out your bow leaving the tips full width and reduce the limb thickness to about 3/4".
I use a vise and a support post on my workbench to hold a stave to remove twist. Always put the belly of your stave down so you won't deflex a stave when you heat it.
I put my pipe wrench on the stave with a piece of sander belt under the jaws to prevent chewing the wood up too bad. Next I hang a 5 gallon bucket on the pipe wrench and start adding weight to the bucket while you heat the stave. I use lead but water will do.
You can watch the stave untwist this way, go past straight because it will spring back when you take the bucket off.
|
|
| From: Jim Davis
|
|
|
|
|
|
|
| Date: 07-Mar-19 |
|
I do it the same as Eric, but I use a big monkey wrench, since I have one. His pipe wrench has the advantage of a hole in the handle. My monkey wrench will let a bucket slip off when the handle points downhill.
|
|
| From: Jeff Durnell
|
|
|
|
|
|
|
| Date: 07-Mar-19 |
|
I've done it that way too when the stave is closer to final dimensions. It works well if it's a single direction of twist that I'm working on... but I put a c-clamp or a pipe clamp on it instead of a wrench, then hang a 8 lb sledge on the end of the clamp. I have a little eye bolt and s hook that I put in the end of the sledgehammer handle, just temporary for this operation. In a stave that's farther along like Eric's is, you have to be careful about where you put that limb support so you don't cause misalignment in the limb. With the weight on it, you heat it until she moves the amount you need. You can also use a 'stop stick' to stop the downward movement of the weighted wrench so it doesn't go too far. I use my adjustable roller support stand as a stop.
If the stave is still full width, and/or depending on the shape, sometimes it's better to use a solid wood caul to work against. With it, and some strategically placed clamps and wedges, I can make several different corrections, fixing alternating twist, humps, and dips, and reflex it too if wanted, before the thing cools. Have a plan, have everything you're gonna need ready within arm's reach when it comes out of the steamer, and work quickly.
On yours, what seems like a single long twist, I'd clamp the handle area down solidly, parallel to the caul, then put all clamps off center, on the 'high side' of each limb, and clamp snugly to the caul. If there's enough crown on the stave's back, the clamping down only on the high side will take it down to the caul, and then will roll it over, effectively over-correcting slightly. After it cools, and is unclamped, it should spring back to about where you want it.
|
|
| From: beardedone
|
|
|
|
|
|
|
| Date: 07-Mar-19 |
|
Thank you Jeff, very insightful. Thanks everyone. I will post pictures on this thread when the stave is worked down if anyone has an interest
|
|
| From: Eric Krewson
|
|
|
|
|
|
|
| Date: 07-Mar-19 |
|
With my method I always plan a little limb tweaking to bring the limb back into alignment should it wander to the side a bit.
|
|
| From: Pa Steve
|
|
|
|
|
|
|
| Date: 07-Mar-19 |
|
beardedone, definitely post pictures of your progress. You were given some very good advice. Good luck with your build.
|
|
| From: beardedone
|
|
|
|
|
|
|
| Date: 08-Mar-19 |
|
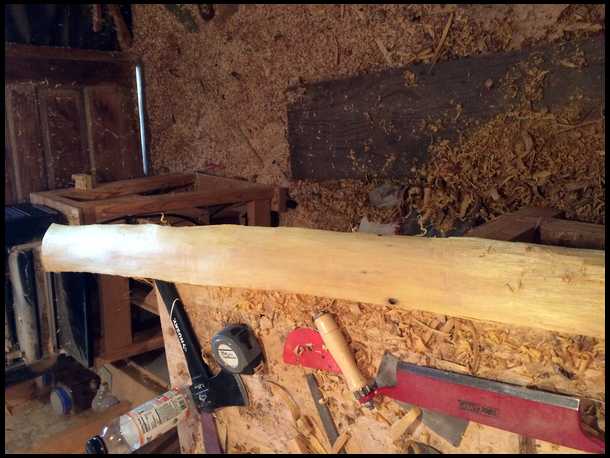
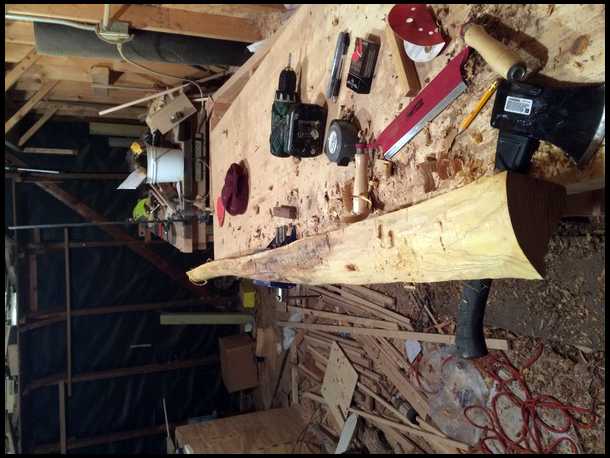
Started chasing a good ring tonight, just missing some bore holes. Tough work chasing a ring but fun!
|
|
| From: beardedone
|
|
|
|
|
|
|
| Date: 08-Mar-19 |
|
Here’s a photo of the twist, not quite 90 degrees but close
|
|
| From: beardedone
|
|
|
|
|
|
|
| Date: 09-Mar-19 |
|
My method has been to take the ends of the stave down to the chosen growth ring then slowly work my way down the stave. I have found that standing in front of the light made it easier to see the difference in late wood rings and to see the early wood. Takin’ her slow, new at this. If I don’t feel comfortable with the integrity of the ring I was thinking about that fabric snakeskin for a backing. Anyone ever use it?
|
|
| From: PEARL DRUMS
|
|
|
|
|
|
|
| Date: 09-Mar-19 |
|
Dont let a backing be an excuse for not getting a good back. Not trying to be harsh, but there is no reason to not get a clean back or hurry it along hastily. Patience wins the race :) You have a nice stick of osage there, yank a bow from it.
|
|
| From: beardedone
|
|
|
|
|
|
|
| Date: 09-Mar-19 |
|
Thanks pearl drums. Started again at it this morning, makes so much more sense now. Really getting into this bugger now. Went down like four rings past cambium layer and slowly working from end with scraper and outlining with pencil if needed, then drawknifing the layers on top and repeating with scraper. Drawknife came close to tearing out my ring but working slow. Stave has seasoned for 2-3 years, very excited about this
|
|
| From: beardedone
|
|
|
|
|
|
|
| Date: 09-Mar-19 |
|
Halfway done backing this stave! One pin knot otherwise very clean. Does anyone have a favorite layout for osage? I have my ideas, and plenty of resources out there, but curious about what works best for you guys? Probably gonna induce reflex and debating a cut in shelf or a built out rest. Also, if you take breaks in finding a ring, would you seal what you have done already?
|
|
|
|
| From: Pa Steve
|
|
|
|
|
|
|
| Date: 09-Mar-19 |
|
Take it slow and once you get the hang of chasing a ring your progress will steadily increase. Patience is definitely an asset in bow building. Looking good so far. Good luck and keep us posted.
|
|
| From: Jeff Durnell
|
|
|
|
|
|
|
| Date: 10-Mar-19 |
|
When I strip bark, sapwood, and chase out a heartwood ring, it's typically done in one session, or one day anyway, then seal it. Just because, there have been times I thought it should have been dry enough because I've had the stave for a while, but the bark and sapwood somehow keeps moisture inside there. If it's literally been years, in a dry, controlled environment, it 'could be' dry enough under there, but why risk it? I'm usually going to "one above" the ring that will be the bow's back anyhow, so I seal it.
Now, after it dries enough that it can be shaped and flexed, it's usually safe to take it down to the good ring and leave it bare.
One more quick note regarding this... if/when you ever process a fresh green stave right from the stump and full of moisture(which is when it's easiest), it should be sealed any time you quit working on it. I've seen them check incredibly fast... depending on other conditions like heat, air movement, etc, it can happen in as little as an hour or two.
So yeah, it's hard to give you simple, definitive advice because it depends on how wet or dry it actually is. But you'll learn how to judge it and deal with it accordingly.
|
|
| From: Bjrogg
|
|
|
|
|
|
|
| Date: 10-Mar-19 |
|
You've got it coming your way beardedone. I find the same with my lighting over my vice. I can always see ring better from one side. You can also feel the early growth and hear it crunch when staves are a bit drier. Also the answer is yes. Always seal freshly exposed ring when done for day. I've had them dry check over night on part I didn't seal. I also agree with Pearl. I haven't used the fabric snake skins but I'd put way more confidence in a good ring than any backing. Take your time, use your light and seal that back. I like to get to the crunchy early wood and only move about six inches at a section. Then cleaning ring up with cabinet scrapers. Get edge to where you clearly know what's what and do another few inches. Bjrogg
|
|
| From: beardedone
|
|
|
|
|
|
|
| Date: 10-Mar-19 |
|
Jeff,why do you do take it one ring above your back initially? Accidental dings along the way?
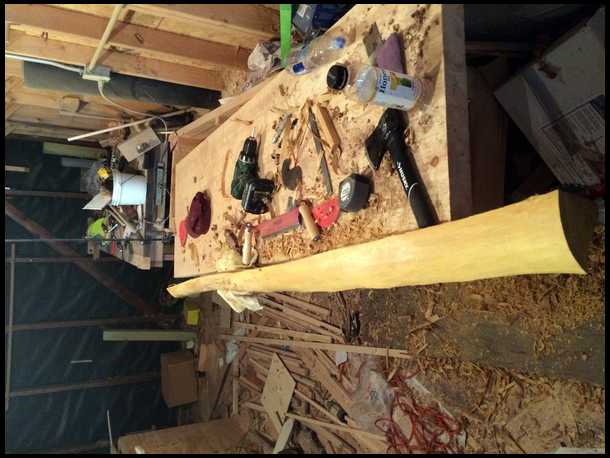
Thanks Bjrogg, all done now. Got a very solid back, not in the least concerned about it being too thin or about ring violations, very happy. It’s amazing how the wood wants to do what you want and shows you how to make a bow out of it, especially with the sound difference using the draw knife, so cool.
Got stave marked out on back to 1” from center on each side and gonna seal it and start hogging her out. Twist looks way less daunting now as well.
|
|
| From: Jeff Durnell
|
|
|
|
|
|
|
| Date: 10-Mar-19 |
|
Beardedone, when I go at an osage stave with the bark on, I like to be pretty aggressive initially, hogging off bark, sapwood, and any unwanted heartwood rings as quickly as possible. I like to just get it off there without worrying about whether I violated it. The ring I rush down to will surely be violated and I may even be through it, revealing the spring growth of the good ring in places. I may clean it up a little with 2 minutes worth of scraping, but it sure wouldn't cut it as the bow's back. I stop, shellac it, and set it aside to dry, or steam it right away and straighten it or make other corrections to it. Once it's dry, I can quickly remove what's left of that ring, bringing it down to the bow's back with finesse and a cabinet scraper.
|
|
If you have already registered, please sign in now
For new registrations Click Here
|
|
|
|