| From: Dao
|
|
|
|
|
|
|
| Date: 15-Apr-18 |
|
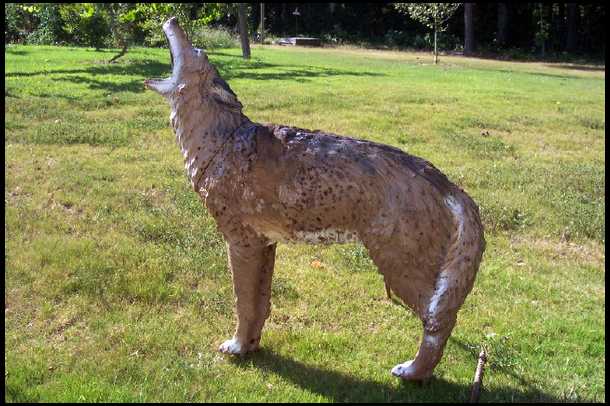
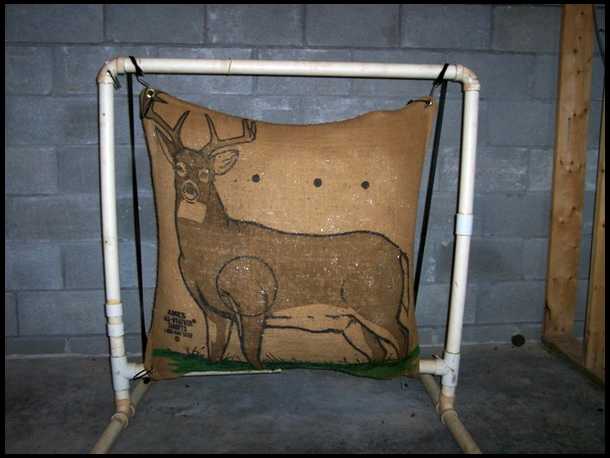
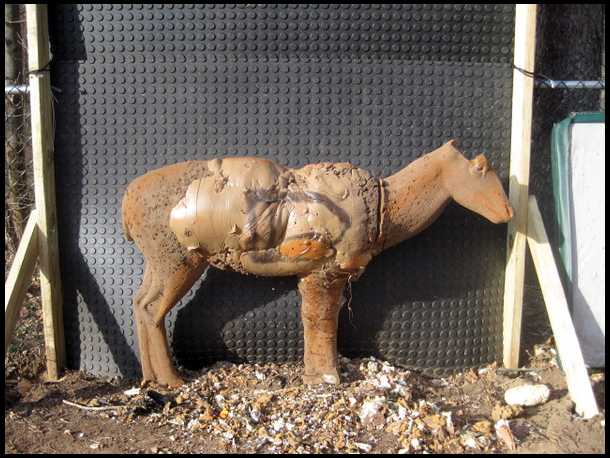
someone I know said "target looks like it's been shot up by shotgun"...
well my grouping _is_ pretty BIG... so 7 month since the last repair attempt, it looks like this.
|
|
| From: Dao
|
|
|
|
|
|
|
| Date: 15-Apr-18 |
|
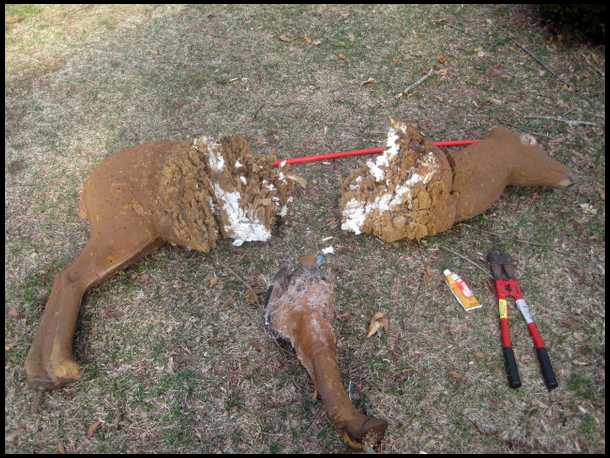
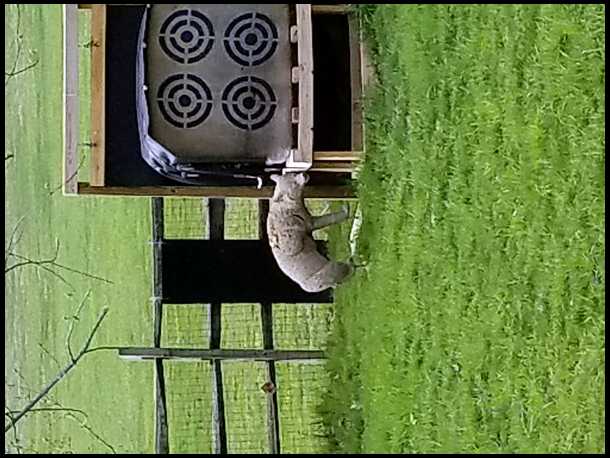
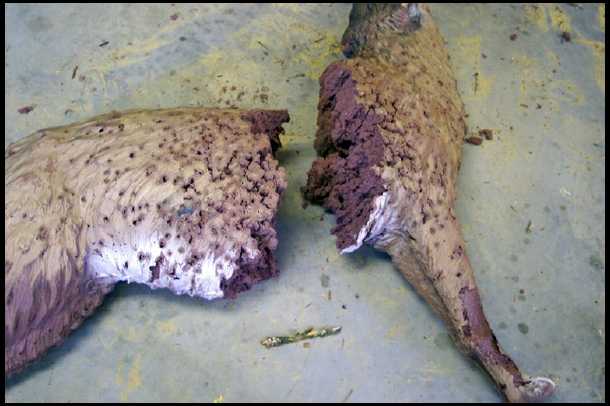
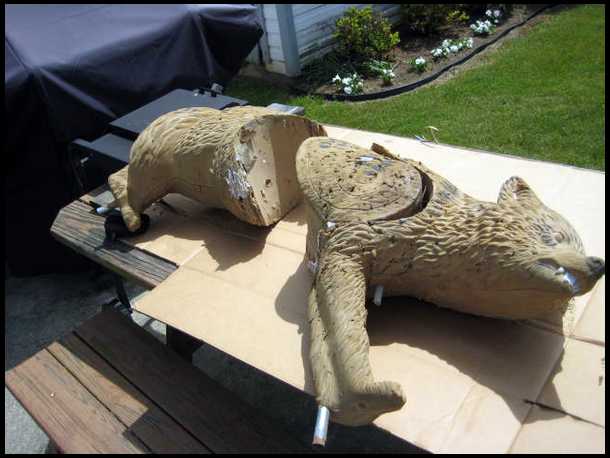
pulled it out to check what it looks like...
yep. in pieces. :)
lets see if I can at least bring it back to usable? condition.
....I hope.
|
|
| From: Dao
|
|
|
|
|
|
|
| Date: 15-Apr-18 |
|
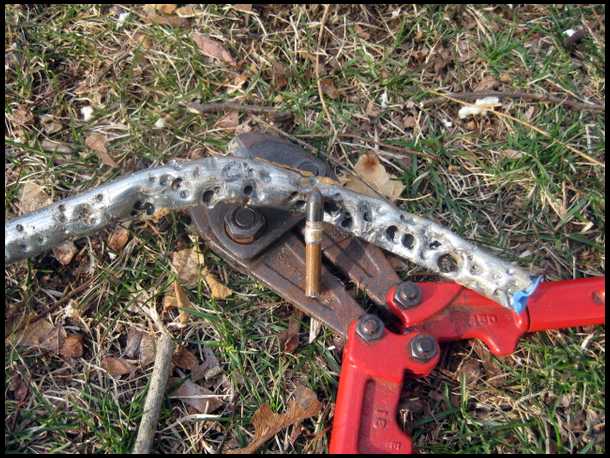
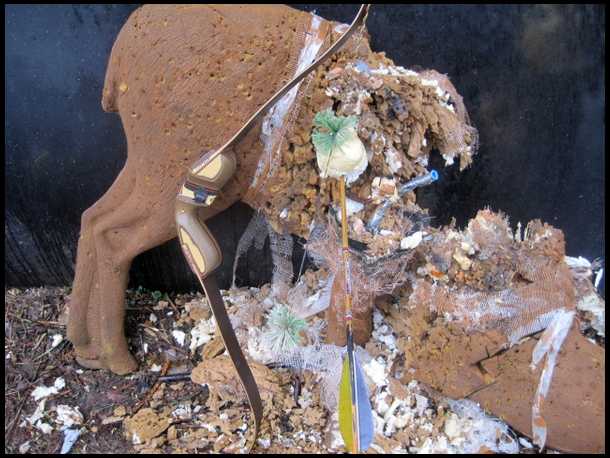
this metal piping in the front leg... it has destroyed more arrows ... ok. if I'm shooting nice small group, I don't have to worry about this. I know. but I'm not a good shooter. so I'm going to get rid of this pipe first.
|
|
| From: Gator1
|
|
|
|
|
|
|
| Date: 15-Apr-18 |
|
This will be interesting.
|
|
| From: Dao
|
|
|
|
|
|
|
| Date: 15-Apr-18 |
|
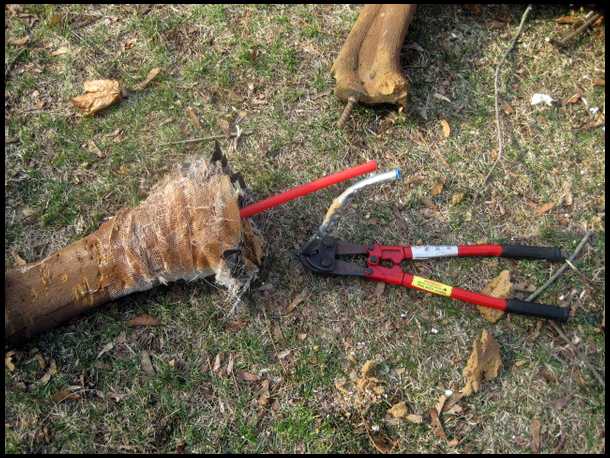
I took out the metal pipe, cut it down shorter... just enough left in the front leg to be able to accept steel rod (that keeps the target upright).
and replaced the top part with semi-flexible piping.
|
|
| From: Dao
|
|
|
|
|
|
|
| Date: 15-Apr-18 |
|
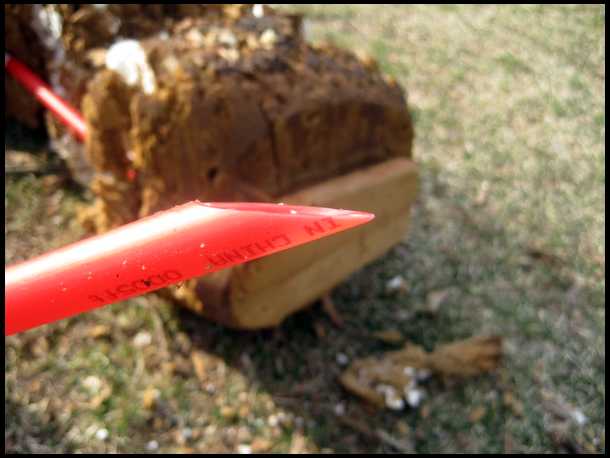
cut the end of the plastic? tube? like this so I can stick it in the still somewhat solid front section of the target.
|
|
| From: Dao
|
|
|
|
|
|
|
| Date: 15-Apr-18 |
|
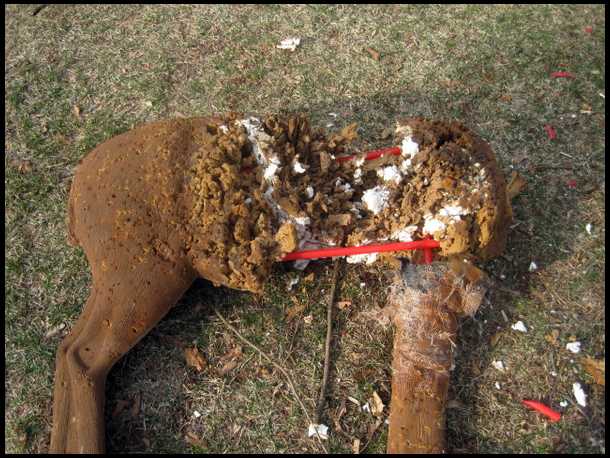
... used the same tubing to "connect" the pieces.
I'm using this plastic tubing because this target had similar tubing along the back and belly inside the foam, to be able to support the structure to be able to accept the replacement core.
|
|
| From: Dao
|
|
|
|
|
|
|
| Date: 15-Apr-18 |
|
this is the plastic tubing originally was in the target. I found it in the pile of shredded foam.
|
|
| From: Dao
|
|
|
|
|
|
|
| Date: 15-Apr-18 |
|
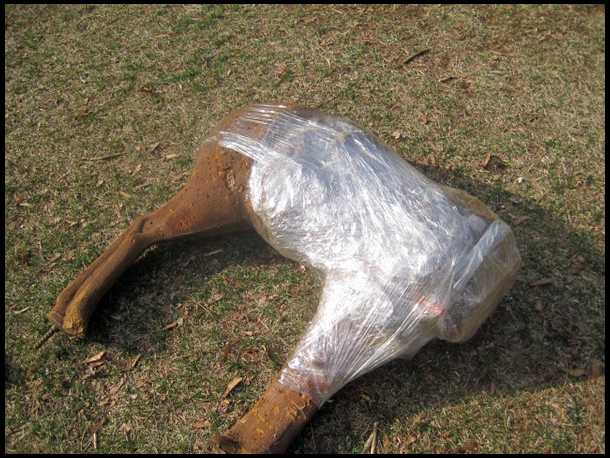
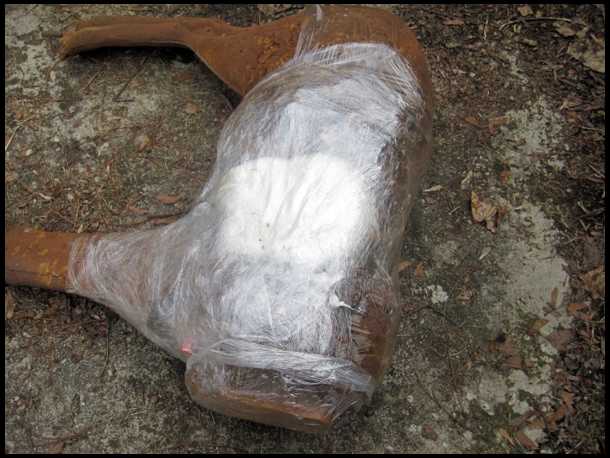
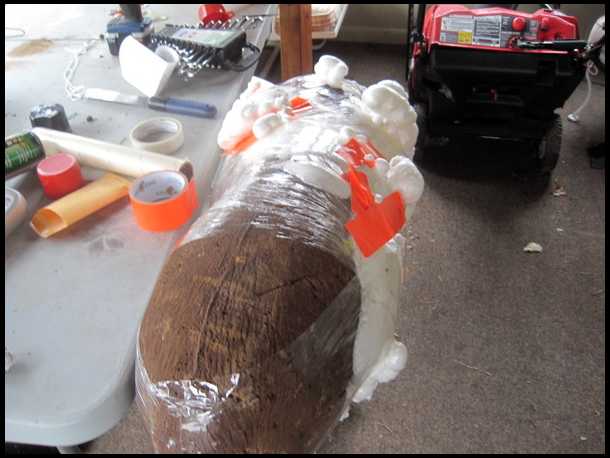
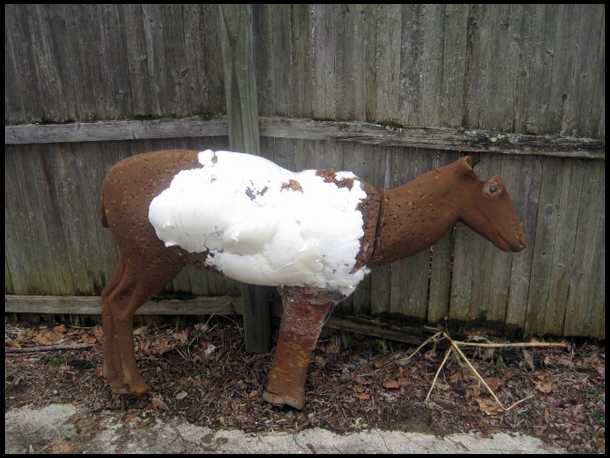
once here, now it's just matter of wrapping it up using saran- wrap.....
I wonder how many cans of loc-tite foam I'm going to need for this....
|
|
| From: Dao
|
|
|
|
|
|
|
| Date: 15-Apr-18 |
|
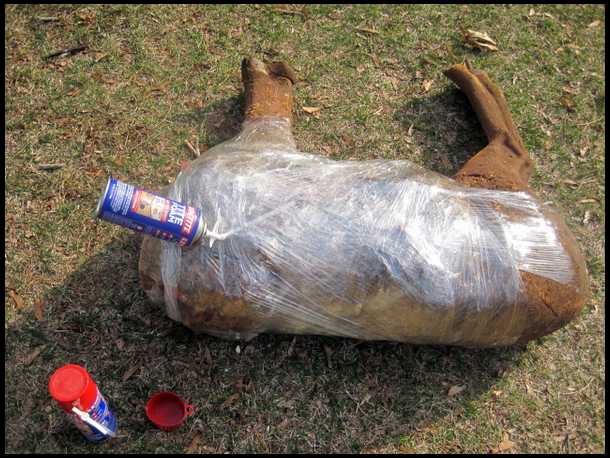
first can going in.
...the temperature today is in low 40th. I'm doing this outside.
my hope is that foam will NOT expand as much, and make it denser for the target.
|
|
| From: Dao
|
|
|
|
|
|
|
| Date: 15-Apr-18 |
|
...immediately after the first can.
will see how much of this expands in few hours.
|
|
| From: Woods Walker
|
|
|
|
|
|
|
| Date: 15-Apr-18 |
|
It WILL expand.....a LOT!
This is exactly how I repair mine, except I do it before they're shot in half. This should be interesting to see......
|
|
| From: bodymanbowyer
|
|
|
|
|
|
|
| Date: 15-Apr-18 |
|
You better get that Target fixed good. Because the Bow coming your way shortly is gonna beat it up :-) JF
|
|
| From: Dao
|
|
|
|
|
|
|
| Date: 15-Apr-18 |
|
I thought about using "filler" too. may be that pink board insulation, cut it layer it, glue it and then connect the pieces...
but I figured I'll try this way first. see how much "denser" the foam can be from cold temperature... and see how many cans I would need.
it won't be pretty, that's for certain. but I'm thinking that I can put it back together, hopefully so that it will last another 6 to 7 months.
|
|
| From: Therifleman
|
|
|
|
|
|
|
| Date: 15-Apr-18 |
|
Kudos---I have repaired targets with foam before, but I would have really given up on that target of yours. Now you've got me thinking about trying to rehab my deer target that has been shot half in two after one or two previous repairs. Thanks for sharing.
|
|
| From: scienceguy
|
|
|
|
|
|
|
| Date: 15-Apr-18 |
|
Dang! Have you considered a career in orthopedic surgery?
|
|
| From: Dao
|
|
|
|
|
|
|
| Date: 15-Apr-18 |
|
ohh, yeah. Burlap.
I read that in one of the past repair thread, but I completely forgot about it... I'll keep that in mind for NEXT time..
|
|
| From: Ranger Joe
|
|
|
|
|
|
|
| Date: 15-Apr-18 |
|
Nice Job! I shot the body out of mine, so I attached the head to the hind quarters and made a kangaroo! LOL- (Maybe I`ll get to hunt Down under some day!)
|
|
| From: Woods Walker
|
|
|
|
|
|
|
| Date: 15-Apr-18 |
|
With that much foam sealant, I'd wait for a minimum of several days before I shot into it and even a good week would probably not be overdoing it. In the core the drying time is much longer.
|
|
| From: Mountain Man
|
|
|
|
|
|
|
| Date: 15-Apr-18 |
|
Dont worry Ted ill call ya tomorrow,,,,i got a body bag to drop off to ya : )
New Freeman ya gota have fresh arrows and targets
|
|
| From: Wapiti - - M. S.
|
|
|

|
|
|
|
| Date: 15-Apr-18 |
|
Show a picture of the finished repair,I would wait a full week & weekend for that foam to cure.
|
|
| From: Dao
|
|
|
|
|
|
|
| Date: 15-Apr-18 |
|
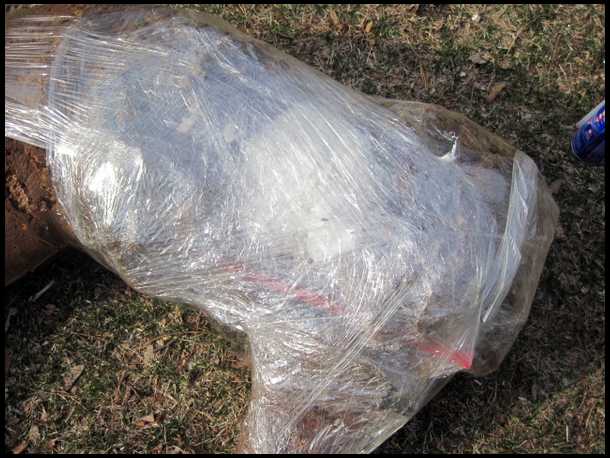
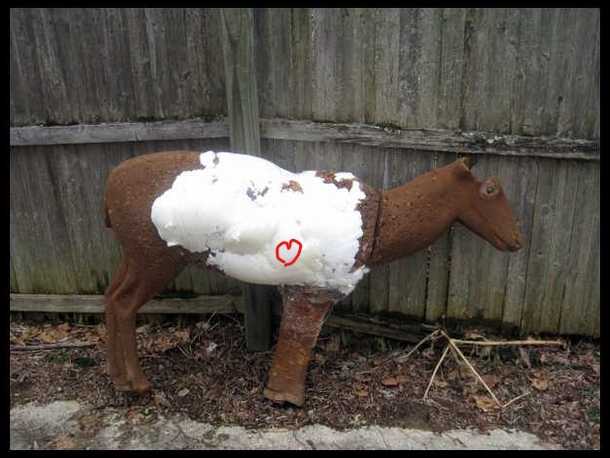
so this is what it looks like after 2~3 hours. out in cold. it really didn't expand much, as I expected.
should end up with denser foam.
which also means longer cure time as some people have mentioned.
|
|
| From: Dao
|
|
|
|
|
|
|
| Date: 15-Apr-18 |
|
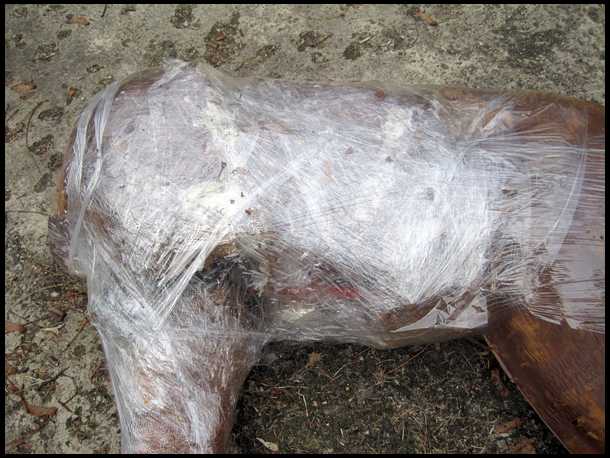
still BIG GAP between torso and leg.
|
|
| From: Dao
|
|
|
|
|
|
|
| Date: 15-Apr-18 |
|
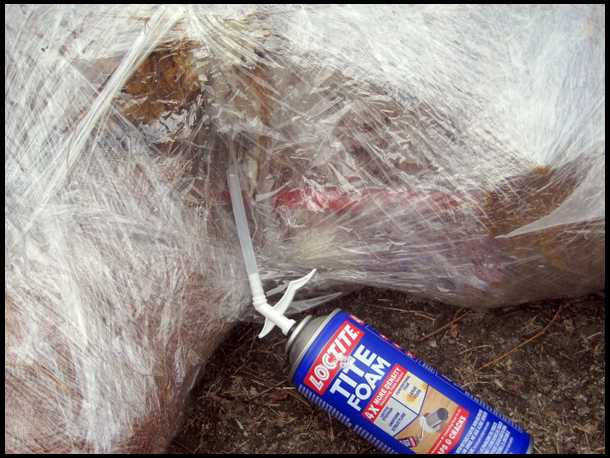
can #2 going in.
with this expansion rate (which is really low compared to say, doing this in summer heat), I'm thinking between 4 to 6 cans total.
will see how this ends up.
|
|
| From: Dao
|
|
|
|
|
|
|
| Date: 15-Apr-18 |
|
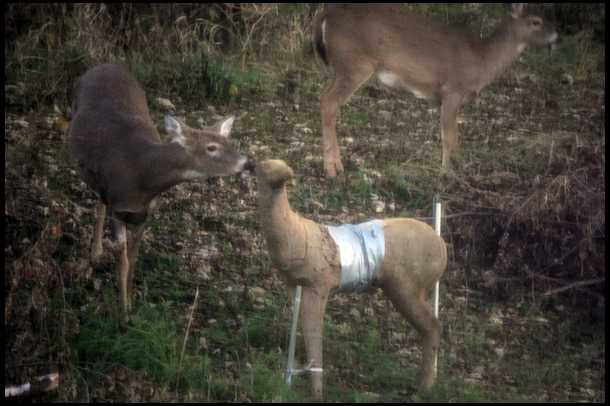
...glad I'm not the only one that shoots target in half!
|
|
| From: SB
|
|
|
|
|
|
|
| Date: 15-Apr-18 |
|
Good Lord man.....throw that thing away and get a bag target!
|
|
| From: 1/2miledrag
|
|
|
|
|
|
|
| Date: 15-Apr-18 |
|
Good job Ted. I will be trying to resurrect mine again once weather breaks.
|
|
| From: Let 'em fly
|
|
|
|
|
|
|
| Date: 15-Apr-18 |
|
Did that to be one of my 3D targets. Must have had different flank because it didn’t last too long. I’ll try this brand and see how my luck changes! Cheers
|
|
| From: Darkhawk
|
|
|
|
|
|
|
| Date: 15-Apr-18 |
|
Fixing up stuff like that may not always be the most economical thing to do but its lots of fun. And having read this thread I have a pretty good idea now of how to build my own 3D target. This will be fun
|
|
| From: JusPassin
|
|
|
|
|
|
|
| Date: 15-Apr-18 |
|
I have 5 3d targets that have lasted for over 10 years with minor repairs. I do my real "work" on bag targets. Way cheaper that way.
|
|
| From: Rik Davis
|
|
|
|
|
|
|
| Date: 15-Apr-18 |
|
I had been considering sending him the cash for a new one, but did not want to offend. I have watched that poor target for I don't know how long. I don't know how he could hit it and keep an arrow in it.
P.S. I don't want to offend any of you guys either, so I will not make the offer to ya'll.
|
|
| From: Wapiti - - M. S.
|
|
|
|
|
|
|
| Date: 16-Apr-18 |
|
It's a good thing either way if you want to spend the extra $ and get a new target that's fine too. Guys are getting ideas to repair or even build a target.
|
|
| From: Too Many Bows Bob
|
|
|
|
|
|
|
| Date: 16-Apr-18 |
|
I've tried using the can stuff and wound up with a mess because it didn't dry fully on the inside. Every time I would pull an arrow out, it would be all sticky. It also didn't have the "resistance" that the original target did.
I used the special stuff that you can find on line to repair 3d targets and didn't have that problem. It was more expensive, but worked a lot better too.
I hope it works out well for you.
TMBB
|
|
| From: Dan
|
|
|
|
|
|
|
| Date: 16-Apr-18 |
|
I just switched to a compressed bail of straw from Tractor Supply for $11 and so far I am really impressed. I just spray paint the outline of a deer on it.
|
|
| From: Dao
|
|
|
|
|
|
|
| Date: 16-Apr-18 |
|

so, after _SIX_ can of foam at 5 dollar a can, for whopping 30USD, the deer has been successfully "tumorized" :).
the temperature is in high 30s to low 40s, so foam really did not expand at all.(why it needed 6 cans. in higher temp, it would have been ok with just 2 cans, from past experience).
This is GOOD in that I'll end up with much much denser target.
only problem? would be longer cure time.
|
|
| From: Dao
|
|
|
|
|
|
|
| Date: 16-Apr-18 |
|
...FAT too. :)
i'll leave it here for at least 7 days. I know that it will be hard enough.
will leave it like this for another 2 days, then take the wrap off to allow fume to escape easier.
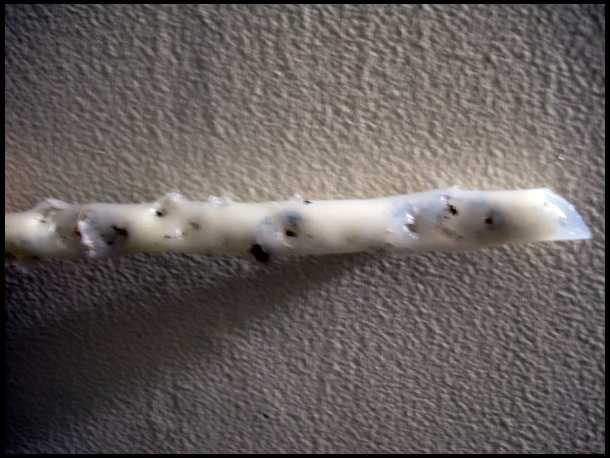
I will test it week from now using a thin stick, kinda like cake- tester for baking, and see how inside looks.
if stick comes out dry, then I'll paint it and will be ready to go. I won't bother shaping it, because I'm going to shoot it up again. :)
next photo update, in 2 to 3 days when I take the wrap off.
|
|
| From: RymanCat
|
|
|
|
|
|
|
| Date: 16-Apr-18 |
|
That's a heck of a repair job but better shoot the wood pecker who destroyed target first or be repairing again. LOL
|
|
| From: Woods Walker
|
|
|
|
|
|
|
| Date: 16-Apr-18 |
|
I had a 3D target get torn up one time at the beginning of November by a buck that was out "cruisin'". He lifted it clear off the support rods, flipped it over and gored it!
|
|
| From: thorn
|
|
|
|
|
|
|
| Date: 16-Apr-18 |
|
Good for you Ted. I am sure it will be a great improvement over your shot gun target. Talk to Jeff at the next meeting you get to. He is the master of target repair.
|
|
| From: GF
|
|
|
|
|
|
|
| Date: 16-Apr-18 |
|
Had to give up on my Block.... I just pulled its guts out and stuffed the contents into a gunny sack.....
It’s not as dense as it could be, but there are several layers of cordura on the back side to reduce pass-through potential. Think I should stuff more foam behind the cordura to create more give in the system..
So far, so good!
|
|
| From: Eric Krewson
|
|
|
|
|
|
|
| Date: 16-Apr-18 |
|
I understand patching targets just to see if you can;
|
|
|
|
| From: Eric Krewson
|
|
|
|
|
|
|
| Date: 16-Apr-18 |
|
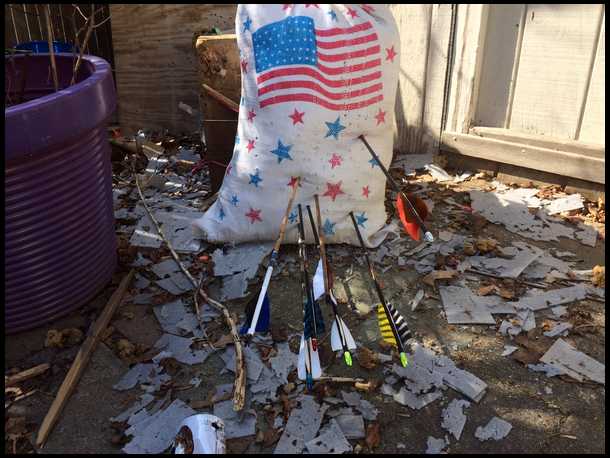
I have 20 3Ds that I bought shot up after big tournaments. Spreading your shots over a bunch of them keeps them intact longer, some of mine are over 30 years old and have been patched a dozen times or more.
With one target that is barely recognizable you might consider an Ames bag target stuffed with plastic, they are double sided. They last along time If you pick different spots to shoot at besides the heart lung area (head shots). I added a few dots to mine to make me pick a spot in a different part of the target. This one is about 20 years old but I only shoot it on days when the weather is too bad to shoot outside.
BTW, I bought the coyote shown above in the shot in two condition at a tournament for $5, no one else bid on it.
|
|
| From: Eric Krewson
|
|
|
|
|
|
|
| Date: 16-Apr-18 |
|
I checked and this pillow target is no longer available.
|
|
| From: Budly
|
|
|
|
|
|
|
| Date: 16-Apr-18 |
|

Dao - Is this your vehicle? Just kidding, good job on the target!
|
|
| From: Tim Finley
|

|
|
|
|
|
|
| Date: 17-Apr-18 |
|
If its cold and not expanding much is it filling in all the holes and open spots inside the target ?
|
|
| From: Zildjian51
|
|
|
|
|
|
|
| Date: 17-Apr-18 |
|
Just don't rig that deer up to electrodes to get it by electricity. You'll end up with "Frankendeer." LOL!
|
|
| From: ron w
|
|
|
|
|
|
|
| Date: 17-Apr-18 |
|
Mr. Dao..........you are something else. It was good to see you on Saturday. Keep shooting..........
|
|
| From: WildernessBuck
|
|
|
|
|
|
|
| Date: 17-Apr-18 |
|
Man,I had no idea something like that could be restored! Hope you get some good use out of it. I have sent targets to the landfill WAY before they got to that stage. You have inspired me to see worn out targets in a different way. Dave
|
|
| From: reddogge
|
|
|
|
|
|
|
| Date: 17-Apr-18 |
|
My father's motto was "Why buy it for $5 when you can fix it for "10. This project was way cheaper. I fished this coyote out of a dumpster at BBTC. It was in 3 pieces. With some construction cement and banding straps I put it together and drilled 3/8" holes throught it and hammered 3/8" glued dowels through it. It now guards the target butt.
|
|
|
|
| From: Dao
|
|
|
|
|
|
|
| Date: 18-Apr-18 |
|
thank you for encouragement, sharing your experiences, and giving me ideas. I'll keep those suggestions in mind for the next time.
really Artistic and well done repair job by lots of people. If I'd found the same target for $5, then I'd be buying them too. :)
this target was blem, I think I paid $150... which got shot up in half a year. I can't find blem now, and the same target costs $220. which will be shot up again in 6 month.
so spending 10 to 30 dollars every 6 month to repair an existing target makes sense to me.
now, if the target last more then 4 years... at the rate I shoot at them. then I'll buy a new one!
anyway, here's what it looks like after 2 days, wrap taken off.
not pretty, but it'll do.
will let it stand like this for another week or so, and then test, and paint.
part of the problem with saran wrap is that when foam expands in between wraps. takes away from integrity as a whole, and some portion of the hole is not filled as result. I may give it one more can to fill in the small spaces... or not.
|
|
| From: Woods Walker
|
|
|
|
|
|
|
| Date: 18-Apr-18 |
|
Don't paint it, it looks like a piebald colored deer now! ;-)
|
|
| From: fishin coyote
|
|
|
|
|
|
|
| Date: 18-Apr-18 |
|
Ted, Looks good but I fixed it for you. :)
|
|
| From: rraming
|
|
|
|
|
|
|
| Date: 18-Apr-18 |
|
That is one ugly ass target now! and it has no brain!
|
|
| From: dean
|
|
|
|
|
|
|
| Date: 18-Apr-18 |
|
I get a new target every year and patch two with the tan crack sealer foam. Even though i shoot a lot of broad heads two months before deer season, it is rare that one breaks in half for three years of use in my mini 3D setups. Of course, I am not dumping 6 broad heads at a time into them either. A max of three.
|
|
| From: mountaineer
|
|
|
|
|
|
|
| Date: 18-Apr-18 |
|
I patch mine about once a year as well. I have 2 3D targets, and a bail target. For me - I just enjoy shooting the live animal "look" of a 3D target more than the bail, and so do my two kids. For us, repairing one when needed is cheap, relatively easy, and works very well.
One thing I started doing that adds longevity is using yoga blocks as the "core" then filling around them with the expanding foam. I used burlap contact cemented onto the target to create the outer shell of the void, instead of plasti-wrap. It works great and seems to add a bit of integrity once the foam pushing out into and through the burlap. I shape with a razor and a rasp, then paint. We've been shooting the same Glendel for 7 or 8 years now with this method.
|
|
| From: dean
|
|
|
|
|
|
|
| Date: 18-Apr-18 |
|
I should make a cast of a deer target. I am friends with a guy that can spray just about any kind of foam for insulating or what ever for just a couple of bucks if he is on a job sight and set up. Some of the foam is just the same as the rubbery heart cores on my deer targets. I believe he said it is used for vibration dampening on heavy equipment of some kind.
|
|
| From: Babysaph
|

|
|
|
|
|
|
| Date: 18-Apr-18 |
|
I would have bought a new one with the money I made working at my job for the amount of time it took to repair that,
|
|
| From: Mountain Man
|
|
|
|
|
|
|
| Date: 19-Apr-18 |
|
Isnt that a great part of being American!!
Ted took the money he earned at his job and rebuilt his old target Everybody gets a choice!! What a great country!!! I like the Zombie deer dummy,,,,next you should just make a mold and pour the foam though ; )
|
|
| From: Too Many Bows Bob
|
|
|
|
|
|
|
| Date: 19-Apr-18 |
|
I think that the problem that you are going to experience is that the goo on the inside can't dry because the stuff on the outside has sealed the moisture in.
I got around that, after experiencing it, by layering the stuff as I put it in. Put a layer on then let it sit for a few days, repeat as necessary.
Good luck, I hope I'm wrong.
TMBB
|
|
| From: zwickey chad
|
|
|
|
|
|
|
| Date: 19-Apr-18 |
|
Good gosh man...........put a new target on your Christmas list or something:)
|
|
| From: Babysaph
|
|
|
|
|
|
|
| Date: 19-Apr-18 |
|
It is a great country. Work smart.
|
|
| From: Mountain Man
|
|
|
|
|
|
|
| Date: 19-Apr-18 |
|
Well boys,,,fixing the target is working Buying a new one is shopping,,,,,i guess we all have our own idea of work
I woulda stuffed the target chunks in a bag and shot that but i like Ted making a Frankindeer Kinda like putting ILF limbs on an old compound riser instead of just buying a new Win Win
|
|
| From: Dao
|
|
|
|
|
|
|
| Date: 19-Apr-18 |
|
so, WHY. well I guess the best answer is that "I wanted to"
is it smart?
my Dad never told me I'm smart, and I tend to agree with him.
so probably a not-smart idea.
...but I had fun doing it though ;)
I've put my "testing stick" through the target in different area. and most of it is already DRY! just few spots, and at shallower depth that needs to cure.
I'll continue to let it dry out (thank you to those who suggested to let it sit for week to 10 days), and the way it is going, I think it'll be shootable in about 5 days or so.
will update with photo once I have it painted!
Thanks for everyone's opinions!
I read them and enjoy all of them.
-ted
|
|
| From: ahunter55
|
|
|
|
|
|
|
| Date: 19-Apr-18 |
|
Mine will need new tape this year but the real ones don't mind.
|
|
| From: Dao
|
|
|
|
|
|
|
| Date: 24-Apr-18 |
|
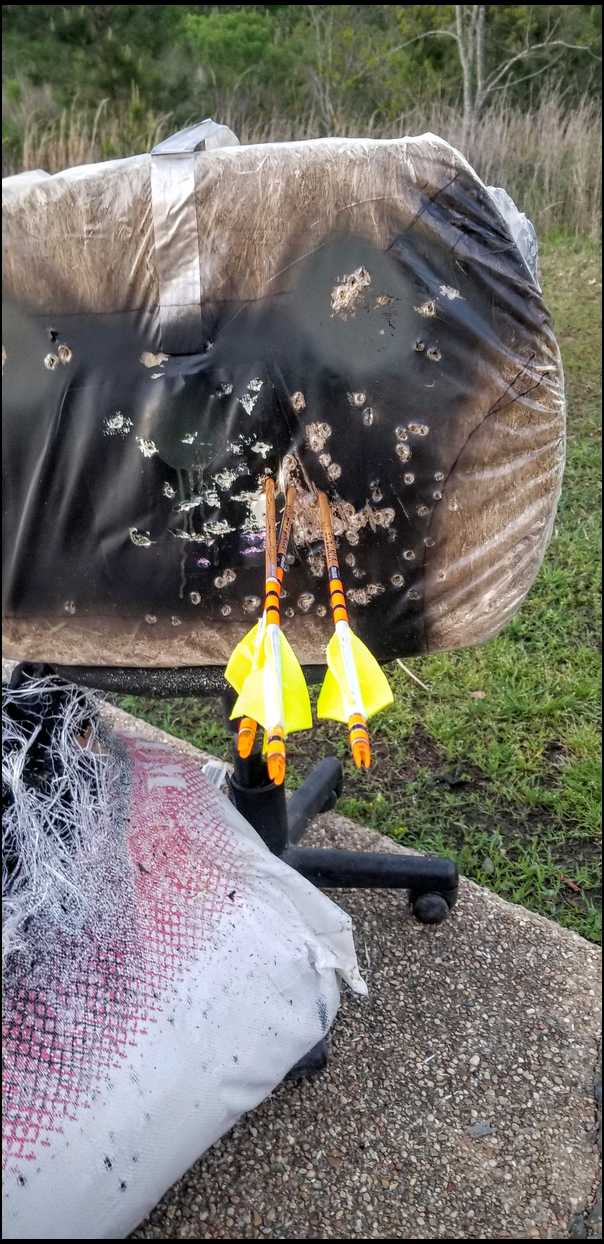
last photo update on this thread.
this is how the target looks like now, after it has been painted.
the foam is completely dry and it is DENSE! will see how long it'll last.
-ted
|
|
| From: reddogge
|
|
|
|
|
|
|
| Date: 24-Apr-18 |
|
Good job. I like repair jobs myself. In fact I'm putting in a new battery connector into a fishing scale. Most people would just throw it away.
|
|
| From: Mountain Man
|
|
|
|
|
|
|
| Date: 24-Apr-18 |
|
I think i got a set of 6 point sheds round here Ted Think of how pretty,,"Ole Lumpy",,would be with some antlers glued on,,,,,ah,,,,him,,,,,it,,,,well you know what i mean Good job!
; )
|
|
| From: rallison
|
|
|
|
|
|
|
| Date: 24-Apr-18 |
|
I like your style...good on ya, mate!
A couple guys mentioned giving 7 days drying time, may take even more!
I make my broadhead test targets similarly...except I tape up a cardboard boxand fill Iit with foam.
My first one, I waited a few days and tested it. The center was still goop and coated my arrow and broadhead. That crap was near impossible to clean off!
Another thing I was told was to do it outside and leave it there during total drying and setup...according to that info, a lot of heat and spontaneous combustion can occur. I dunno, but more than one barn fire has resulted from the same circumstances by mowing hay bales not fully dryed.
|
|
| From: twostrings
|
|
|
|
|
|
|
| Date: 24-Apr-18 |
|
Those short, nasty bows of yours are some wicked. One can only imagine that the countryside around you offers similar views of violent devastation.
|
|
| From: Keefers
|
|
|
|
|
|
|
| Date: 25-Apr-18 |
|
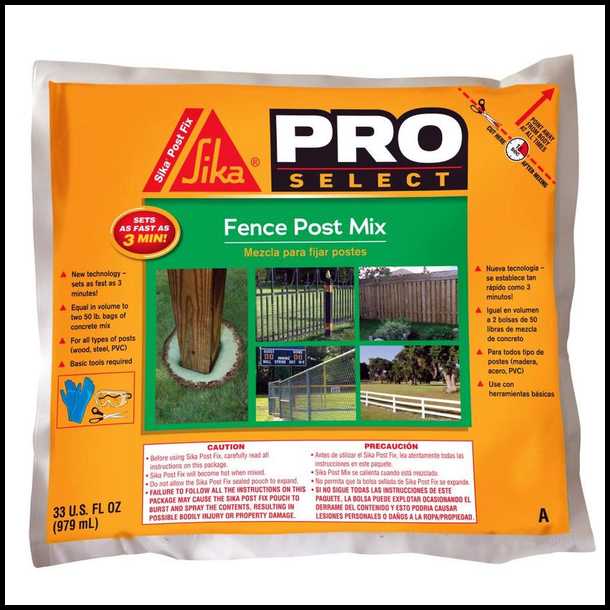
I have not given this a try but wonder "If" anyone has seen it and tried it? Only $11.95 and sets up in 3 minutes Fully cured in 3 hours.Last year we had some rail posts set at work and this stuff expanded fast and if done correctly it works pretty good. I would think if just the front of a vital is all shot up you could just lay the target down and let it level out over the holes and let it expand.Then take a Farrier's rasp and work off the overflow and clean it up.Saw's All with long blade or a hand saw will cut as well . I would think it can do several targets such at a range and it does set up quick. Anyway I hope the picture loads here for you to see?
|
|
If you have already registered, please sign in now
For new registrations Click Here
|
|
|
|