| From: Vtbow
|
|
|
|
|
|
|
| Date: 04-Feb-18 |
|
Ok, just wanted to start this thread. In the next two weeks I will be doing a 76er hydrodip/camping bow build and thought people might want to follow along. I've never done a hydro dip and hope others can learn from my mistakes :-) all feedback and ideas are welcome, thanks!
|
|
| From: Vtbow
|
|
|
|
|
|
|
| Date: 04-Feb-18 |
|
By "threaf" I me and "thread" :-)
|
|
| From: Vtbow
|
|
|
|
|
|
|
| Date: 04-Feb-18 |
|
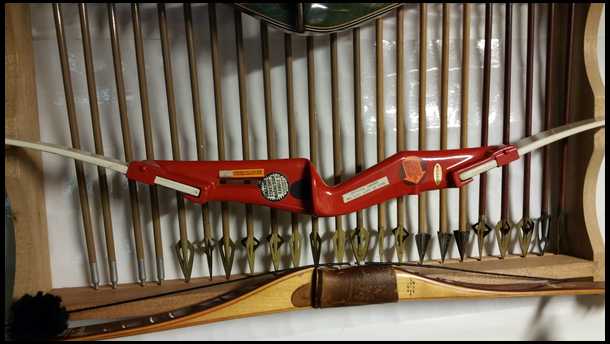
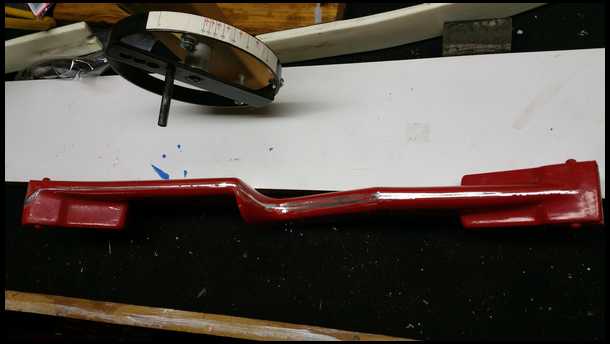
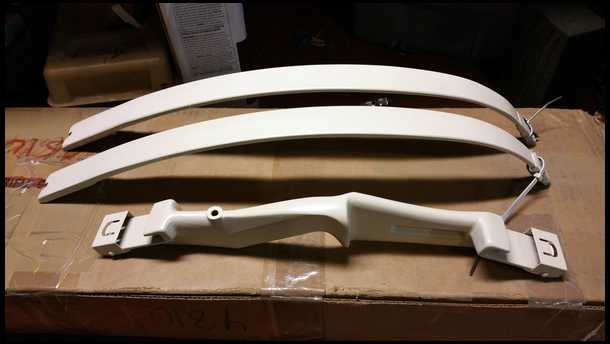
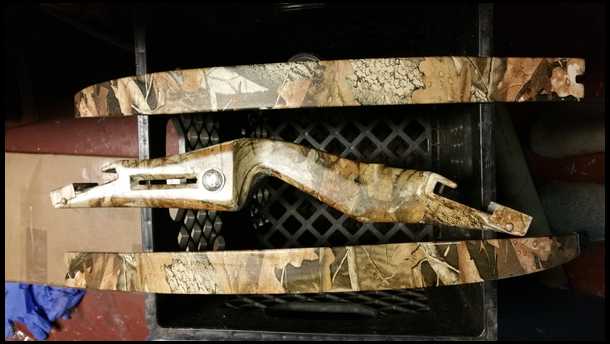
This will be the subject of the experiment!
|
|
| From: bigdog21
|
|
|
|
|
|
|
| Date: 04-Feb-18 |
|
sounds like fun
|
|
| From: J. Julian
|
|
|
|
|
|
|
| Date: 04-Feb-18 |
|
Awesome good luck.
|
|
| From: Knifeguy
|
|
|
|
|
|
|
| Date: 04-Feb-18 |
|
I'll be watching. Lance
|
|
|
|
| From: Vtbow
|
|
|
|
|
|
|
| Date: 04-Feb-18 |
|
At least 12 pots...I drink a pot of perculated coffee a day!
|
|
| From: savage1
|
|
|
|
|
|
|
| Date: 06-Feb-18 |
|
Try a French press. We haven't used our coffee pot in the longest time.
I have a bow I been wanting to either do or have done. The kryptic seems popular these days.
|
|
| From: Dry Bones
|
|
|
|
|
|
|
| Date: 06-Feb-18 |
|
Just pressed a cup and ready to see where this goes. Folks have hydro dipped almost anything.
-Bones
|
|
| From: Vtbow
|
|
|
|
|
|
|
| Date: 06-Feb-18 |
|
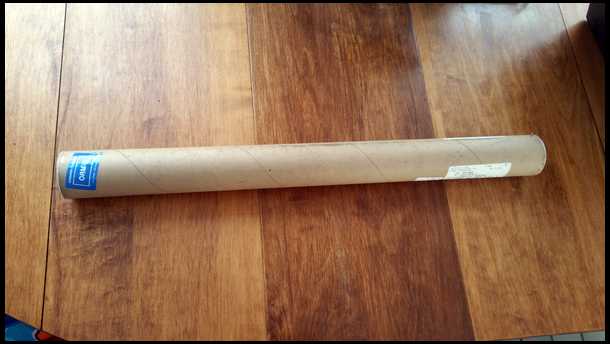
Kit showed up yesterday. I'll do an unboxing of it tonight. $69 to my door, everything needed but masking tape and a container.
|
|
| From: Vtbow
|
|
|
|
|
|
|
| Date: 06-Feb-18 |
|
Ok, had a break to open this uo. Well pacaged and includes everything, including a self etching primer which is key if I remove the mold lines fron the riser.
|
|
| From: Vtbow
|
|
|
|
|
|
|
| Date: 06-Feb-18 |
|
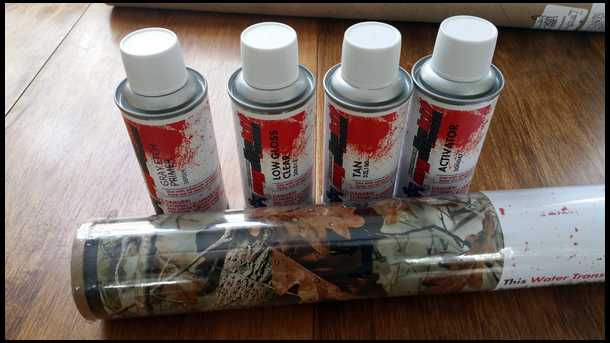
All the goodies!
|
|
| From: Vtbow
|
|
|
|
|
|
|
| Date: 06-Feb-18 |
|
Kit I'm using...should be more than enough for entire bow.
|
|
| From: vthunter
|
|
|
|
|
|
|
| Date: 06-Feb-18 |
|
Where were you able to purchase the kit?
|
|
| From: Vtbow
|
|
|
|
|
|
|
| Date: 06-Feb-18 |
|
vthunter, sent you a pm.
|
|
| From: Longcruise
|
|
|
|
|
|
|
| Date: 06-Feb-18 |
|
I saw that outfit on the web and was intrigued.
I'm watching closely. One of my bows might end up being dunked. :^)
|
|
| From: Vtbow
|
|
|
|
|
|
|
| Date: 06-Feb-18 |
|
Longcruise I figured it was worth a try and I'd spend at least $50 in rattle can paint and correct primer if I was to just camo paint it.
|
|
| From: Longcruise
|
|
|
|
|
|
|
| Date: 06-Feb-18 |
|
Hello yes! I like the pattern you picked.
|
|
| From: Vtbow
|
|
|
|
|
|
|
| Date: 06-Feb-18 |
|
Thanks, we'll see how it comes out, hoping to make some serious progress this weekend!
|
|
| From: Jim Casto Jr
|
|
|
|
|
|
|
| Date: 06-Feb-18 |
|
Timely. I've been watching some YouTube videos the last few days thinking I might dip one of my risers. Thanks for letting us follow along.
|
|
| From: Dry Bones
|
|
|
|
|
|
|
| Date: 06-Feb-18 |
|
Got the good in, ready for the real mess,. UM.. Dipping. :D to start.
-Bones
|
|
| From: SB
|
|
|
|
|
|
|
| Date: 06-Feb-18 |
|
69.00? That would buy a lot of spray paint!....or a powder coat job.
|
|
| From: Vtbow
|
|
|
|
|
|
|
| Date: 07-Feb-18 |
|
Sb, I completely hear ya, you'd think it'd be so much cheaper to rattle can, but:
-can of high quality SEM self etching primer $20 -base coat color $7 -3 color camo ultra flat a $7 each $21 -I like a automotive matte "rim" clearcut by duplicolor(super hard and chip resistant) $8
$56 total, plus my time going to the auto store and local home improvement box store Puts the costa pretty close...
|
|
| From: George D. Stout
|
|
|

|
|
|
|
| Date: 07-Feb-18 |
|
Krylon or Rustoleum is $3.96 a can. There are some interesting dip ideas on youtube as well, surprised me how well they worked with cheap rattle-can paint.
|
|
| From: Vtbow
|
|
|
|
|
|
|
| Date: 07-Feb-18 |
|
George d. Stout where r you getting your krylon camo ultra flat Locally here is 6.99 a can!!! I'm getting ripped off!
|
|
| From: Longcruise
|
|
|
|
|
|
|
| Date: 07-Feb-18 |
|
Relax guys! This isn't about cost, it's about having some fun with something different. Heck, it doesn't cost anything to follow.
I have enough rattle can paints to do ten Bows but I still might give this a whirl.
|
|
| From: Vtbow
|
|
|
|
|
|
|
| Date: 07-Feb-18 |
|
:-)I'm super relaxed! Definitley not about cost, just like to put projects in perspective when I take them up! I have a ton of rattle cans as well... still sounds like I"m getting ripped off though :-)
|
|
| From: Longcruise
|
|
|
|
|
|
|
| Date: 08-Feb-18 |
|
I see what you mean and agree. Just didn't want to see the thread run into the barrow pit with all that cost discussion.
Let's have some fun! At your expense! 8-)
|
|
| From: Vtbow
|
|
|
|
|
|
|
| Date: 08-Feb-18 |
|
I hear ya! Should get some prep work done tonight/tomorrow night. will post pics and progress!
|
|
| From: Vtbow
|
|
|
|
|
|
|
| Date: 08-Feb-18 |
|
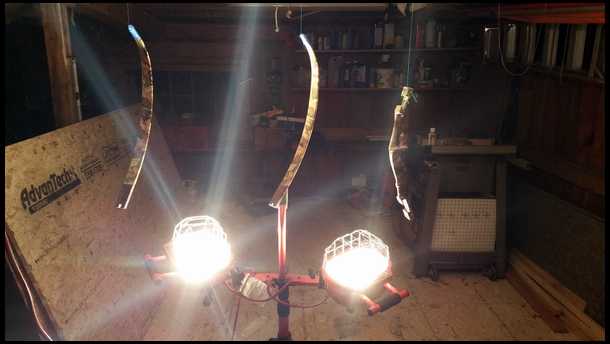
Quick file work to remove original mold lines
|
|
| From: Vtbow
|
|
|
|
|
|
|
| Date: 08-Feb-18 |
|

|
|
| From: PECO
|
|
|
|
|
|
|
| Date: 08-Feb-18 |
|
Good thread. I used one of those kits to do the forearm and stock on my ML. I used the NatGear pattern and it turned out nice. I am curios to see how it works on a bow.
|
|
| From: Vtbow
|
|
|
|
|
|
|
| Date: 09-Feb-18 |
|

Making a little progress, sanded to whiteout, then down to 220, then red em pad
|
|
| From: Vtbow
|
|
|
|
|
|
|
| Date: 09-Feb-18 |
|
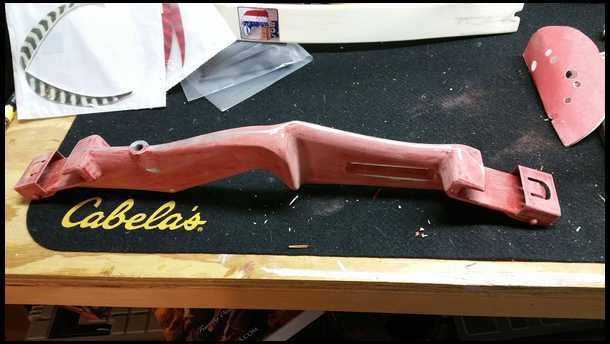
Making a little progress, sanded to whiteout, then down to 220, then red em pad
|
|
| From: Vtbow
|
|
|
|
|
|
|
| Date: 09-Feb-18 |
|
First coat or primer
|
|
| From: Vtbow
|
|
|
|
|
|
|
| Date: 09-Feb-18 |
|
Limbs and riser primed....base coat in 2 hrs...stay tuned!
|
|
| From: Vtbow
|
|
|
|
|
|
|
| Date: 10-Feb-18 |
|
Tan base coat applied. Plan is to dip tomorrow night!
|
|
| From: KDdog
|
|
|
|
|
|
|
| Date: 10-Feb-18 |
|
Very cool. Looking forward to the finished product. Nice job.
|
|
| From: Let 'em fly
|
|
|
|
|
|
|
| Date: 10-Feb-18 |
|
I’ve been intrigued by the look of dipped bows. Excited to see how this turns out and maybe give it a try myself.
|
|
| From: Jim D
|
|
|
|
|
|
|
| Date: 10-Feb-18 |
|
Thanks for letting us tag along. In for the finale.
|
|
| From: Dry Bones
|
|
|
|
|
|
|
| Date: 10-Feb-18 |
|
Are you going to clean off the medallion once done or?? Waiting on the final.
-Bones
|
|
| From: Vtbow
|
|
|
|
|
|
|
| Date: 10-Feb-18 |
|
Bones- I taped off the medallion, hoping to get a crisp line since the medallium es potruding.....we'll see!
|
|
| From: Dan In MI
|
|
|
|
|
|
|
| Date: 10-Feb-18 |
|
pop the medallion out and stick it back on when done.
|
|
| From: Vtbow
|
|
|
|
|
|
|
| Date: 10-Feb-18 |
|
Good idea dan, I'll see how that goes.
|
|
| From: unhinged
|
|
|
|
|
|
|
| Date: 10-Feb-18 |
|
Very cool. Thanks for sharing your experence with us.
|
|
| From: Dan In MI
|
|
|
|
|
|
|
| Date: 10-Feb-18 |
|
Be gentle. It's plastic with a stud out the back to press into a hole.
|
|
| From: Longcruise
|
|
|
|
|
|
|
| Date: 10-Feb-18 |
|
Is the base primer part of the kit? Is it integral to the whole process or??
Following with interest.
|
|
| From: Vtbow
|
|
|
|
|
|
|
| Date: 10-Feb-18 |
|
Base primer was part of kit. It's a self etching primer, like an automotive SEM self etching primer. Integral, yes, but could us another brand I'm sure. Base coat was tan and included. It is what the suggest for background since film is clear
|
|
| From: Longcruise
|
|
|
|
|
|
|
| Date: 10-Feb-18 |
|
I see. Fun stuff.
|
|
| From: Vtbow
|
|
|
|
|
|
|
| Date: 10-Feb-18 |
|

It's dipping time!
|
|
| From: Vtbow
|
|
|
|
|
|
|
| Date: 10-Feb-18 |
|
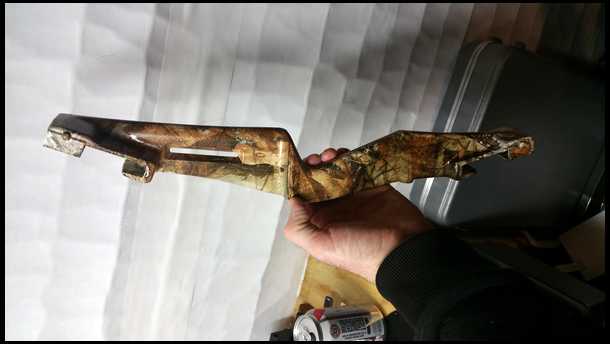
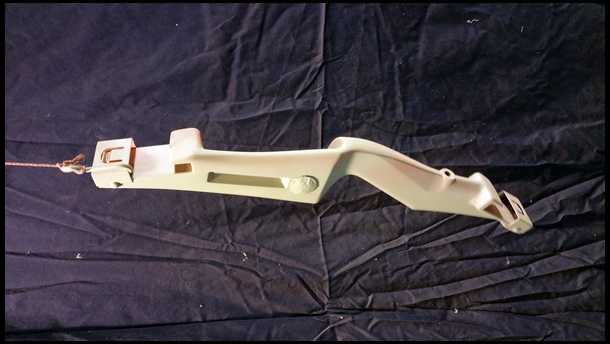
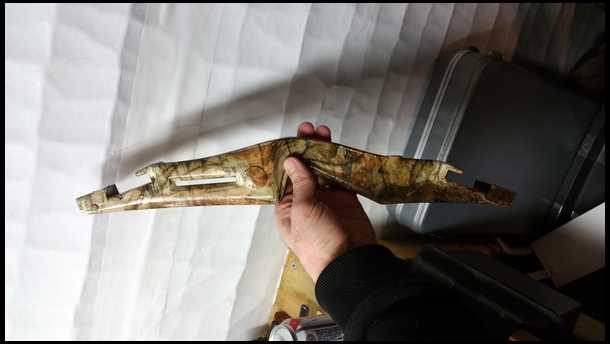
Don't know why I did the riser first.
|
|
| From: Vtbow
|
|
|
|
|
|
|
| Date: 10-Feb-18 |
|
|
|
| From: Vtbow
|
|
|
|
|
|
|
| Date: 10-Feb-18 |
|
|
|
| From: Vtbow
|
|
|
|
|
|
|
| Date: 10-Feb-18 |
|
|
|
| From: bigdog21
|
|
|
|
|
|
|
| Date: 10-Feb-18 |
|
looks good from here.
|
|
| From: Gator1
|
|
|
|
|
|
|
| Date: 10-Feb-18 |
|
Nice. Looks great
|
|
| From: Mike E
|
|
|
|
|
|
|
| Date: 10-Feb-18 |
|
Turned out nice, well done.
|
|
| From: Vtbow
|
|
|
|
|
|
|
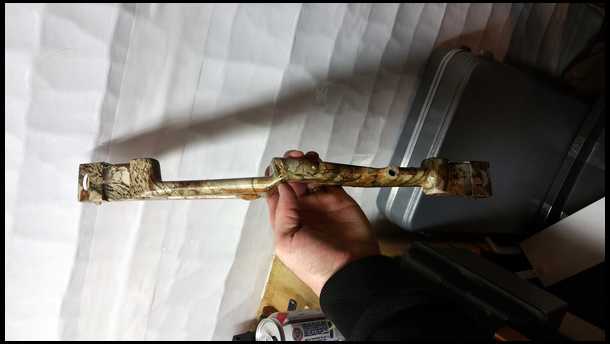
| Date: 10-Feb-18 |
|
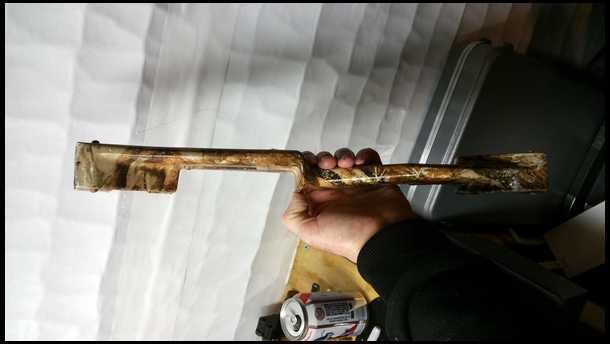
Learning curve is pretty instant on this....much better!
|
|
| From: Vtbow
|
|
|
|
|
|
|
| Date: 10-Feb-18 |
|
|
|
| From: Vtbow
|
|
|
|
|
|
|
| Date: 11-Feb-18 |
|
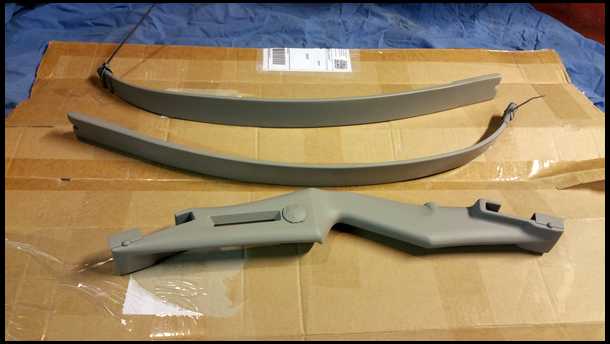
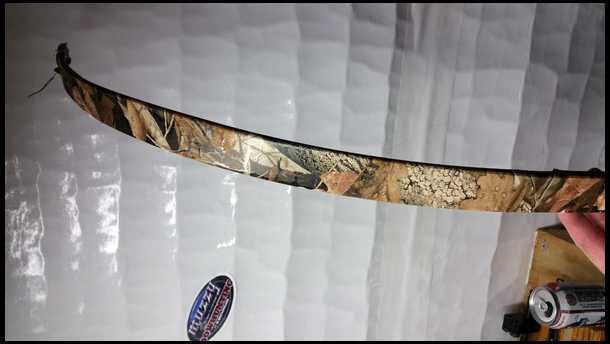
Second limb...I think I'm doing ok!
|
|
| From: Vtbow
|
|
|
|
|
|
|
| Date: 11-Feb-18 |
|
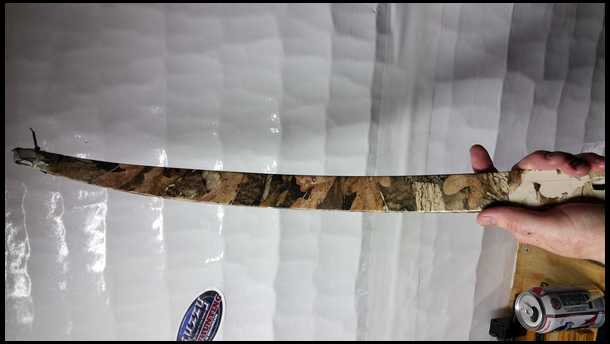
Ok, this is pretty awesome...
|
|
| From: Barber
|
|
|
|
|
|
|
| Date: 11-Feb-18 |
|
Looks cool ! I have had bows and guns hydrodiped but never done it myself.
|
|
| From: Knifeguy
|
|
|
|
|
|
|
| Date: 11-Feb-18 |
|
I think you just talked me into dipping my "A" Mag. That's awesome. Lance
|
|
| From: Vtbow
|
|
|
|
|
|
|
| Date: 11-Feb-18 |
|
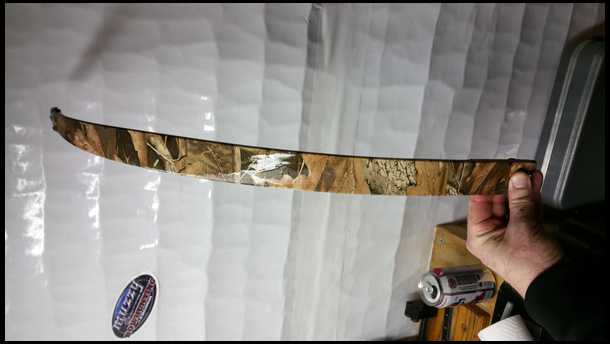
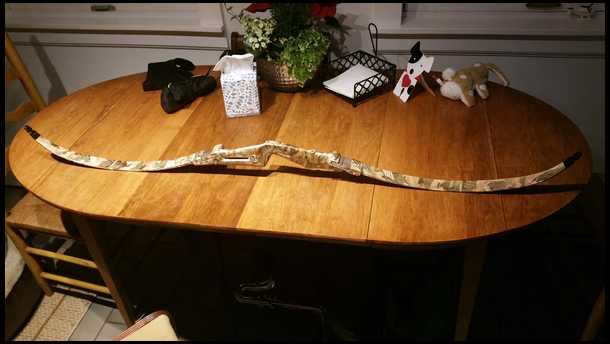
Thanks everyone. Lance, definitely better than a rattle can job, I'm pretty happy with how it came out- def. doesn't look like a 76er anymore! I'll put a summary of what I found was helpful and what I screwed up on in next couple days.
|
|
| From: Mountain Man
|
|
|
|
|
|
|
| Date: 11-Feb-18 |
|
Came out pretty damn good!
|
|
| From: vthunter
|
|
|
|
|
|
|
| Date: 11-Feb-18 |
|
NICE JOB !!!
|
|
| From: Jim D
|
|
|
|
|
|
|
| Date: 11-Feb-18 |
|
Turned out great. I like it!
|
|
| From: Bud B.
|
|
|
|
|
|
|
| Date: 11-Feb-18 |
|
Following!
Very nicely done!!
|
|
| From: Dry Bones
|
|
|
|
|
|
|
| Date: 11-Feb-18 |
|
I like it A LOT. Congratulations.
-Bones
|
|
| From: Vtbow
|
|
|
|
|
|
|
| Date: 11-Feb-18 |
|
Thanks everyone, not perfect by any means, but a valiant first experience into hydro dipping. Box call, yes it now gets a clear coat. Probably 3 coats, the sent a "low gloss" and if I don't like it I'll hit it with some matte afterwords. Test showed very very low luster.
|
|
| From: rock74
|
|
|
|
|
|
|
| Date: 11-Feb-18 |
|
That looks great, I may have to try that on one of my Excels.
|
|
| From: Longcruise
|
|
|
|
|
|
|
| Date: 11-Feb-18 |
|
That's cool! Will the system adapt to dipping a one piece bow?
|
|
| From: Bones44
|
|
|
|
|
|
|
| Date: 11-Feb-18 |
|
Looks great ! Make sure to clear coat it to protect the finish
|
|
| From: Vtbow
|
|
|
|
|
|
|
| Date: 11-Feb-18 |
|
System would work for 1 piece if less than 6'6" long, that's the longest piece of film ive seen, but you could call. Imagone you could do a double dip, left side, then right side in like a 12" piece of pvc cut in half to make a trough.
Just thew the first coat of clear on about 10 minutes ago.
|
|
| From: bowbert
|
|
|
|
|
|
|
| Date: 11-Feb-18 |
|
Well Done!
Bret
|
|
| From: 3Ditional
|
|
|
|
|
|
|
| Date: 11-Feb-18 |
|
Looking good!
|
|
| From: Vtbow
|
|
|
|
|
|
|
| Date: 11-Feb-18 |
|
3rd coat of clear drying...
|
|
| From: Vtbow
|
|
|
|
|
|
|
| Date: 11-Feb-18 |
|
I call it the camo mobile! Back into the basement to hang near the furnace for some good dry heat to cure the clear coat. Will hang here for 12 days to harden to full cure.
|
|
| From: Vtbow
|
|
|
|
|
|
|
| Date: 12-Feb-18 |
|
Ok so here are quick takeaways:
-As with everything finishing, PREP PREP PREP
-The directions do not mention wiping down with solvent, or tack cloth/etch between each step, definitely do!
-They suggest edging the film with masking tape when dipping-- I did this withe blue 1" masking tape. Not sure if the 1" was too large and heavy or what, but this made the film lose surface tension and not float--this lead to poor activation and the issues with some spotty finish on the riser. I wouldn't use tape at all, worked MUCH better without.
-container size MATTERS. you do not want the film to even touch the sides, and you need plenty of space to get the part in without hesitation.
-make sure water is deep enough to shake item below the surface
-DIP SLOWWWWWWWWWWLY.....did I say slow?
-Water temp matters, a little higher than lukewarm seemed to work best
-I dipped in a rubber made bin on the floor. IF you can, raise it up to waist height, I Think I would have had more control and been able to move more slowly, as well as seen what was going on better
-DO NOT REUSE WATER- I tried to do a quick touch up on a spot and really just made a mess and wasted material--nothing worked as it should in the water which already had activator in it
-Wear gloves...I know this is common sense, but I didnt because I was moving around so much to get water from the laundry room etc. My fingernails are still a little camo, and luckily I was able to get it off my wedding ring with some acetone...don't think the camo ring would have flown with my wife.
This really wasnt too difficult at all, and I think anyone could do it if you are patient and follow the directions you can get a professional job at home. I'm going to do a quiver hood for this bow next and I am confident my lessons will make a huge difference in the end process.
Feel free to reach out if you have questions! -Brian
|
|
| From: Vtbow
|
|
|
|
|
|
|
| Date: 12-Feb-18 |
|
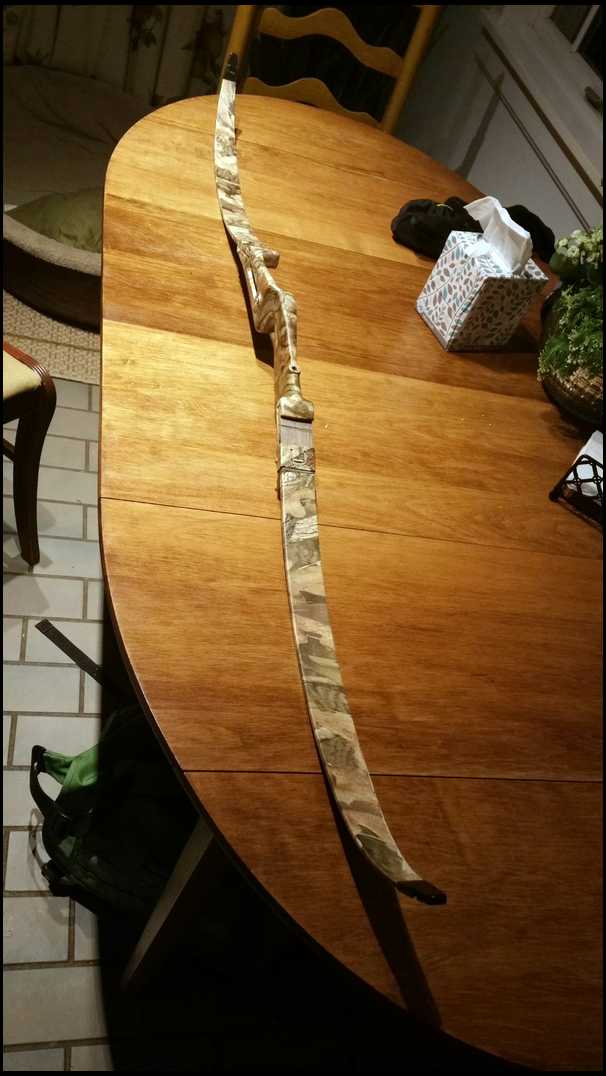
Final assembly pics...
|
|
| From: Vtbow
|
|
|
|
|
|
|
| Date: 12-Feb-18 |
|
|
|
| From: Knifeguy
|
|
|
|
|
|
|
| Date: 13-Feb-18 |
|
Not a plain Jane 76er anymore! It looks nice! Give yourself an "Atta Boy" Lance
|
|
| From: treehermit
|
|
|
|
|
|
|
| Date: 13-Feb-18 |
|
Well done and thank you for the summary too!
|
|
| From: smj8322
|
|
|
|
|
|
|
| Date: 13-Feb-18 |
|
Looks good. I thought about doing mine myself but didn't want to screw it up. I had the guy that's doing mine order the treebark film a couple days ago.
|
|
| From: Vtbow
|
|
|
|
|
|
|
| Date: 13-Feb-18 |
|
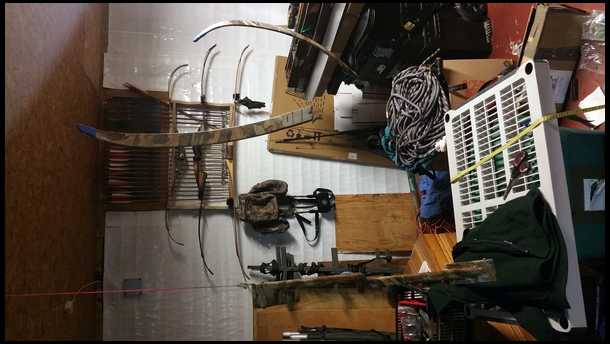
Pretty happy with how it came out, considering. Definitely better look ok ng than the original red and white 76er! Could actual hunt with it. Next will be quiver,bsome takedown arrows and a small padded zip case!
|
|
| From: Longcruise
|
|
|
|
|
|
|
| Date: 13-Feb-18 |
|
Call me nuts, but I wanna do one in the flag theme. :^)
|
|
| From: Vtbow
|
|
|
|
|
|
|
| Date: 13-Feb-18 |
|
Longcruise--could of done the flag on the white limbs of mine with the red riser and thrown a blue and white string on it and it would have been pretty slick!
|
|
| From: Longbow58
|
|
|
|
|
|
|
| Date: 13-Feb-18 |
|
Great Job Brian thanks for the dip along very helpful.
|
|
| From: Vtbow
|
|
|
|
|
|
|
| Date: 13-Feb-18 |
|
Thanks John, glad you enjoyed it and found it helpful!
|
|
| From: ny yankee
|
|
|
|
|
|
|
| Date: 22-Feb-18 |
|
Yes, really cool!
|
|
| From: Sinner
|
|
|
|
|
|
|
| Date: 22-Feb-18 |
|
That's pretty nice looking!
|
|
| From: Vtbow
|
|
|
|
|
|
|
| Date: 22-Feb-18 |
|
Thanks Jeff. Should have the quiver done in next few days...sap strated running last week and through my plans off :-)
|
|
| From: Vtbow
|
|
|
|
|
|
|
| Date: 22-Feb-18 |
|
Hey dan, YES. Crazy warm, low 60s. You have concords, or? Had a few different types at our old house but haven't established any here yet. Looking forward to the hat, thanks again!
|
|
| From: Vtbow
|
|
|
|
|
|
|
| Date: 22-Feb-18 |
|
Nice Dan. Nice, this was a few years ago....kiss those grapes!!!
|
|
| From: Vtbow
|
|
|
|
|
|
|
| Date: 22-Feb-18 |
|
*miss those grapes....
|
|
| From: Stoner
|
|
|
|
|
|
|
| Date: 22-Feb-18 |
|
Great job right there. I have an old Shakespear that wood look good on. John
|
|
| From: Longcruise
|
|
|
|
|
|
|
| Date: 23-Feb-18 |
|
Know what you mean, BC. They get most of the grapes and more than their share of raspberries.
Not like I have a lot of grapes to begin with. I'd love to be able to grow the way the pictures here show.
|
|
| From: Vtbow
|
|
|
|
|
|
|
| Date: 23-Feb-18 |
|
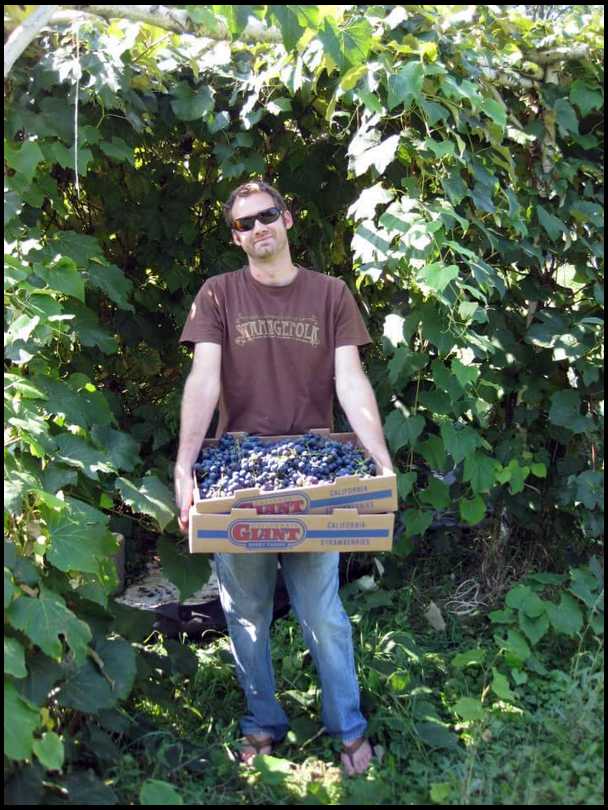
Longcruise- The arbor was 8' tall, 16' wide and 10' deep. We had more than we knew what to do with. A combination of jug wine, jam, and juice and we couldnt keep up with them! The picture is before I lined the area underneath with 2" thick reclaimed white marble to keep the weeds down and give us some shade to sit in next to our veggie garden.
We have pretty massive issues with our blueberries now...birds, rabbits, squirrels--had a blackbear print in the garden last year...Also put 150 strawberries in last year, so we'll see how that ends up this year :-)
|
|
| From: nybubba
|
|
|
|
|
|
|
| Date: 23-Feb-18 |
|
Good job, look great
|
|
| From: Mpdh
|
|
|
|
|
|
|
| Date: 23-Feb-18 |
|
Vtbow, Do you have any relatives in sw Michigan? They have a big blueberry, strawberry, operation near here with same last name as you.
MP
|
|
| From: Mountain Man
|
|
|
|
|
|
|
| Date: 23-Feb-18 |
|
Brian i couldnt keep the bears out of my strawberry patches so i built a natural blind on one end and nother on the other end ; ) Win win
|
|
| From: Vtbow
|
|
|
|
|
|
|
| Date: 23-Feb-18 |
|
Mpdh, no relatives in Michigan. Mountain man, there have been a few rabbits in the pot..:-)
|
|
| From: Mountain Man
|
|
|
|
|
|
|
| Date: 23-Feb-18 |
|
Shhhhh,,,dont tell anybody bout the black berrys, beach nut and apple trees everywhere and all the grouse,turkey,deer and moose! Let'm think its all potheads and ski instructors ; )
|
|
| From: Vtbow
|
|
|
|
|
|
|
| Date: 23-Feb-18 |
|
;-)
|
|
| From: Vtbow
|
|
|
|
|
|
|
| Date: 23-Feb-18 |
|
Ok. Back on topic...did the quiver. Waited too long after spraying the activator. Definitely distorted the pattern big time, oh well...needed a PBR....
|
|
| From: Vtbow
|
|
|
|
|
|
|
| Date: 26-Feb-18 |
|

Oh crap....apparently my favorite automotive matte clear coat does NOT play well with the hydrodip film....don't use this!!!
|
|
| From: Vtbow
|
|
|
|
|
|
|
| Date: 26-Feb-18 |
|
Wow...crazy...and this was prepped really well...
|
|
| From: bodymanbowyer
|
|
|
|
|
|
|
| Date: 26-Feb-18 |
|
Pretty cool, thanks for sharing. :-) JF
|
|
| From: Mountain Man
|
|
|
|
|
|
|
| Date: 26-Feb-18 |
|
Well better just the quiver and you didnt try it on bow
|
|
| From: Vtbow
|
|
|
|
|
|
|
| Date: 26-Feb-18 |
|
Yup mountain man...ran out of the clear they gave me....have to figure out what is is.
|
|
| From: Vtbow
|
|
|
|
|
|
|
| Date: 01-Mar-18 |
|
Ok, contacted the company....they specifically said DO NOT USE ACRYLIC based clear coats with the hydrodip...must have missed that warning(it wasnt there) They say stick with urethane based products the whole way through and shouldnt have a problem. Just wanted to keep anyone interested in this in the loop. Cheers!
|
|
If you have already registered, please sign in now
For new registrations Click Here
|
|
|
|