| From: Hiram
|
|
|

|
|
|
|
| Date: 04-May-14 |
|

Starting a thread called the Warfing Wall and will post builds and answer questions and help anyone if I can along with other guys that build their own, not just me.
Anyone who wants to talk Bolt downs or ILF, let's talk about it in this thread and then when someone asks a question they can search up this thread and go through it for info.
One exclusive thread that will build and build with information that can be referred to with everyone involved.
I will be here posting pics and builds and hope others put in their stuff also so everyone has one good reference to search up and return to for lot's of info.
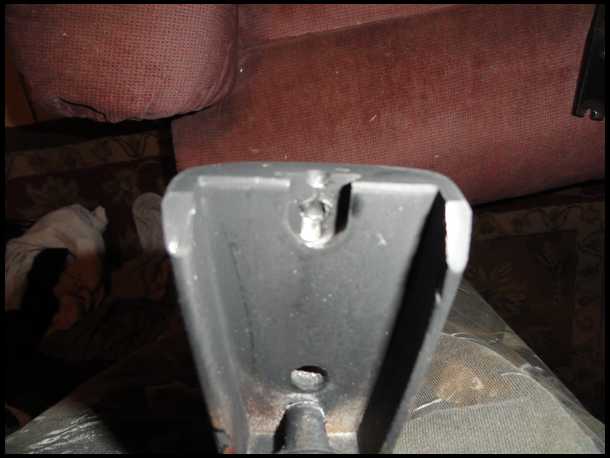
Locating center on a Black Bear is almost always 0.865 from the riser walls on the inside to center.
|
|
| From: Hiram
|
|
|
|
|
|
|
| Date: 04-May-14 |
|

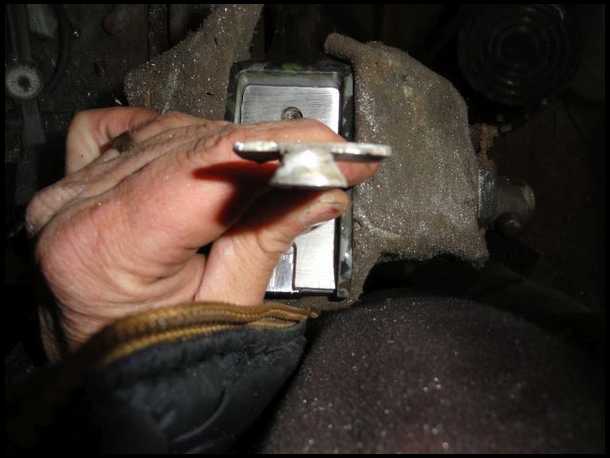
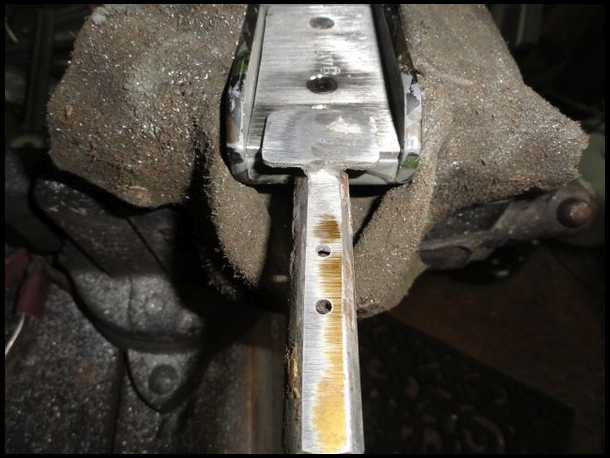
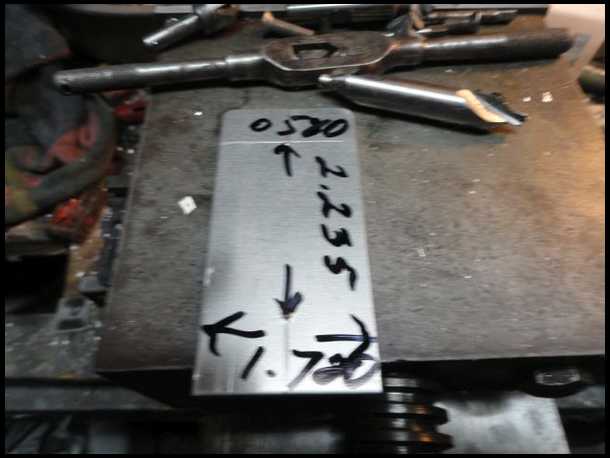
You can make yourself a good centerline tool very easy.
From the limb bolt center down 2.100 is the end of your dovetail.
I have this one marked for moving limb bolts inward on Prolines too. Just make sure your holes are centered in your tool.
|
|
| From: Hiram
|
|
|
|
|
|
|
| Date: 04-May-14 |
|

|
|
| From: digdug
|
|
|
|
|
|
|
| Date: 04-May-14 |
|
can a Indian deerhunter compound be warfed
|
|
| From: Bowitis
|
|
|
|
|
|
|
| Date: 04-May-14 |
|
Great idea!
|
|
| From: Fuzzy
|
|
|
|
|
|
|
| Date: 05-May-14 |
|
good idea to a point, after about 500 posts, threads with lots of pics get very slow to load.
|
|
| From: Hiram
|
|
|
|
|
|
|
| Date: 01-Jun-14 |
|

|
|
| From: Hiram
|
|
|
|
|
|
|
| Date: 01-Jun-14 |
|

|
|
| From: Hiram
|
|
|
|
|
|
|
| Date: 01-Jun-14 |
|

|
|
| From: Hiram
|
|
|
|
|
|
|
| Date: 01-Jun-14 |
|

No dovetails
|
|
| From: gluetrap
|
|
|
|
|
|
|
| Date: 01-Jun-14 |
|
i got ?? only. can sage limbs be bolted onto a pse polaris riser or black bear riser, or newer whitetaill ii riser ?..ron
|
|
| From: Hiram
|
|
|
|
|
|
|
| Date: 01-Jun-14 |
|
Yessir,,,just ingenuity bro,,
|
|
| From: doug
|
|
|
|
|
|
|
| Date: 01-Jun-14 |
|
go for it , sounds like a good idea.
|
|
| From: gluetrap
|
|
|
|
|
|
|
| Date: 01-Jun-14 |
|
i have bb and pse polaris. i see whitetailII all the time. thinking aboute geting some limbs and trying them out. if it works for me i will post results here. mite take a while, got to thin the herd for funds...ron
|
|
| From: Hiram
|
|
|
|
|
|
|
| Date: 01-Jun-14 |
|

Might just as well..Proline with Quinn limbs
|
|
| From: Hiram
|
|
|
|
|
|
|
| Date: 01-Jun-14 |
|

|
|
| From: Hiram
|
|
|
|
|
|
|
| Date: 01-Jun-14 |
|

I have no idea where that dirt hill picture came from??? like it jumped in my browser from somewhere else,,,,
|
|
|
|
|
|
| From: quiverman2
|
|
|
|
|
|
|
| Date: 03-Jun-14 |
|
Black Bear and sage limbs works very well!
|
|
| From: quiverman2
|
|
|
|
|
|
|
| Date: 03-Jun-14 |
|
Black Bear and sage limbs works very well!
|
|
| From: quiverman2
|
|
|
|
|
|
|
| Date: 03-Jun-14 |
|
Black Bear and sage limbs works very well!
|
|
| From: GLangley
|
|
|
|
|
|
|
| Date: 03-Jun-14 |
|
Finally got a BB riser.Now the fun of building a warf after wanting one for a long time.
|
|
| From: doug
|
|
|
|
|
|
|
| Date: 03-Jun-14 |
|
Hiram, HOW WIDE DO THE LIMB POCKETS NEED TO BE FOR THE SAGE LIMBS? IS IT 1 3/4"?
|
|
| From: Hiram
|
|
|
|
|
|
|
| Date: 29-Jun-14 |
|

|
|
| From: Hiram
|
|
|
|
|
|
|
| Date: 29-Jun-14 |
|

|
|
| From: Hiram
|
|
|
|
|
|
|
| Date: 29-Jun-14 |
|

|
|
| From: Hiram
|
|
|
|
|
|
|
| Date: 29-Jun-14 |
|

|
|
| From: Hiram
|
|
|
|
|
|
|
| Date: 15-Aug-14 |
|

TD 16 hood milled away to ILF
|
|
| From: Hiram
|
|
|
|
|
|
|
| Date: 15-Aug-14 |
|

Gamemaster limb bushings
|
|
| From: Hiram
|
|
|
|
|
|
|
| Date: 15-Aug-14 |
|

Gamemaster two ILF
|
|
| From: Hiram
|
|
|
|
|
|
|
| Date: 15-Aug-14 |
|

|
|
| From: Hiram
|
|
|
|
|
|
|
| Date: 15-Aug-14 |
|

Yes to DAS also
|
|
| From: Hiram
|
|
|
|
|
|
|
| Date: 15-Aug-14 |
|

|
|
| From: Hiram
|
|
|
|
|
|
|
| Date: 15-Aug-14 |
|

I stopped dipping on April 18th because a doctor visit for my ear ringing to a specialist revealed I had canverous type lesions in my mouth.
I had luekoplakia,,my gums were purple,,I went back two months after stopping and my gums were pink and healed.
Guys,,,it is the hardest thing I have had to do and it still hurts wanting a dip but stop dipping right now. You can do it,,,,,
|
|
| From: Hiram
|
|
|
|
|
|
|
| Date: 15-Aug-14 |
|

Pro Vantage
|
|
| From: Hiram
|
|
|
|
|
|
|
| Date: 15-Aug-14 |
|

Make your own adjustable off the shelf button from a bolt by spinning it against a belt sander in a drill,
|
|
| From: Hiram
|
|
|
|
|
|
|
| Date: 15-Aug-14 |
|

Drill and tap 5/16x24 and add a toothpick,,ready for some velcro.
|
|
| From: Hiram
|
|
|
|
|
|
|
| Date: 15-Aug-14 |
|

Little velcro on the bolt head and on the shelf and the TP for the pivot point and go shoot....
|
|
| From: Hiram
|
|
|
|
|
|
|
| Date: 15-Aug-14 |
|

|
|
| From: Hiram
|
|
|
|
|
|
|
| Date: 15-Aug-14 |
|

|
|
| From: Hiram
|
|
|
|
|
|
|
| Date: 15-Aug-14 |
|
See some interest may do the Mini mag build?
|
|
| From: GLangley
|
|
|
|
|
|
|
| Date: 15-Aug-14 |
|
I would be interested in seeing the build. I love my warf.
|
|
| From: roger
|
|
|
|
|
|
|
| Date: 15-Aug-14 |
|
Sam, I quit 'chew about a decade ago.....You can do it, brother. Cancer ain't worth it. Congrats and great work as always. :)
|
|
| From: Wildhog
|
|
|
|
|
|
|
| Date: 15-Aug-14 |
|
Sam I am with Roger. You can quit the chew. I quit chewing 3 years ago so now I don't have one single vice! Well sort of......
|
|
| From: Hiram
|
|
|
|
|
|
|
| Date: 01-Oct-14 |
|

I like building for Guys that really love their Bow and keep them. This gent loves his Proline that I moved the bolts inward and dovetailed the pockets to ILF.
|
|
| From: Hiram
|
|
|
|
|
|
|
| Date: 01-Oct-14 |
|

Recent builds
|
|
| From: Hiram
|
|
|
|
|
|
|
| Date: 01-Oct-14 |
|

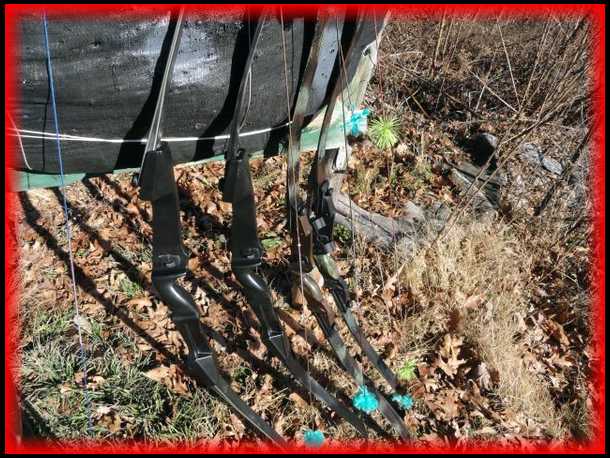
Straight
|
|
| From: Hiram
|
|
|
|
|
|
|
| Date: 01-Oct-14 |
|

Proline
|
|
| From: Hiram
|
|
|
|
|
|
|
| Date: 01-Oct-14 |
|

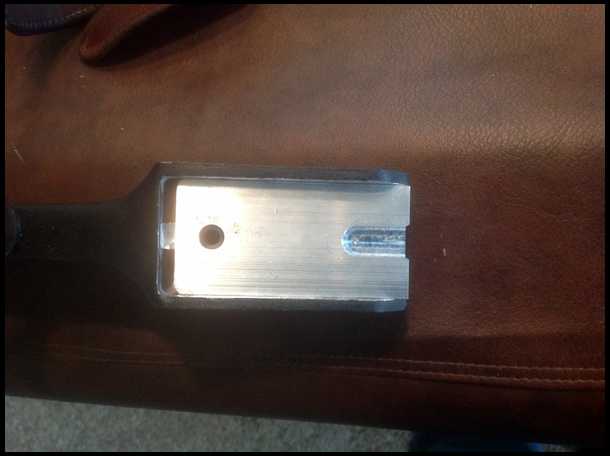
Dovetail in the floors milled in and no dovetail entry from the bottom. ILF,,,,,
|
|
| From: Hiram
|
|
|
|
|
|
|
| Date: 01-Oct-14 |
|

Moving the limb bolts in enables the ILF profile to really fill the pocket floor and look better.
|
|
| From: benzy
|
|
|
|
|
|
|
| Date: 01-Oct-14 |
|
That last picture expalins a lot about "moving the limb bolts". Looks good!
|
|
| From: JM3
|
|
|
|
|
|
|
| Date: 01-Oct-14 |
|
Sam,
If I wanted to be on the lookout for a riser to warf, what’s the most important aspect to be concerned with? Any particular makes or models that lends themselves well to this conversion process?
I know they can be made out of most any compound but figured if I decide to tackle this I might as well make it as painless of a process as possible.
Seeing this makes me want to fire up my milling machine! Be nice to use it to make myself something for a change.
|
|
| From: Hiram
|
|
|
|
|
|
|
| Date: 03-Oct-14 |
|

Yes,,and if your a machinist a Bear black bear is the one! All you need is an ILF limb.
|
|
| From: Hiram
|
|
|
|
|
|
|
| Date: 03-Oct-14 |
|

TD 3's
|
|
| From: Hiram
|
|
|
|
|
|
|
| Date: 03-Oct-14 |
|

TD'S
|
|
| From: GLangley
|
|
|
|
|
|
|
| Date: 03-Oct-14 |
|
Wouldn't mind having one of the black ones. To go with my BB warf.
|
|
| From: Hiram
|
|
|
|
|
|
|
| Date: 03-Oct-14 |
|

DAS RAMBO
|
|
| From: Hiram
|
|
|
|
|
|
|
| Date: 03-Oct-14 |
|

|
|
| From: Hiram
|
|
|
|
|
|
|
| Date: 03-Oct-14 |
|

An old Astro Compound gonna be a ILF riser soon,,
|
|
| From: Hiram
|
|
|
|
|
|
|
| Date: 03-Oct-14 |
|

|
|
| From: tonto59
|
|
|
|
|
|
|
| Date: 03-Oct-14 |
|
Good thread. Sam in your opinion what is the best shooting compound you made into an ILF set up? Also I have a Bear Polar LTD compound. Can I put bolt on limbs on this and make it a shooter? Or is it a better ILF candidate? Thanks
|
|
| From: Hiram
|
|
|
|
|
|
|
| Date: 03-Oct-14 |
|

Up the center line is the first mark even with the pivot point of the grip, then measure the pockets off this line for your angle. Measure the pocket floors, NOTTTTTT THE RISER TOPS!!! The riser tops on a Black Bear are steeper (less angle) than the floors. You can measure from the centerline to the belly side of the riser to see how much deflex you have in the riser. Less pocket angle means more pre-load, more angle means less. More deflex may equate to predicting brace height? Less BH and less angle means speed and preload. "If you look at a Bow that has both of these preload indicators of less and less and say "that Bow looks like it would be hard to string" Ol Adcock,,,,You will have a fast Bow!! Go below six inches of BH and you will have a Bow that is hard to shoot in a recurve!!! Prolines with recurve limbs is a good seven in BH Bow which usually is a good compramise between shootability and the too radical!!! Guys wanting to warf all these radical reflexed risers will NOT be ABLE TO COMPETE WITH anyone who is a decent seasoned 3-D competitor like Greysquirrel or Matt or,,,,,and it goes on,,,the list that is! lol
|
|
| From: Hiram
|
|
|
|
|
|
|
| Date: 03-Oct-14 |
|
Really, the only thing that means anything is the actual limb mounting surfaces relative to each other. from these two, a vertical axis can be established. In other words, a straight line between to identical (read mirror image) points of each limb mount. Wow, I went back and read that- clear as mud. let's try a pic:
Name: Riser limb angle.jpg Views: 95 Size: 81.1 KB
To try to explain that: Measurements to or taken from the outside points of the riser don't give you accurate information. The red line is the line following the surface inside the pocket where the limb will mount. The black line follows the outside profile of the limb pocket. Riser metal here could be ground away and affects nothing concerning limb angle relative to the vertical axis of the riser. The blue lines are just suppose to be random lines parallel to the vertical axis of the riser... note that the "limb angle" relative to these lines is the same no matter where the measurement is taken, ie. top, middle or bottom line.
Make sense? Anyway this is the way I determine limb angle quickly. For real accurate measurements, I mount the riser in a mill vise and measure deflection at equal points of each limb pocket and then trig it out using the actual numbers I get. This method is only used when I'm trying to change or clean up a limb pad. It has no practical use for much other than that.
|
|
| From: Hiram
|
|
|
|
|
|
|
| Date: 03-Oct-14 |
|
The Bear Black Bear or the Hoyt Rambo are the best risers for a Recurve Bow and a warf riser.
|
|
| From: tonto59
|
|
|
|
|
|
|
| Date: 04-Oct-14 |
|
Thanks Sam. Interesting stuff.
|
|
| From: Hiram
|
|
|
|
|
|
|
| Date: 29-Oct-14 |
|
Good stuff on WARFBOW
Wayne Stiles?WARFBOW 53 mins ·
RE: ILF-style & DAS limb attachment fittings Part 1
Both style of fittings basically use the same diameter hole. HOWEVER----don't you hate that----since few of the limbmakers actually produce their own fittings they have to depend on the QC of whichever supplier they have contracted with (Border, I believe is the only one who actually produces their own "Ilf" fittings) My impression, based on playing with them for quite a while, is that the holes are bored in the limb-butts slightly undersized and the ILF fittings pressed in with some sort of industrial press. therefore the hole will be press formed to the exact dimensions of the fitting used--whatever they are--including the anti-rottional milling or ribbing. Ilf fittings are a 4 part assembly, the actual dovetail fitting that is pressed int the limb butt from the underside, a small plunger the protrudes from the bottom of the dovetail to "lock" it in place in the dovetail slot in the riser, the spring that holds it in place and a broad head threaded screw that is inserted into the upper end of the main fitting. these screws vary in configuration some are slotted some have a "phillips" head, some require an allen wrench and some are simply a thing flat hex bolt. I have seen more than one type used by the same mfg. Limb butt thickness pretty well dictates the required length of the main housing since the protruding dovetail MUST fit the slots milled in the riser properly and the small cylindrical portion above the dovetail itself also need to be of the correct diameter and length.
Bear in mind that while the ILF dovetail connector fittings may look alike careful measurement and examination will show that they often vary in diameters and lengths, from brand to brand, and even within brands over time and model changes
when working across MFG platform or mixing and matching limbs and risers, and especially when dealing with WARFS careful attention must be paid to these dimensions, both the fittings themselves and the dovetail slots in the risers, to get a safe secure and consistently aligned fit.
In the majority of cases things will work fine but occasionally some careful work with fine files and magic-marker may be required. UnlikeUnlike ·
You and Tim McEwen like this. Wayne Stiles Part 2 The DAS fitting
the DAS fitting was derived form the attachment fitting Early Hoyt employed in the models before he invented the "ILF" fitting it basically consists of a rimmed internally threaded bushing that is solid in the upper rimmed end. It is simply pressed into the hole bored in the limb. a threaded bolt is inserted upwards through the floor of the riser's limb pocket and tightened into the threaded bushing drawing it down tightly to the riser.
In creating the DAS fitting David Sosa made some additional refinements. the internally threaded bushing actually protrudes from the bottom of the limb. Rather than just a simple hole bored through the floor of the pocket David created an elongated round ended slot the outside diameter of the protruding part of the fitting. In the bottom of that slot was another elongated, but narrower slot for the shank of the attachment bolt. the bolt had a reduced thread diameter near the knob or head. the bolt pass through slot had a thread diameter hole drilled and threaded at its outer end. the rest of the slot was just wide enough to let the reduced diameter slide back and forth.
The whole point to this small but significant improvement was to enable the limb with fitting inserted to be slid into the riser pocket with the protruding fitting located in the the outer end of the slot; the attachment bolt inserted and threaded upward into the fitting until it was almost tight; then the limb and bolt could be sild reward until the protruding fitting end was in solid contact with the solid metal of the riser slot. If properly fitted this helped carry the inward forces of the limb that other wise would be bearing on the limb draw bolt and/or to the actual end of the pocket if the limb was too deeply slotted. once both limbs were fitted, and strung and everything was solidly in place the knobs or thumb screws could be tightened.
This produced a much solider attachment than the ILF setup. however it was a bit slower and it does require a bit more attention to dimension especially an the matter of the fitting protrusion and the dimensions of the milled slots. because it is so solid in its fittment to the riser is is also much easier to make it a dead quiet system---And Davids goal was to produce the best possible HUNTING bow that would be able to use the state-of-the-art high-tech FITA-type limb sets Some Post-David versions have pretty well dispensed with the reduced diameter thread less portion to the thumb bolt and the larger diameter threaded part of the lower slot. it is a cost and time saver and all that is lost is the ability to retain the bolt in there riser when the bow is dissembled . 20 mins · Edited · Unlike · 2 Wayne Stiles PART 3 interchanging ILF/DAS fititngs.
simply put it means unscrewing the top screw in the ILF Fitting dropping the spring and plunger out, removing the lower dovetail portion of the fitting and inserting a DAS fitting into the same hole fro the top of the limb. HOWEVER----here it comes again----this has to be done with some care. Occasionally you might find a limb that has an max-tolerance hole and min tolerance fittings that allows you to push parts out and press parts in with thumb pressure alone. but I've worked with close to 50 sets of limbs over the years switching them back and forth. I've only run into one set that were that sloppy. more often the ILF fittings are firmly pressed into undersized holes with a mechanical press of some sort. You could simply drive the out with a punch and hammer and a chunk of wood with a hole large enough for the dovetail to slip through as it comes put of the limb. but that may well damage the fitting and perhaps the limb. Once the ILF fitting is out you could simply hammer the DAS fitting in but you run the risk of getting it crooked and damaging the limb to the fitting. The best way I have found is to find a pair of hex headed bolts threaded to be a good solid fit in the ILF firing and in the the DAS fitting screwing the bolt into the fitting solidly allows you to use an small arbor press or a careful padded bench vise to press the fittings in or out. you also need some sort of block with a hole drilled to keep the limb solidly and safely in place while the fittings are being pressed in and out. IN my tool bag of bow repair stuff I carry the 2 bolts, an old 1" socket, and a 4" fine threaded high quality C'clamp this serves as a "field-expedient" arbor press.
its a pretty simple process if you work carefully. A few of the older W&W Limbs 'David worked with required careful reaming since their fittings were undersized for the DAS fittings but its a simple shiny to do If you run into a set of them. The key is to work carefully keep things straight and aligned and do't get impatient. even with my improvised c-clamp set up I can usually switch a set of fittings in or out in 10 or 15 min or less, unless I drop one of the little plungers or a spring and have to hunt for it
|
|
|
|
|
|
|
|
|
|
|
|
| From: 1/2miledrag
|
|
|
|
|
|
|
| Date: 22-Jun-17 |
|
I warfed a black bear using ILF plates. The plates are a very snug fit in the limb pocket and I have not glued or JB welded tham in...do I need to? I might add that I did grind out that tab of metal at the top of each pocket so the plates go in all the way. Thanks
|
|
If you have already registered, please sign in now
For new registrations Click Here
|
|
|
|