| From: Bobmeister
|
|
|
|
|
|
|
| Date: 31-Mar-11 |
|
This will be a build along on a short 14" riser. First I had to play around with the limb bed angle. I have made several 17" ILF risers but shortening one up that much will change poundage considerably. So I used a 2x4 and fastened some limbs to it to see what I would get. I settled for 18 degrees on each limb would give a 2# gain over my 17" risers.
Here is my layout and I even colored it in to get an idea of how it will look. also the 2x4 mockup. 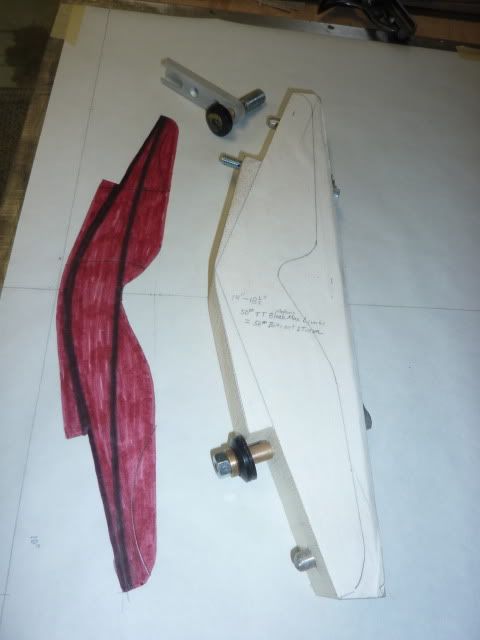
Next we need to choose some lumber, I think we will go with the cocobolo on the left. 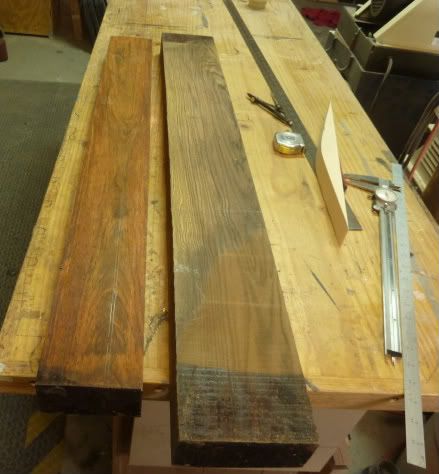
Here are the riser blocks cut to length. O yah we will be making 2 risers. 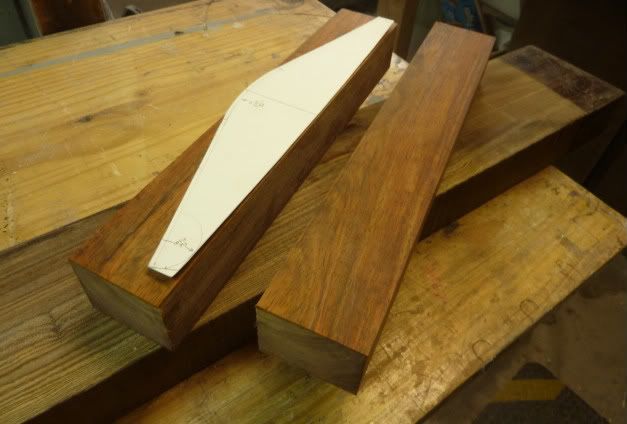
|
|
| From: Bobmeister
|
|
|
|
|
|
|
| Date: 31-Mar-11 |
|
. I went ahead and cut the riser blocks down the middle because we are going to put a linen phenoilc I-beam down the center for strength. now lets surface the haves in the drum sander.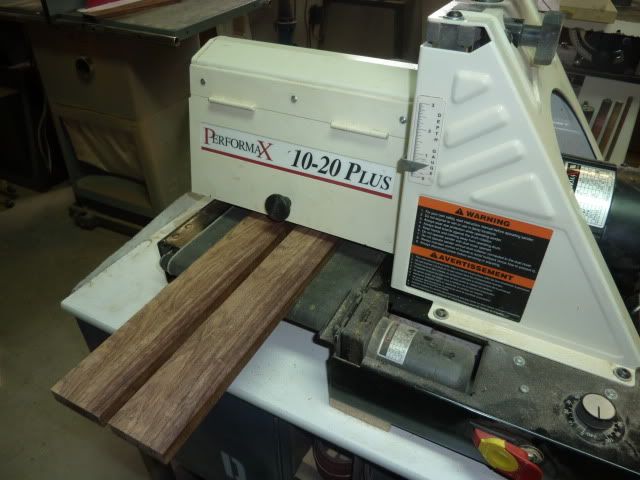
Cutting the phenolic I-beam on the table saw (I use a old blade for this).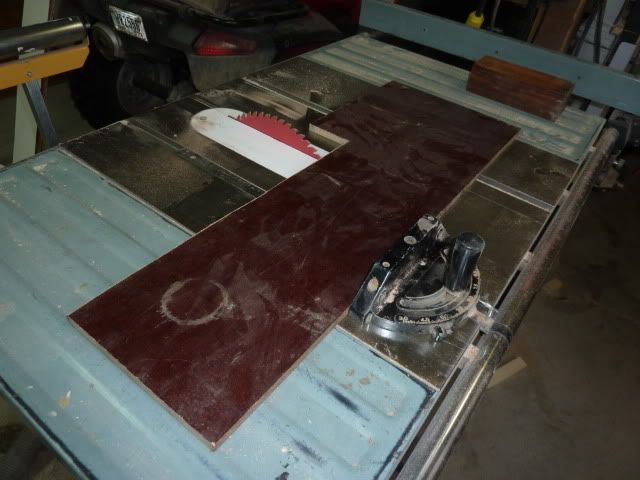
This is what the riser sandwich looks like before glue up.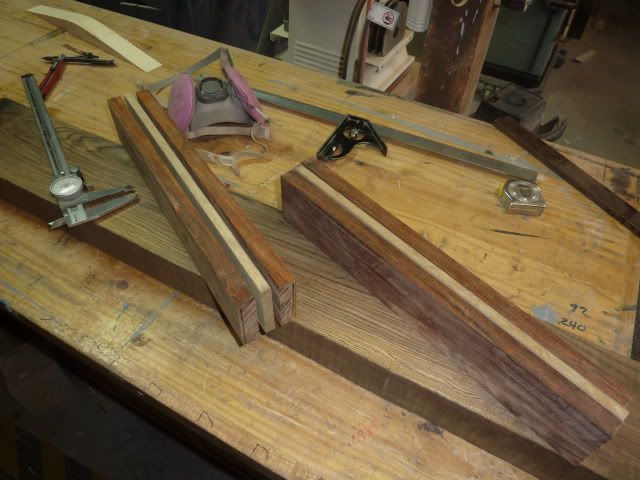
|
|
| From: Bobmeister
|
|
|
|
|
|
|
| Date: 31-Mar-11 |
|
Riser bock sandwich being glued together with Smooth-on. They are clamped to a cast iron plate and left to cure. 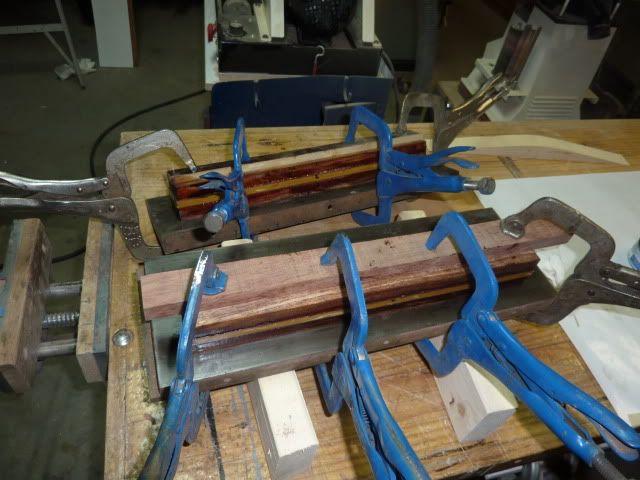
All cured ready for the next step. notice the match marks on the end grain, this is so I don't mix up the pieces and the grain matches on both sides. 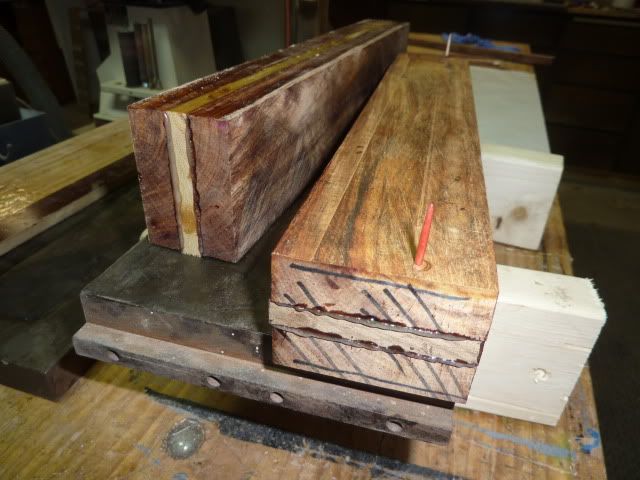
|
|
| From: Warf
|
|
|
|
|
|
|
| Date: 31-Mar-11 |
|
Cool! Thanks Keep em coming.
|
|
| From: t-dog
|

|
|
|
|
|
|
| Date: 31-Mar-11 |
|
Great talent on display. Love these type threads.
Mark
|
|
| From: Warf
|
|
|
|
|
|
|
| Date: 31-Mar-11 |
|
Did you stagger the pnenolic to be at center shot?
|
|
| From: Jim Terrio
|
|
|
|
|
|
|
| Date: 01-Apr-11 |
|
This is fantastic! I love these threads also!!!
|
|
| From: rd2
|
|
|
|
|
|
|
| Date: 01-Apr-11 |
|
Great thread,I'm gonna follow this one for sure.
|
|
| From: Bobmeister
|
|
|
|
|
|
|
| Date: 01-Apr-11 |
|
Now we are going to cut some accents to put in the riser, they will be maple and black phenolic strips.
This is a adjustable guide that I made for slicing laminations on the band saw. Here we are cutting maple about 50 thousands thick. 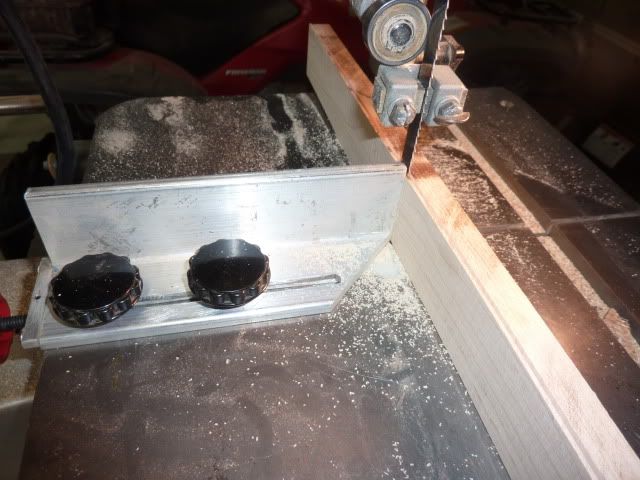
After running the maple lams through the drum sander they are now .030 thick 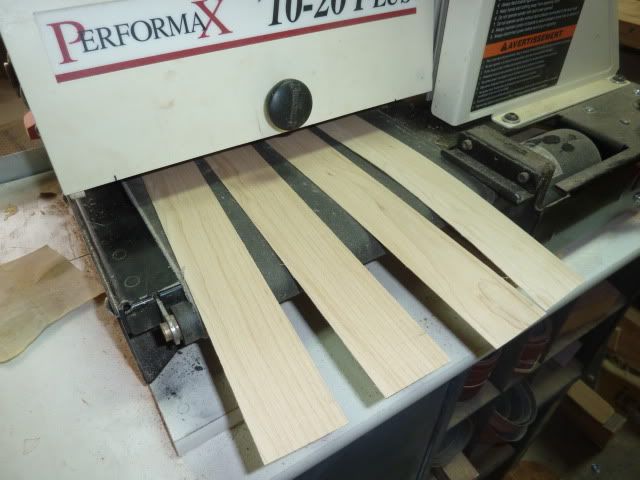
Cutting the 1/8" black phenolic to width(1.75). It will also be run through sander to take the finish off and roughn the suface for gluing. 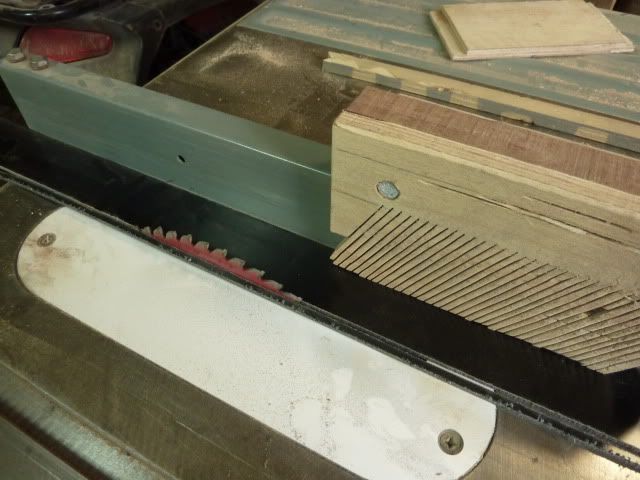
|
|
| From: Bobmeister
|
|
|
|
|
|
|
| Date: 01-Apr-11 |
|
This next step is critical in that everything needs to be set just right. Here we are using radius jig to cut a 23.437" radii the length of the block. A good sharp blade will make the deference, you can also see a paper with the layout on it glued to the side. 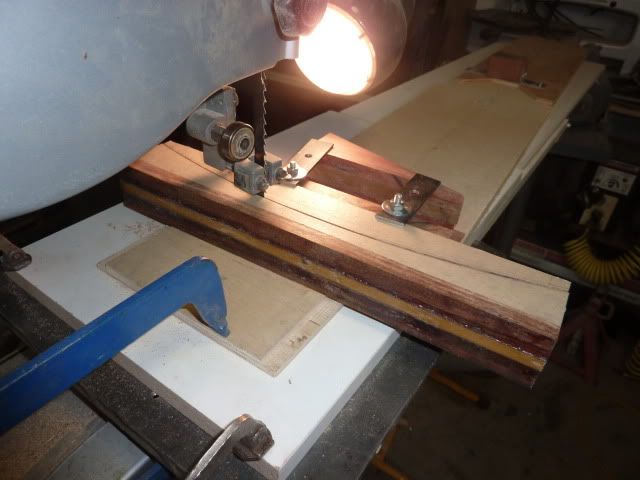
Now to the spindle sander to cleanup the curf marks from the bandsaw blade. when doing this it is important to continually check fit with the accent lams between the 2 pieces. You never want to force any gap out with excessive force, that will only build tension into the riser. 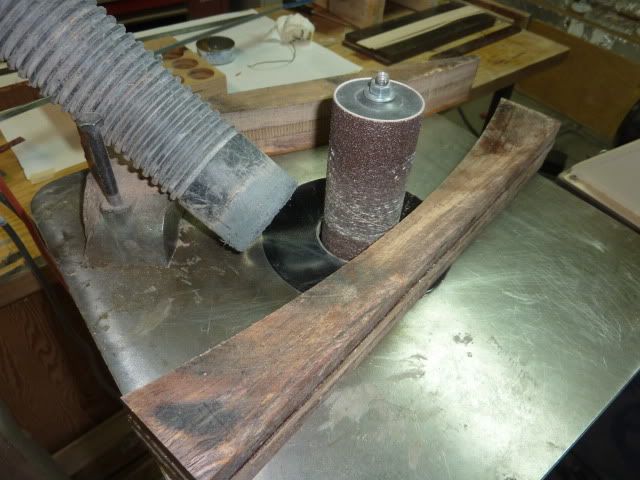
Here we are ready to sling some more bow snot. 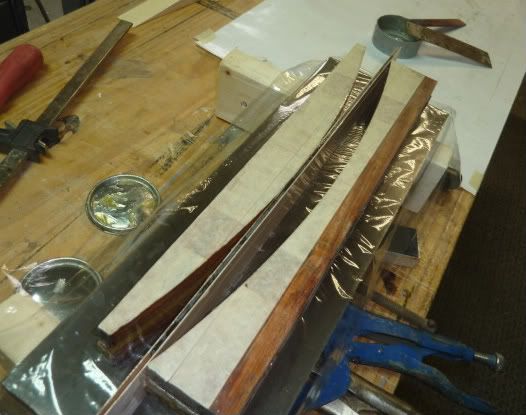
|
|
| From: Bobmeister
|
|
|
|
|
|
|
| Date: 01-Apr-11 |
|
Glue cured and all the barnacles have been knocked off in the drum sander. 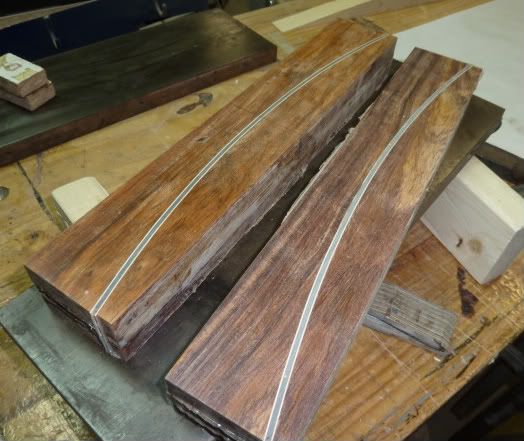
Close up of the glue joint, everything looks good so far. 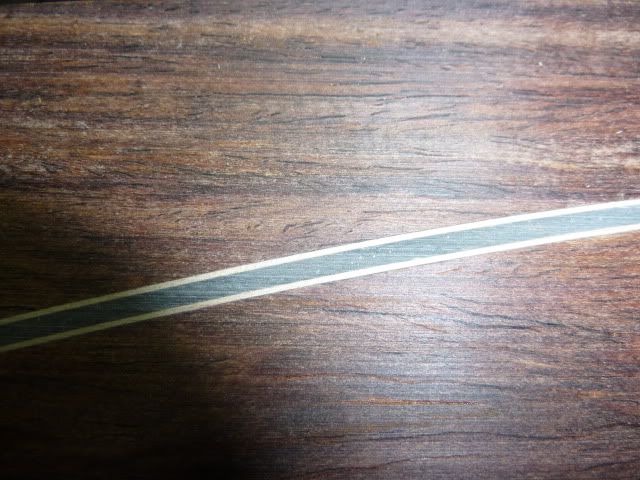
Time to cut the limb bed angle. We have just the fixture for doing so. This is a adjustable jig that I use for different riser designs, it is set at 18 degrees for these risers. 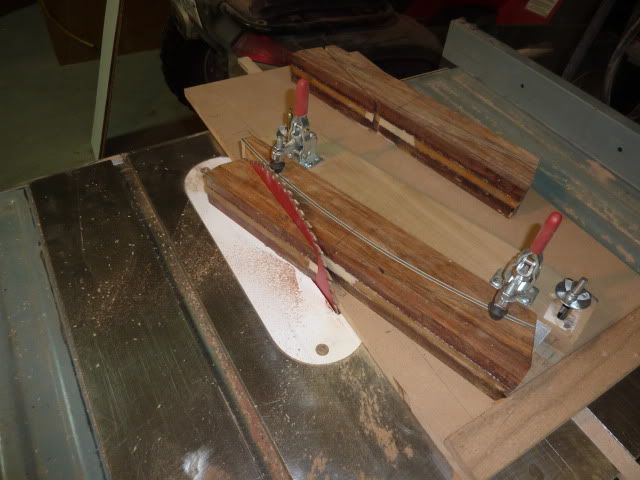
|
|
| From: Bobmeister
|
|
|
|
|
|
|
| Date: 01-Apr-11 |
|
Rounding over the back side on the disc sander to blend to the limb beds (6.25" radius). Then we need to glue a piece of 1/8" phenolic to this suface. 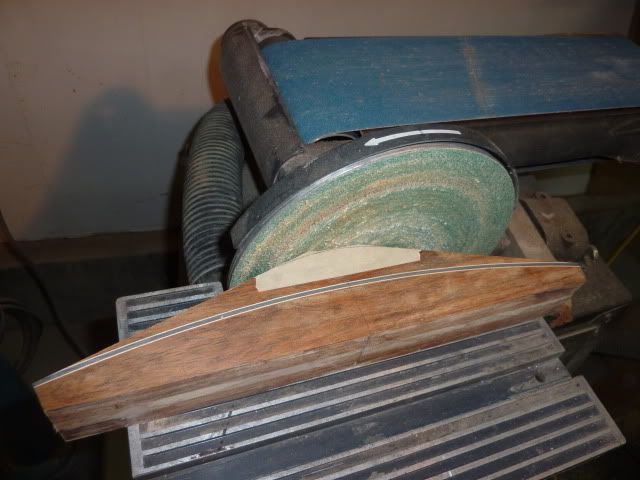
It might be hard to see in this picture but what I have done is glued the triangular drops from the limb beds to a scrap piece of fiberglass. This will be a clamping jig for putting even pressure on the phenolic strip overlay. Just a little trick that Kirk of BIGFOOT BOWS taught me. 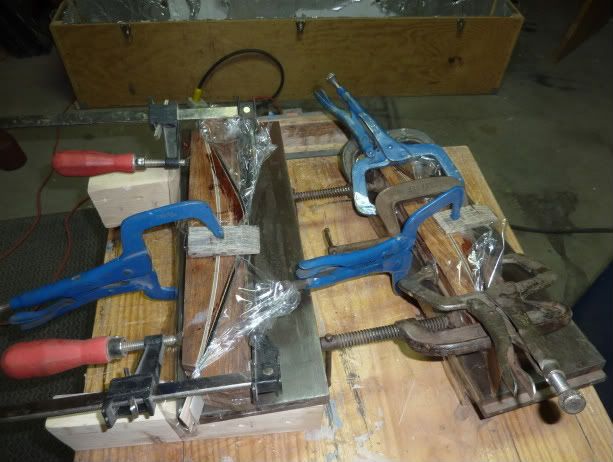
Time to start setting up the router. This is a .750" bit for making the slot for the ILF dovetail fitting that we will use. 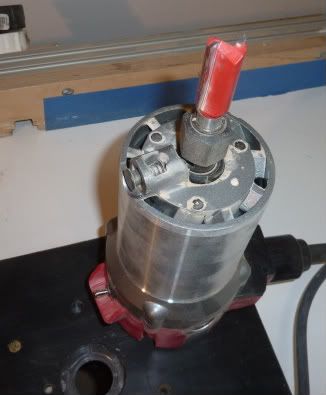
|
|
| From: No-sage
|
|
|
|
|
|
|
| Date: 01-Apr-11 |
|
Bobmeister,
Thanks for doing this. I've just started researching the hardware for this job.
It looks like you're using the fittings from Lancaster Archery Supply?
Could you show a close-up of the limb bolt when you get around to fitting it in. The one in the catalog has what looks like a threaded bushing, but there's a small SS screw in the picture too that I couldn't picture what it did or where it goes.
Where do you measure the 15" for riser length and the 18 deg for the limb pads?
Thanks
|
|
| From: sixby
|
|
|
|
|
|
|
| Date: 01-Apr-11 |
|
Great job Bob. You sure know how to build a riser right. God Bless you , Steve
|
|
| From: Jim Terrio
|
|
|
|
|
|
|
| Date: 01-Apr-11 |
|

It is simply amazing to see what you do with wood.
I love this thread!!!!! Can't wait for the next installment Thanks.!!!.
|
|
| From: Bobmeister
|
|
|
|
|
|
|
| Date: 01-Apr-11 |
|
No-sage, the aluminum dovetail hardware is mad by Jim Mann he has every thing you need in ILF hardware. http://www.piratesofarchery.net/bb/viewtopic.php?f=51&t=12010
Warf, the phenoic is centerline so it will be about 1/8" thick at the window, with a 1/8" past center arrow pass.
Here is a close up of the router setup. I took a piece of scrap wood and milled it to the exact width (1.750") of the riser block and made practice slots. I did this to get the slot exactly centered, ( plus or minus .002") is what I got. This is critical since we are not using a lateral adjustment.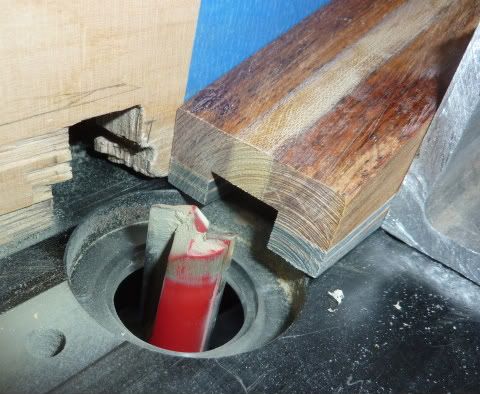
All done routing the blocks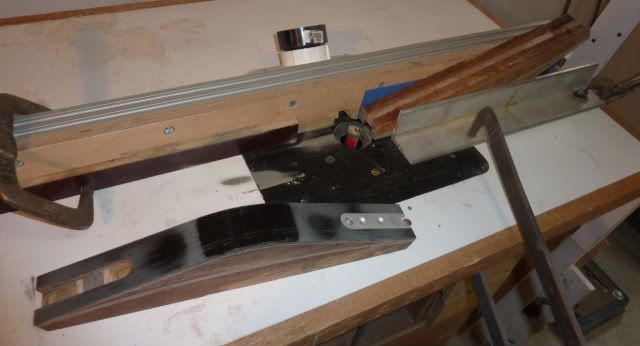
I drilled the 27/64" hole for the limb bolt insert but forgot to take pictures. I have a drill guide for doing this will try to fined some pics of the guide latter. Anyway here is a pic of hi-tech 1/2-13 tapping setup. I finish off with a bottom tap. 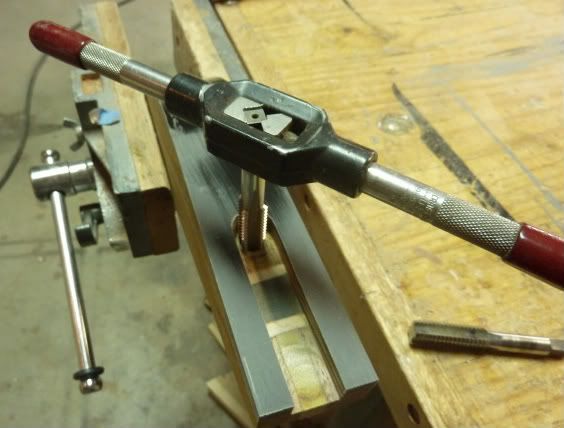
|
|
| From: charlie
|
|
|
|
|
|
|
| Date: 01-Apr-11 |
|
Great!! Thanks for taking the time to show us.
|
|
| From: Bobmeister
|
|
|
|
|
|
|
| Date: 01-Apr-11 |
|
Again I forgot to pictures of the next step, guess I'm getting sloppy. What I did was glue on one more piece of 1/8" phenolic and 2 laminations of 1/16" cocobolo topped with 2 little coco wedges. 
An other view, the little #10-24 holes were drilled and tapped using the dovetaile fitting as a guide. 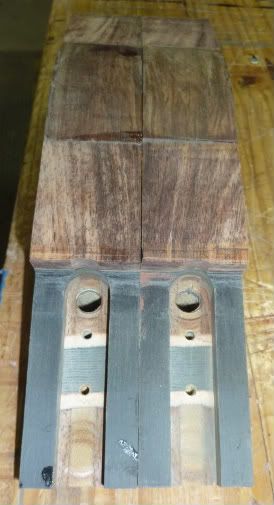
Now they are actually looking like risers. Went ahead and made a pattern for tracing out the profile.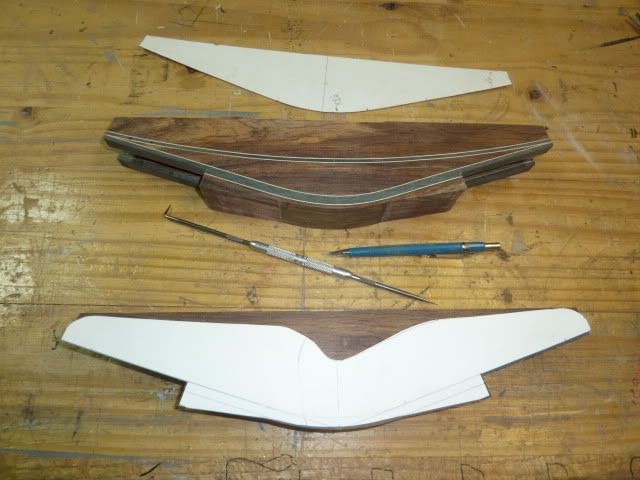
|
|
| From: Bowbaker
|

|
|
|
|
|
|
| Date: 01-Apr-11 |
|
Bobmiester that is a fantastic build along, thanks for sharing with us. You build some of the nicest looking bows around for sure.
|
|
| From: Bigo
|
|
|
|
|
|
|
| Date: 02-Apr-11 |
|

I love that Bobmeister
I would like to know how did you machine that corner, and how did you reshape the radius in the inside of the corneré
thank for that buildalong
max
|
|
| From: Tsudoenihm
|
|
|
|
|
|
|
| Date: 02-Apr-11 |
|
luv these kind of build alongs...thanks Bob!
|
|
| From: Bobmeister
|
|
|
|
|
|
|
| Date: 03-Apr-11 |
|
Bigo, The black 1/4"wide stripe is 2 pieces of 1/8" phenolic, one stops at the limb but area and the other goes to the end of the riser. This gives the look of being notched or machined out.
OK done with all of the glue up we will put the Smooth-on away.
At this stage the riser just needs to be shaped, we will use the bandsaw, spindle sander, drill press and half round file. 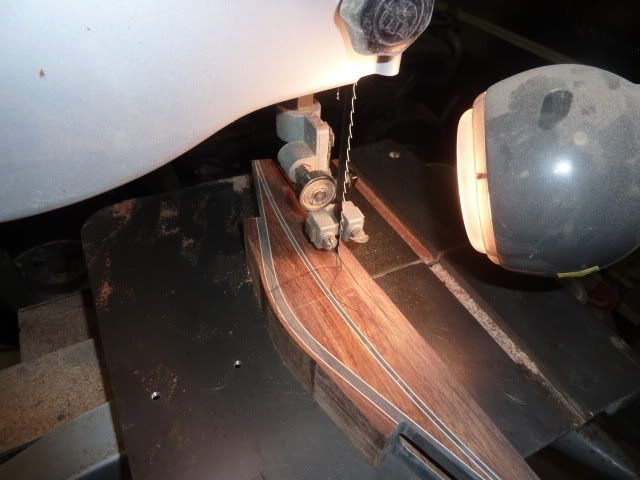
|
|
| From: Bobmeister
|
|
|
|
|
|
|
| Date: 03-Apr-11 |
|
Now we will rough cut the shelf and sight window. I will stay away from the layout line on this cut and machine with a drill press and spindle sander.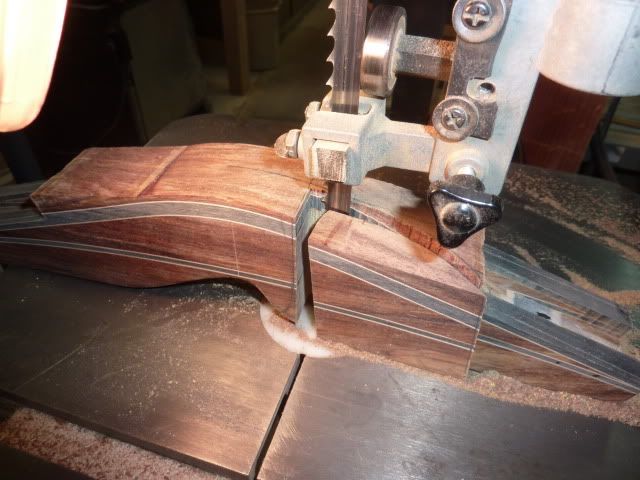
In this pic. I am using serfacing bit in the drill press, slowly feeding by hand cutting about 20 thousandths at a time until I get to the layout line. 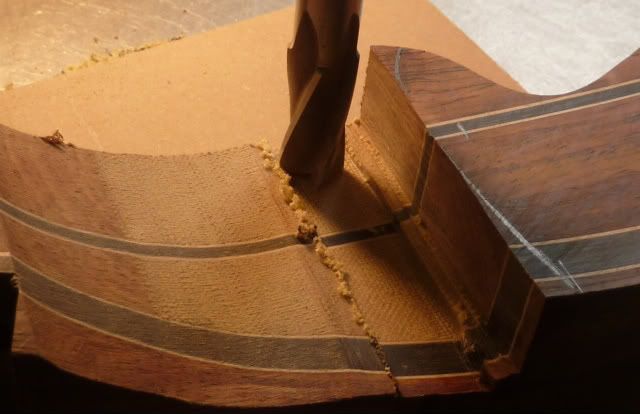
Using a very aggressive burr file we will shape the shelf area to the desired outline. This bit has to large of radius for my taste so let's drop down to a 1/4" carbide burr file next.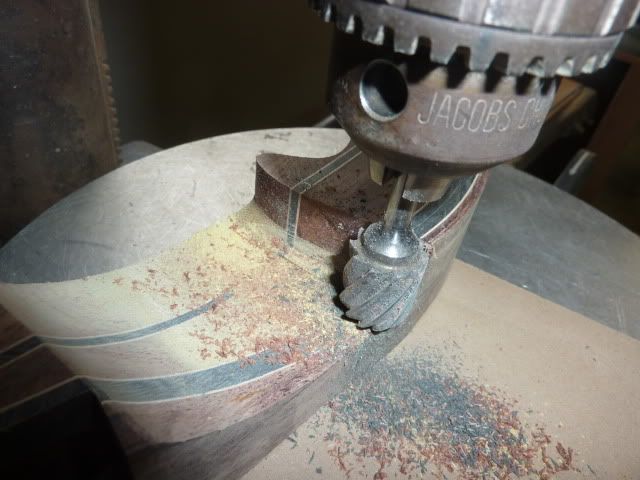
See how the shank of the 1/4" bit guides use along, kind of like using a patten. 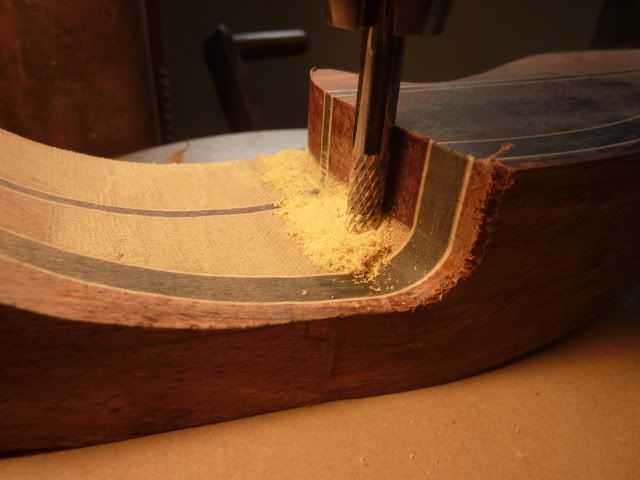
|
|
| From: Bobmeister
|
|
|
|
|
|
|
| Date: 03-Apr-11 |
|
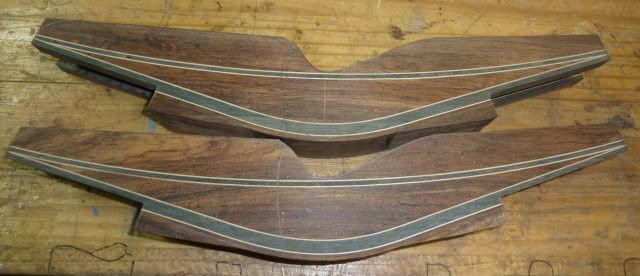
Sneaking up on the last pass with the 1/4' burr file, this will leave us with a 1/8" radius in the corner.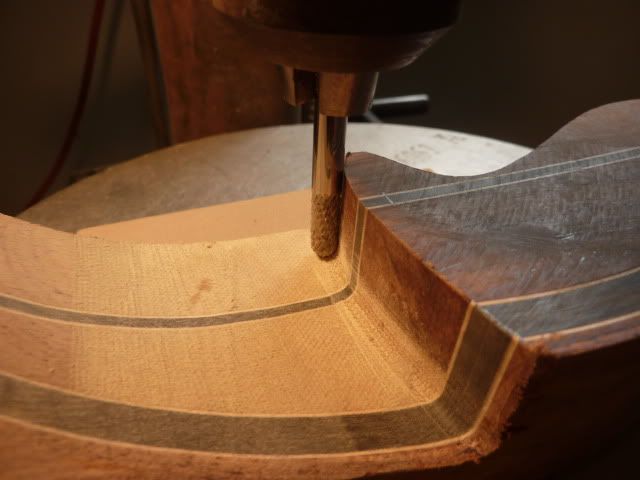
Let's get a sneak peek of what's in store.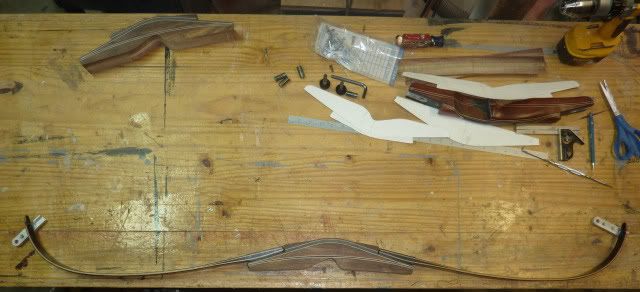
Shelf and sight window complete and on the bottom riser I did a little shaping with the spindle sander. 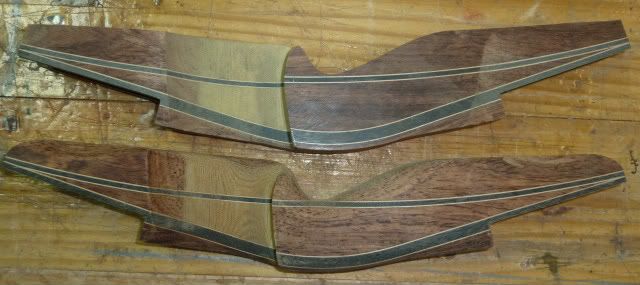
|
|
| From: Bobmeister
|
|
|
|
|
|
|
| Date: 03-Apr-11 |
|
Looking at the back side you can see the offset of the sight window cut 1/8" past centerline. Also how the lime bed tapers in to the shape of a ILF limb.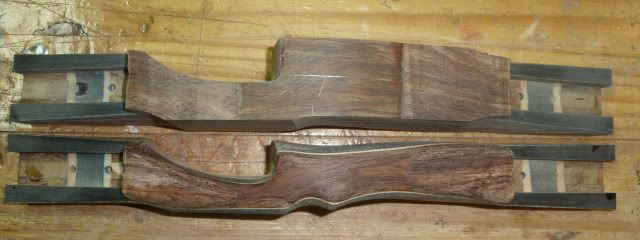
Right side view.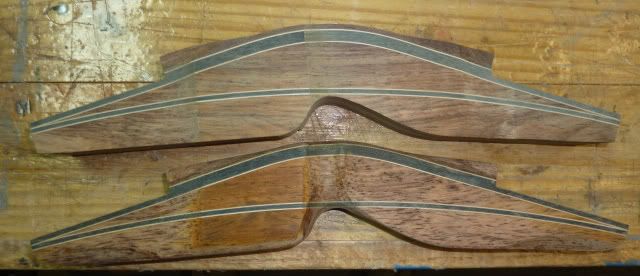
After a lot of spindle sander work and file work by hand we are ready for 100 grit sand paper then 220 grit then some Tunderbird epoxy.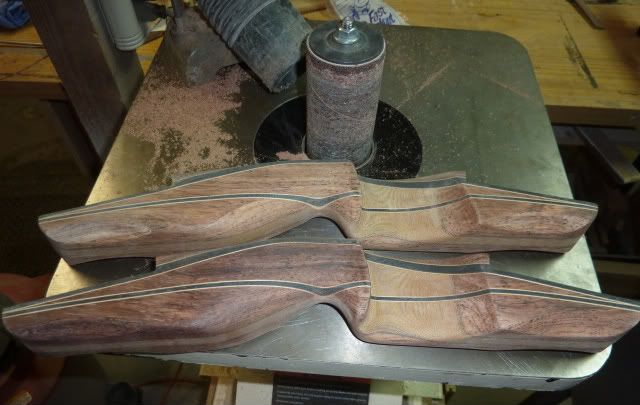
|
|
| From: Bobmeister
|
|
|
|
|
|
|
| Date: 03-Apr-11 |
|
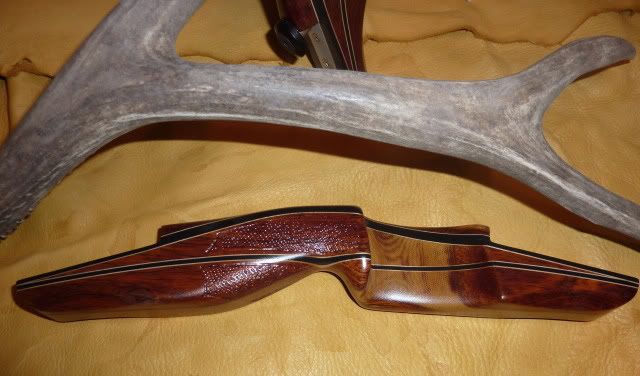
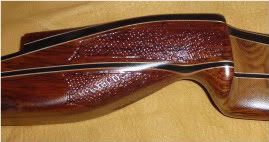
Here is the end result. Hope yall enjoyed the ride and thanks for looking.
Specifications
14" overall length
18 Degree limb beds
Cocobolo and Phenolic material consisting of 17 individual piece
Dovetail inserts by Jim Mann http://www.piratesofarchery.net/bb/viewtopic.php?f=51&t=12010
sprayed Thunderbird epoxy finish
|
|
|
|
| From: 4nolz@work
|
|
|
|
|
|
|
| Date: 04-Apr-11 |
|
awesome buildalong TTT
when the LW remodels as promised it will be alot easier to post these buildalongs.
|
|
| From: strshotx
|
|
|
|
|
|
|
| Date: 04-Apr-11 |
|
Nice looking riser and building along!
|
|
| From: Chief
|
|
|
|
|
|
|
| Date: 04-Apr-11 |
|
That is as nice a work as I've seen anywhere. Impressive, thanks for sharing!
><>
Chief
|
|
| From: JimE.IV
|
|
|
|
|
|
|
| Date: 04-Apr-11 |
|
Awesome. How about a look of the finished bow strung?
Thanks for sharing - Nice work.
|
|
| From: t-dog
|
|
|
|
|
|
|
| Date: 04-Apr-11 |
|
AWESOME!!!
Mark
|
|
| From: woodinhand
|
|
|
|
|
|
|
| Date: 04-Apr-11 |
|
One of my favorite build-a-longs. Awesome job!! Don't forget some finished pics with limbs attached. Again great craftsmanship. Carl
|
|
| From: rd2
|
|
|
|
|
|
|
| Date: 04-Apr-11 |
|
Great buildalong,beautiful riser,and with that I beam design it should be tough as nails.
|
|
| From: Mann
|
|
|
|
|
|
|
| Date: 04-Apr-11 |
|
Thanks for a great buildalong! That is as good looking a riser as I have ever seen. Mann
|
|
| From: grinch
|
|
|
|
|
|
|
| Date: 04-Apr-11 |
|
Thanks that finished up really nice.
|
|
| From: Lil' Okie
|
|
|
|
|
|
|
| Date: 04-Apr-11 |
|
Beautiful and well done..thanks
|
|
| From: Jim Terrio
|
|
|
|
|
|
|
| Date: 04-Apr-11 |
|
What a great thread and what a beautiful riser. Thanks.
|
|
| From: riverrat
|
|
|
|
|
|
|
| Date: 04-Apr-11 |
|
nice work Bobmeister. You've got skill. thanks.
|
|
| From: REG
|
|
|
|
|
|
|
| Date: 20-Sep-11 |
|
Very nice work. But, now I'm even more scarred to try this. I'm sure I would have failed. Saved me a lot of heartache and headaches.
|
|
If you have already registered, please sign in now
For new registrations Click Here
|
|
|
|


