| From: tradslinger
|
|
|
|
|
|
|
| Date: 27-Feb-24 |
|
I am not a fantastic arrow builder, mine seldom look what I would call fancy or really nice. They are simple and functional with a few that have some paint frills. I am talking about any of them but this is about wood arrows.
As I taper the ends with my hand held plastic taper tools with the small blades, I find the occasional shaft that is kind of gummy and doesn't want to cut right. This is with new tools. So, I knuckled down and made one of those simple jigs that you adjust for the two angles. I have an old belt sander that still barely works with a disk sander on the side of it.
Everything looked great until I actually went to clamp the jig down onto the table for the disc. None of my clamps would work. So, I had to go to the big city (3 1/2 hour drive one way) yesterday and made a quick stop at Harbor Freight where I picked up two deep throat clamps.
So now, I can use this one tool for whatever size shafts that I have. Nothing special about my jig, just a simple one like found on the web. So, no more gummed up taper tools as I try to prepare arrows for these guys.
I had made one 2- plus years ago but lost it in several moves, so now I have another one. They can really speed things up too if you have a lot to do.
|
|
| From: Rooty
|
|
|
|
|
|
|
| Date: 27-Feb-24 |
|
Top Hat
|
|
| From: N Y Yankee
|
|
|
|
|
|
|
| Date: 27-Feb-24 |
|
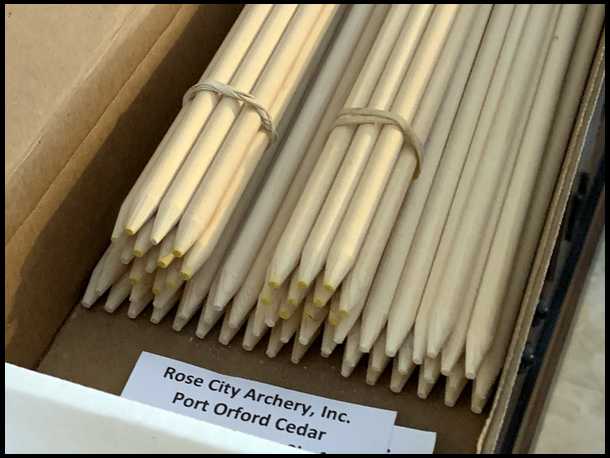
Anything other than cedar, you need really sharp blade and spin the shaft in a drill, and feed it really slow. Or just do what you did.
|
|
| From: Jim Davis
|
|
|
|
|
|
|
| Date: 27-Feb-24 |
|
I made two fixtures that fit the sander table slot and drill them and the table so I can bolt the fixtures in place--one for each angle.
|
|
| From: deerbow55
|
|
|

|
|
|
|
| Date: 27-Feb-24 |
|
woodchuck taper tool
|
|
| From: flint kemper
|
|
|
|
|
|
|
| Date: 27-Feb-24 |
|
Yes that will work. A lot of guys use a disc sander. Once it’s set up it is fast. Perfect nock and point tapers are critical for great arrows don’t slack there or in straightening.
|
|
| From: Stephengiles
|
|
|
|
|
|
|
| Date: 27-Feb-24 |
|
Funny I did the same thing today. I may refine the design a little but it does as intended.
|
|
| From: Eric Krewson
|
|
|
|
|
|
|
| Date: 28-Feb-24 |
|
I made my sander tape jig to fit the miter slot on the disc sanding table, easy off and on and only needs spring clamp to hold it in place. It is perfectly adjusted for the right distance from the disc every time I put it on the sander. I get perfect tapers every time I use it after I got the angle adjustment just right when I made it.
|
|
|
|
| From: felipe
|
|
|
|
|
|
|
| Date: 28-Feb-24 |
|

I screw my belt sander to the jig I built on a 2X12, point and nock tapering is my least favorite part of arrow making so last time I set up I tried to taper all the shafts needed for my shooting days. The belt sander does turn out nice tapers.
|
|
| From: felipe
|
|
|
|
|
|
|
| Date: 28-Feb-24 |
|
Making sawdust
|
|
| From: Eric Krewson
|
|
|
|
|
|
|
| Date: 01-Mar-24 |
|
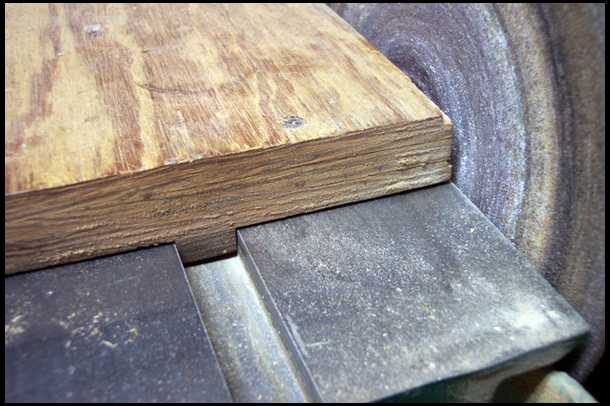
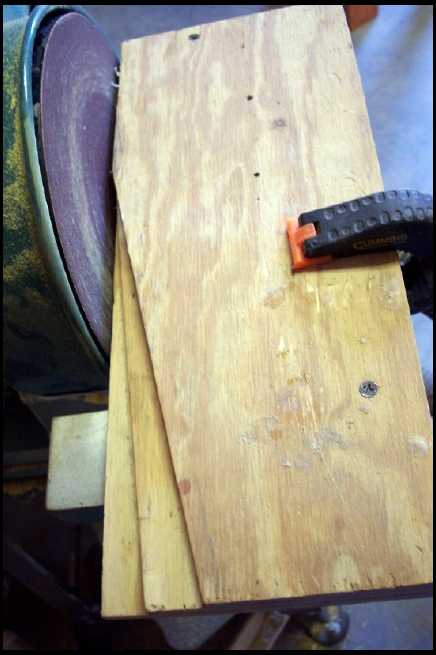
I was asked how I made my jig, here is how.
I made the base plate first, I am a measure once cut twice person so I measured the distance from the miter slot to the disc and installed the piece on the bottom of the base to go in the slot. I left the base slightly over sized by just a little, I slid the base into the miter slot with the sander running and let the sanding disc true up the base to be just off the sanding disc. I used 1/4" plywood for all the parts. The next step was making the 5 degree taper guide. I measured and marked 5 degree taper from the leading (sanding disc side) edge and put an oversized piece of 1/4 plywood with one screw at right side into the base so the piece would pivot. I clamped everything down and ran a point taper on a shaft. To test the fit, I used an uncleaned field point that still had the factory oil and crud inside it. I put the point on the new taper and checked for wobble, took the point off the shaft and checked for oil and crud contact on the entire taper. At first, I may have a crud mark on only part of the shaft. I made little adjustments with the angle plate and more tests until I had a perfect fit and crud on the entire taper. I used a clean taper for each test. I put another screw through the 5 degree guide into the base plate to lock everything into place when I was satisfied with the taper. I put down the 11 degree nock point guide on top of the point taper guide the same way. I measured the angle from the leading edge of the base plate and went through the same fine tuning as I did for the point taper. I checked my nock fit on a tapered shaft I ran through the clamped down guide, I was looking for zero wobble and the taper filling the nock completely. Again, it took a few minor adjustments to get it perfect. When I was satisfied I put a couple of screws through the two guide plates and into the base plate. Because my guide plates were slightly oversized, I cut off most of the extra plywood with my bandsaw and I ran the jig edges on the belt sander to make everything square and neat. I had a nail for a point stop at first but found I could eyeball the taper length just as well and did away with the nail.
|
|
|
|
|
|
| From: Longcruise
|
|
|
|
|
|
|
| Date: 09-Mar-24 |
|
I went with one of these and get good results.
https://www.3riversarchery.com/tru-center-v2-taper- tool-for-wood-arrow-building.html
|
|
| From: CStyles
|
|
|
|
|
|
|
| Date: 09-Mar-24 |
|
I will never buy from Tru center again. Bought a real nice taper tool from them in 2005, when they replaced it with a new model, no more new blades for mine.
|
|
If you have already registered, please sign in now
For new registrations Click Here
|
|
|
|