| From: unhinged
|
|
|
|
|
|
|
| Date: 20-Mar-18 |
|
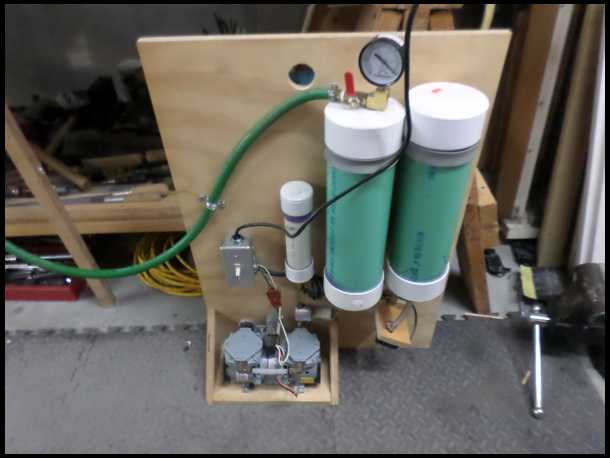
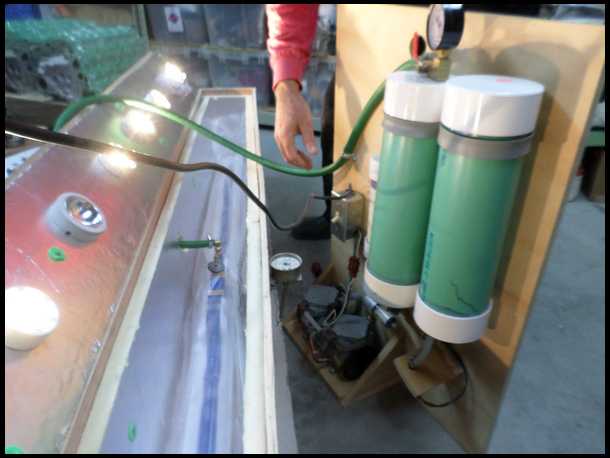
Vacuum press, that is. I have been wanting to try a different method for pressing a Glass Bow. I have always used C-clamps in the past, but was never interested in the hose method. I had build a vacuum press some years ago and thought about using it for a Bow, but never got around to it. Well, I am finally getting around to it. I vacuumed the Riser, which was simple and came out good. The first pic is of the funky press I built.
|
|
| From: unhinged
|
|
|
|
|
|
|
| Date: 20-Mar-18 |
|
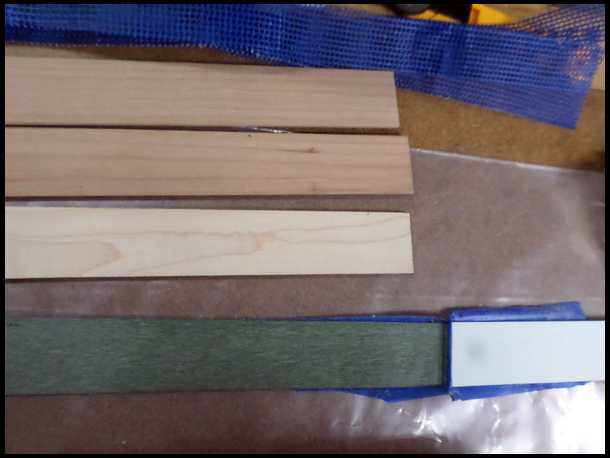
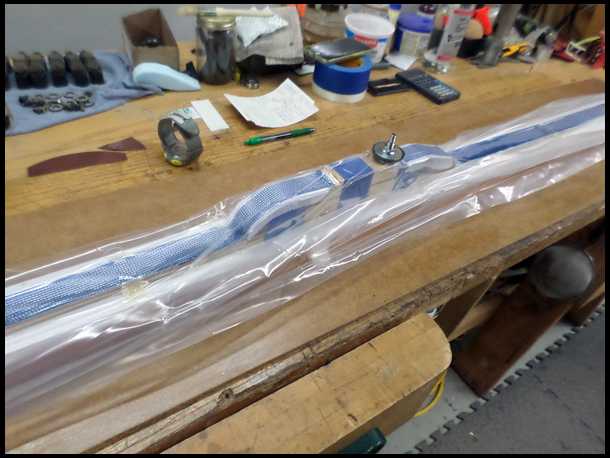
These are some pics of the riser and improvised vacuum bag
|
|
| From: unhinged
|
|
|
|
|
|
|
| Date: 20-Mar-18 |
|
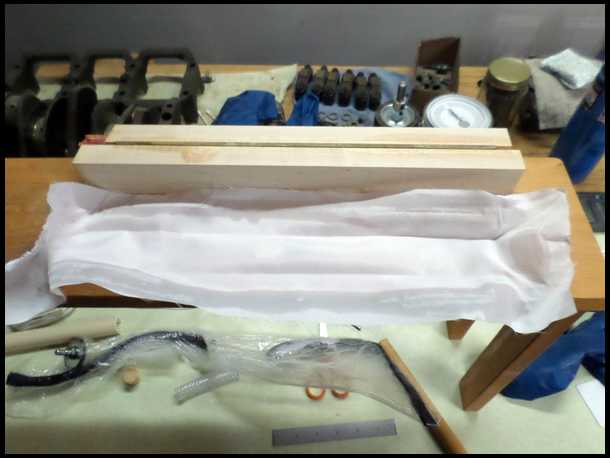
the white fabric in the pic, is peel-ply to absorb the excess resin
|
|
| From: unhinged
|
|
|
|
|
|
|
| Date: 20-Mar-18 |
|
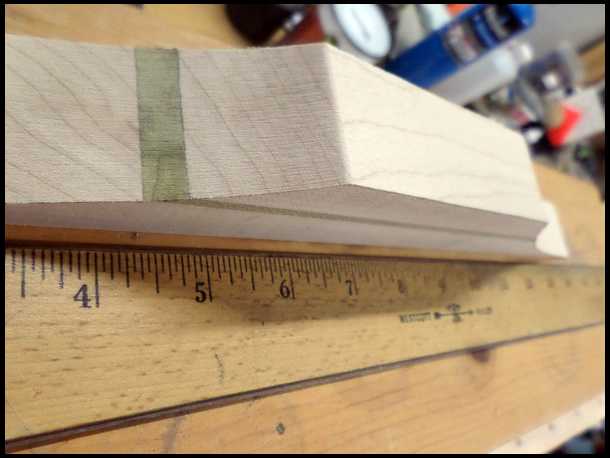
The riser is Maple with a strip of Poplar. I am sure Poplar is pallet wood to you folks back east, to me it's a real nice wood to work with. It's has fine, closed grain and works easy. I don't know of any other domestic wood that can be green or yellow, I like green!
|
|
| From: unhinged
|
|
|
|
|
|
|
| Date: 20-Mar-18 |
|
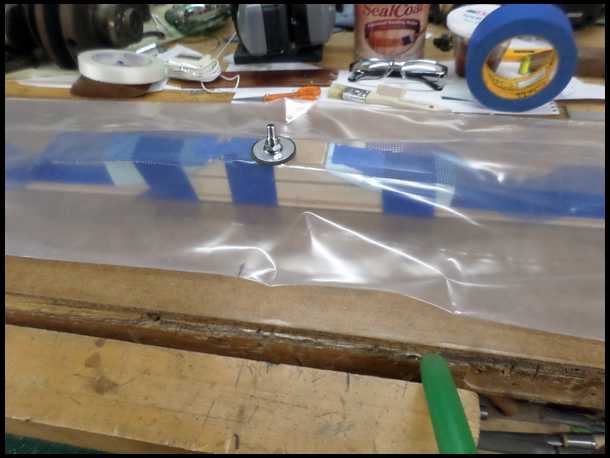
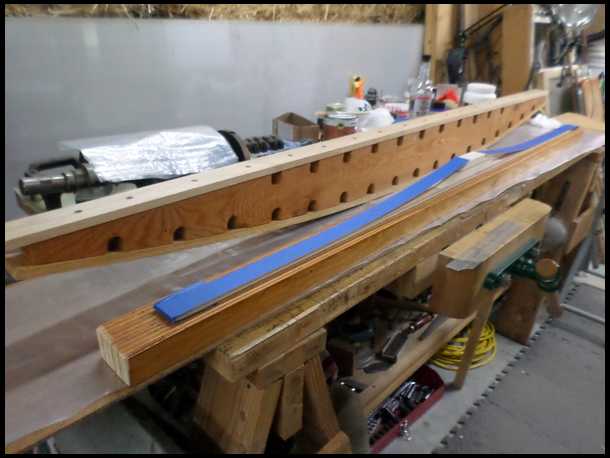
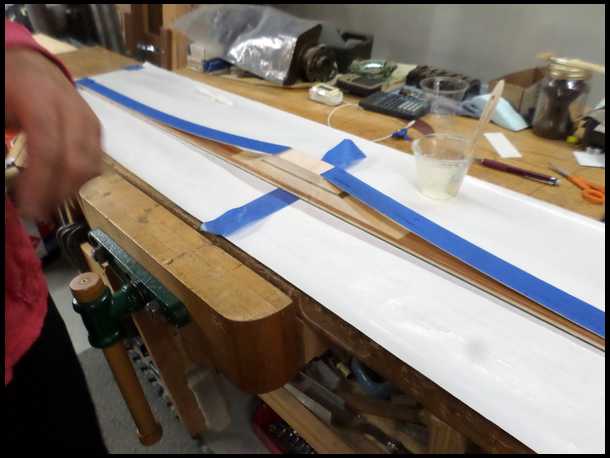
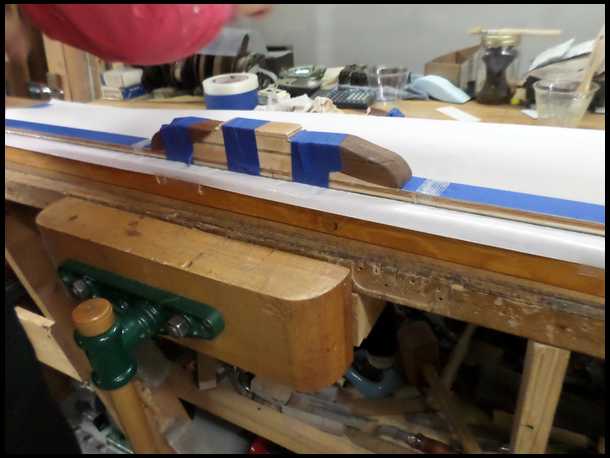
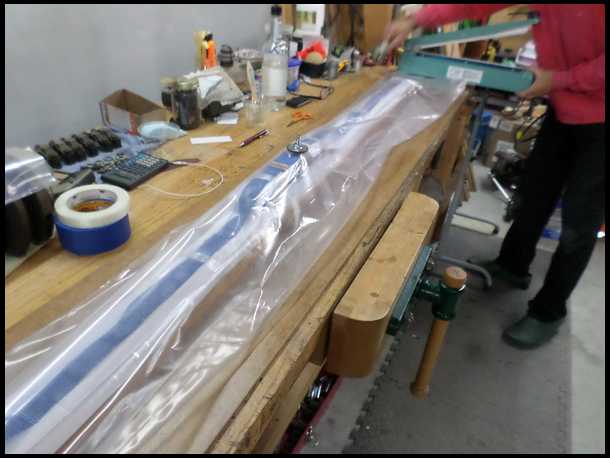
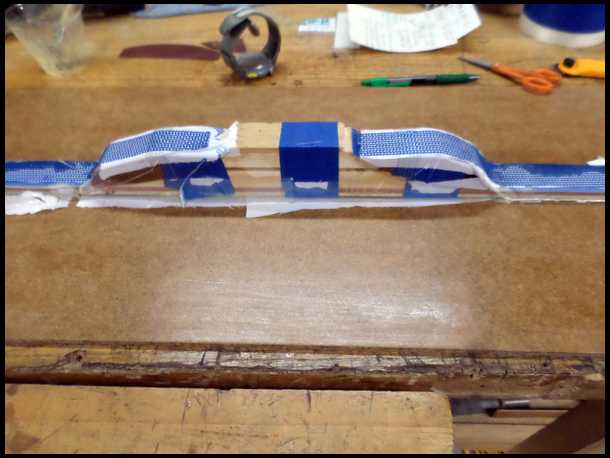
So today i did a dry run on the entire bow. I think it is going to work! I have a old clamping form that I thought of using to vacuum the bow on, but I am thinking it is unnecessary. If I vacuum the Bow on a flat surface and cook it on a flat surface, it's going to cure flat. I used clamping cauls on the dips for a smoother angle on the plastic bag and to concentrate the pressure a little more.
|
|
|
|
| From: unhinged
|
|
|
|
|
|
|
| Date: 20-Mar-18 |
|
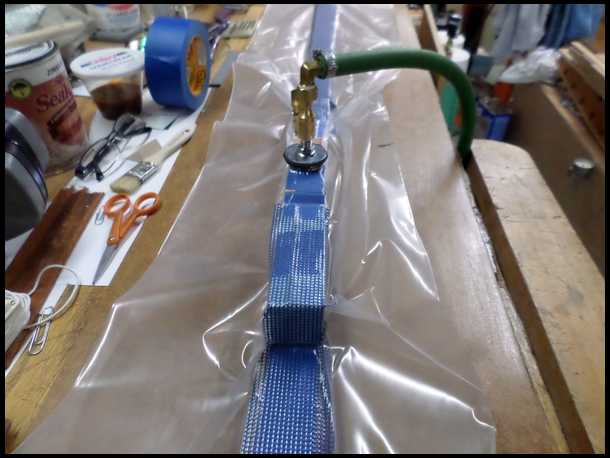
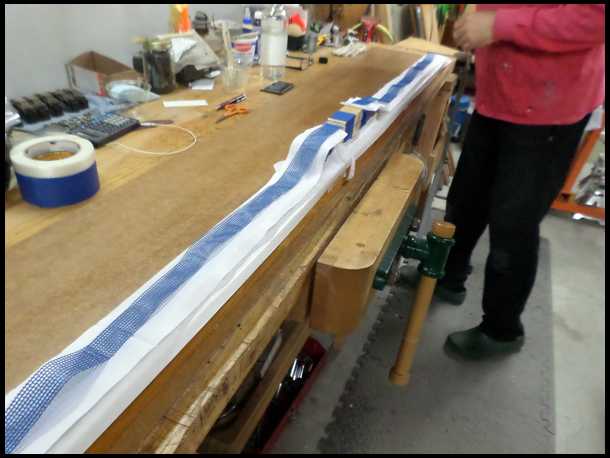
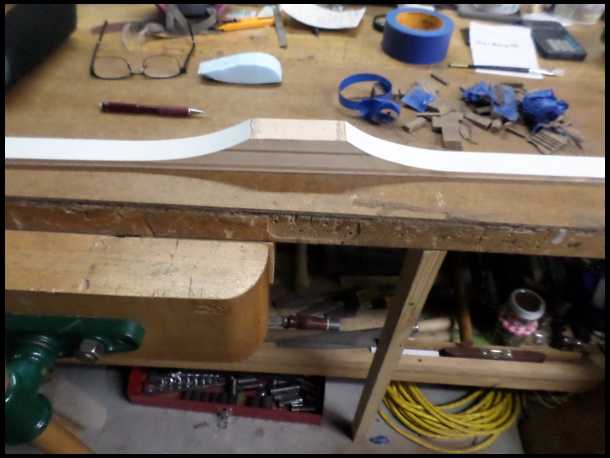
Last pic is Bow in bag, this one is under vacuum.
|
|
| From: unhinged
|
|
|
|
|
|
|
| Date: 20-Mar-18 |
|
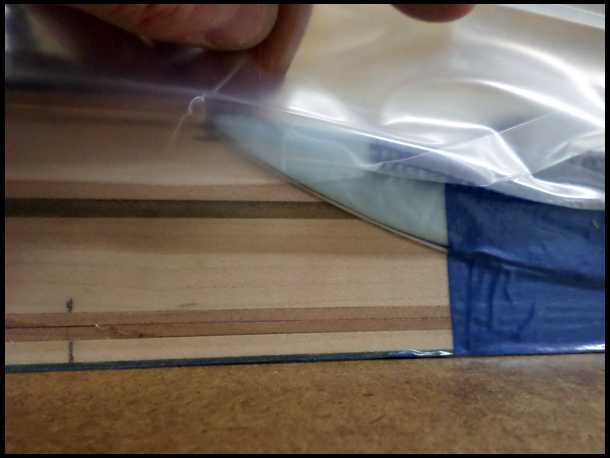
The area of most concern for me is the dips. I think this will be fine, it sucked the glass nice and tight onto the riser. I still need to do the final feathering on the fade- outs.
|
|
| From: 4nolz@work
|
|
|
|
|
|
|
| Date: 20-Mar-18 |
|
What pounds of pressure are the land under? It seems Kirk of Bigfoot talked of trying this but for other reasons of glue curing needing air?
|
|
| From: 4nolz@work
|
|
|
|
|
|
|
| Date: 20-Mar-18 |
|
Might be different if the bow had curves in it as far as glue stress?
|
|
| From: unhinged
|
|
|
|
|
|
|
| Date: 20-Mar-18 |
|
I am using epoxy, which does not need air to cure. Curves should not be an issue, I have pulled curves on other non Bow projects without any problems.
|
|
| From: Dry Bones
|
|
|
|
|
|
|
| Date: 20-Mar-18 |
|
Please keep this going, I am curious to see the final project. Once this "cure in airtight chamber" happens, do you still put it in the hot box or??
-Bones
|
|
| From: unhinged
|
|
|
|
|
|
|
| Date: 20-Mar-18 |
|
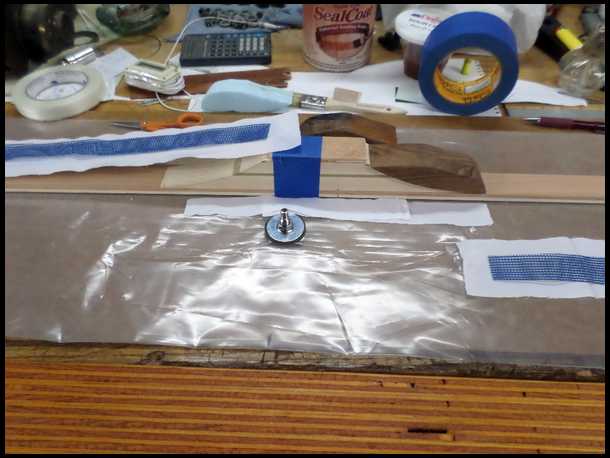
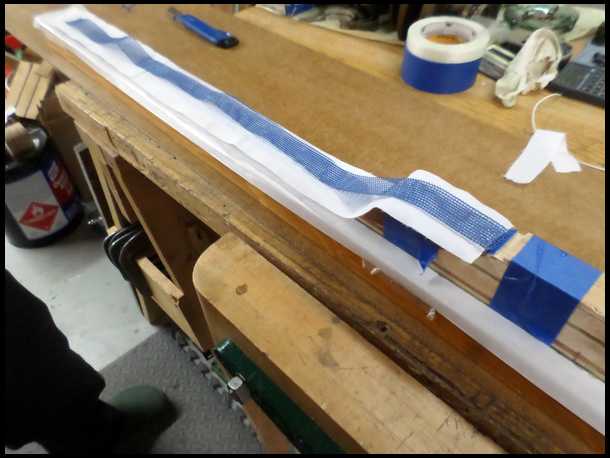
For those of you not familiar with vacuum pressing, the white material is called peel-ply. It's 100% polyester garment lining from Joann fabric. It soaks up the excess resin, but does not stick to the project. the blue stuff is breather material, it allow the vacuum to be pulled down the entire length of the limbs. I use about anything for breather, mostly scrap and crap I salvage. The bag is 4mil LDPE, impulse sealed on the ends, with a reusable valve attached.
|
|
| From: 4nolz@work
|
|
|
|
|
|
|
| Date: 20-Mar-18 |
|
What type of epoxy? Smooth-on?
|
|
|
|
| From: unhinged
|
|
|
|
|
|
|
| Date: 20-Mar-18 |
|
I used Smooth-on Epoxamite 103 for the riser, and will use EA-40 for the limbs.
|
|
| From: unhinged
|
|
|
|
|
|
|
| Date: 20-Mar-18 |
|
I plan on cooking it for 3hrs, under vacuum, at 130 degrees
|
|
| From: 4nolz@work
|
|
|
|
|
|
|
| Date: 20-Mar-18 |
|
Should be bulletproof
|
|
| From: Muddyboots
|
|
|
|
|
|
|
| Date: 20-Mar-18 |
|
Should work. My son has made upwards of a dozen downhill skies with the vacuum method using wood, fiberglass, epoxy, etc.
|
|
| From: Dry Bones
|
|
|
|
|
|
|
| Date: 20-Mar-18 |
|
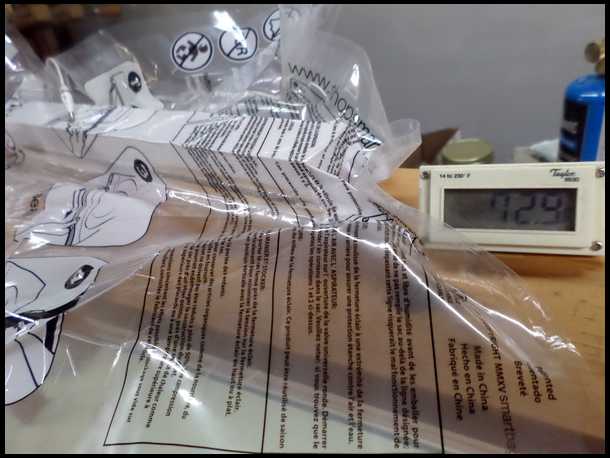
The vacuum bags do not melt at 130? Brand new to this type of setting. Thanks for the information.
-Bones
|
|
| From: unhinged
|
|
|
|
|
|
|
| Date: 20-Mar-18 |
|
LDPE is rated to 178. I noticed some softening above 150. At 130, never had any problems. I have a lot of this tubing, so 3hrs@130 is the ticket for me.
|
|
| From: Longcruise
|
|
|
|
|
|
|
| Date: 20-Mar-18 |
|
At 130 you might want to run a little longer than three hours. Probably won't matter if you leave it on the form under pressure for a few hours after it comes out of the oven.
|
|
| From: unhinged
|
|
|
|
|
|
|
| Date: 21-Mar-18 |
|
I have always used the 18degree rule for room temp cure epoxy. 24hrs@70degrees, 12hrs@88degrees, etc.
|
|
| From: unhinged
|
|
|
|
|
|
|
| Date: 21-Mar-18 |
|
I am not going to have time to glue this thing up until Thursday, so i thought I would backtrack and describe the Bow I hope to build. It's going to be a Hill style, with Green glass on the back; a primary Lam of Maple, full length and double tapered; two spliced Cherry Lams; and White glass on the belly.
|
|
| From: unhinged
|
|
|
|
|
|
|
| Date: 21-Mar-18 |
|
Since this is an experimental project, I decided to take some liberties with construction method and dimensions. I did a couple more mock-ups with and without forms and have concluded that a form is unnecessary. I plan on laying the bag on top of the laminated plank, in the bottom of my hot box. I might tape it down or not.
|
|
| From: MStyles
|
|
|
|
|
|
|
| Date: 21-Mar-18 |
|
Very impressive
|
|
| From: unhinged
|
|
|
|
|
|
|
| Date: 21-Mar-18 |
|
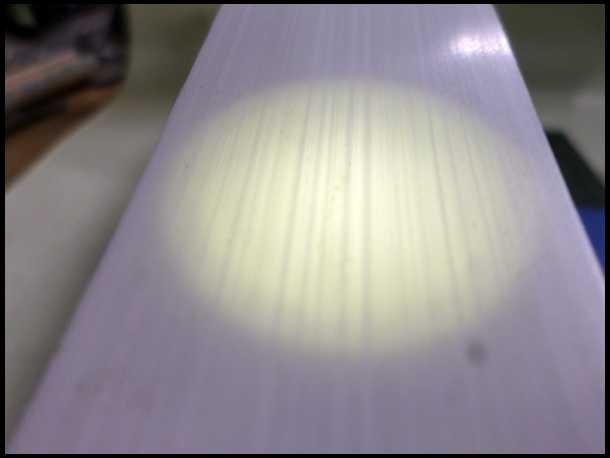
There was thread about the clarity of glass lams a couple days ago. i had not used any clear or in this case white glass in a long time and was surprised to see this. Those streaks are not streaks, they are clumps of fiberglass roving in the resin matrix. Ideally the glass fibers should be evenly distributed, which would preclude the"streaks"
|
|
| From: unhinged
|
|
|
|
|
|
|
| Date: 21-Mar-18 |
|
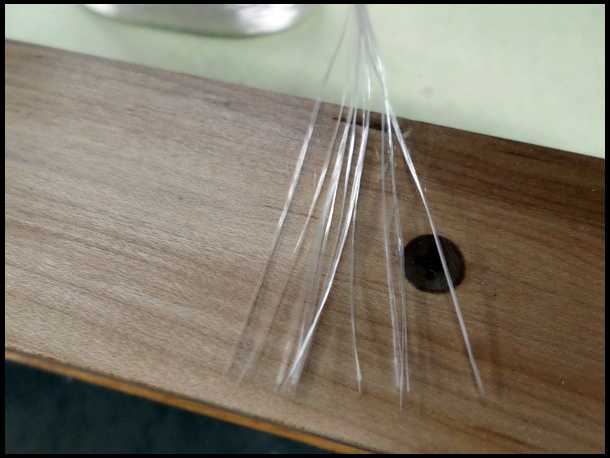
This is some Fiberglass Roving or Thread. Each thread is comprised of a whole lot of strands that I can't measure with digital calipers.
|
|
| From: avcase
|
|
|
|
|
|
|
| Date: 21-Mar-18 |
|
Clamping pressure with vacuum bagging is limited by the local atmospheric pressure. So at sea level, the maximum clamping pressure possible using a vacuum is 14.7 psi. This is a lot less than some bow builders apply with their air hoses, but it may still be plenty depending on the geometry of the bow and thickness of the laminates. I like how it only needs a single sided form, and the pressure should be very evenly applied.
Alan
|
|
| From: 30pt buck
|
|
|
|
|
|
|
| Date: 21-Mar-18 |
|
Dang interesting thread, You need to do a step by step build along. That would be great. Thanks for sharing
|
|
| From: unhinged
|
|
|
|
|
|
|
| Date: 21-Mar-18 |
|
psi, is only one measurement of force. For instance, the vacuum bag "clamp" generates 1800lbs per sq. ft. Sounds much more impressive than 14psi Also, a standard C clamp can get you around 1800lbs per sq. ft.I know a lot of Bows have been made by some notable Bowyer's, with C clamps. 60psi is 8640lbs per sq. ft.! I think their is a relationship, born from coarse, machine finished glueing surfaces; thickened, gap filling epoxy and extreme clamping pressures.
|
|
| From: unhinged
|
|
|
|
|
|
|
| Date: 23-Mar-18 |
|
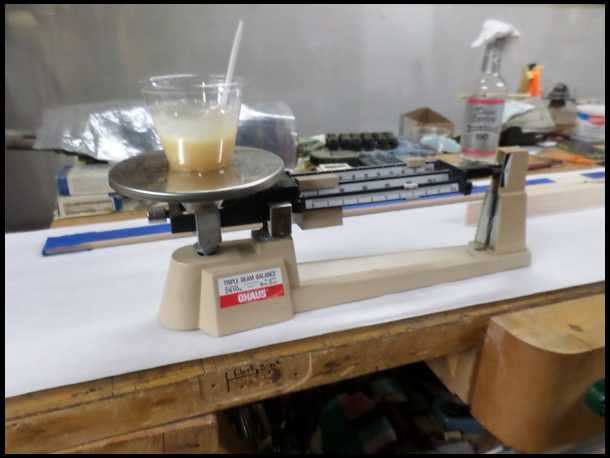
Had to get out the excavator to find this thread. I did manage to get the Bow glued up Thursday afternoon. Took it out of the bag this morning and it worked! But I am getting ahead of myself, because my buddy Ken came over to "watch", but I put him to work right away. He was my camera man and heat gunner. The first pic is, weighing out the epoxy. I know it's overkill, but it's easier than measuring by volume because you only use one container for resin and hardener, and I never second guess if I got the mix right.
|
|
| From: unhinged
|
|
|
|
|
|
|
| Date: 23-Mar-18 |
|
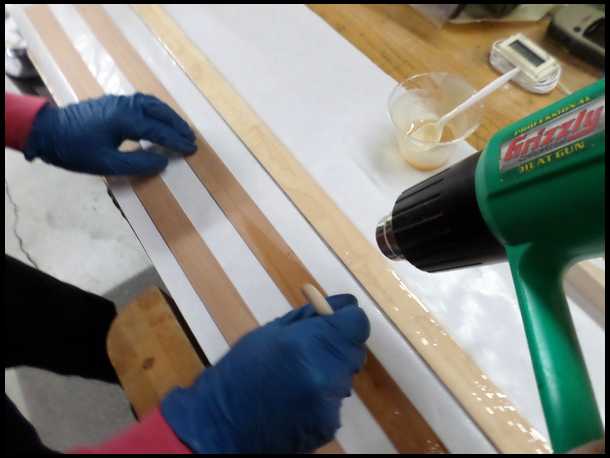
Here we are laying down some glue. EA-40 is damn thick, so I hit the Lam's with a little heat from a gun, on medium low setting and then heat the epoxy as it is getting brushed out. I prefer a brush to a spreader, because I like to beat the epoxy into the wood and glass. Also less waste with a brush and the brushing breaks any surface tension on the materials, which means no dry spots. Oh and i used about 90 grams of epoxy for this 3 Lam Bow.
|
|
| From: unhinged
|
|
|
|
|
|
|
| Date: 23-Mar-18 |
|
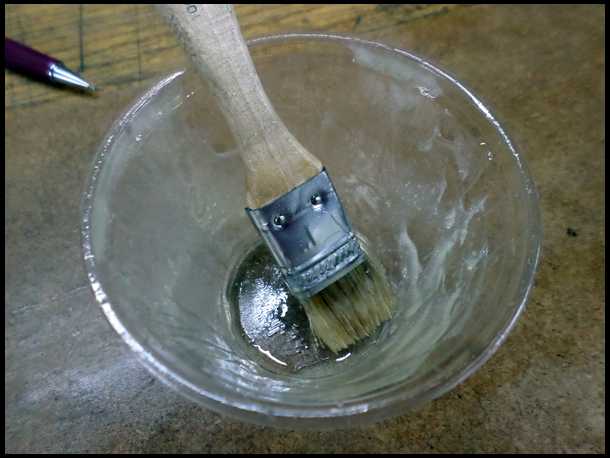
Not much leftover! Just what was left on the side of the cup
|
|
| From: unhinged
|
|
|
|
|
|
|
| Date: 23-Mar-18 |
|
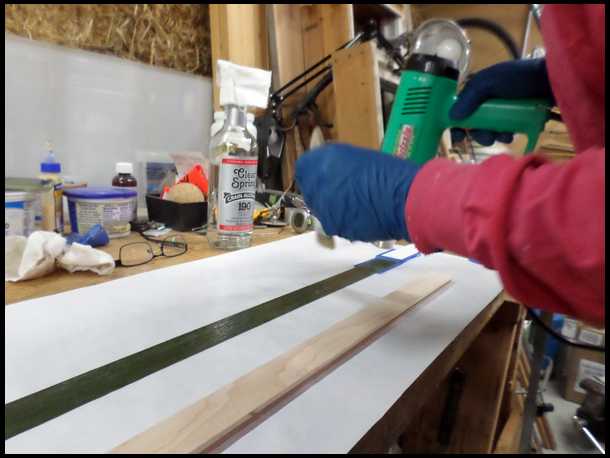
Another action shot. Me gunning and brushing, before I recruited Ken for the job.
|
|
| From: unhinged
|
|
|
|
|
|
|
| Date: 23-Mar-18 |
|
Here is everything, coated with epoxy, getting ready to bag it.
|
|
| From: unhinged
|
|
|
|
|
|
|
| Date: 23-Mar-18 |
|
I taped down the glass just past the fades and taped a spacer block on top of the riser, mostly to minimize the stretch on the bag. Also put clamping cauls on the dips, for the same reason
|
|
| From: unhinged
|
|
|
|
|
|
|
| Date: 23-Mar-18 |
|
Next came the peel-ply and breather mesh.
|
|
| From: unhinged
|
|
|
|
|
|
|
| Date: 23-Mar-18 |
|
Another angle
|
|
| From: unhinged
|
|
|
|
|
|
|
| Date: 23-Mar-18 |
|
And into the bag it goes
|
|
| From: unhinged
|
|
|
|
|
|
|
| Date: 23-Mar-18 |
|
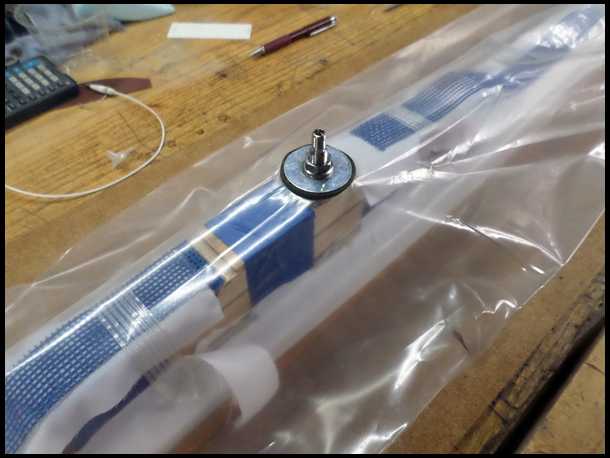
Here is the valve. You make a hole big enough to push the stem thru and there is a gasket and washer on both sides of the bag.
|
|
| From: unhinged
|
|
|
|
|
|
|
| Date: 23-Mar-18 |
|
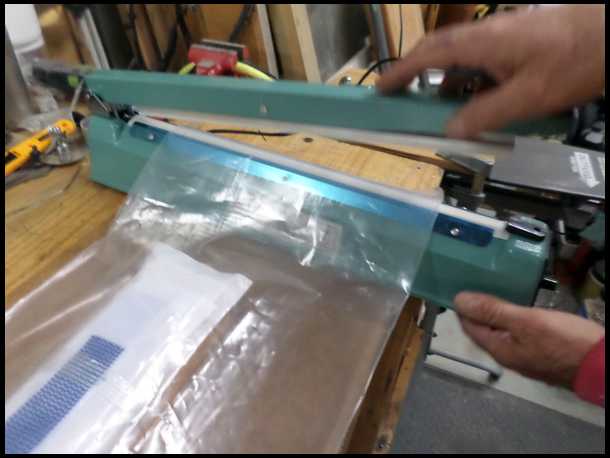
I use a heat sealer to close the ends. I use to use tape, but the heat resistant sealing tape is expensive and does not work any better than this $15. impulse sealer.
|
|
| From: unhinged
|
|
|
|
|
|
|
| Date: 23-Mar-18 |
|
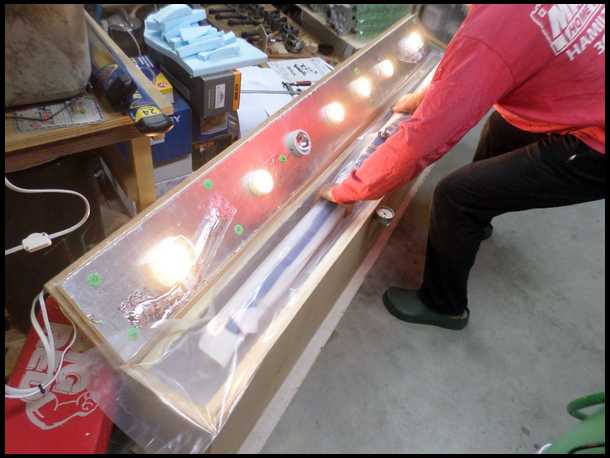
Here it is going in the hot box. I was planning on drawing the vacuum on the bench and then placing the bag in the box on a flat plank, but I had to put the plank in the bag with the bow and then vacuum it in place. A check valve and tubing I needed to move the package while under vacuum, did not arrive in time.
|
|
| From: unhinged
|
|
|
|
|
|
|
| Date: 23-Mar-18 |
|
Vacuum pump connected and sucking!
|
|
| From: unhinged
|
|
|
|
|
|
|
| Date: 24-Mar-18 |
|
I cooked it for 4.5 hrs, 3.5 at 130 degrees and 1hr at 150. Even with the vacuum absent, everything was sucked on tight to the blank.
|
|
| From: unhinged
|
|
|
|
|
|
|
| Date: 24-Mar-18 |
|
Unbagged. There was a lot of cleanup. I should have used more peel-ply and and bleeder fabric, instead of breather mesh.
|
|
| From: unhinged
|
|
|
|
|
|
|
| Date: 24-Mar-18 |
|
Starting to look like a Bow. At this point, I get over confident that it's going to actually work. I did many hours of research, over a period of more than a year, of looking for information on how to vacuum press a bow. I scoured the internet, made inquiries everywhere, perused all the books, old and new, that I could get my hands on. I got nothing. So I decided to give it a shot. With all that in mind, I am going to make a claim, and enjoy while it lasts, The first Documented Vacuum Pressed Bow.
|
|
If you have already registered, please sign in now
For new registrations Click Here
|
|
|
|


