| From: Chemsolder1
|
|
|
|
|
|
|
| Date: 02-Jan-18 |
|
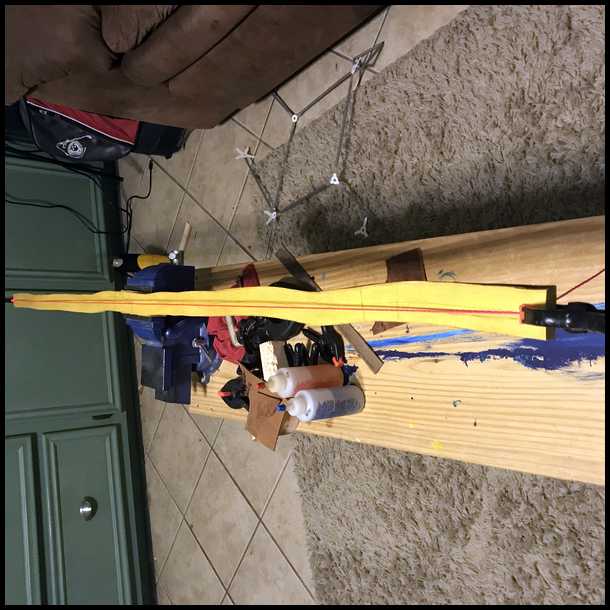
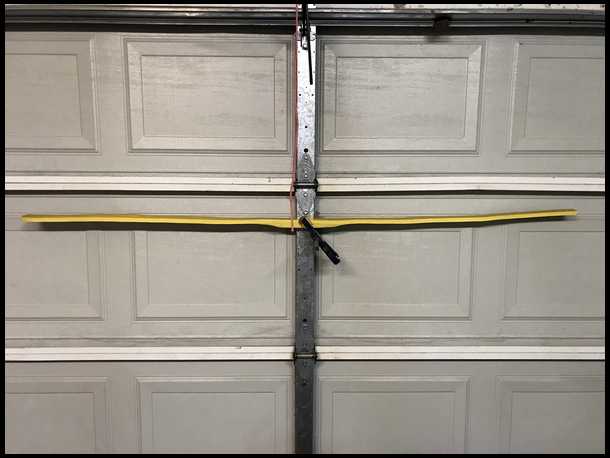
So I have my blank down to1.5” wide following the gran I am getting ready to layout the taper in the tips the string runs through the center of the handle area. This is the end that concerns me, I know when I build a fiberglass laminate recurve I can change string tracking considerably with small changes to the tip on either side of the limb. That gives me pause when I see this tip where if I do a straight taper to the tip it will nearly force the string outside the edge of the limb. I will taper from the lighter line drawn it is at 6” the darker is at 8”.
Plan is to flip the tips a little and possibly remove a small amount of twist if necessary. The goal is mid to low 40’s.
|
|
|
|
|
|
| From: badger
|
|
|
|
|
|
|
| Date: 02-Jan-18 |
|
Any small misalignment issues can be taken care of with some heat and simply moving the limbs over to line up, same with a little limb twist. You can do them both at the same time. More often than not you will have to go back over and make some minor adjustments a second time as you near completion. The stave looks good.
|
|
| From: Jeff Durnell
|

|
|
|
|
|
|
| Date: 02-Jan-18 |
|
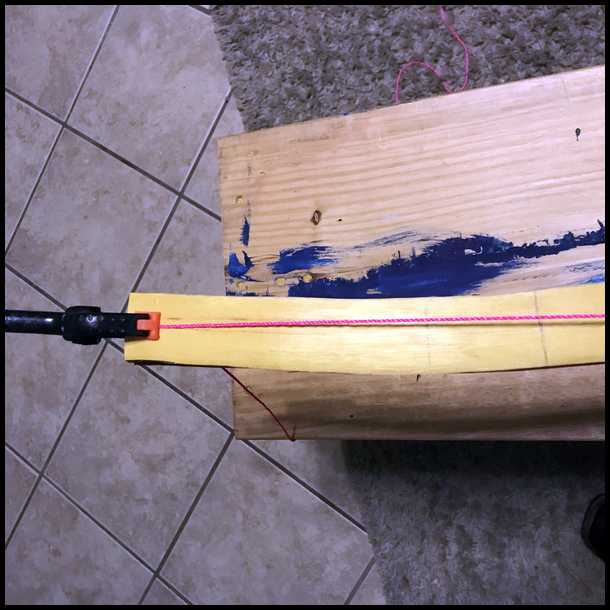
Greg, it took me a minute to figure out what your concern was, but I think I understand now. If I understand you, you are looking at it wrong. Since your stave is snakey, you cannot use the red string as the centerline for limb width/taper layout. You shouldn't try to create a "straight taper". Instead, the taper will follow the natural curve of the stave.
On such a stave, the red string is useful to check that the tips will align with the handle, and you should mark the stave under the red string where you want the center of the tips, and center of the handle to be, but then it should be removed. Optimally, the 'grain centerline' should connect those marks... tip - handle - tip.
Again, the red string isn't used to layout limb width, or limb width taper. THAT is all done off of the centerline you drew down the stave's back when you followed the grain from end to end... and I think I see a faint line there that indicates to me that is indeed what you did.
So remove the red string, and go back to where that longitudinal centerline (grain centerline) intersects your 6 or 8" mark, depending on which you elect to use to begin your taper, and mark the limb width there, by measuring off of the centerline. Then move an inch closer to the tip, make it a fraction narrower, move an inch closer, do it again, and again until you reach the tip, then connect the dots. This will ensure that the limb has a gradual taper that follows the grain of the stave. You can leave the tips a bit wide for now, say 3/4" if you like so that you can fine tune the alignment later. You also have the option of adjusting alignment with heat.
I hope I addressed your concern, and fire any questions at will.
|
|
| From: Jeff Durnell
|
|
|
|
|
|
|
| Date: 02-Jan-18 |
|
By the way, since it's a snakey stave, it's entire width should be layed out off of that 'grain centerline', not just the taper.
|
|
| From: badger
|
|
|
|
|
|
|
| Date: 02-Jan-18 |
|
I agree, lay it out using the grain as your centerline. I didn't understand the question properly.
|
|
| From: Chemsolder1
|
|
|
|
|
|
|
| Date: 02-Jan-18 |
|
Thank you Jeff and Badger,
I was thinking that was the right way to do it on a stave like this just wasn’t sure. So much is different between this and fiberglass laminates. And the Snakey part while it is a dream bow for me is a bit intimidating at the same time. I cut a piece off of this one that was even crazier, May just try to leave it on the next if this turns out.
Badger your comments are right in line with some other information I was needing too on this stave as you can see it has a very faint twist that may need to be dealt with but I will get to that at the same point I flip the tips. Was curious it doing bith at the same time would be asking too much but I think it will all be good.
The next question is around the grip, I was considering options for adding a bit more depth to it. It is currently only 1” thick. I am thinking either using some smooth on and putting a bubinga strip and then a piece of Osage on the belly, or should I just stack a bit of leather up and call it good I do want a shelf and planned on cutting within a 1/4”of center. What say you? Keep or nix the shelf or go smaller? Leather or wood to the back for a deeper grip?
Going to get to finishing my first laminate of the year tonight then layout the rest of the plan on this stave. Make some yellow dust tomorrow night!
|
|
| From: George Tsoukalas
|
|
|
|
|
|
|
| Date: 02-Jan-18 |
|
I agree, too. Mark a pencil line down the middle following the lateral or vertical grain that runs tip to tip.
This may help you.
http://traditionalarchery101.com/layout.html
Jawge
|
|
| From: Stoner
|
|
|
|
|
|
|
| Date: 02-Jan-18 |
|
Jeff explained it. I lay a string tip to tip and see where the tip centers are. The string bisects the handle. After that the wood grain tells you where the limbs will flow. John
|
|
| From: Jeff Durnell
|
|
|
|
|
|
|
| Date: 02-Jan-18 |
|
I'd add wood to the grip to increase its depth. Wood added there adds strength. Leather doesn't. If you're going to cut in a shelf, you'll need every bit of strength you can get. I've added wood to staves that were too thin to get the handle shape I wanted. Never had a problem. I prep those gluing surfaces with a toothing plane blade. That's just the way i do it... never had a failure, even in areas that flex. If you've made glass bows with Smooth On, you know the routine as far as prepping gluing surfaces, right? You should be fine.
|
|
| From: Chemsolder1
|
|
|
|
|
|
|
| Date: 03-Jan-18 |
|
Yeah Jeff real comfortable gluing up risers and laminating woods. It is this whole the grain dictates everything about my bow thing that is new for me. Now mind you I do take into account grain in my laminates here though it is a whole new level. Much respect to all of you who craft these beasts. I did get my laminate sprayed, and this bow layed out cut and started floor tillering. We will see if we can get some wood added to the belly of the riser tomorrow.
|
|
| From: Chemsolder1
|
|
|
|
|
|
|
| Date: 03-Jan-18 |
|
Jawge I knew I had seen that on your site before but I kept trying to follow a dead bookmark to get there exactly what I wound up doing. And if this one doesn’t work I still have the other half of the original stave. I really want to get two out of it though.
|
|
| From: George Tsoukalas
|
|
|
|
|
|
|
| Date: 03-Jan-18 |
|
I am glad you have my site now to help you, Chemsolder1. I had to move my site to another host. Jawge
|
|
| From: Bob Rowlands
|
|
|
|
|
|
|
| Date: 03-Jan-18 |
|
No comment other than that looks like a nice stave. Good luck with it.
|
|
| From: RonG
|
|
|
|
|
|
|
| Date: 03-Jan-18 |
|
Chemsolder1, beautiful job looking forward to the completion. you are doing great by asking before acting.
|
|
| From: Arvin
|
|
|
|
|
|
|
| Date: 04-Jan-18 |
|
Jeff said it well. Arvin
|
|
|
|
If you have already registered, please sign in now
For new registrations Click Here
|
|
|
|