| From: bodymanbowyer
|
|
|
|
|
|
|
| Date: 06-Jan-17 |
|
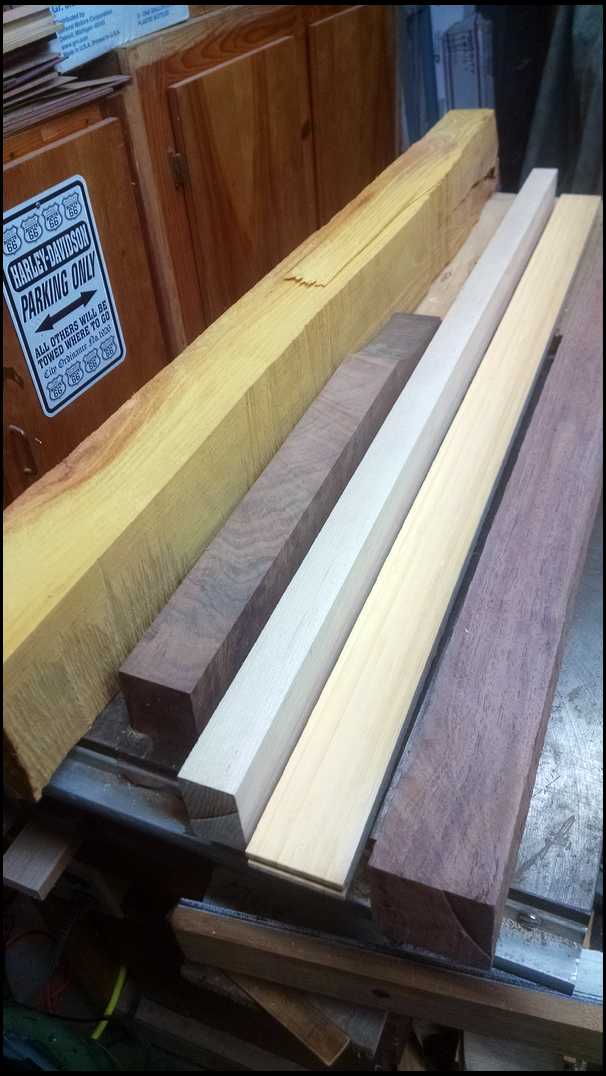
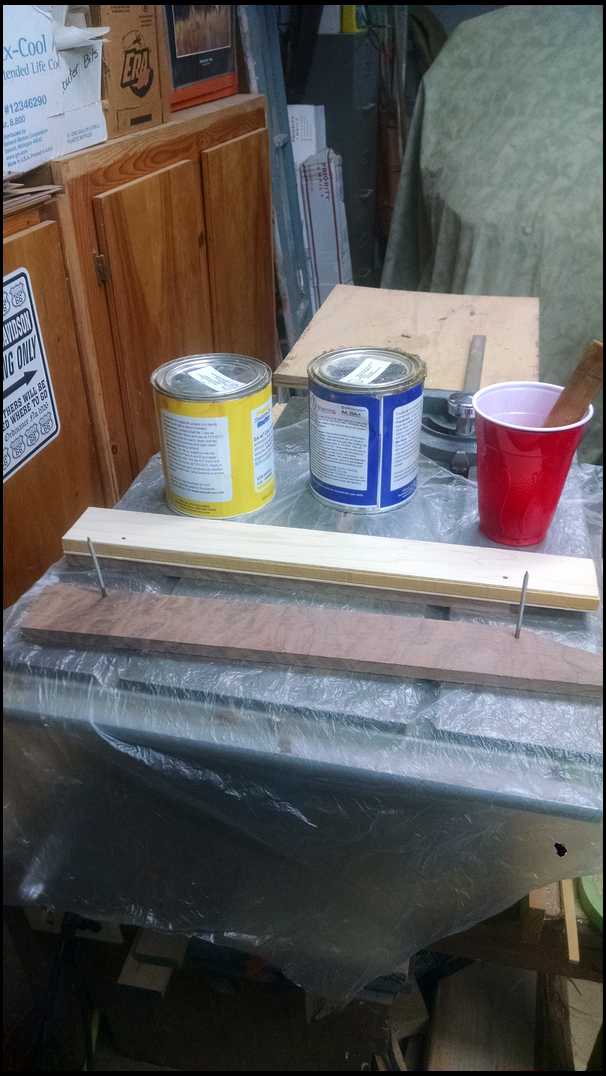
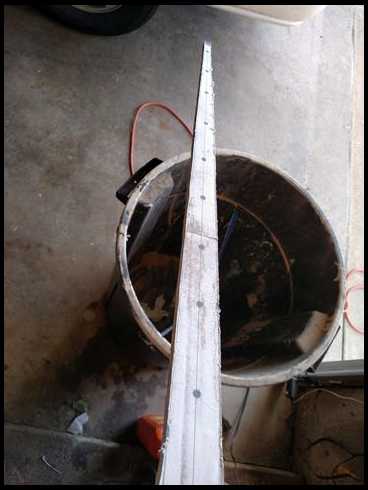
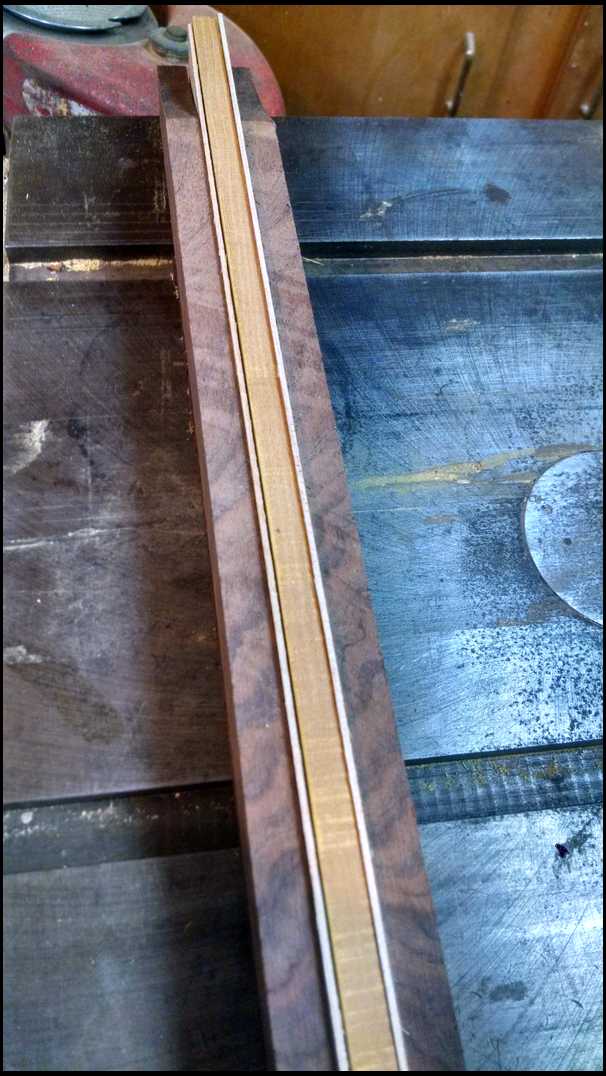
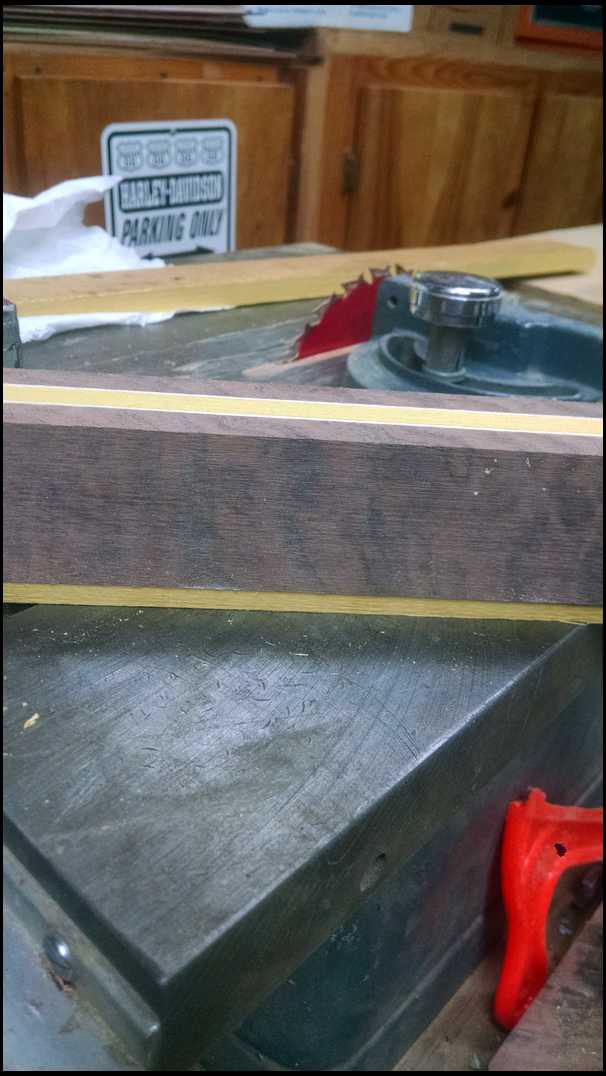
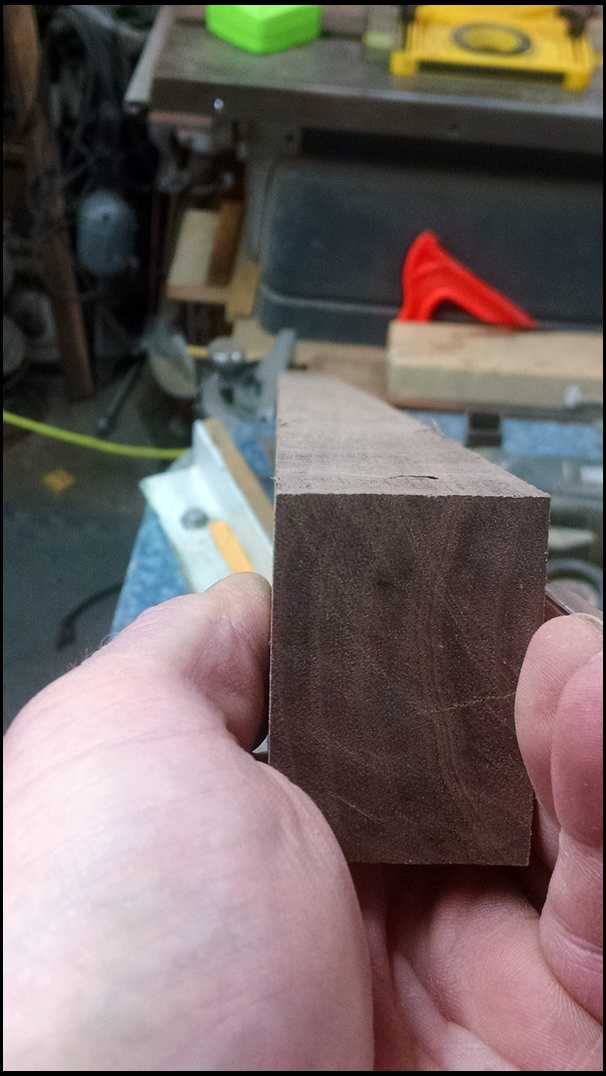
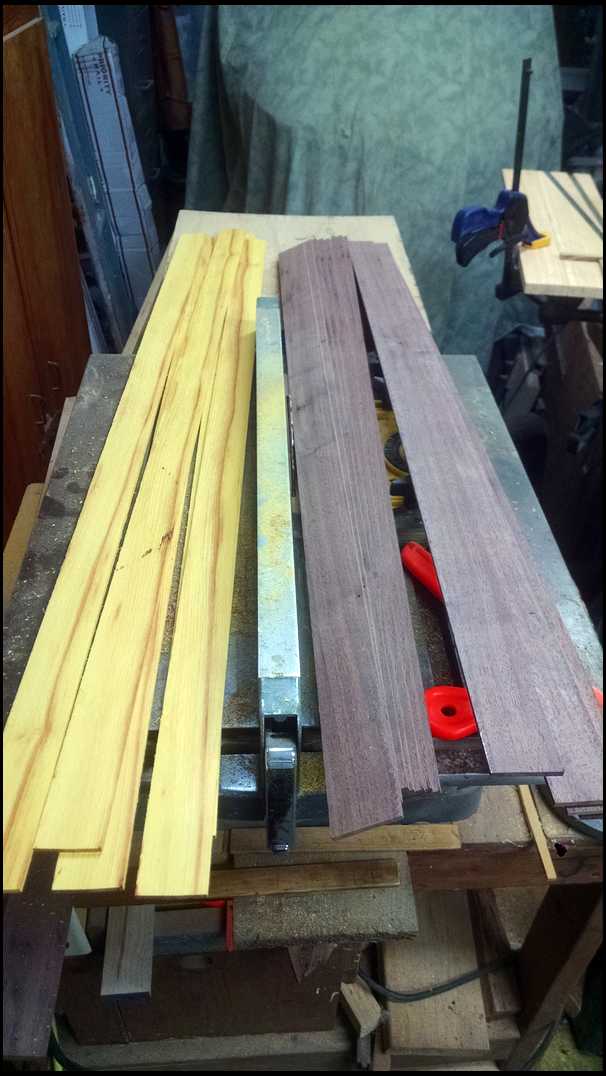
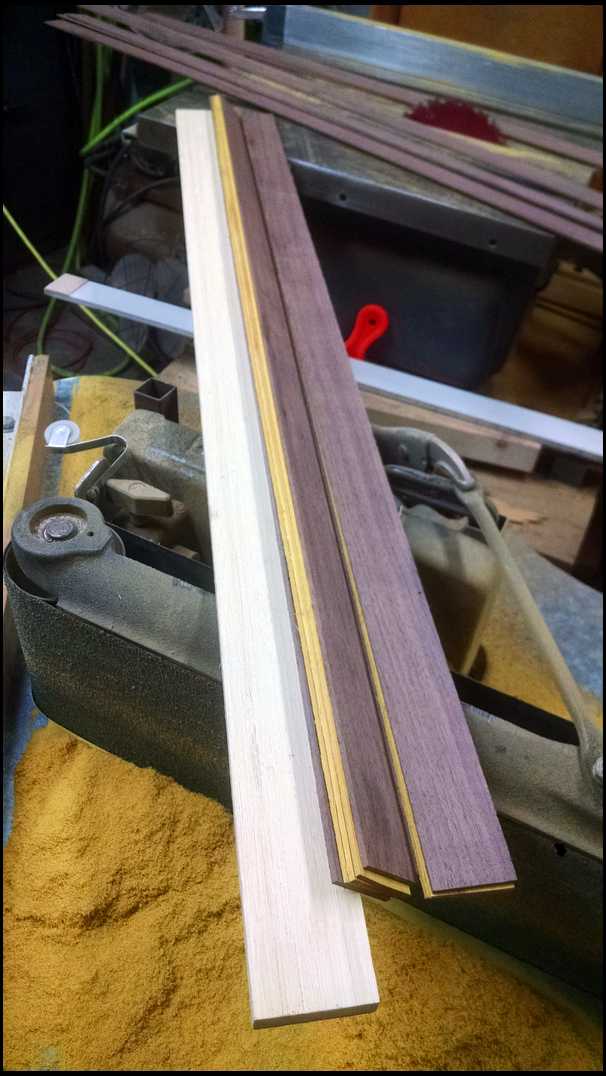
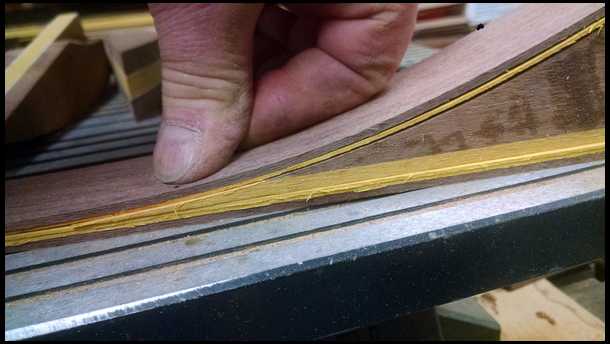
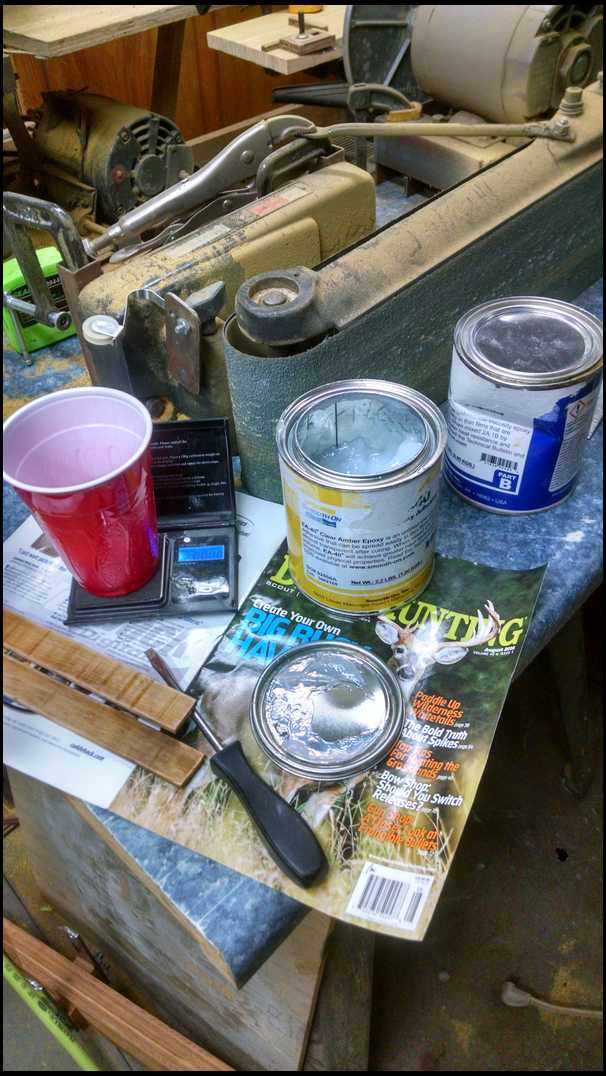
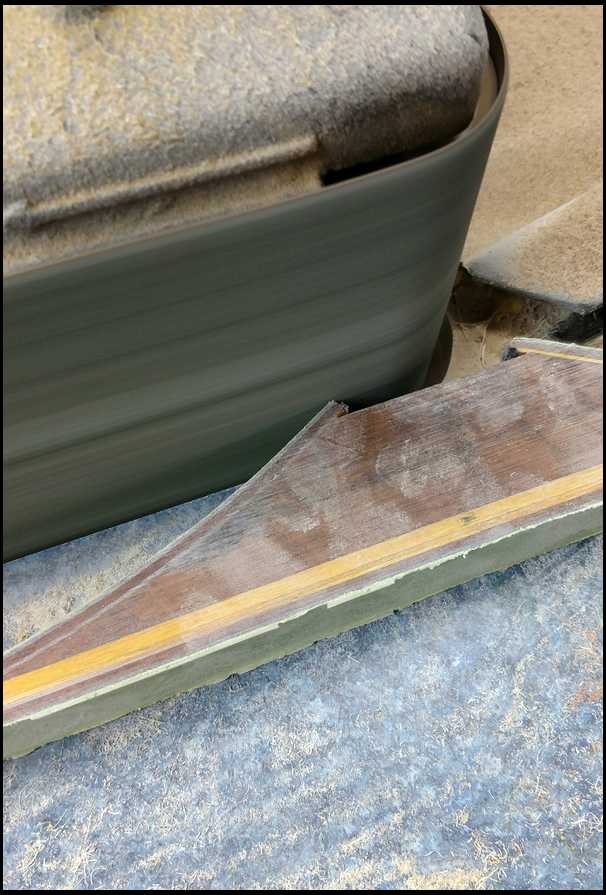
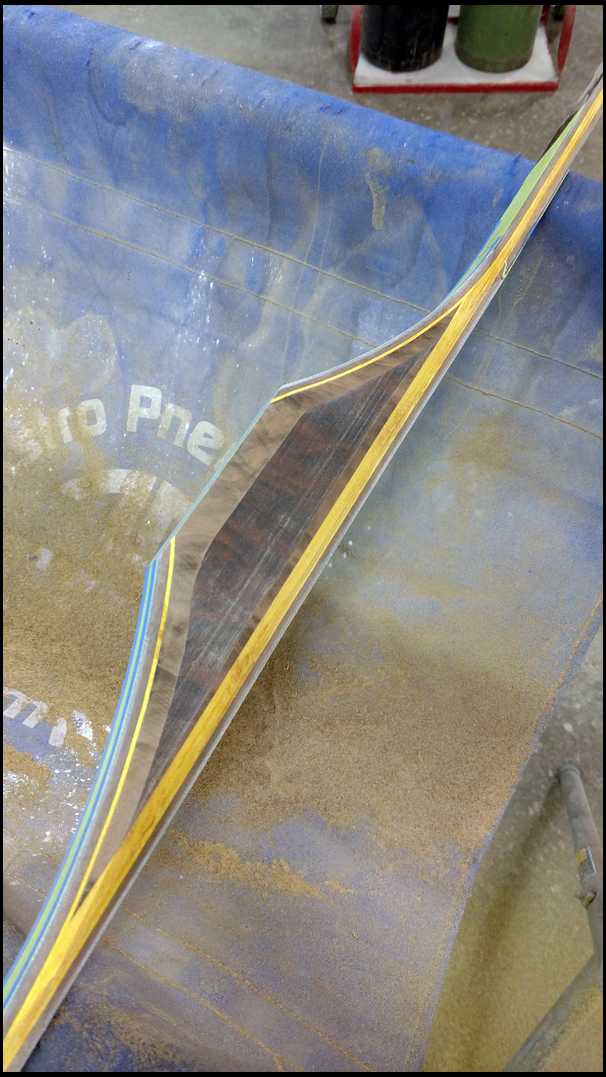
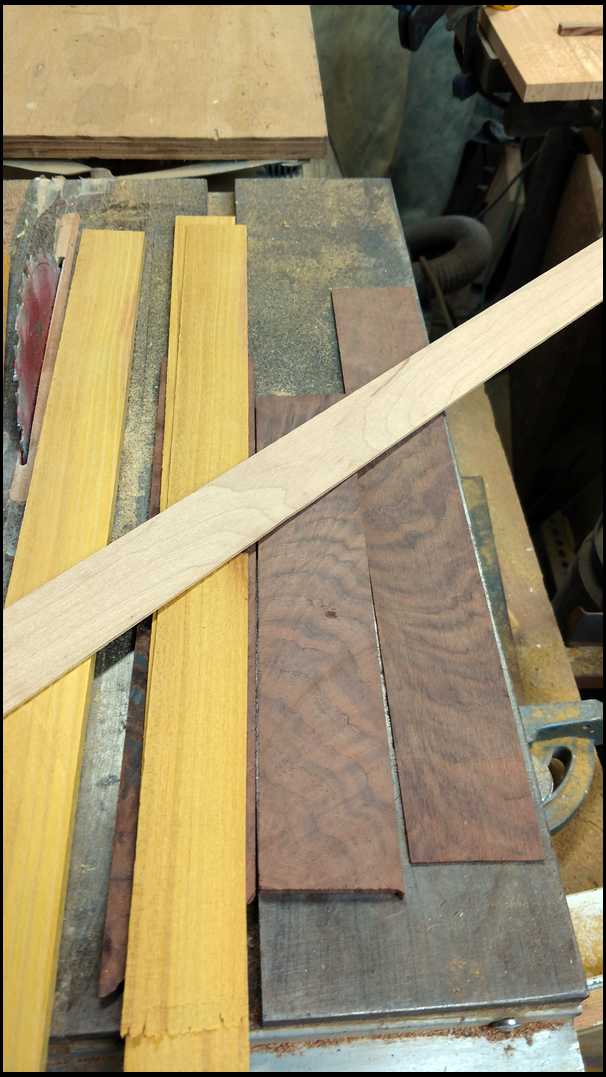
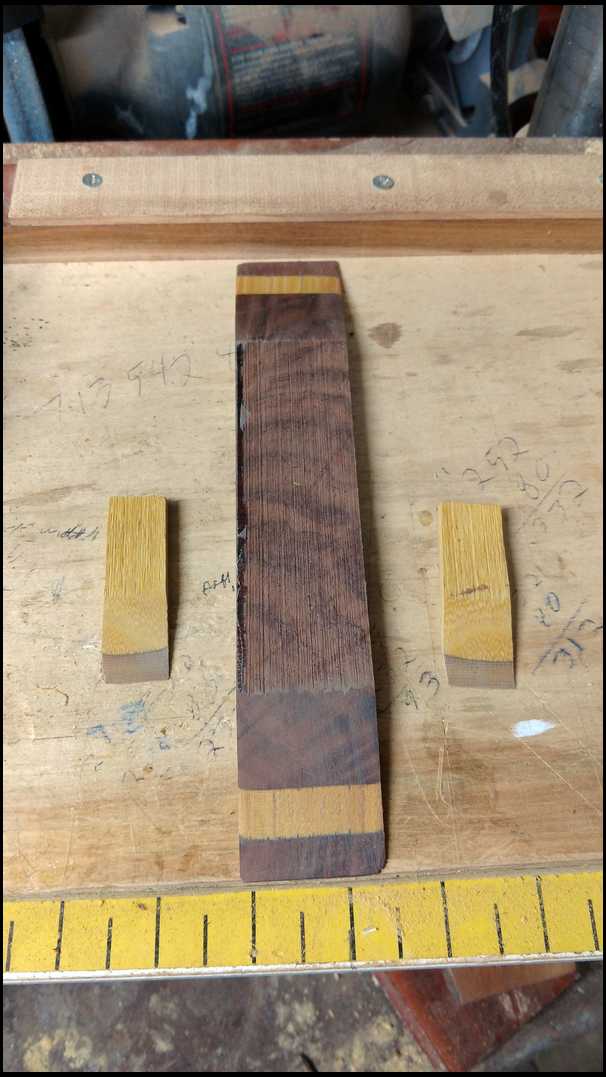
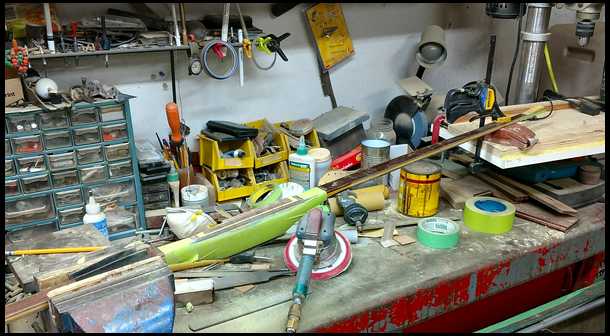
From left to right. Local Osage, Curly Missouri walnut,maple,bamboo flooring, aka actionboo and Missouri Walnut. JF
|
|
| From: Bobmeister
|
|
|
|
|
|
|
| Date: 06-Jan-17 |
|
Let it rip Jeff......
Most all domestic to.
|
|
|
|
| From: muddyIA
|
|
|
|
|
|
|
| Date: 06-Jan-17 |
|
Excellent. Adding to favs.
|
|
| From: Tracker7
|
|
|
|
|
|
|
| Date: 06-Jan-17 |
|
Looking forward to it, thanks.
|
|
| From: bodymanbowyer
|
|
|
|
|
|
|
| Date: 06-Jan-17 |
|
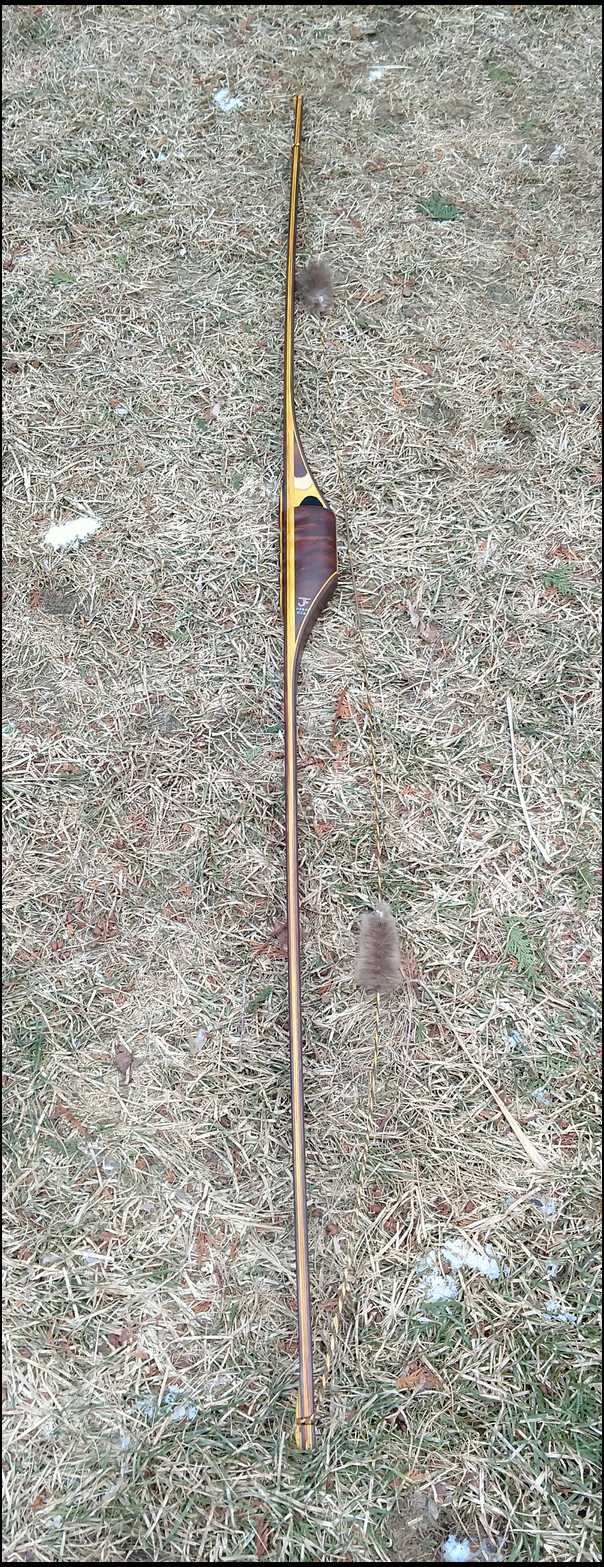
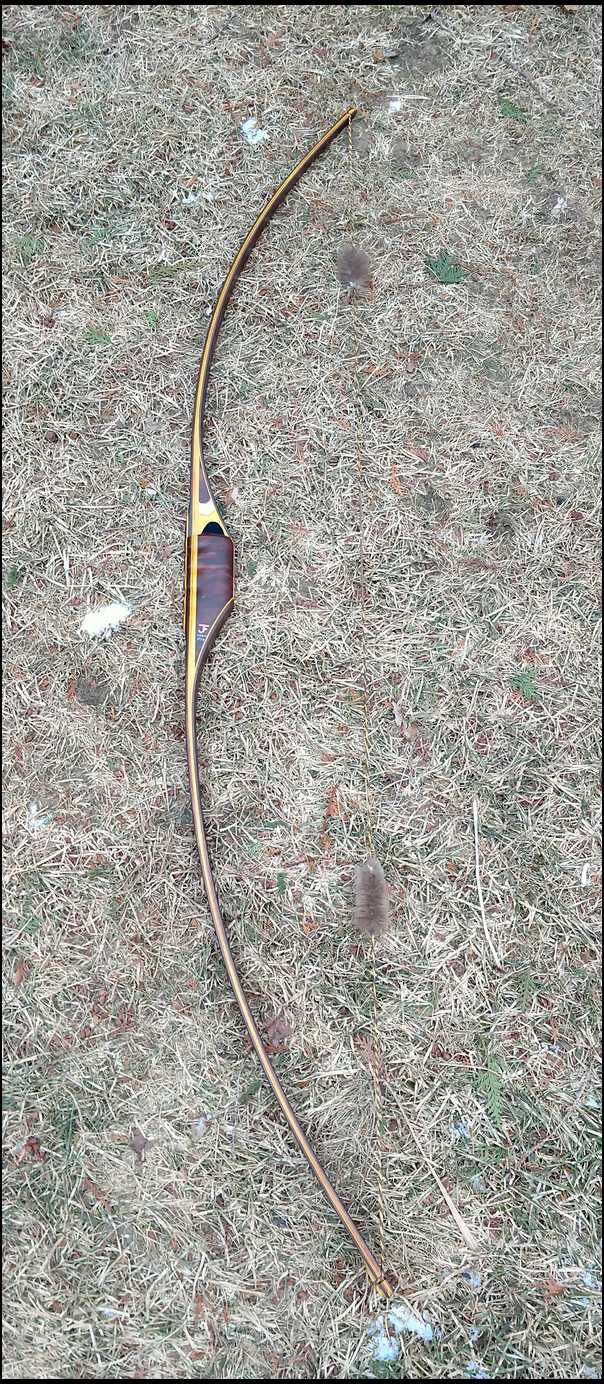
It's gonna be 66" NtN 55# at 28" flat glass back longbow, with a 16" riser. This all started from a Bingham Projects design form, that you as given to me from one of the doctors my wife worked for. The form and hot box came from out east somewhere. This started it all. This bow will be #38. At least my wife knows where I can be found, most of the time ;) JF
|
|
| From: Flinger1
|
|
|
|
|
|
|
| Date: 06-Jan-17 |
|
???? Diggin' in!
|
|
| From: Flinger1
|
|
|
|
|
|
|
| Date: 06-Jan-17 |
|
Aw man, my popcorn and beer didn't work :( You'll just have to trust me,,lol!
|
|
| From: bodymanbowyer
|
|
|
|
|
|
|
| Date: 06-Jan-17 |
|
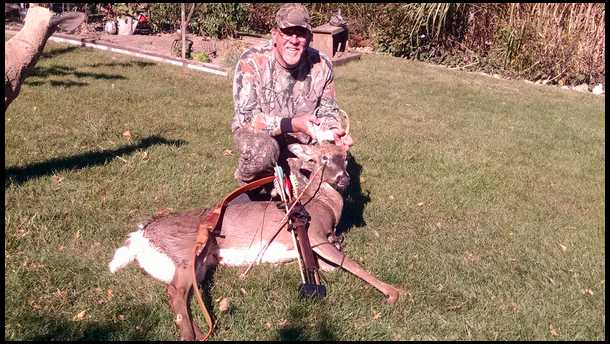
I do need to hunt this weekend, since this is the last weekend I'll be able to hunt. Season ends the 10th of January. I will be taking Maqokita Revenge bow with me. So just a small delay in really rolling a long with this. So stay tuned :) JF
|
|
|
|
| From: Bob Rowlands
|
|
|
|
|
|
|
| Date: 06-Jan-17 |
|
Looking forward to this. Thanks.
|
|
| From: Jeepman
|
|
|
|
|
|
|
| Date: 06-Jan-17 |
|
Popcorn and beer at my house...let the buildup begin....jeepman
|
|
| From: Stoner
|
|
|
|
|
|
|
| Date: 06-Jan-17 |
|
Waiting patiently.....adding to favorites. John
|
|
| From: The Whittler
|
|
|
|
|
|
|
| Date: 06-Jan-17 |
|
I wish you lived closer I would be over there watching. :-)
|
|
| From: Dry Bones
|
|
|
|
|
|
|
| Date: 06-Jan-17 |
|
Jeff, get on with it will ya. KIDDING!! :-D Hope your hunt goes as successful as mine did tonight.
-Bones
|
|
| From: Deno
|
|
|
|
|
|
|
| Date: 07-Jan-17 |
|
Following along with the rest....good hunting Deno
|
|
| From: Fats
|
|
|
|
|
|
|
| Date: 07-Jan-17 |
|
Iam here can't wait thanks for doing this it gives a lot of us a chance to see how things work
|
|
| From: bodork
|
|
|
|
|
|
|
| Date: 07-Jan-17 |
|
Can't wait! That curly walnut looks real nice! Be pretty in a knife! LOL
|
|
| From: Matt Ewing
|
|
|
|
|
|
|
| Date: 07-Jan-17 |
|
Take your time, I would hunt too.
|
|
| From: N. Y. Yankee
|
|
|
|
|
|
|
| Date: 07-Jan-17 |
|
Looks like it should be nice.
|
|
| From: Bowbaker
|

|
|
|
|
|
|
| Date: 07-Jan-17 |
|
Going to be fun. That osage is awesome.
|
|
| From: Greyfox
|
|
|
|
|
|
|
| Date: 07-Jan-17 |
|
Looking forward to seeing you make magic. Good luck hunting. -3° here this morning.
|
|
| From: Pip
|
|
|
|
|
|
|
| Date: 07-Jan-17 |
|
Thank you been waiting!
|
|
| From: Jeff Durnell
|

|
|
|
|
|
|
| Date: 07-Jan-17 |
|
Actually, I'm an osage nut, but I'm more impressed with that piece of maple than anything else. It looks like a real good piece.
|
|
| From: bodymanbowyer
|
|
|
|
|
|
|
| Date: 08-Jan-17 |
|
Not many Deer up at my father-in-law place. So I'll just let them be. For now. Back to the buildalong. JF
|
|
| From: bodymanbowyer
|
|
|
|
|
|
|
| Date: 08-Jan-17 |
|
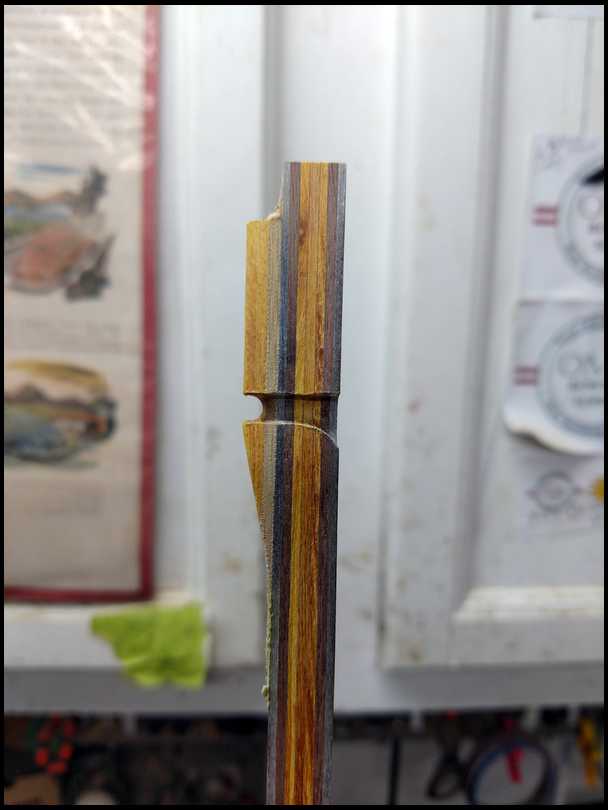
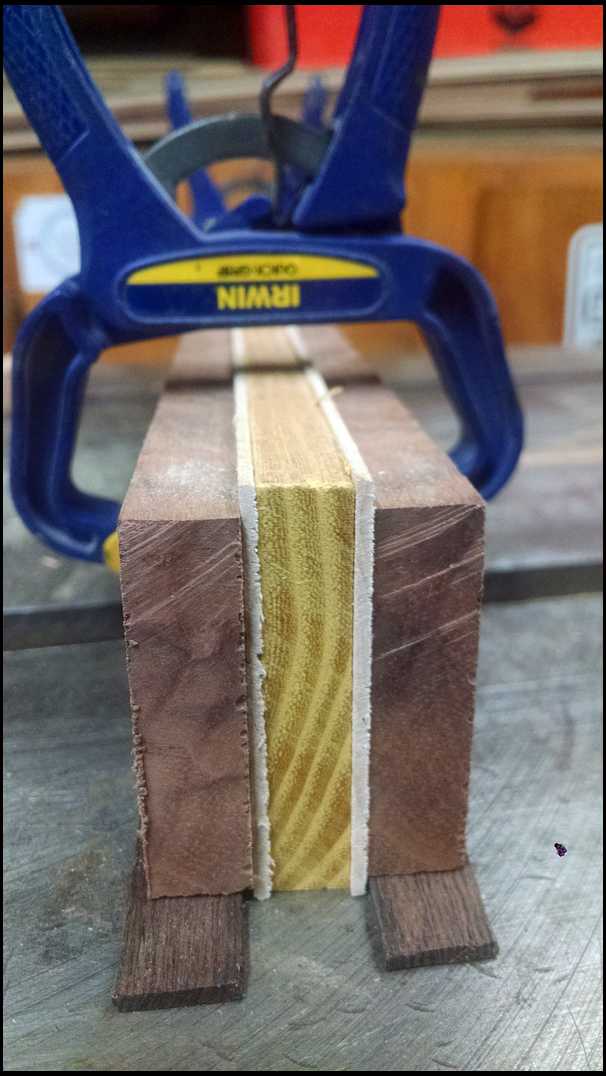
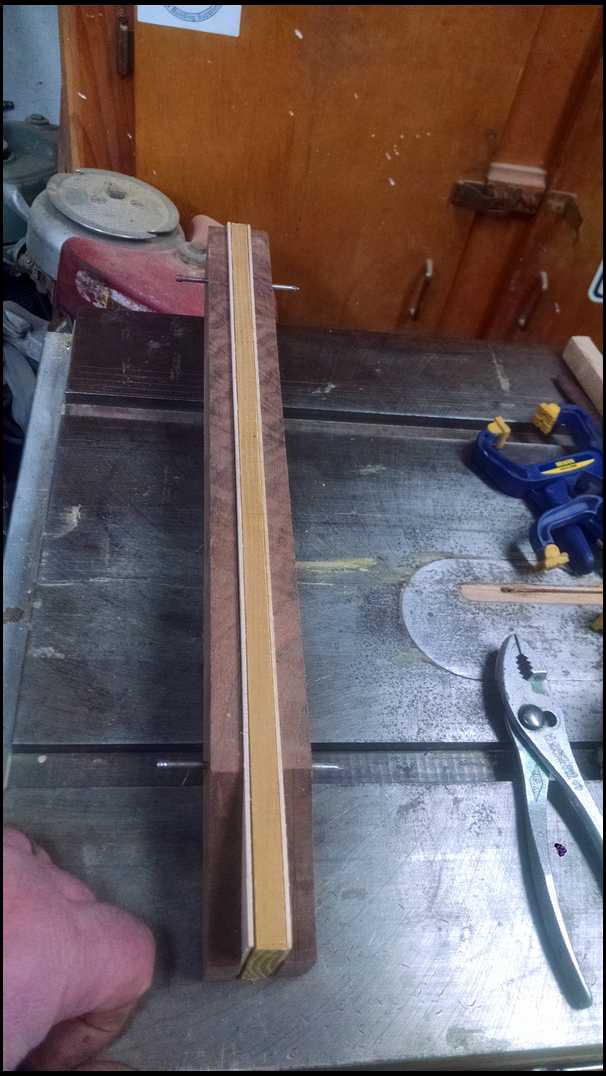
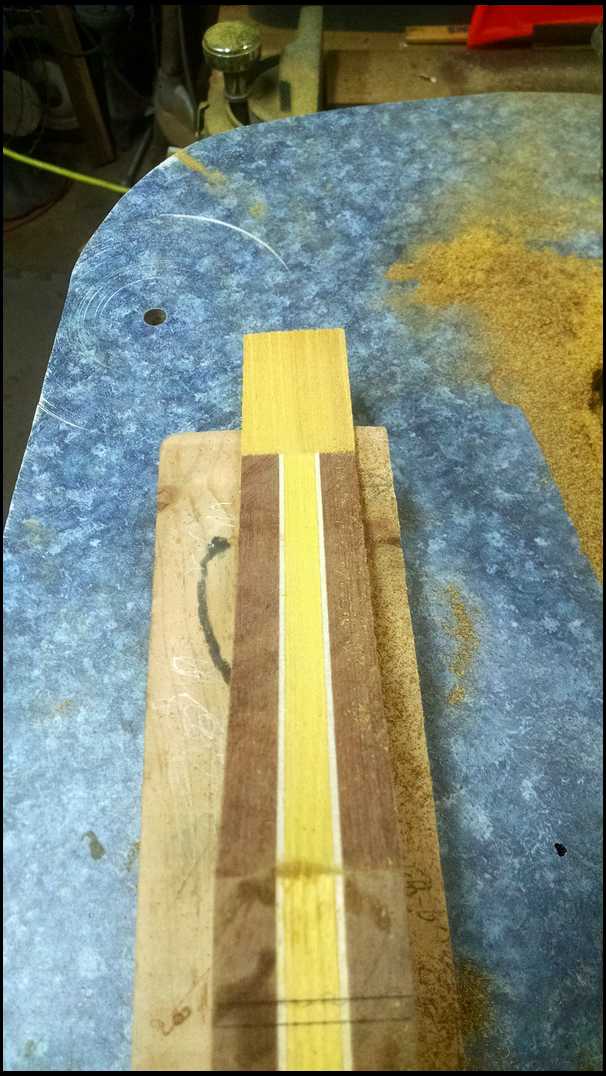
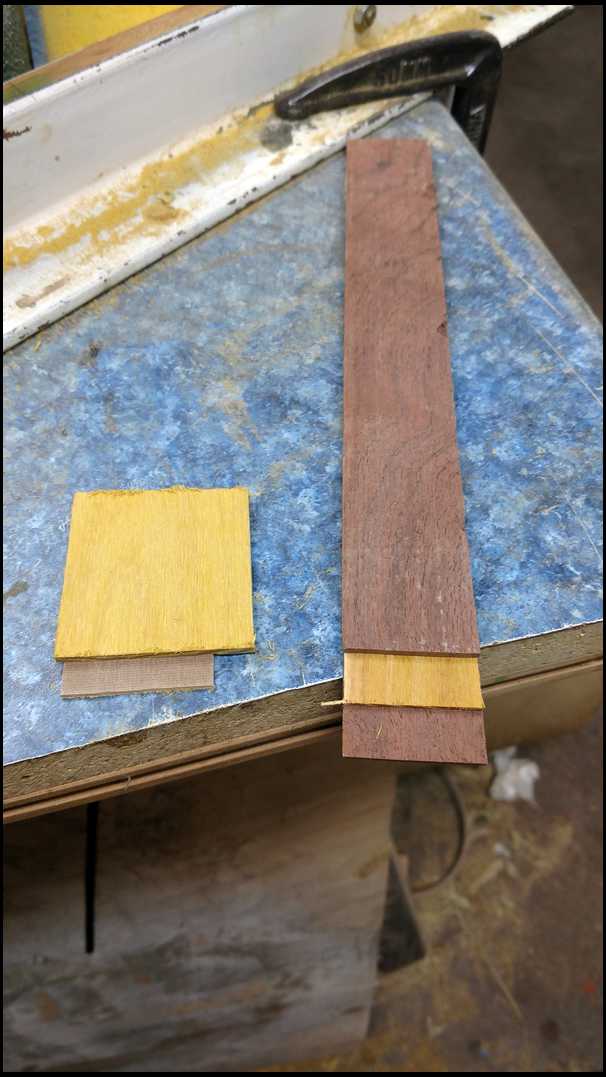
I want two 1/2" pieces of the curly walnut. 2" tall 17" long. One 3/8" piece of Osage, for weight and center strength. Two strips of maple 1/16" for accents. JF
|
|
| From: bodymanbowyer
|
|
|
|
|
|
|
| Date: 08-Jan-17 |
|

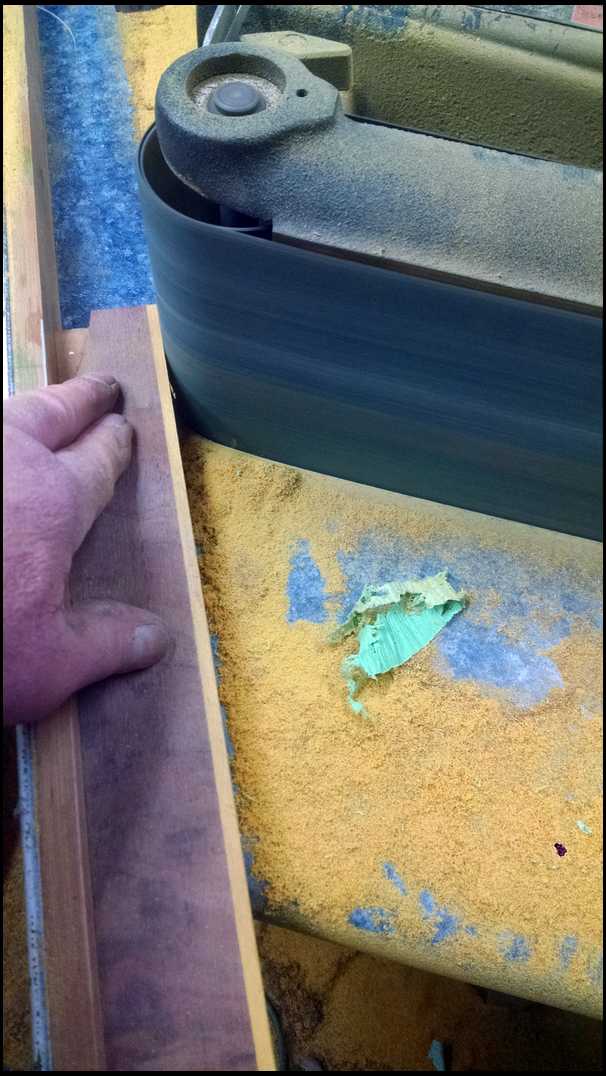
I'll take them down to exact size on my edge grinder. JF
|
|
| From: bodymanbowyer
|
|
|
|
|
|
|
| Date: 08-Jan-17 |
|
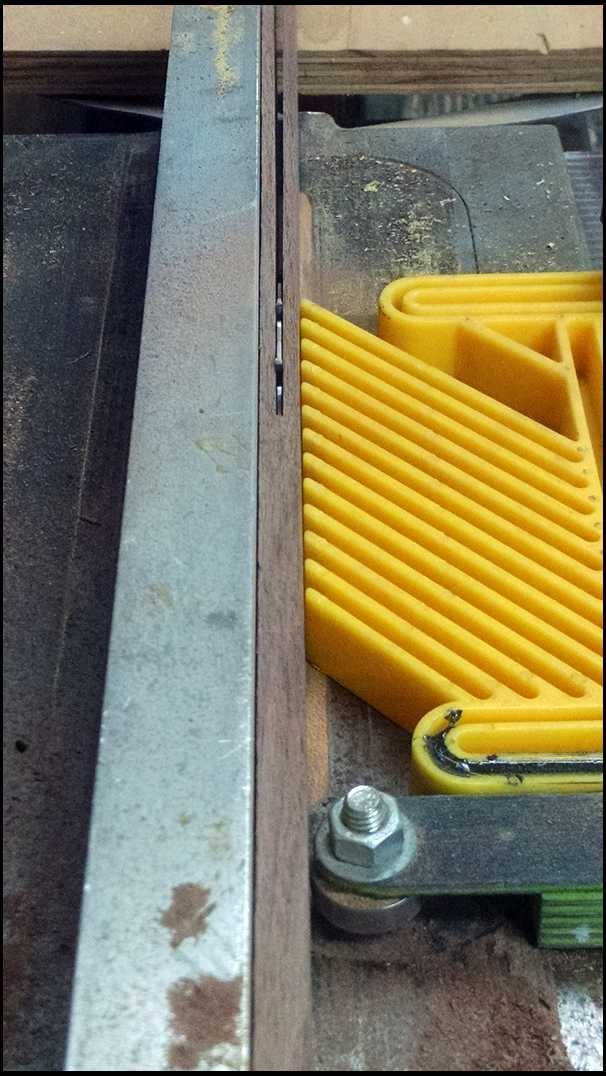
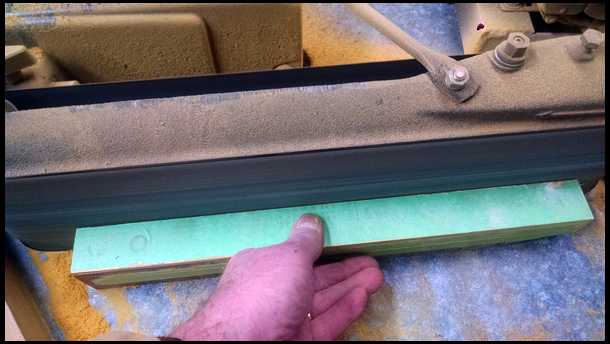
The thin maple I run them through the edge grinder on a parallel sled, easier to control,when so thin. I can do .030 veneers with this setup too. JF
|
|
| From: bodymanbowyer
|
|
|
|
|
|
|
| Date: 08-Jan-17 |
|
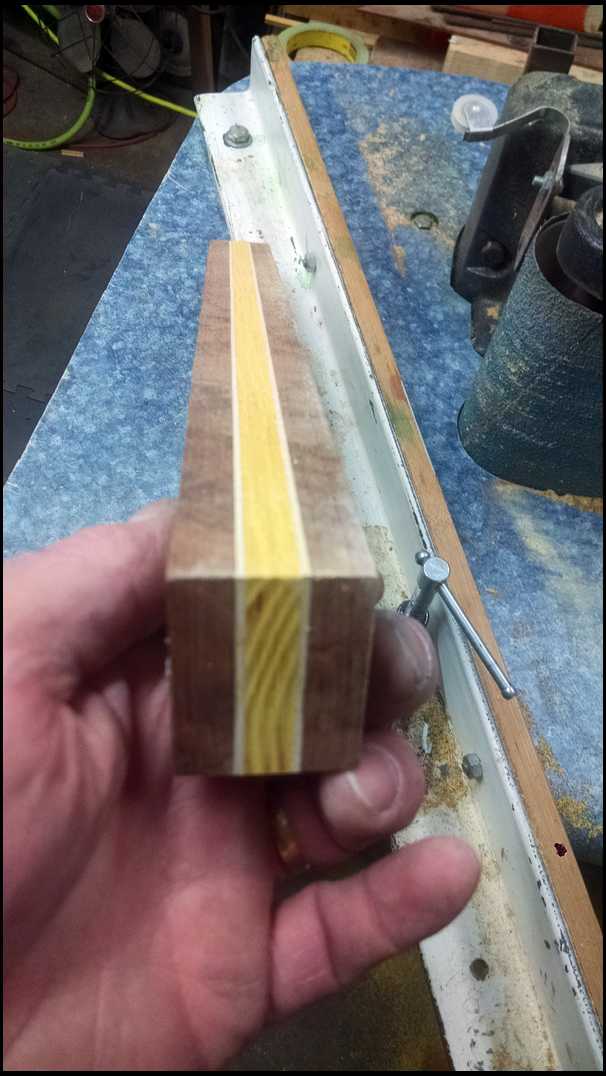
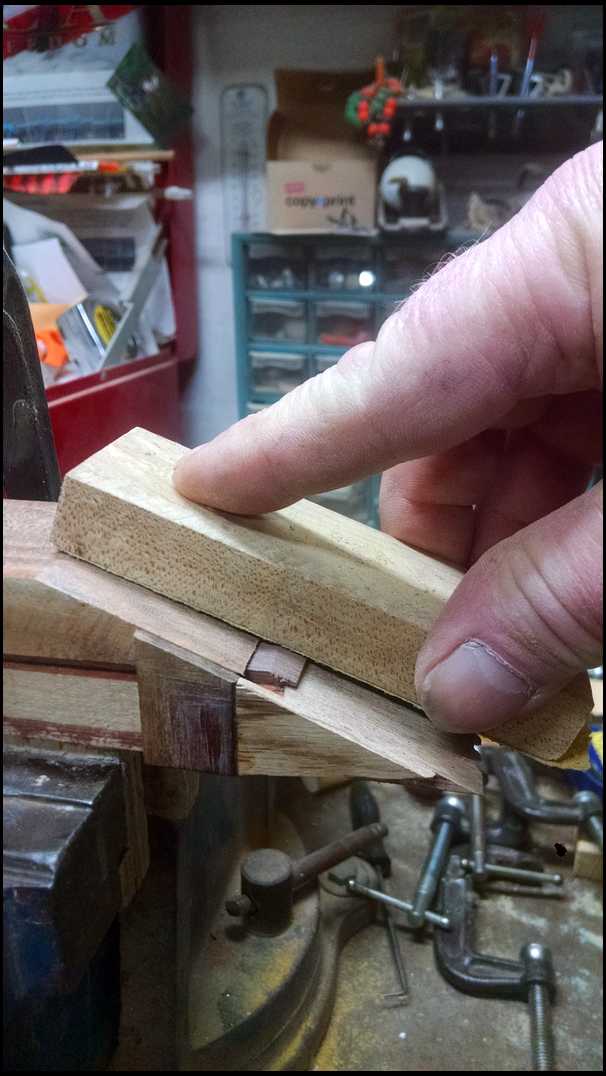
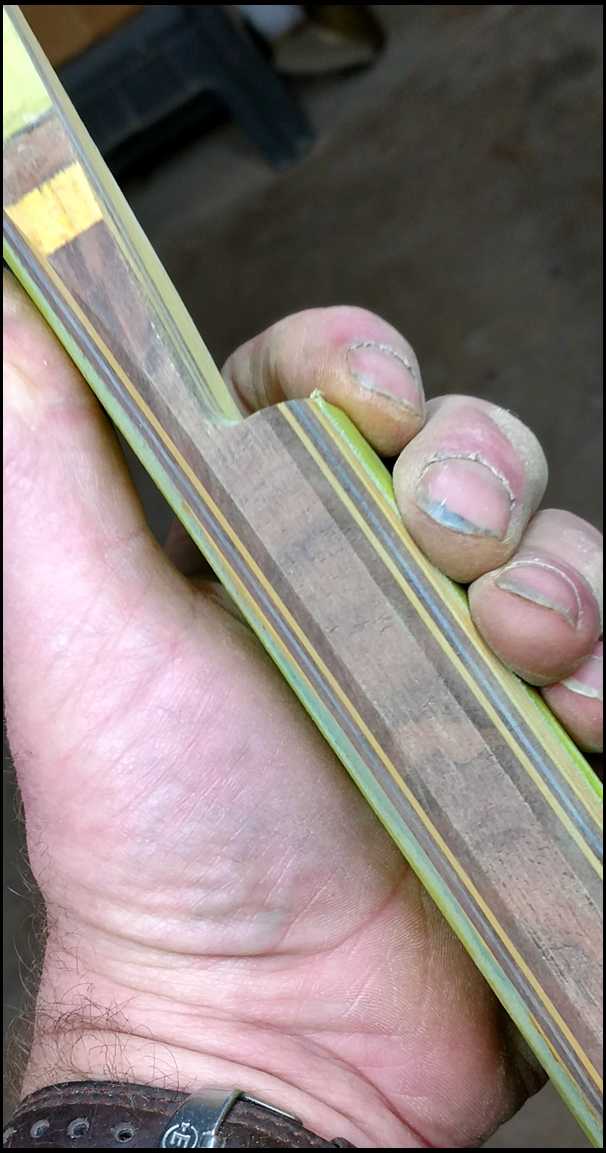
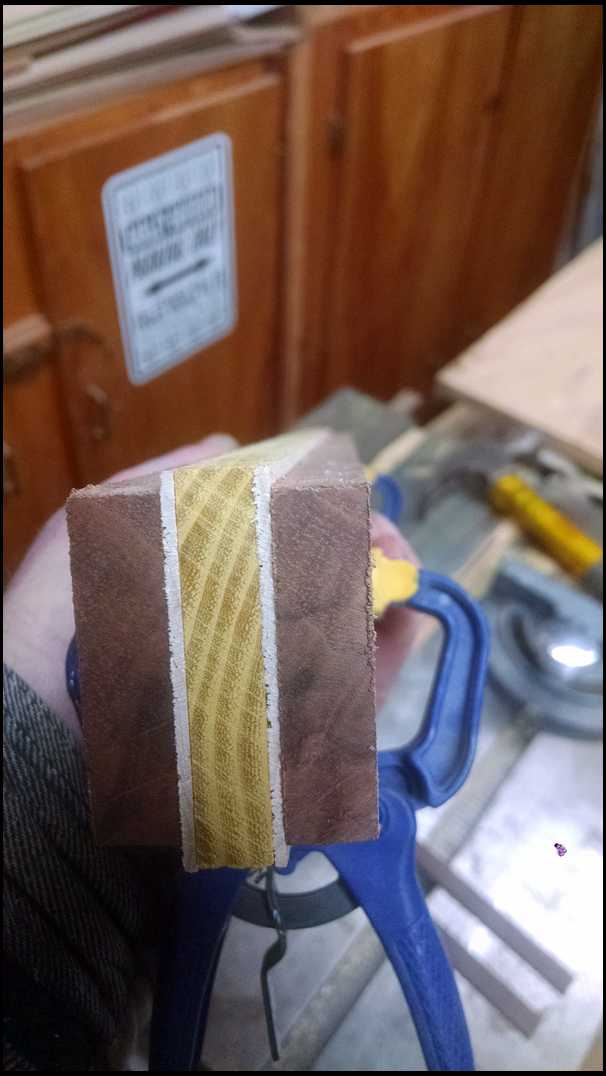
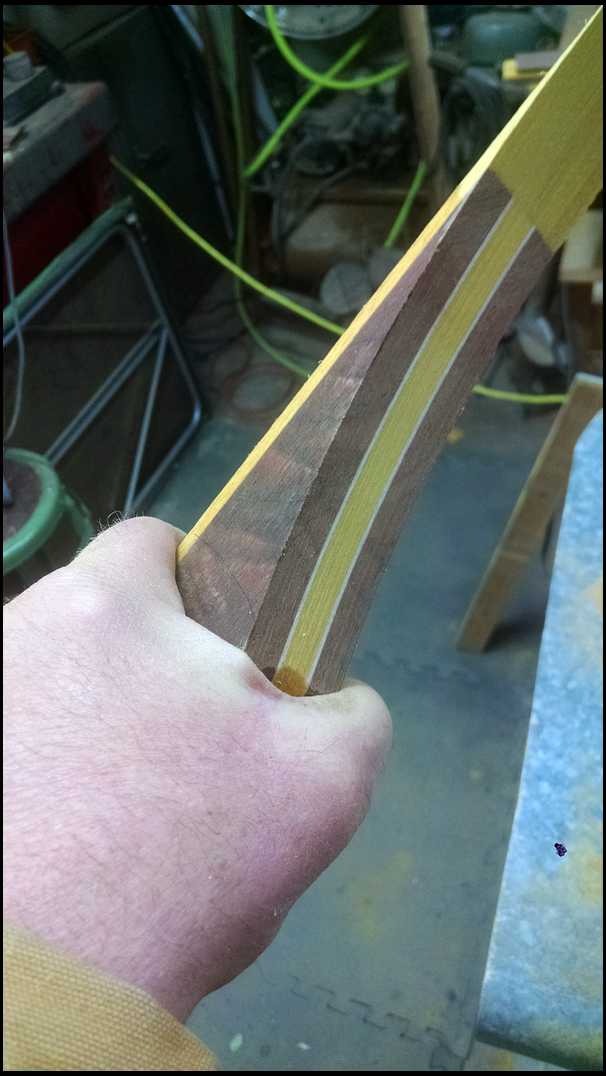
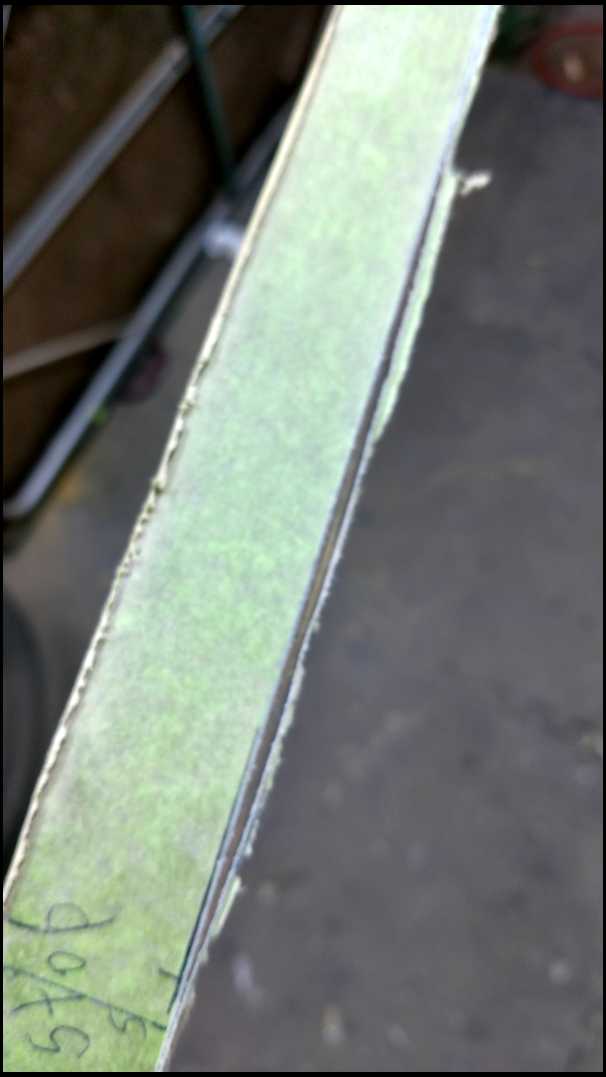
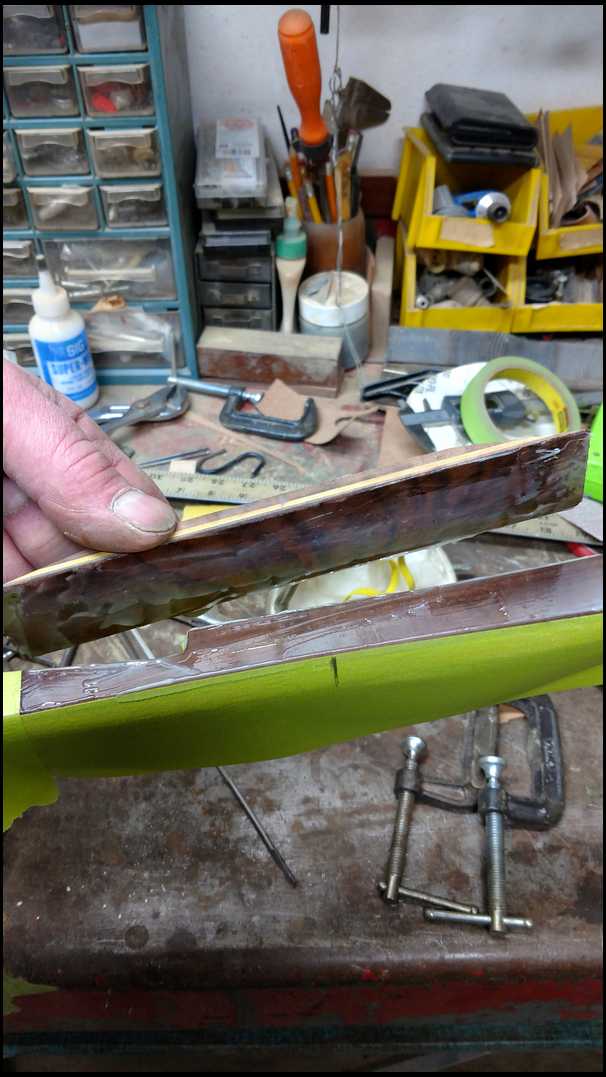
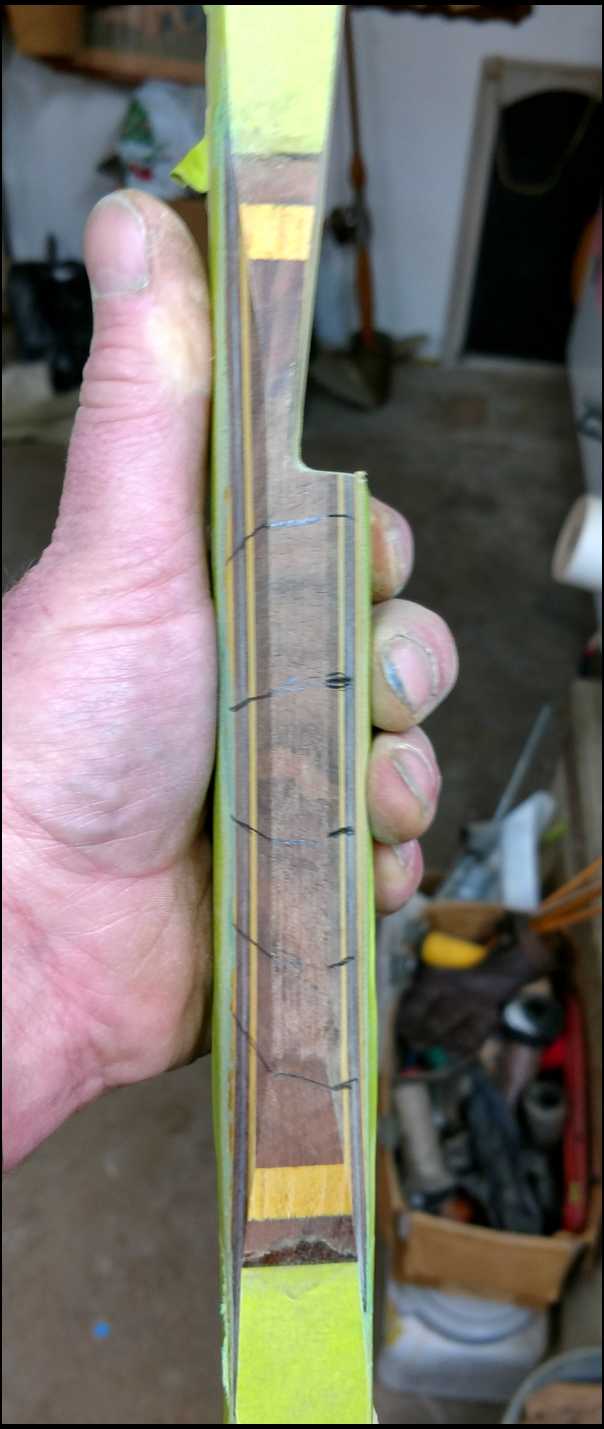
Now I have my width of 1.5" with everything together. The walnut pieces are the same thickness as well as the maple, to each other. I was told the Walnut can split out through the wild grain. That's why I choose to use it just on the outside. Osage and maple will make for a great center core.
|
|
| From: bodymanbowyer
|
|
|
|
|
|
|
| Date: 08-Jan-17 |
|
The Osage will not stay Gold forever. It'll turn a light Golden brown, in time. I'll glue this up tomorrow night. This will not be all. There will be more to the riser, coming later. JF
|
|
|
|
| From: Crow
|
|
|
|
|
|
|
| Date: 08-Jan-17 |
|
Hope I dont miss any of this. This is what I needed to see,since the thought of building a bow is intimidating.
|
|
|
|
| From: bodymanbowyer
|
|
|
|
|
|
|
| Date: 08-Jan-17 |
|
Crow, the riser doesn't have to be complicated and fancy. It can be simple as just one beautiful piece of wood. But I have visions :) JF
|
|
| From: Dry Bones
|
|
|
|
|
|
|
| Date: 08-Jan-17 |
|
Jeff your visions are.. well.. extra visionary to say the least. That is a good looking assembly. Not to side track the build a long, but when are you putting together a recurve form. ;-)
-Bones
|
|
| From: bodymanbowyer
|
|
|
|
|
|
|
| Date: 11-Jan-17 |
|
Allrighty, back at it. I put a couple spacers under the walnut,to let the Osage and maple stick out alittle on both sides. Since I don't have to much excess of walnut in height. JF
|
|
| From: bodymanbowyer
|
|
|
|
|
|
|
| Date: 11-Jan-17 |
|
I do this and clamp to get the walnut even. JF
|
|
| From: bodymanbowyer
|
|
|
|
|
|
|
| Date: 11-Jan-17 |
|
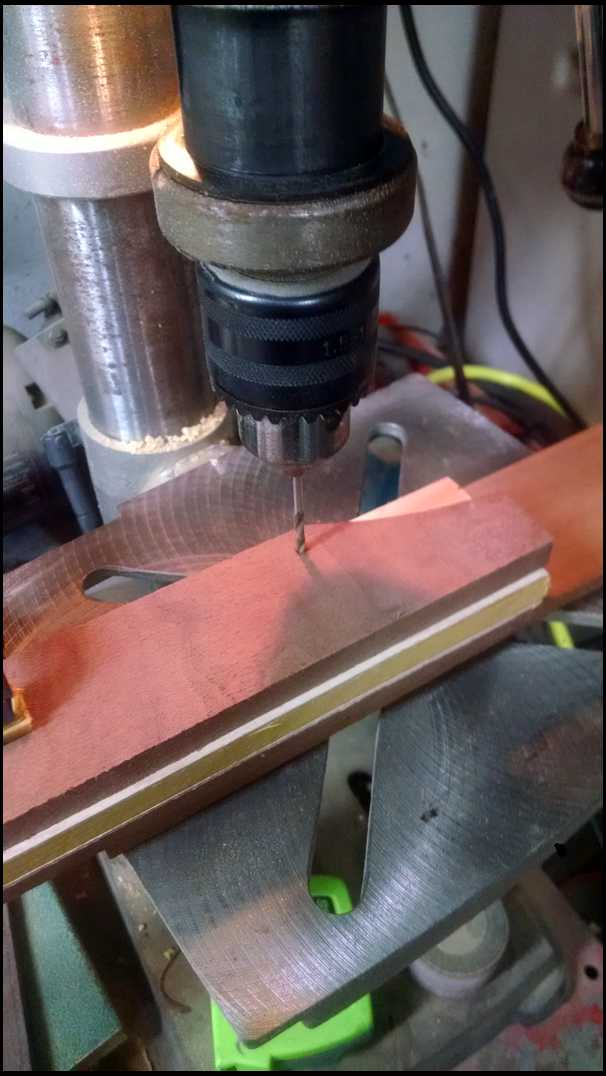
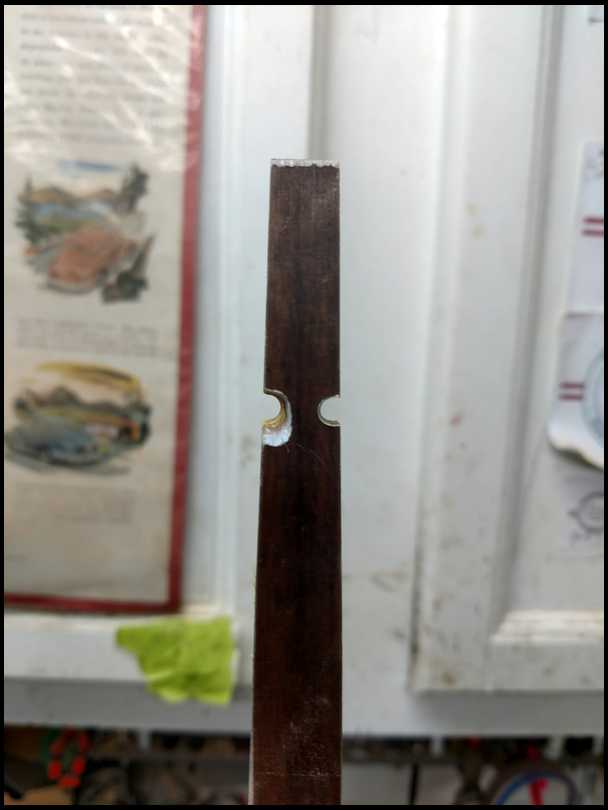
Instead of fighting the laminations sliding around, during glue up. I drill a 1/8" hole on each end. Where it won't be in the final riser. JF
|
|
| From: bodymanbowyer
|
|
|
|
|
|
|
| Date: 11-Jan-17 |
|
This is so I can put a 10D finish nail through the pieces, to line up during glue up. JF
|
|
|
|
| From: bodymanbowyer
|
|
|
|
|
|
|
| Date: 11-Jan-17 |
|
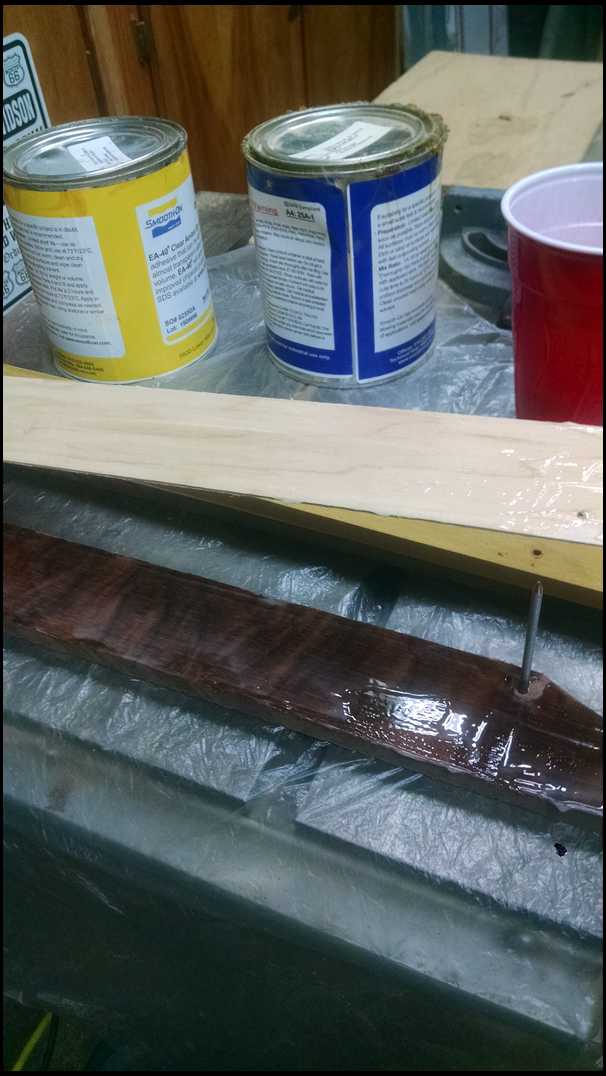
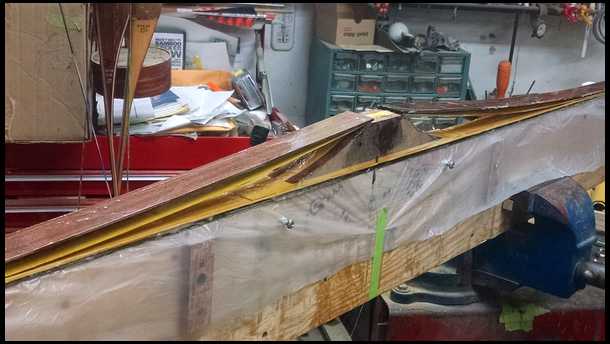
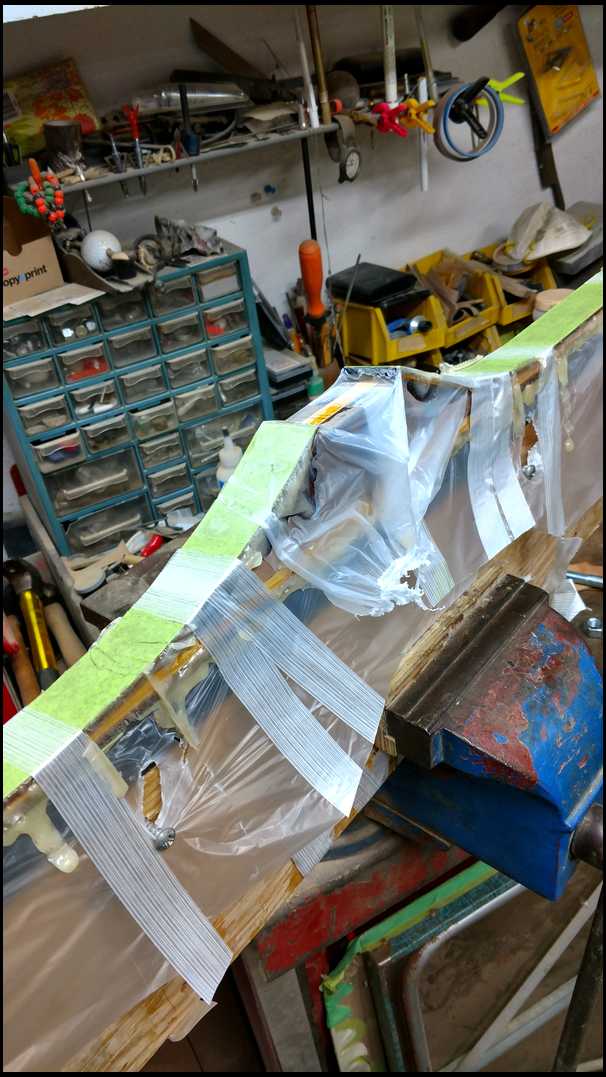
I mixed 2oz of smooth-on epoxy. Butter both mateing surfaces and stack, on to the next,and so on until all are stacked. JF
|
|
| From: bodymanbowyer
|
|
|
|
|
|
|
| Date: 11-Jan-17 |
|
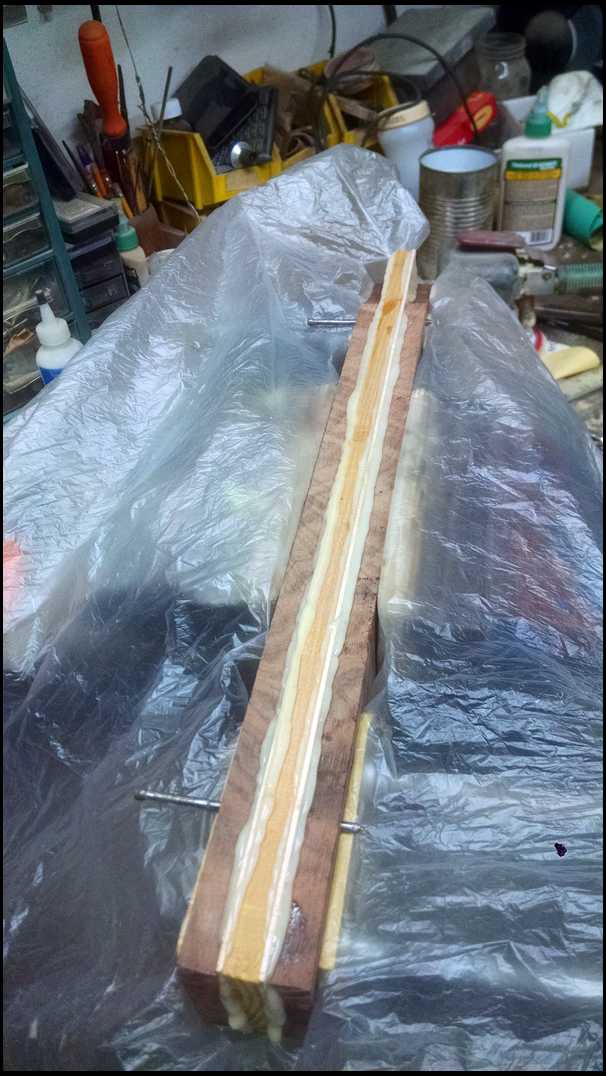
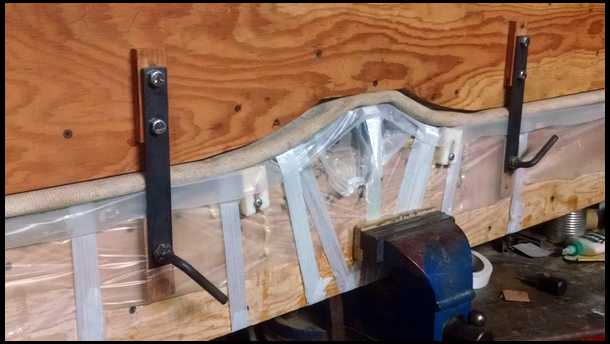
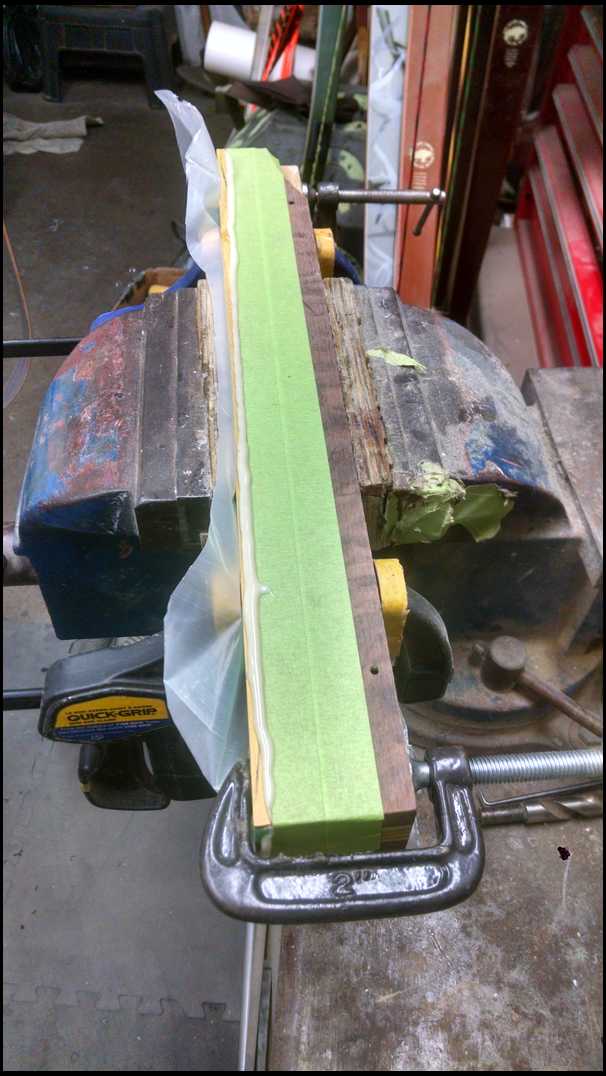
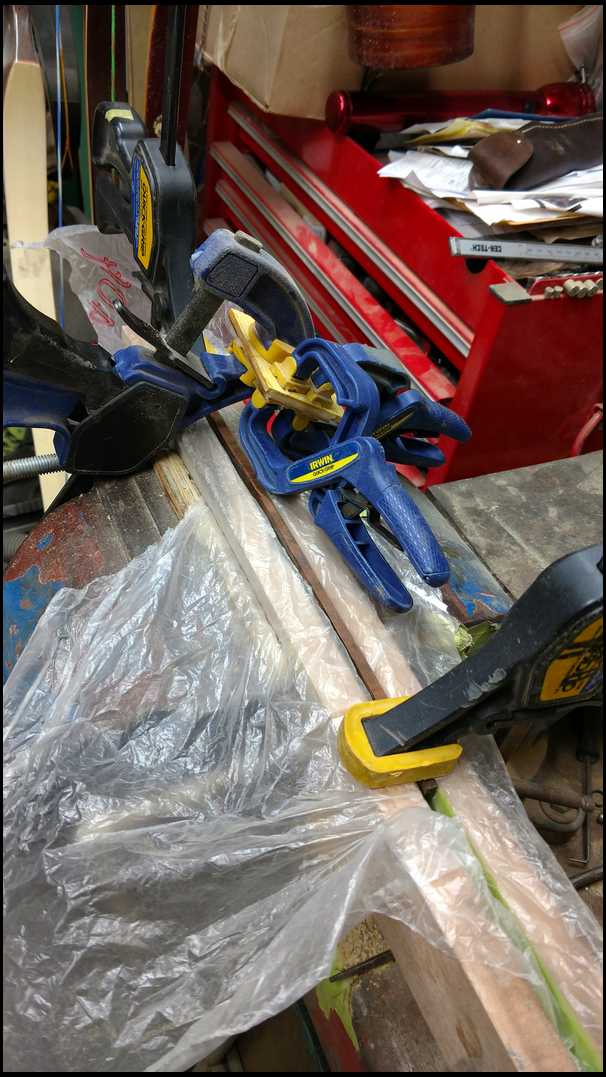
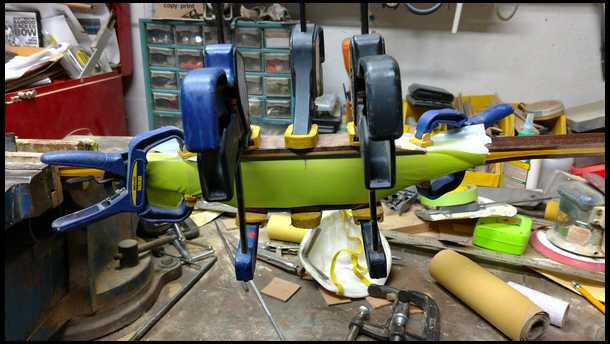
Set in vise and clamps, everthing wrapped in plastic,to keep from sticking. Snug all clamps. Don't tighten to much, just snug. Pull nails after tightening. Or they will be glued in to stay :) Let dry overnight. JF
|
|
| From: CD
|
|
|
|
|
|
|
| Date: 11-Jan-17 |
|
This is so cool!
|
|
| From: bodymanbowyer
|
|
|
|
|
|
|
| Date: 11-Jan-17 |
|
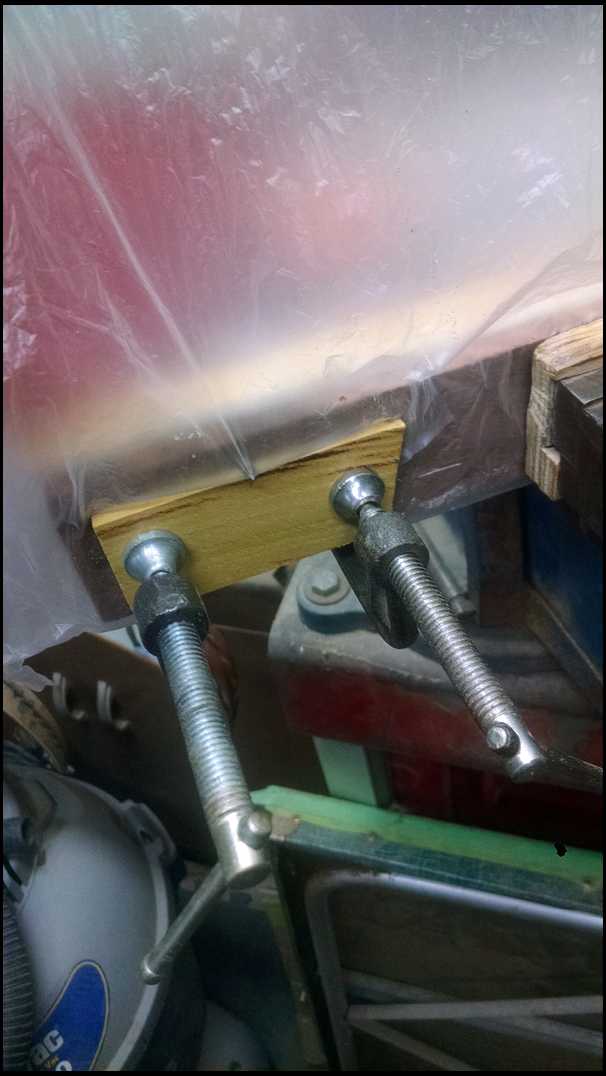
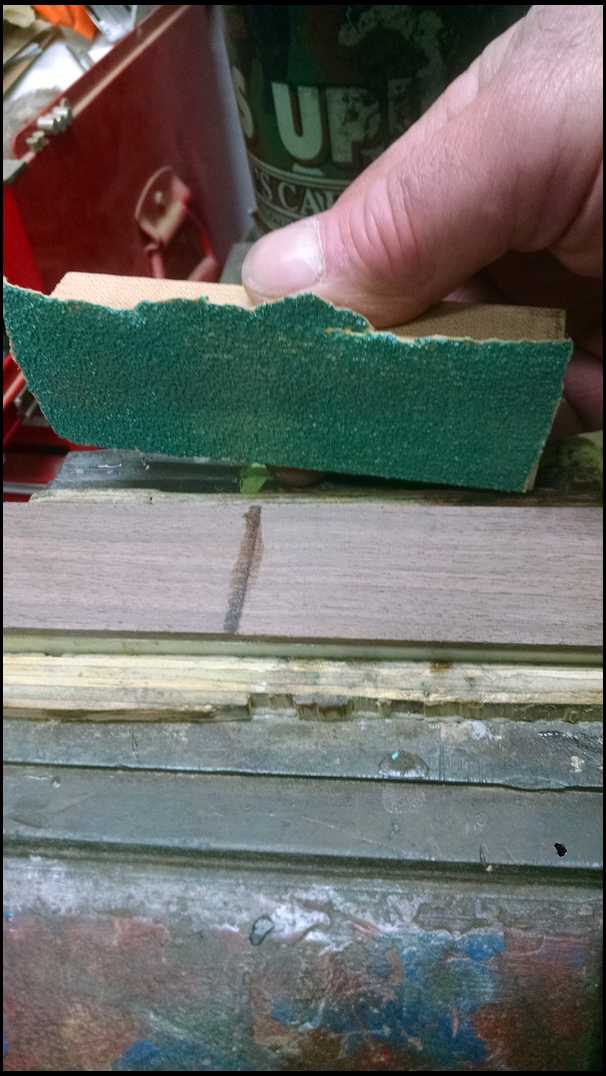
I put some small laminate leftovers under my clamps. To spread out the clamp pressure and so I don't chip the burl walnut. JF
|
|
| From: bodymanbowyer
|
|
|
|
|
|
|
| Date: 11-Jan-17 |
|
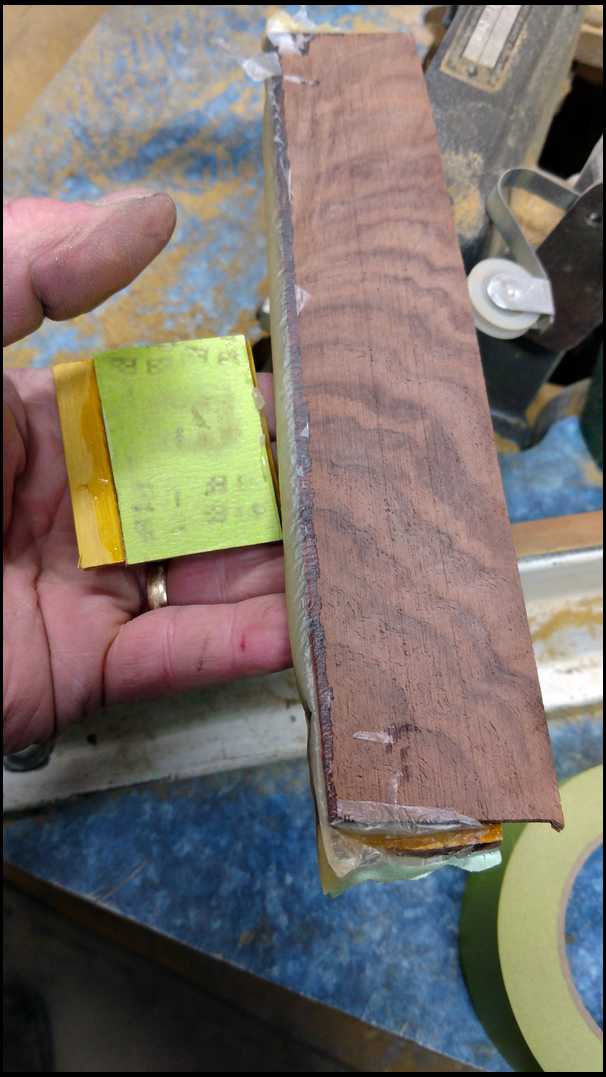
Don't forget to pull the alignment pins :) Now dry. JF
|
|
| From: bodymanbowyer
|
|
|
|
|
|
|
| Date: 11-Jan-17 |
|
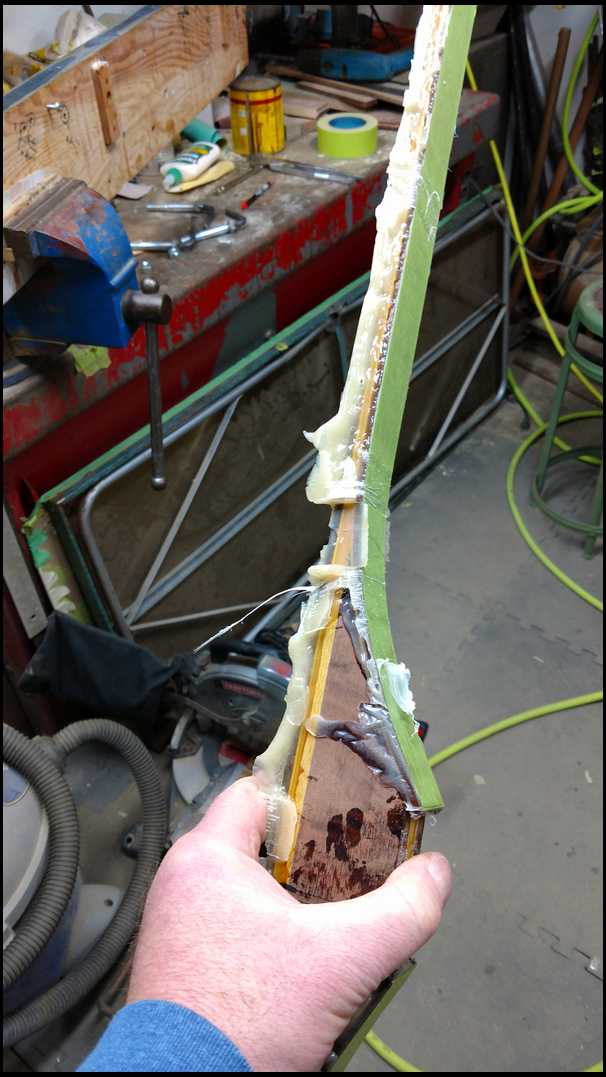
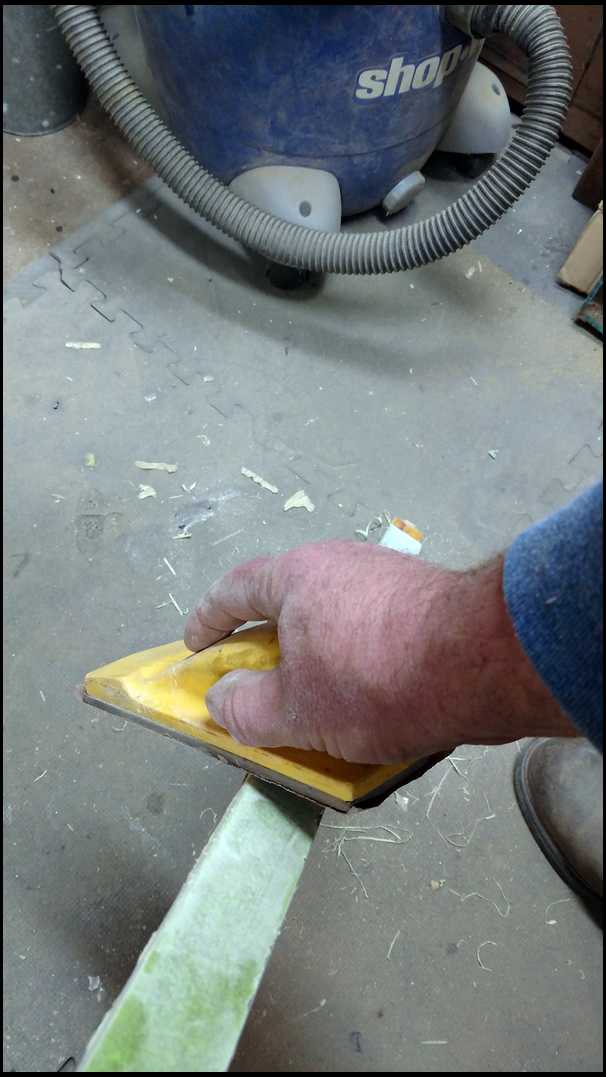
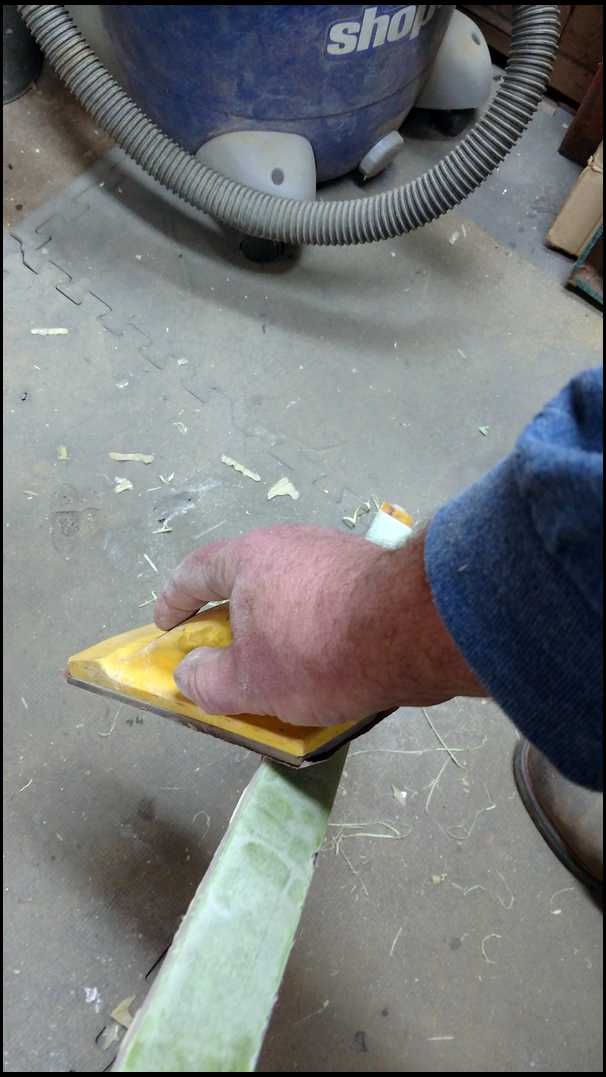
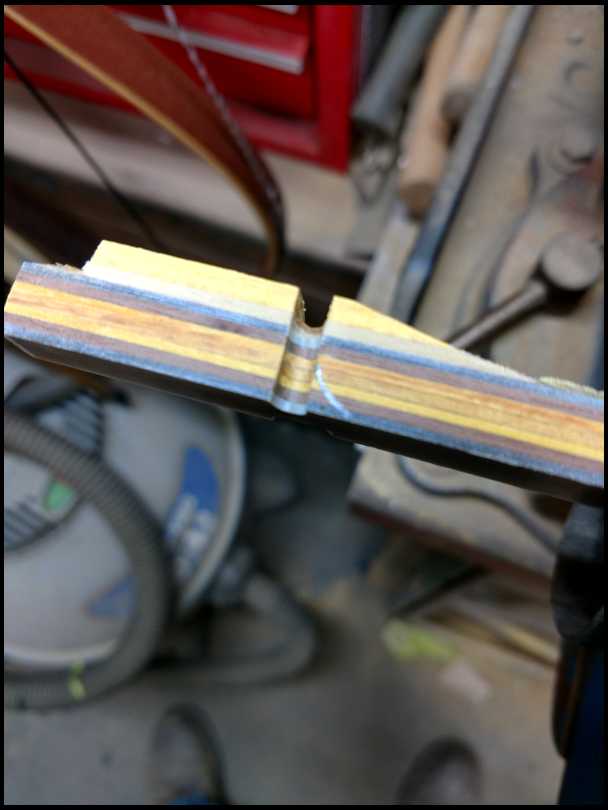
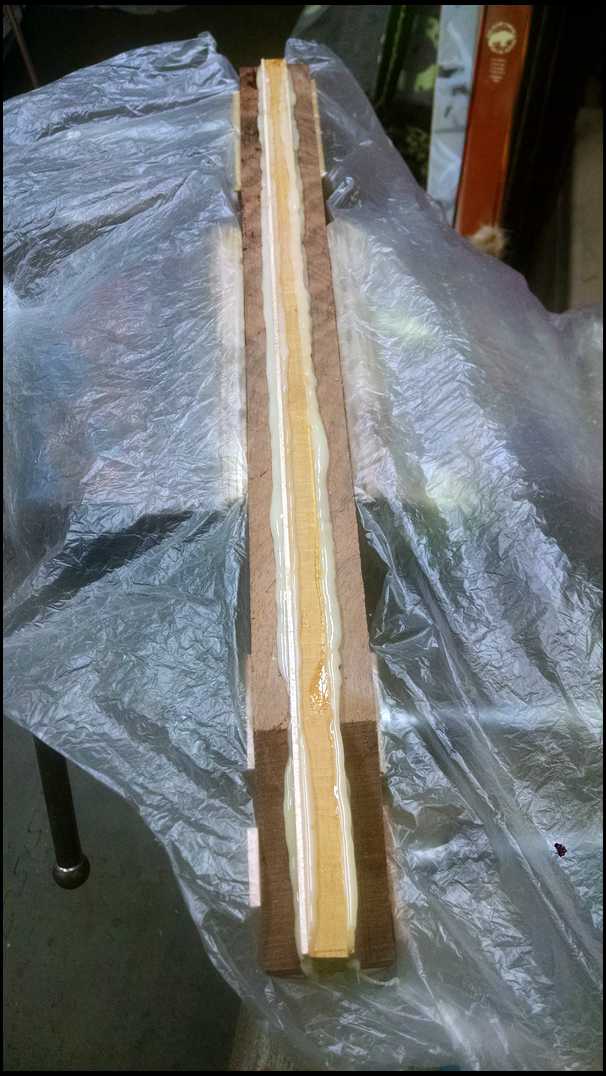
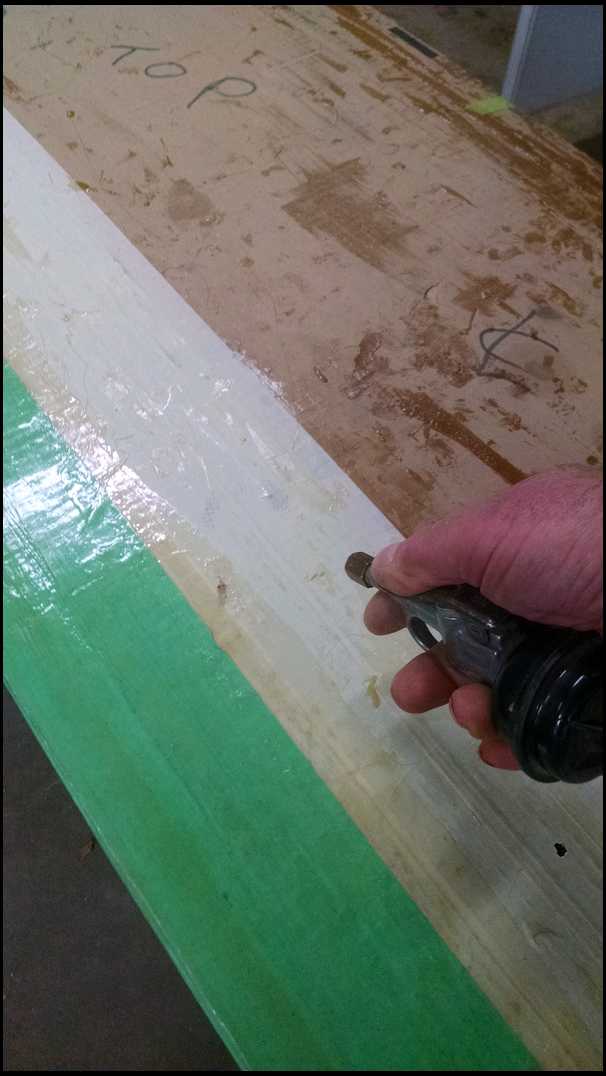
Next night it dry. Clean up the excess glue, on the edge grinder. The run it through against the fence, untill it's flush with the Walnut. JF
|
|
|
|
| From: bodymanbowyer
|
|
|
|
|
|
|
| Date: 11-Jan-17 |
|
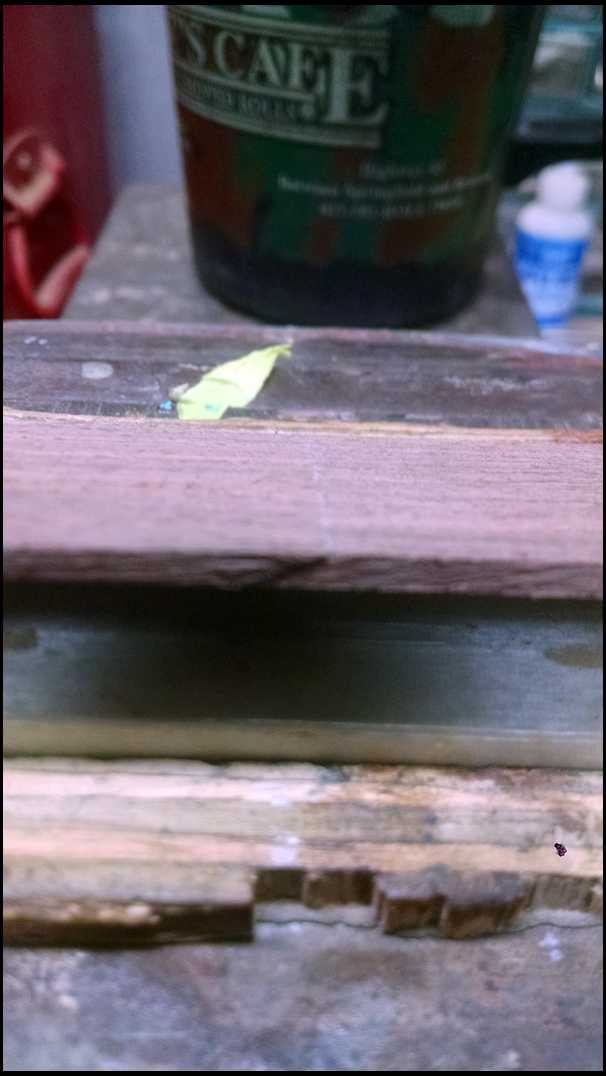
Since burl walnut could be prone to cracking. That's the reason I put a center of some other woods in it. Also I'm gonna foot the riser,it's what I call it. Putting a better strong wood on the back of the riser. JF
|
|
| From: bodymanbowyer
|
|
|
|
|
|
|
| Date: 11-Jan-17 |
|
About 3/16" of Osage as a stronger footing or power lam, what ever it's called. This will give it a stronger fadeout and give it the illusion of a thicker center core. I won't have to worry about the burl walnut breaking at the fade-outs. JF
|
|
| From: bodymanbowyer
|
|
|
|
|
|
|
| Date: 11-Jan-17 |
|
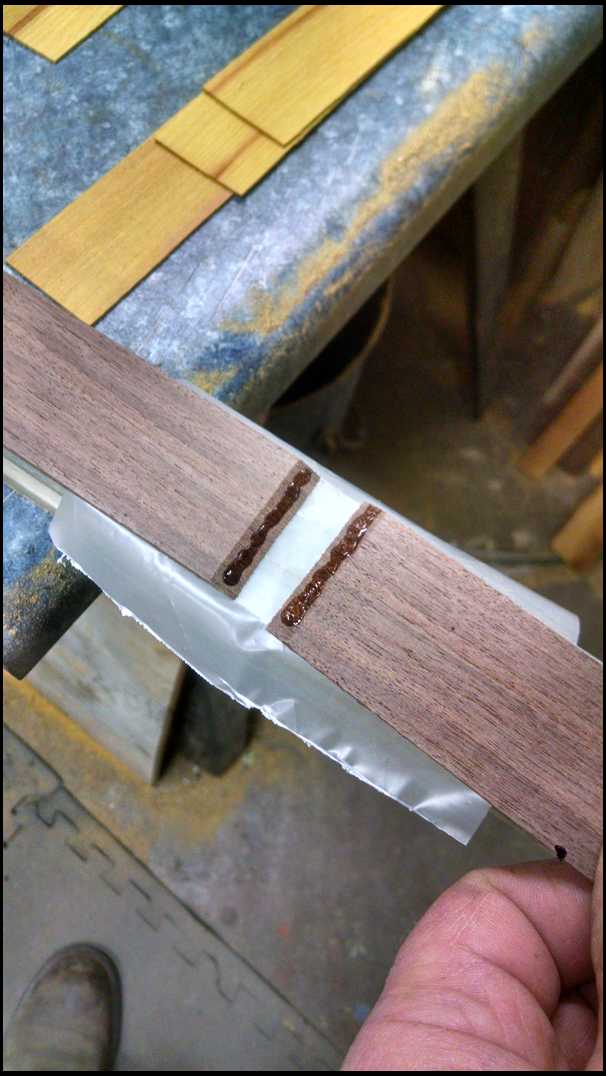
Mix an once of smooth-on epoxy and glue and clamp, overnight. JF
|
|
| From: bodymanbowyer
|
|
|
|
|
|
|
| Date: 11-Jan-17 |
|
This riser is footed. More coming tomorrow. JF
|
|
| From: mgerard
|
|
|

|
|
|
|
| Date: 11-Jan-17 |
|
Great pictures and explanations JF. Thanks.
|
|
| From: bodork
|
|
|
|
|
|
|
| Date: 12-Jan-17 |
|
This bow is gonna be a beauty. I can tell you first hand that this curly walnut is stunning. Jeff, would you mind licking a piece of it and showing a pic to give the followers a hint of it finished beauty? That's the first thing I did with the stuff you sent me! Okay, you can wet it however you want. LOL
|
|
| From: bodymanbowyer
|
|
|
|
|
|
|
| Date: 12-Jan-17 |
|
Bodork :) lol I'll try at least my tongue won't Stick, like the flag pole did ;) lol JF
|
|
| From: Dry Bones
|
|
|
|
|
|
|
| Date: 12-Jan-17 |
|
Lookin good Jeff. Fun watching one come together.
-Bones
|
|
| From: Old School
|
|
|
|
|
|
|
| Date: 12-Jan-17 |
|
Definitely a "favorites" thread, thanks Jeff!
|
|
| From: Matt Ewing
|
|
|
|
|
|
|
| Date: 12-Jan-17 |
|
He said lick a piece. Lol Looks great Jeff!
|
|
| From: Greyfox
|
|
|
|
|
|
|
| Date: 12-Jan-17 |
|
Looking good.
|
|
| From: bodymanbowyer
|
|
|
|
|
|
|
| Date: 12-Jan-17 |
|
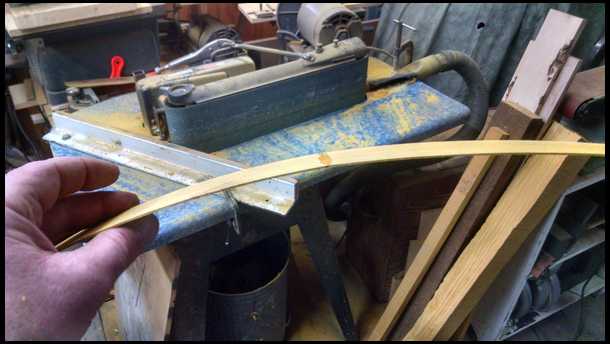
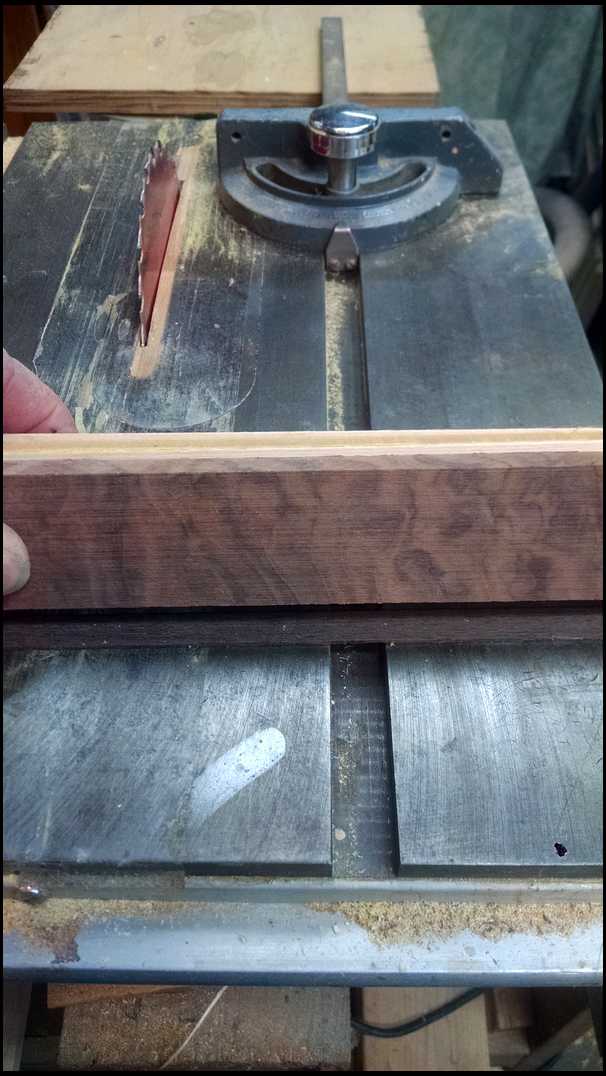
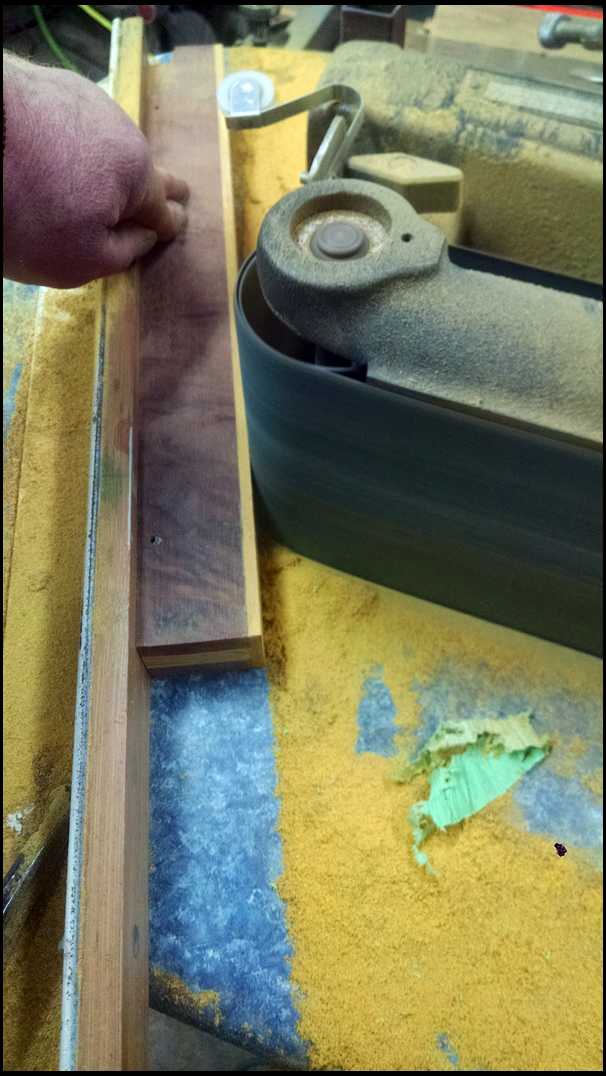
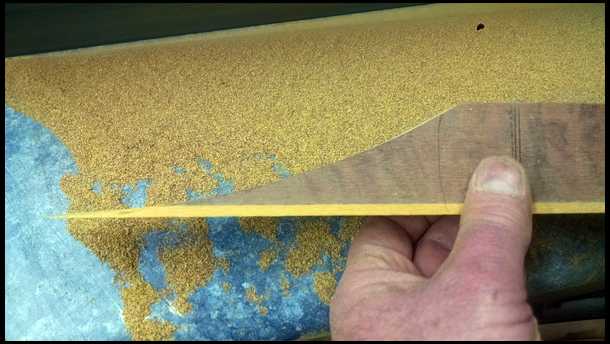
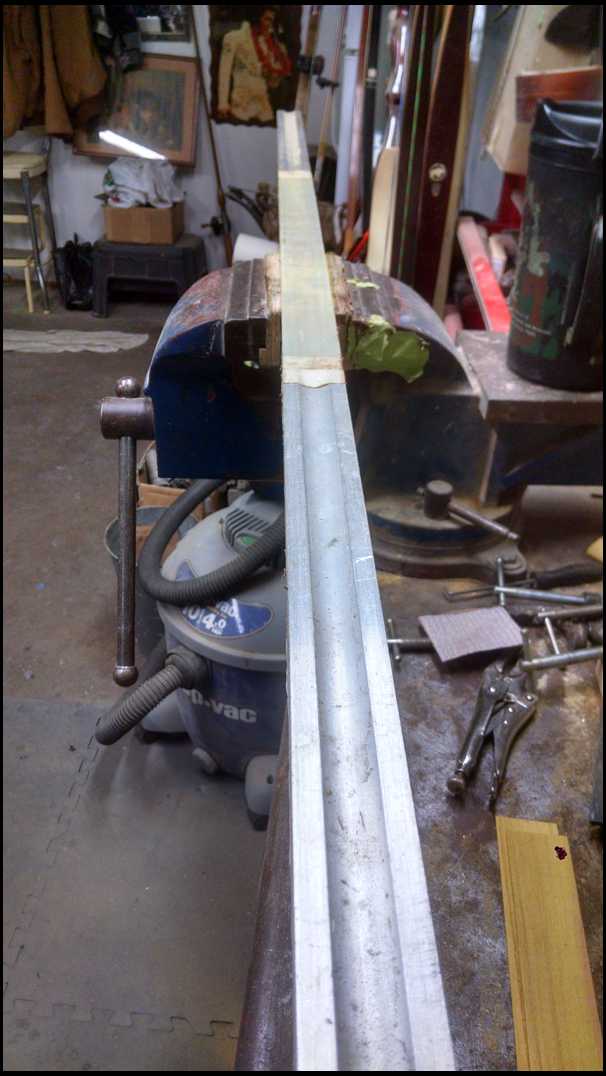
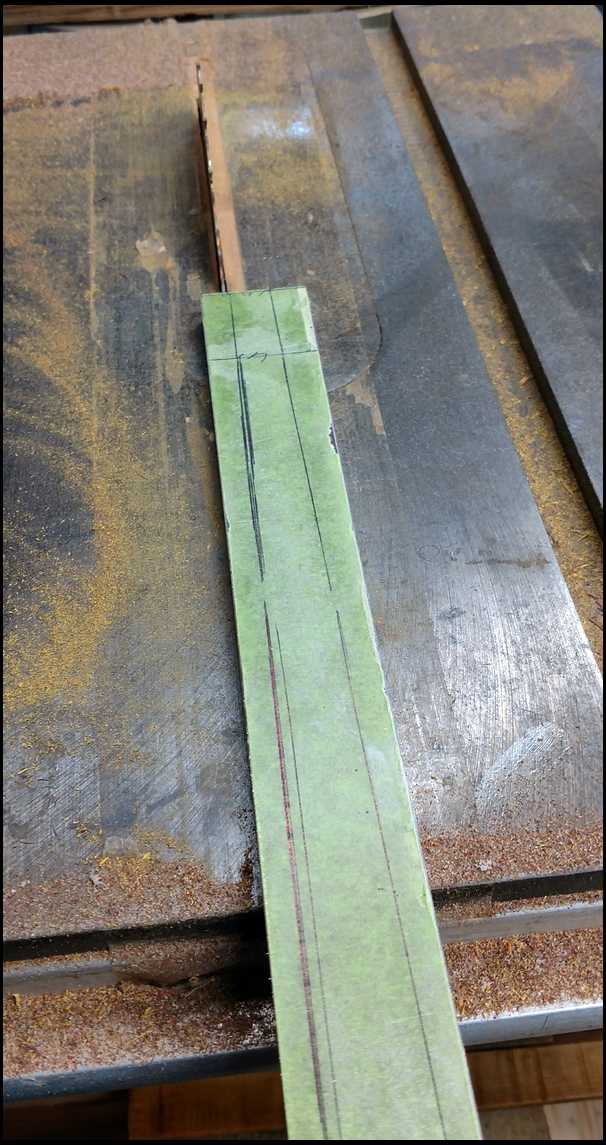
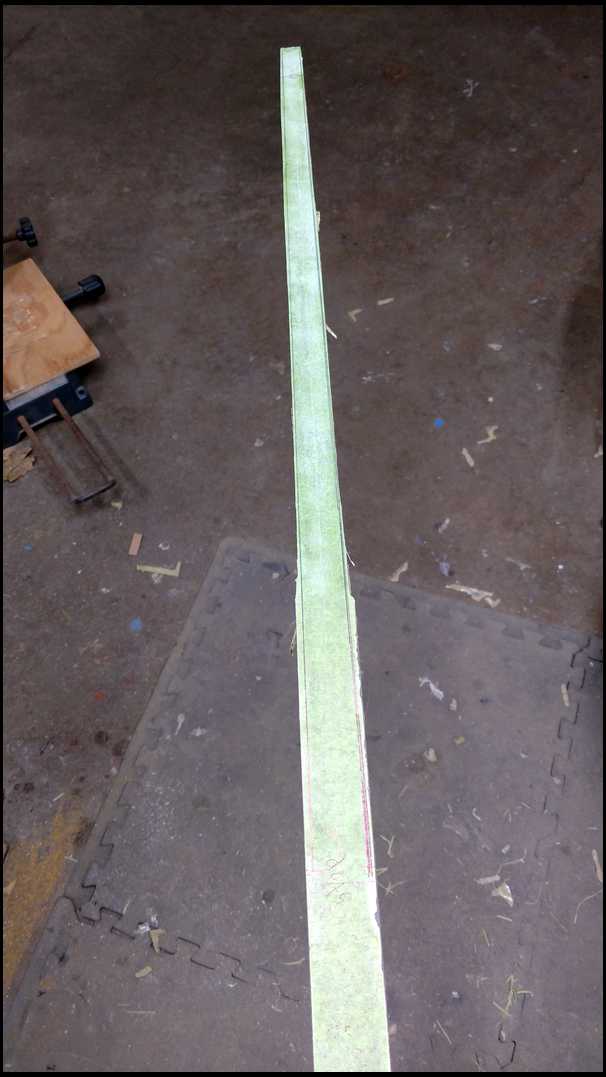
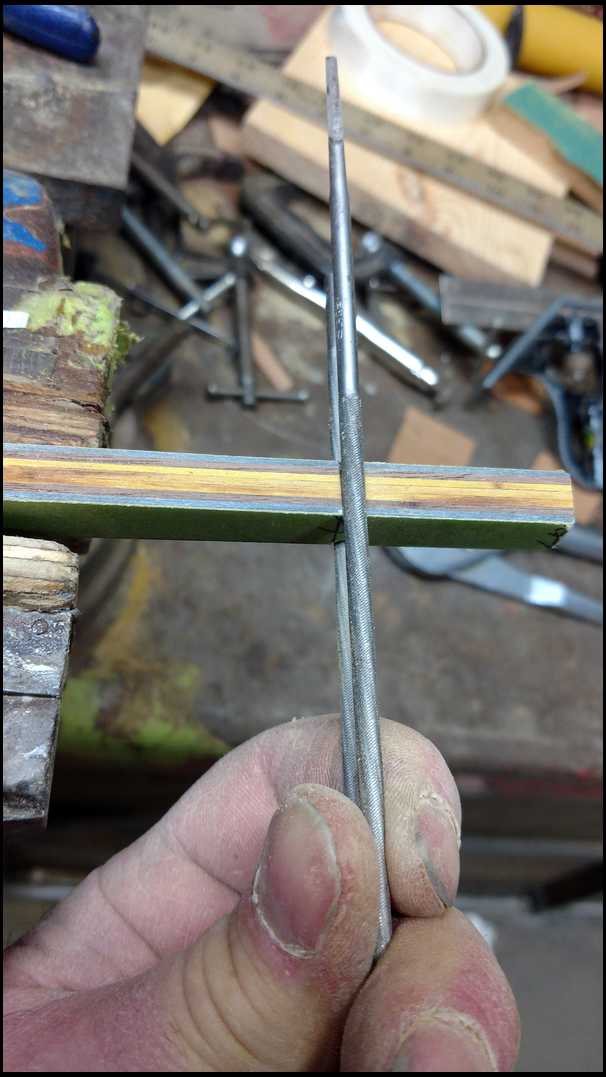
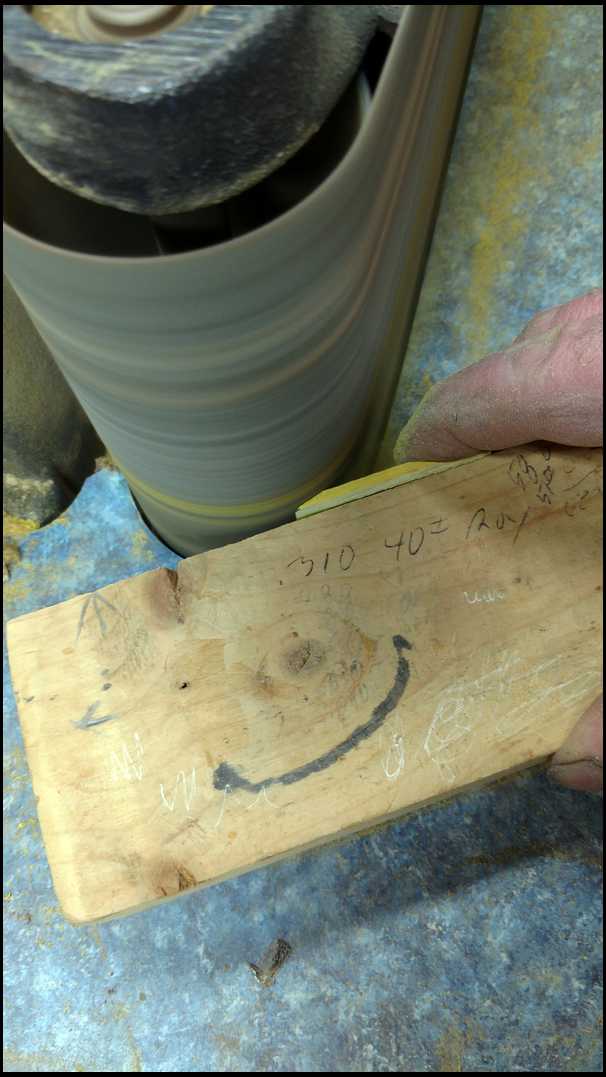
OK, while the riser stack is curing. I'll get started on the limb laminations. Missouri Walnut and Iowa Osage will be the limbs. I squared up the walnut,to a thickness of 1.5" I did this by running it through my edge grinder. JF
|
|
| From: bodymanbowyer
|
|
|
|
|
|
|
| Date: 12-Jan-17 |
|
Nice and straight. Ready to rip some laminations. JF
|
|
| From: bodymanbowyer
|
|
|
|
|
|
|
| Date: 12-Jan-17 |
|
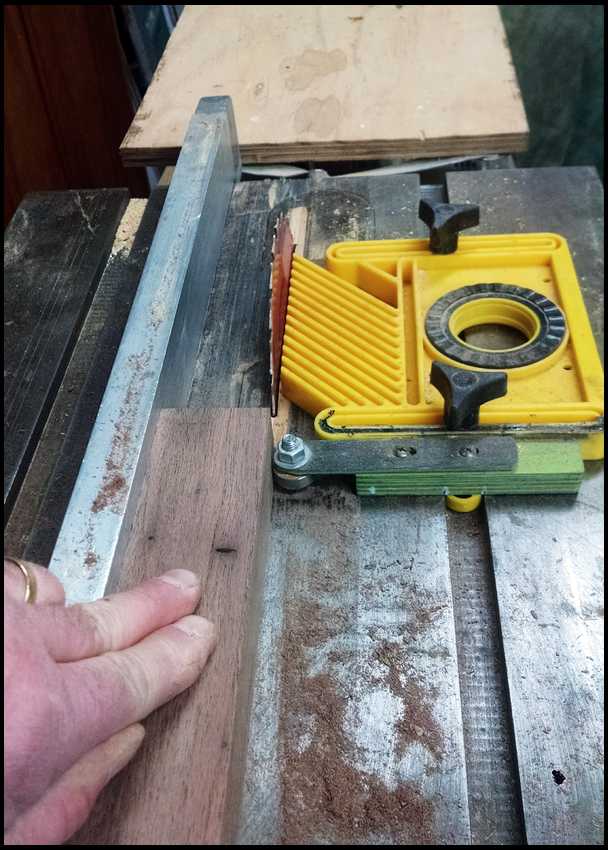
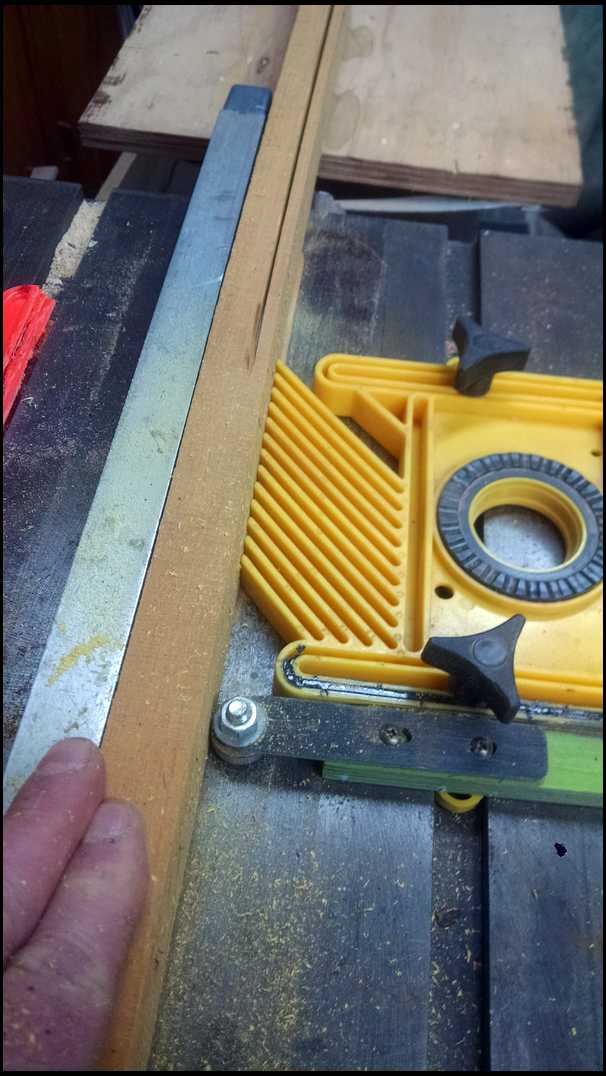
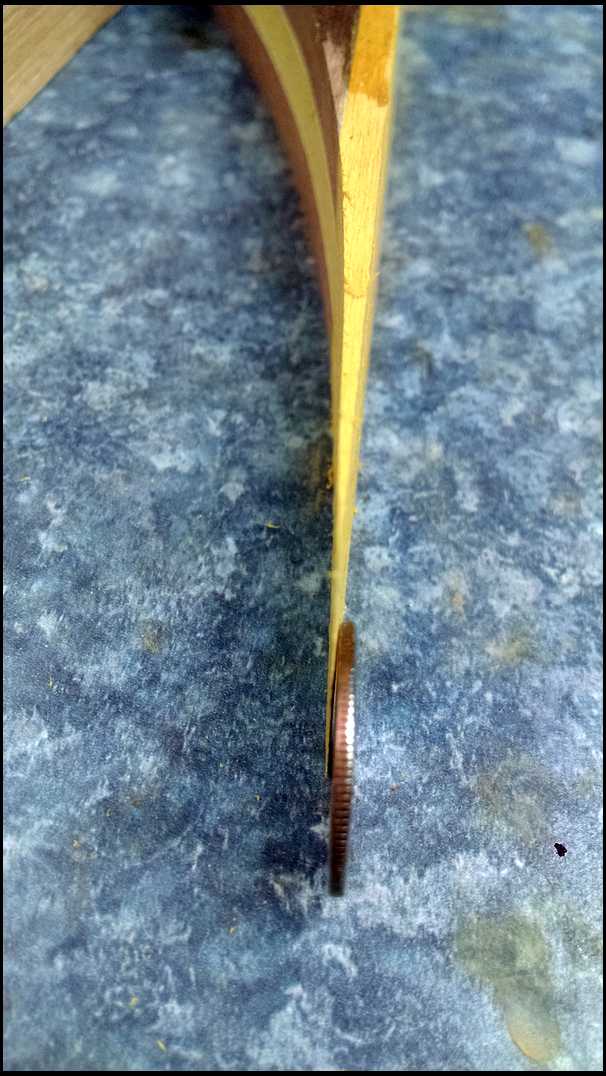
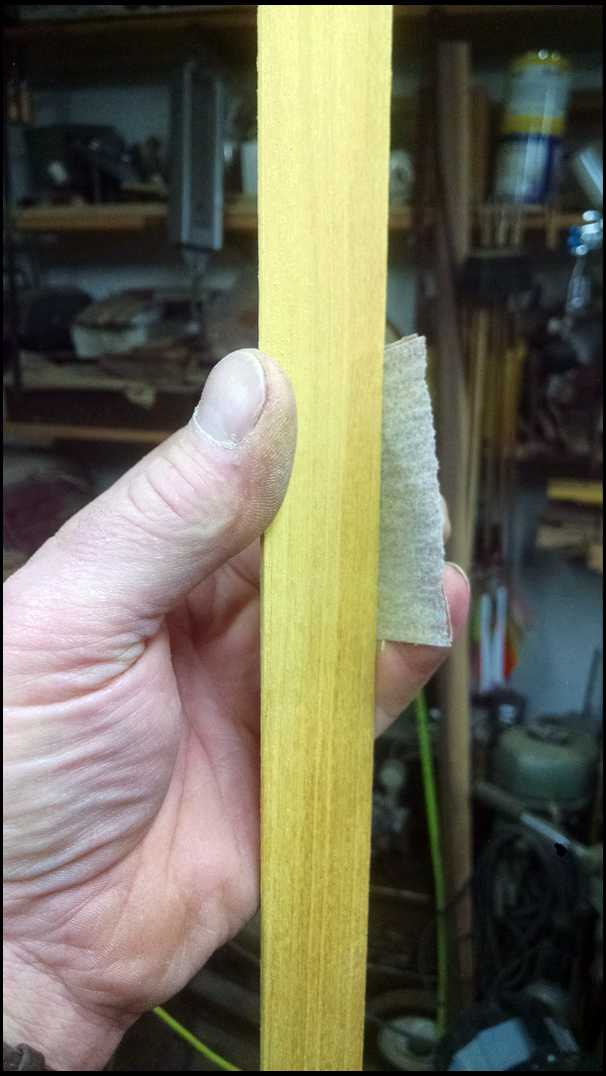
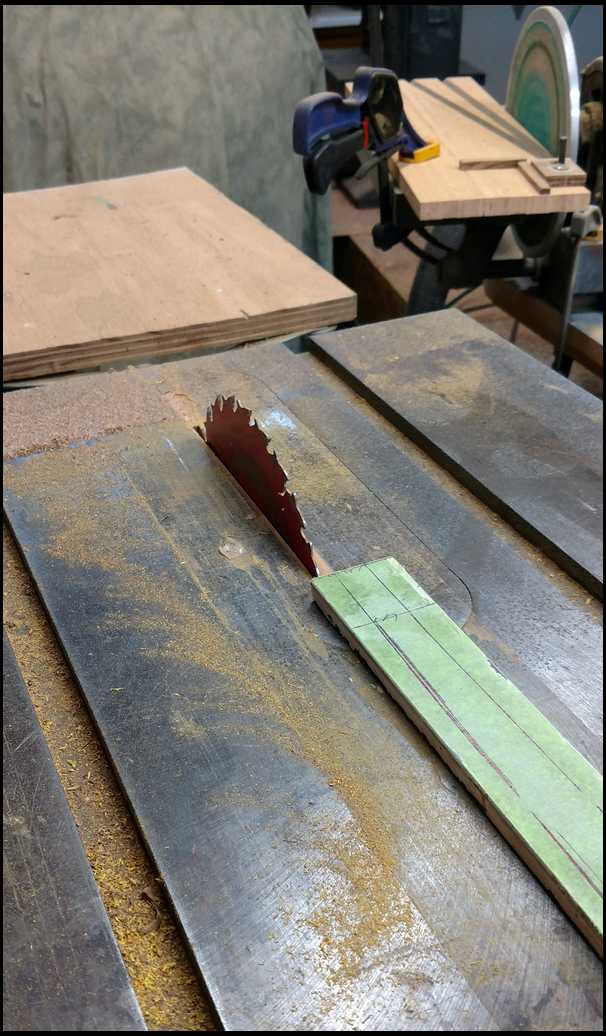
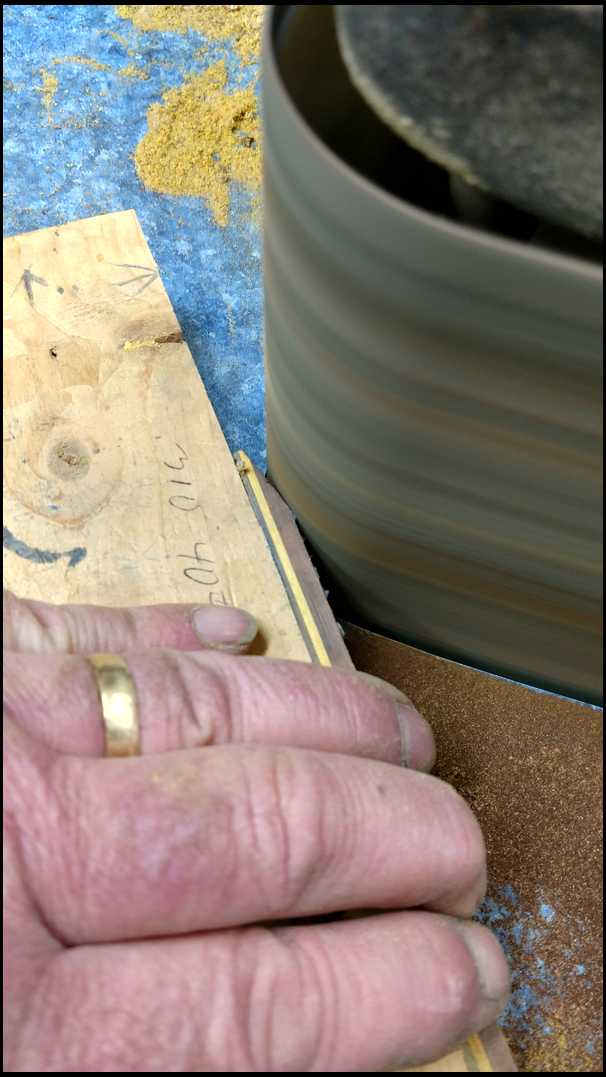
I want the limbs to be vertical grain, this makes it closer to actionwood or actionboo. Should help control twist and give greater strength. I added a adjustable bearing to a feather board. I adjust the feather board left towards the blade for thinner laminations. JF
|
|
| From: bodymanbowyer
|
|
|
|
|
|
|
| Date: 12-Jan-17 |
|
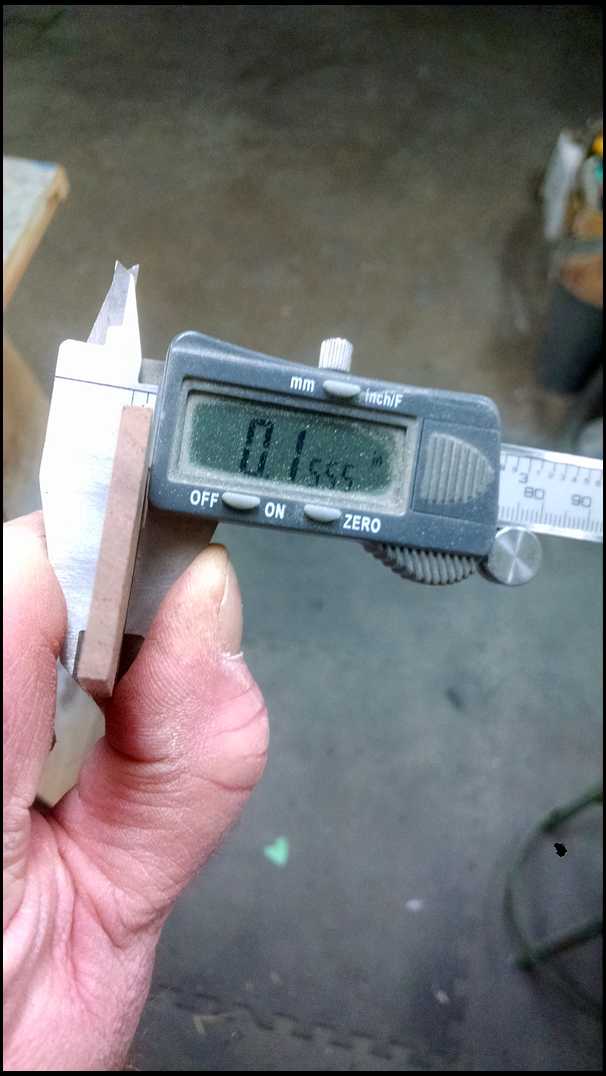
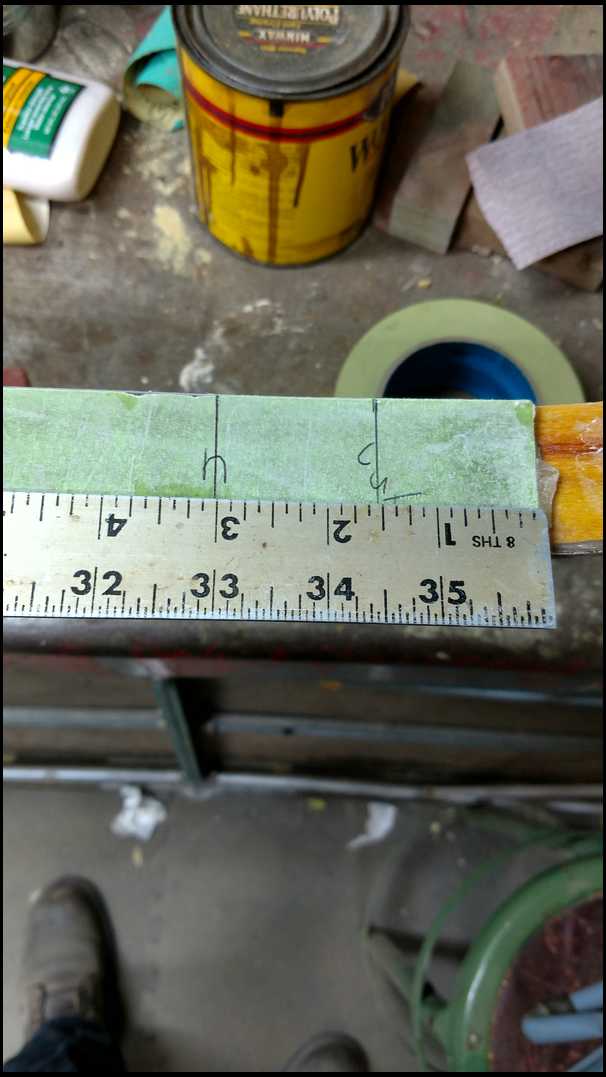
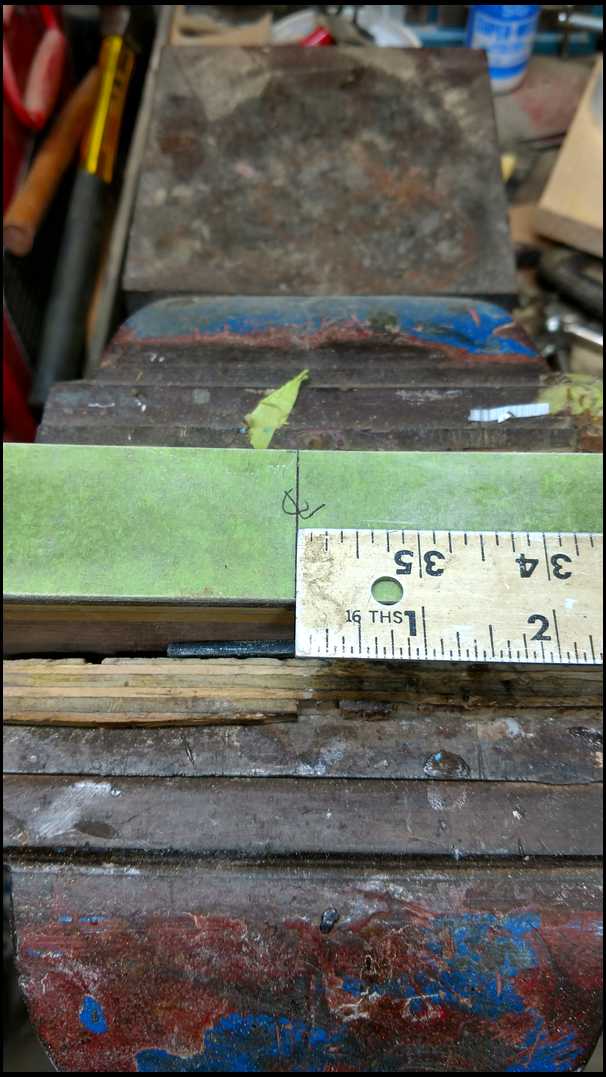
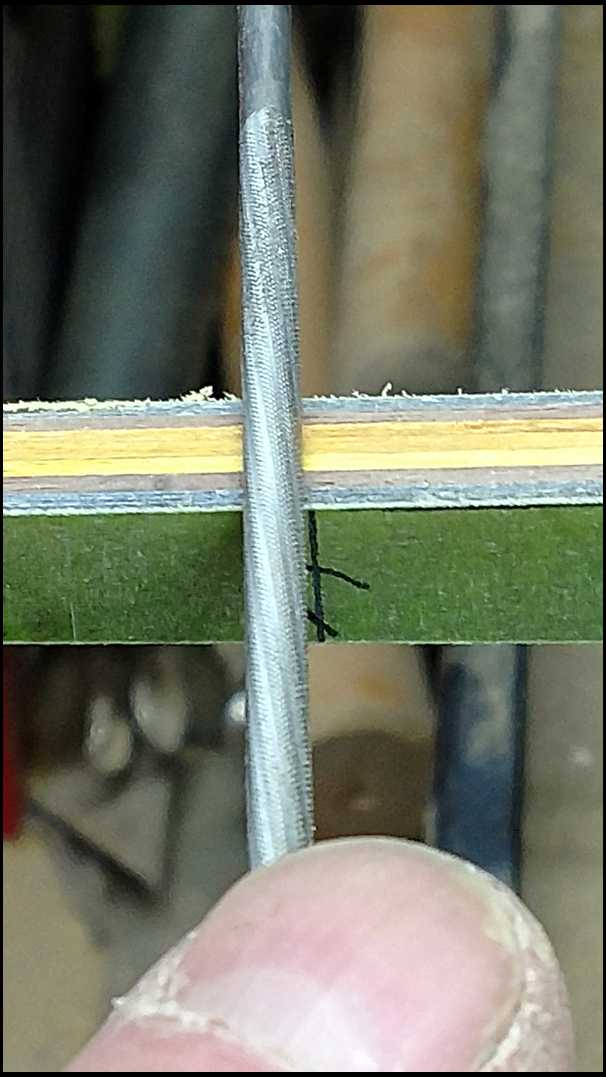
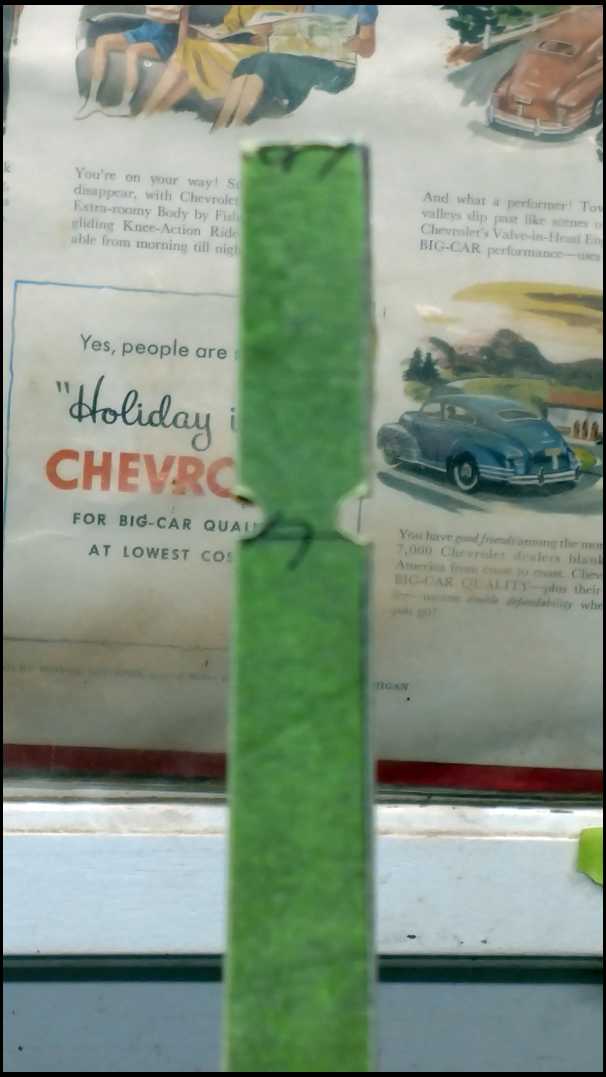
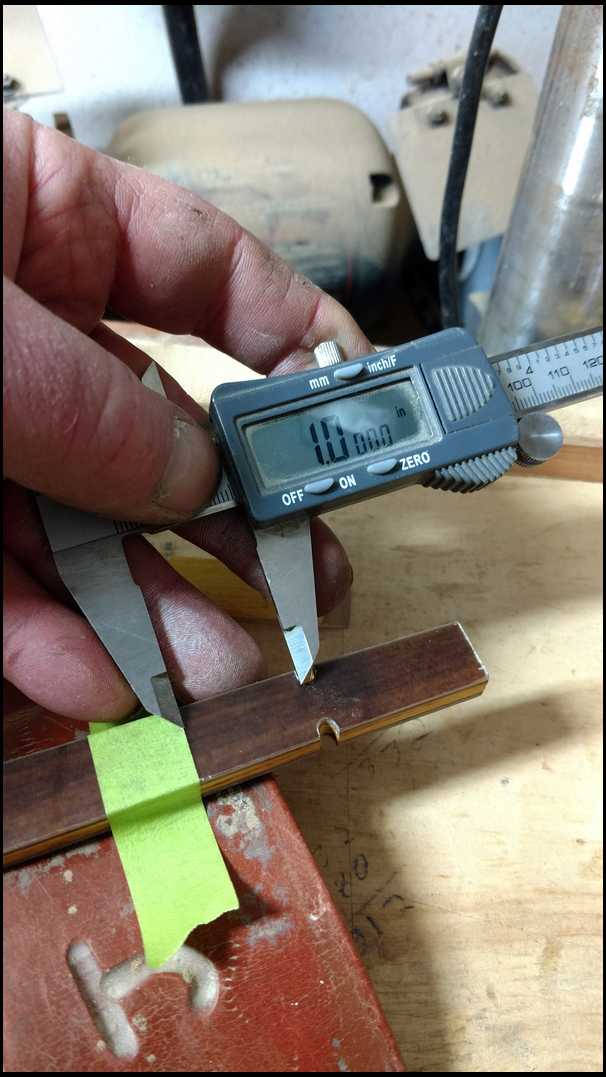
First cut .155 I need to move it left a little. JF
|
|
| From: bodymanbowyer
|
|
|
|
|
|
|
| Date: 12-Jan-17 |
|
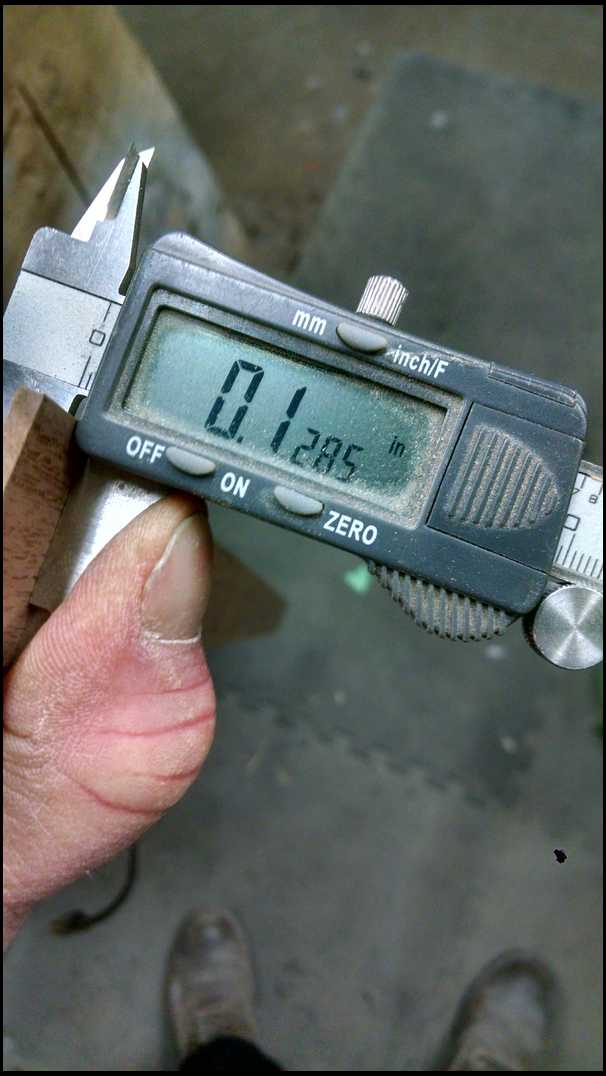
.128 that's better. Now all I have to do is keep move the fence to the right after each cut. JF
|
|
| From: bodymanbowyer
|
|
|
|
|
|
|
| Date: 12-Jan-17 |
|
Last cut, I got lucky and ended up with all the same size or dang close. JF
|
|
| From: bodymanbowyer
|
|
|
|
|
|
|
| Date: 12-Jan-17 |
|
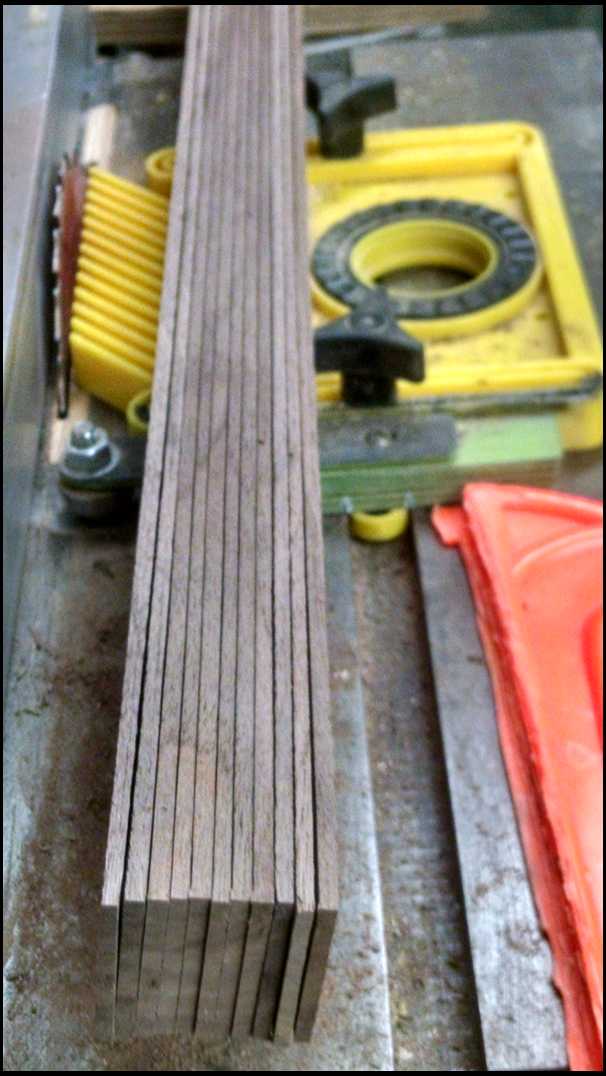
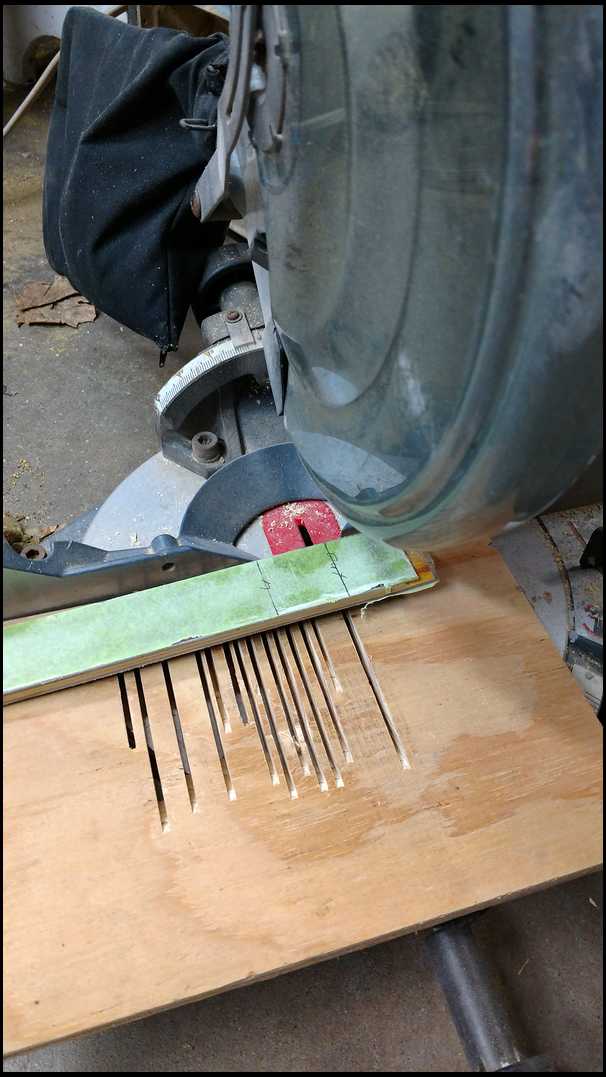
11 laminations from that peice, I only need 4 of the best ones. There all good but I can pick what I want. JF
|
|
| From: Longcruise
|
|
|
|
|
|
|
| Date: 12-Jan-17 |
|
Great build along. The anti squirm nails went off like a strobe in my brain.:). Have only done one lammed riser and it ended well, but wish I'd known about the nails.
Keep up the good work.
|
|
| From: bodymanbowyer
|
|
|
|
|
|
|
| Date: 12-Jan-17 |
|
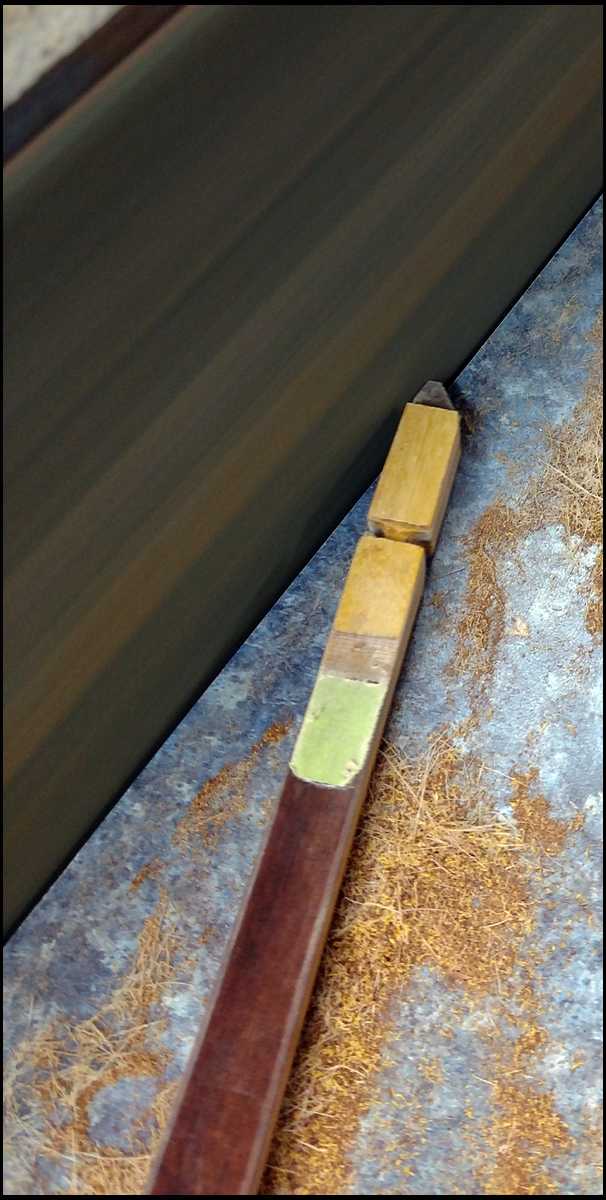
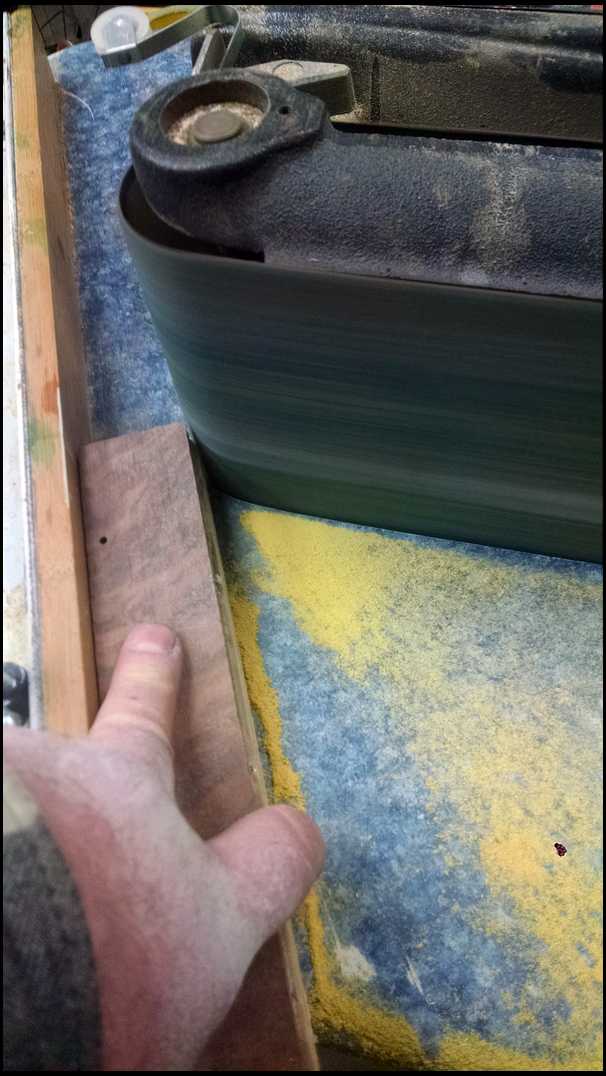
Now that all the laminations have been cut. Next it's over to the edge grinder -the lamination grinder. I'll be using a parallel sled first to true them to .120 After the have been tried, the Walnut lams will get ground on a .002 taper sled. JF
|
|
| From: bodymanbowyer
|
|
|
|
|
|
|
| Date: 12-Jan-17 |
|
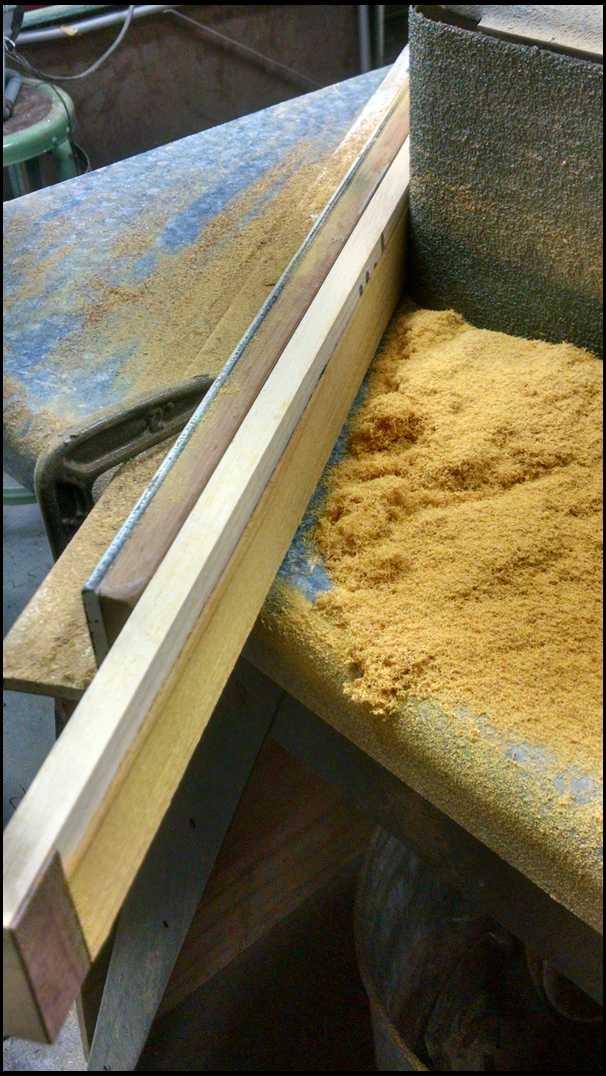
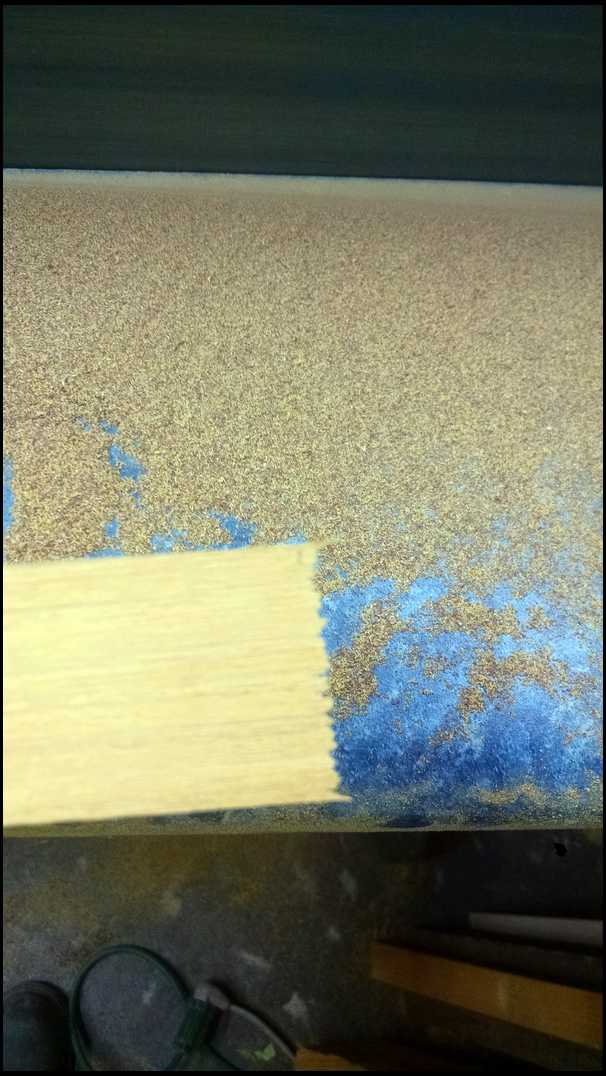
Making grinder dust with 36grit. JF
|
|
| From: bodymanbowyer
|
|
|
|
|
|
|
| Date: 12-Jan-17 |
|
All the laminations are ground. I'll have a stack thickness at the fade- outs of .468 for a 55# Bow,with a 16" riser. Narrow,thick limbs on a 66" flat longbow. Jf
|
|
| From: neuse
|
|
|
|
|
|
|
| Date: 13-Jan-17 |
|
Thank you for doing this, alot of work on your part taking and posting all the picturtes.
|
|
| From: Dry Bones
|
|
|
|
|
|
|
| Date: 13-Jan-17 |
|
All that beautiful gold dust. Must be doing a little grinding on that osage. :-) What do you do with all the sawdust?
-Bones
|
|
| From: bodymanbowyer
|
|
|
|
|
|
|
| Date: 13-Jan-17 |
|
Longcruise, I had to chuck up the nail in the drill press and polish it with some 80 grit on a board so it fit the 1/8" hole easier. JF
|
|
| From: Greyfox
|
|
|
|
|
|
|
| Date: 13-Jan-17 |
|
Looking great.
|
|
| From: PaPa Doc
|
|
|
|
|
|
|
| Date: 13-Jan-17 |
|
When do I pick it up! Lol
|
|
| From: PaPa Doc
|
|
|
|
|
|
|
| Date: 13-Jan-17 |
|
When do I pick it up! Lol
|
|
| From: bodymanbowyer
|
|
|
|
|
|
|
| Date: 13-Jan-17 |
|
More cool stuff coming after dinner, stay tuned :) JF
|
|
| From: bodymanbowyer
|
|
|
|
|
|
|
| Date: 13-Jan-17 |
|
Dan, I'm using a course cut wet lumber blade made by Diablo. Home depot has them. Works great and I've cut a lot with it even fiber glass. A local guy hal9000 'Tom Morrel' told me about it. I've a spare but haven't felt the need to change yet. On your table saw make sure your fence is slightly wider on the exit end, 1/32-1/16" JF
|
|
| From: bodymanbowyer
|
|
|
|
|
|
|
| Date: 13-Jan-17 |
|
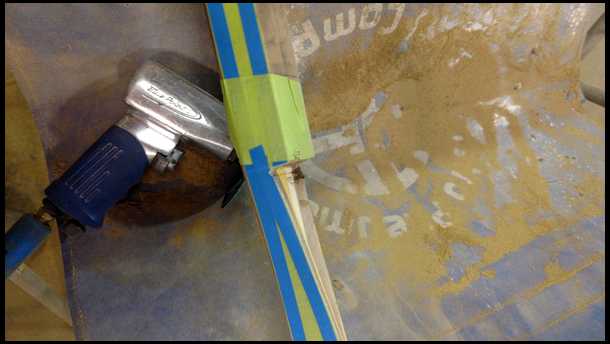
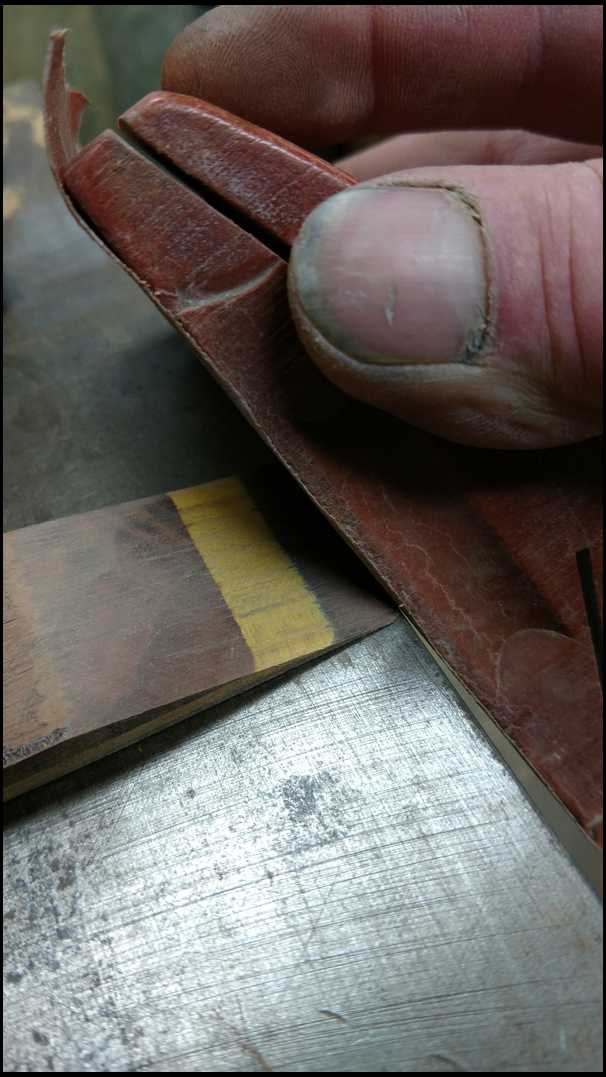
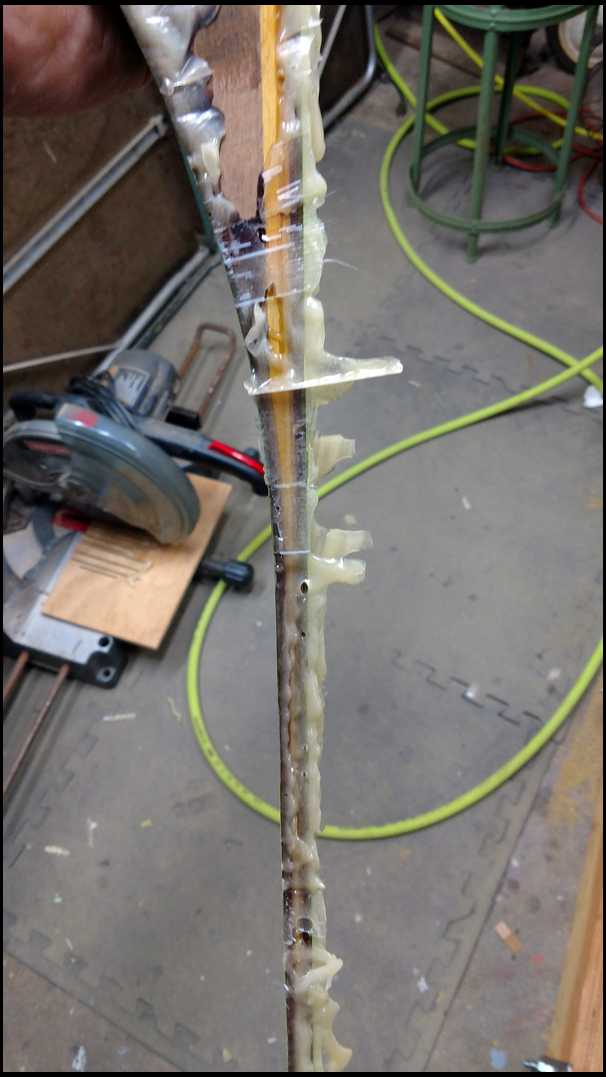
Cleaning off the excess glue on the sides. Just a little off the sides. JF
|
|
| From: bodymanbowyer
|
|
|
|
|
|
|
| Date: 13-Jan-17 |
|
Now I'm taking the tape off the bottom and a little bit of glue and wood. JF
|
|
| From: bodymanbowyer
|
|
|
|
|
|
|
| Date: 13-Jan-17 |
|
Running everything through the edge grinder, keeps it all square. JF
|
|
| From: bodymanbowyer
|
|
|
|
|
|
|
| Date: 13-Jan-17 |
|
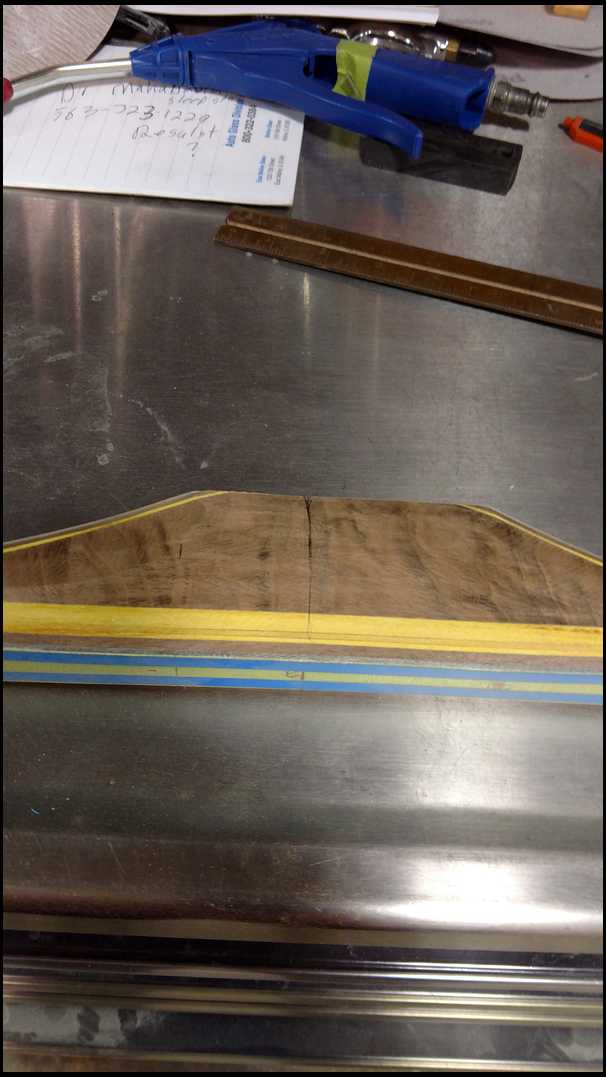
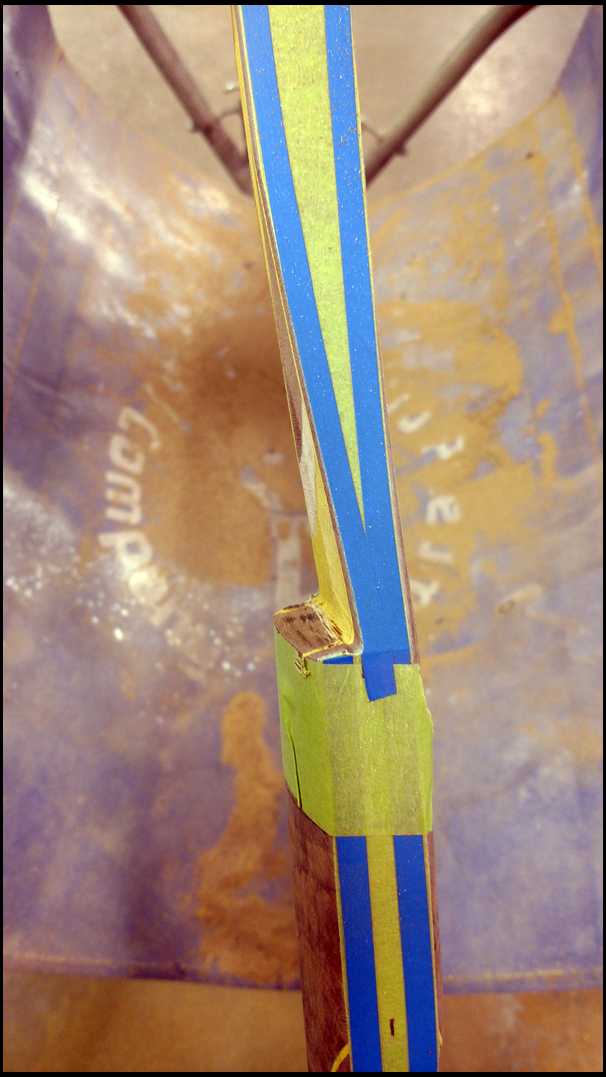
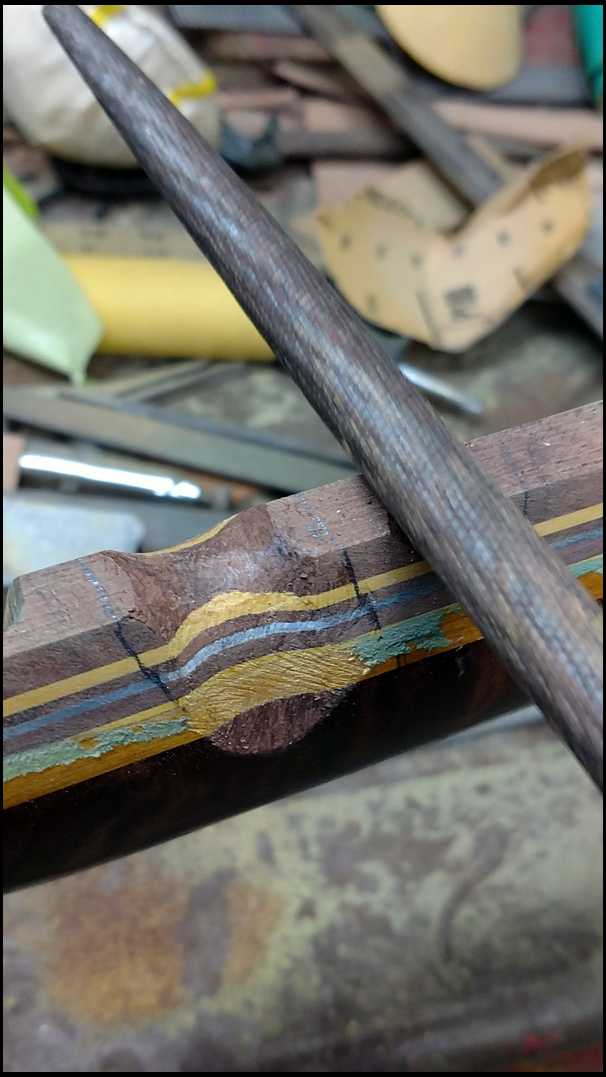
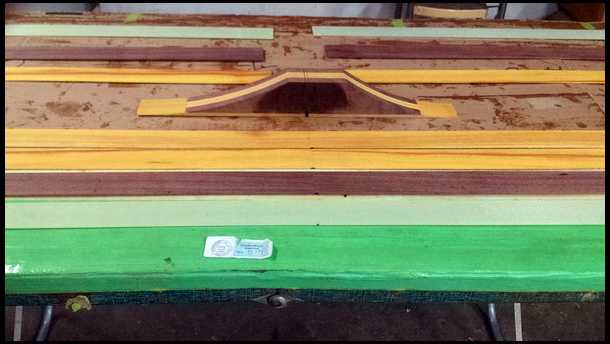
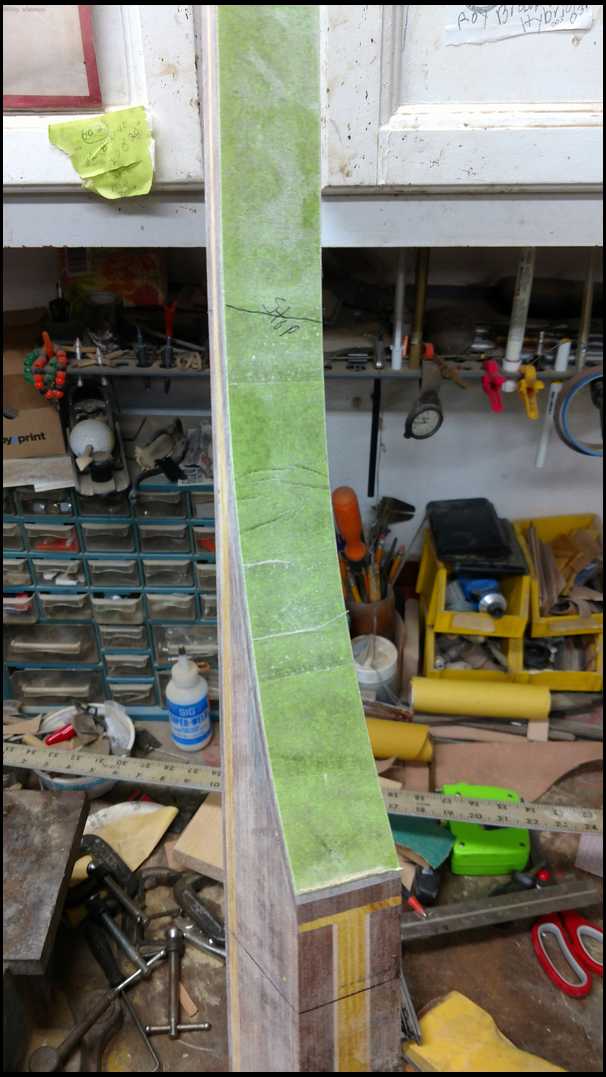
After all the glue is cleaned off, it time to lay out the belly ramps. I use a pattern that I have made and altered over time, until I got what I want. JF
|
|
| From: bodymanbowyer
|
|
|
|
|
|
|
| Date: 13-Jan-17 |
|
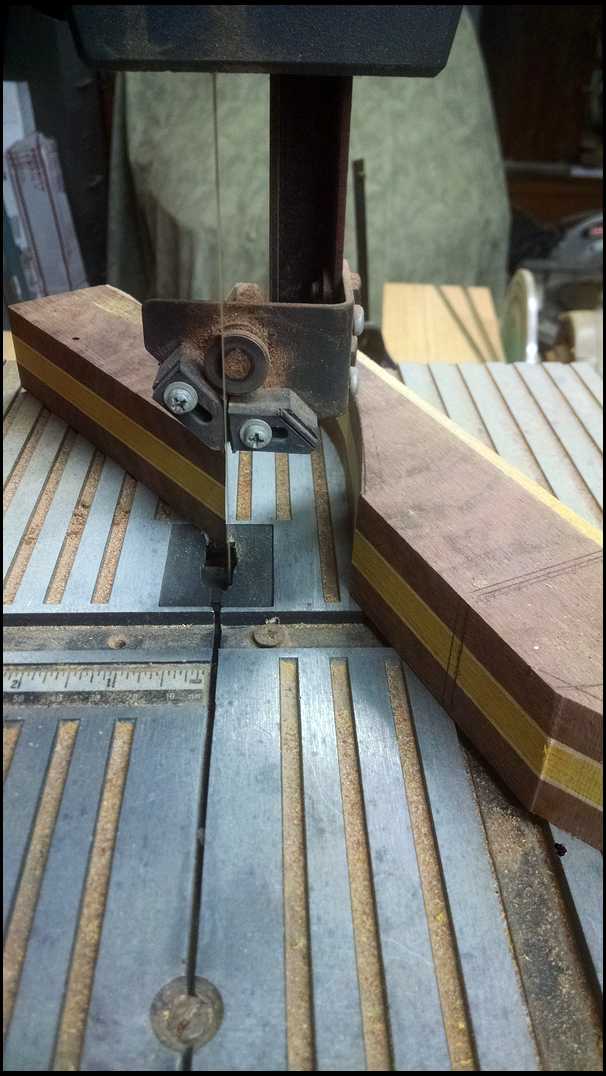
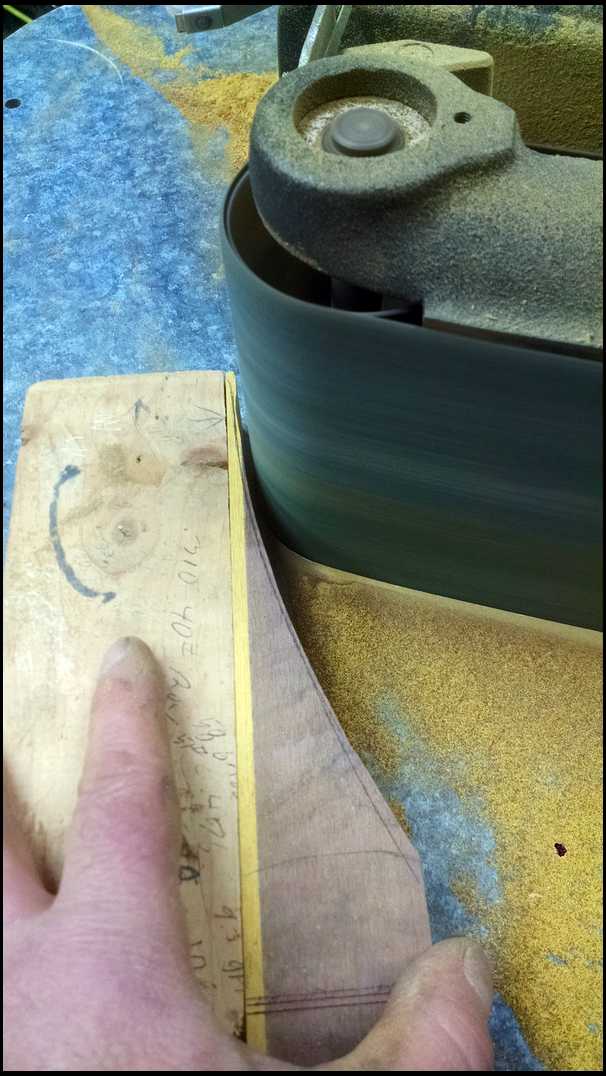
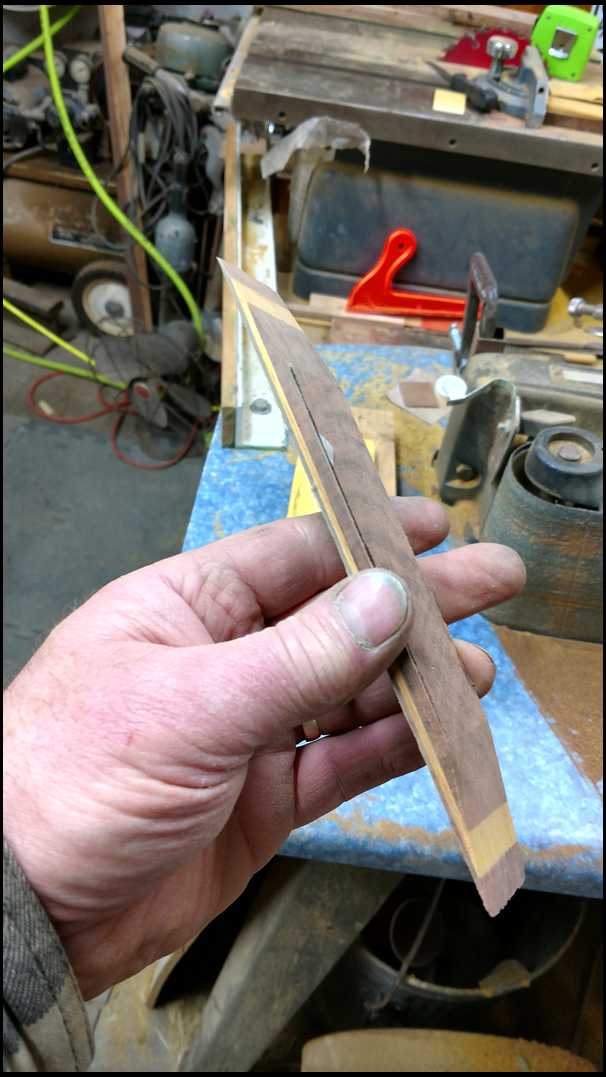
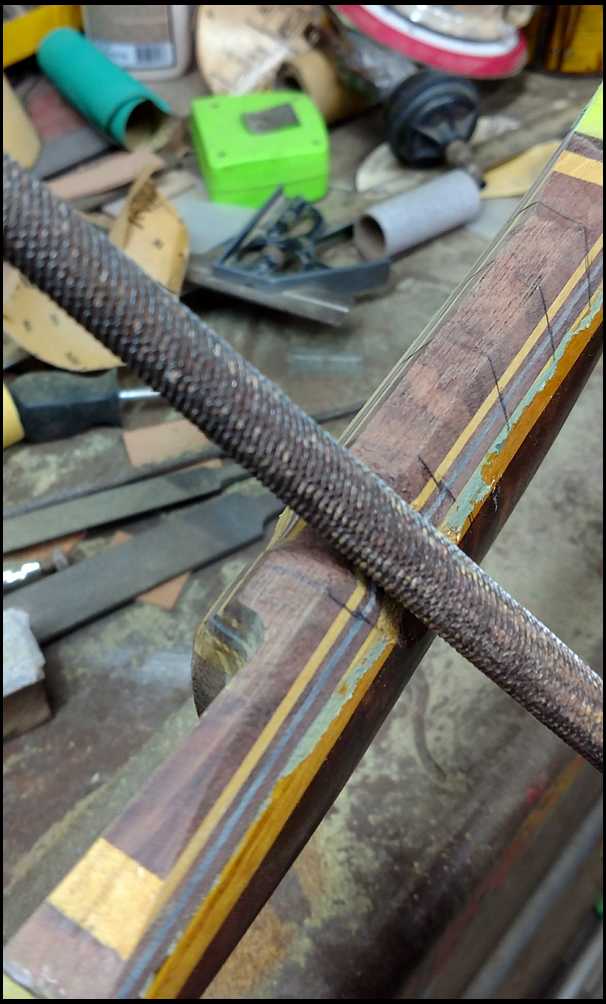
Here I will finally use the bandsaw. Cutting next to the line. I will fine tune the belly ramps on the edge grinder. JF
|
|
| From: bodymanbowyer
|
|
|
|
|
|
|
| Date: 13-Jan-17 |
|

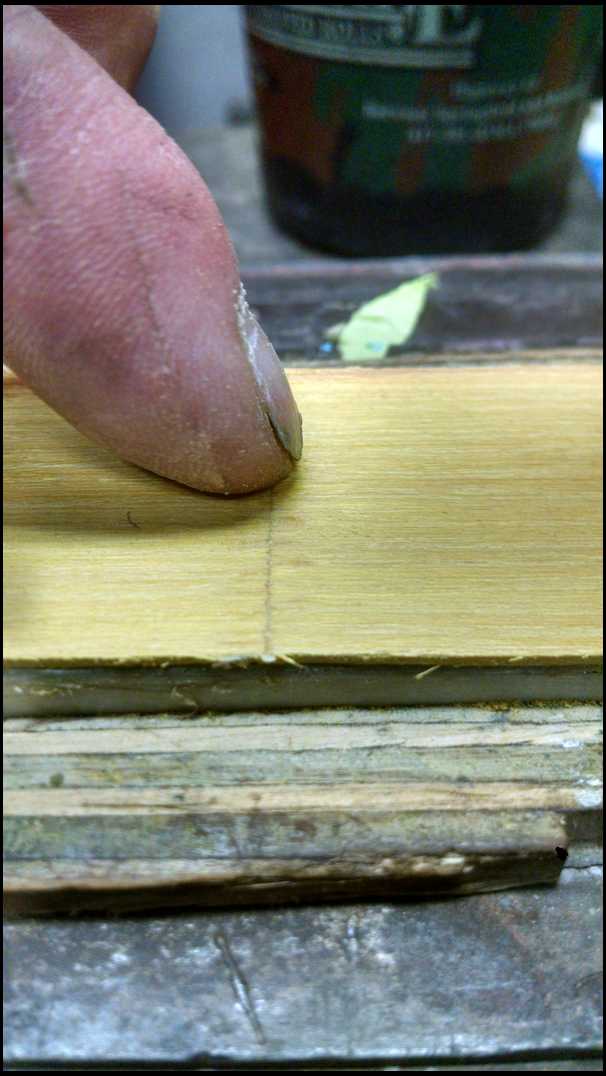
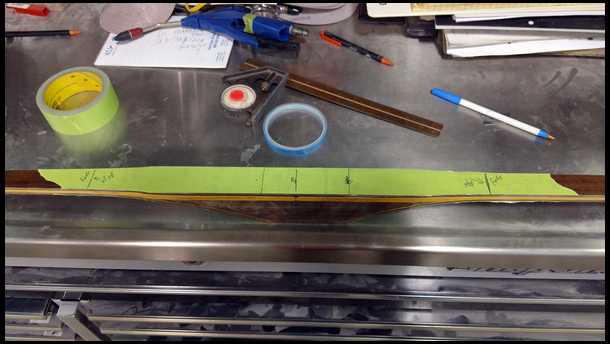
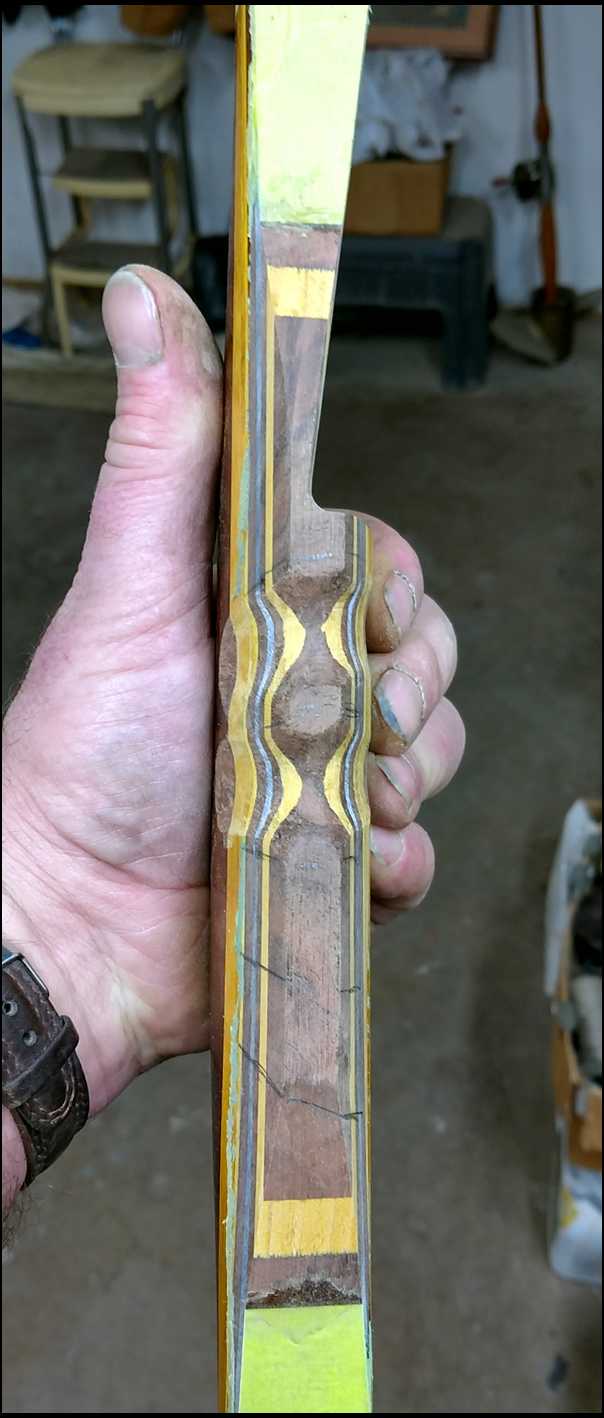
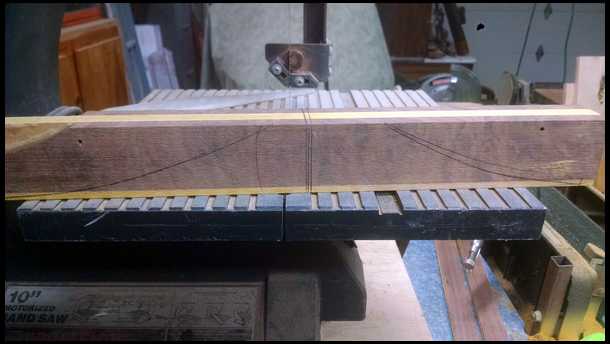
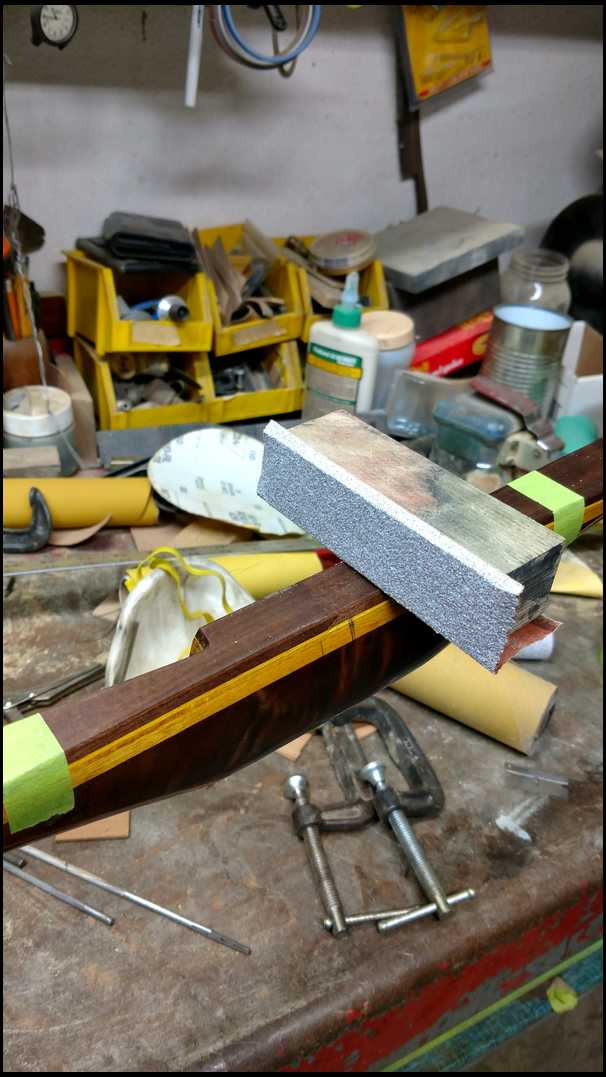
No pattern now it's all looks and feel to get the ramps smooth and even. I mark on the back where the fade-outs stop. 16- 1/2" riser. 8 1/2" on the top to make it slightly weaker and 8" on the bottom ramp to make it slightly stronger limb. A builder that used to be in Michigan is where I got the idea from. But he uses a 15 1/2" riser. JF
|
|
|
|
|
|
| From: bodymanbowyer
|
|
|
|
|
|
|
| Date: 13-Jan-17 |
|
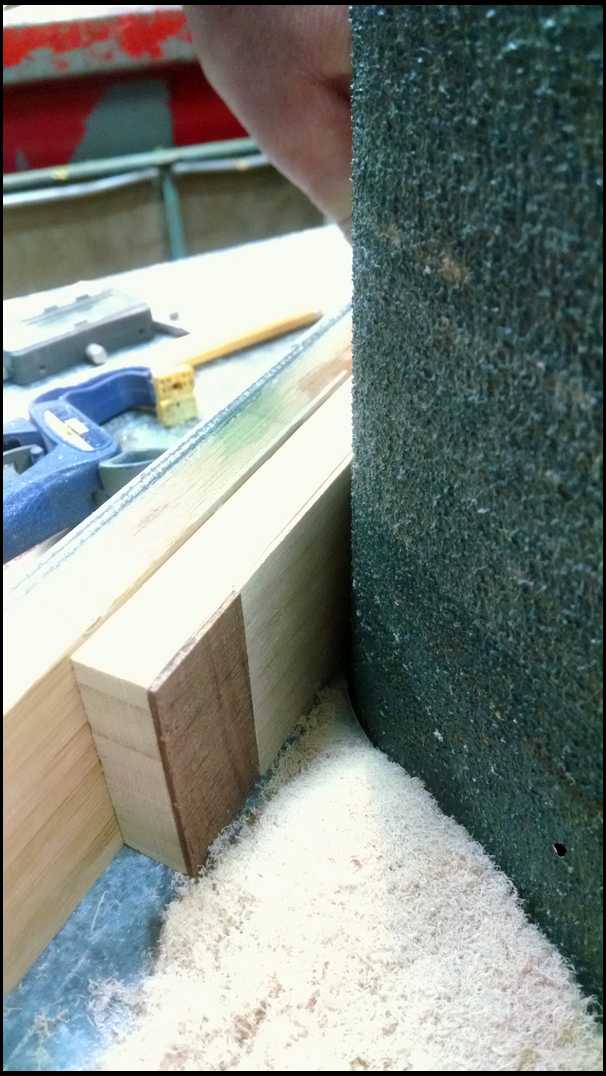
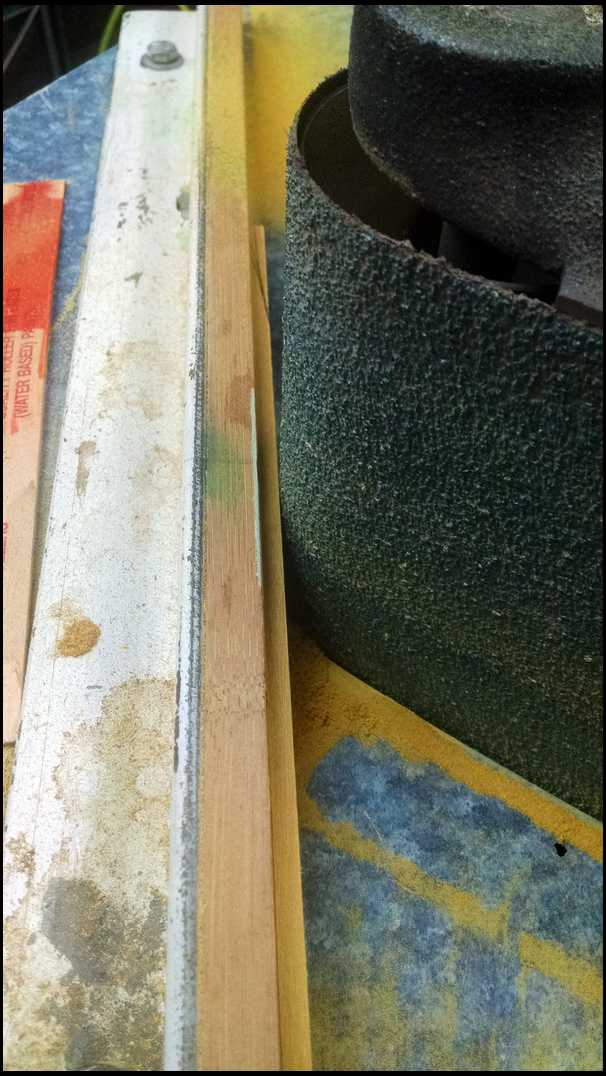
Using a squared up block as a backup support makes it easier to hold on to and support the fine fade tips from flexing. I made the block square by running it through against the fence, earlier and I just keep using it. JF
|
|
| From: bodymanbowyer
|
|
|
|
|
|
|
| Date: 13-Jan-17 |
|
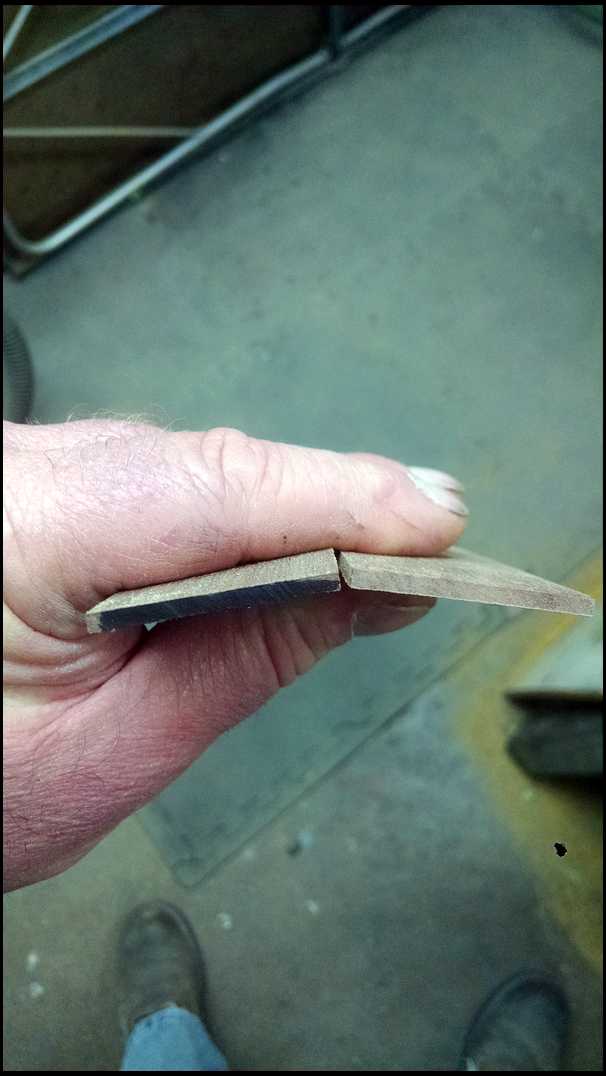
I've reached my marks on both ends. JF
|
|
|
|
| From: bodymanbowyer
|
|
|
|
|
|
|
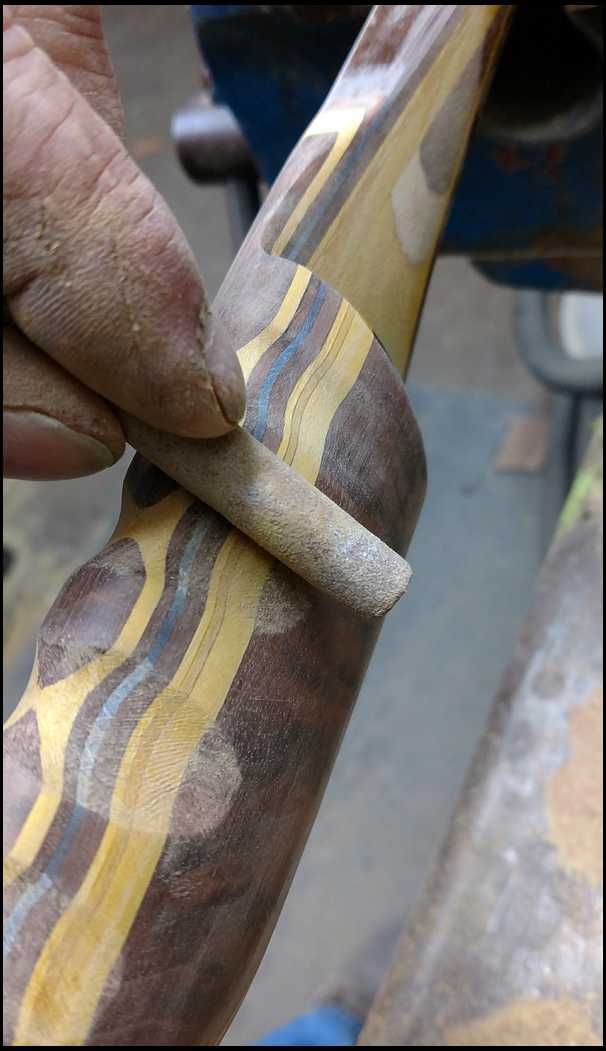
| Date: 13-Jan-17 |
|
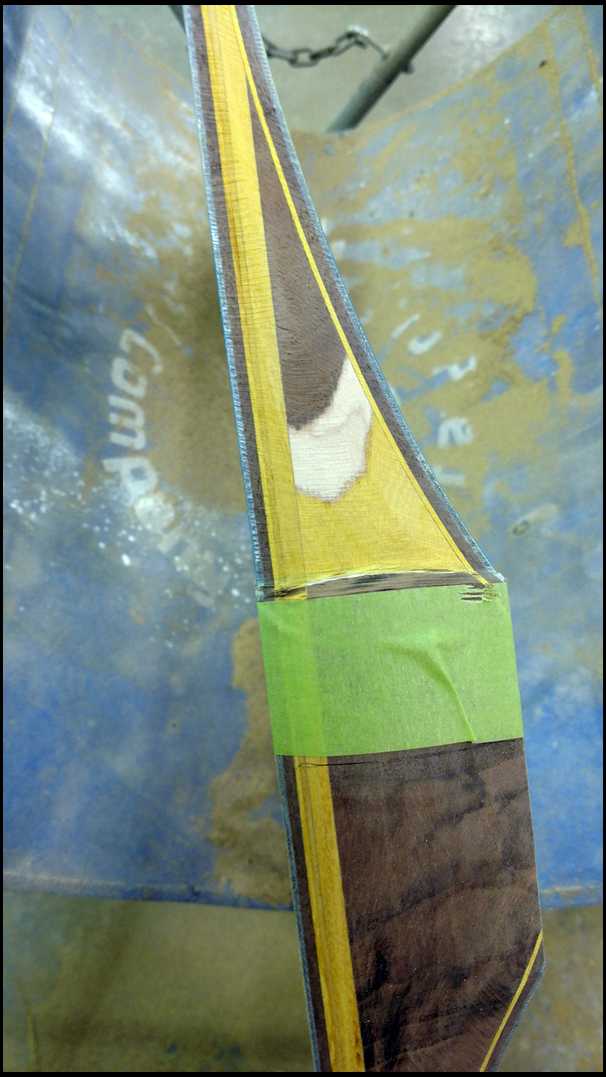
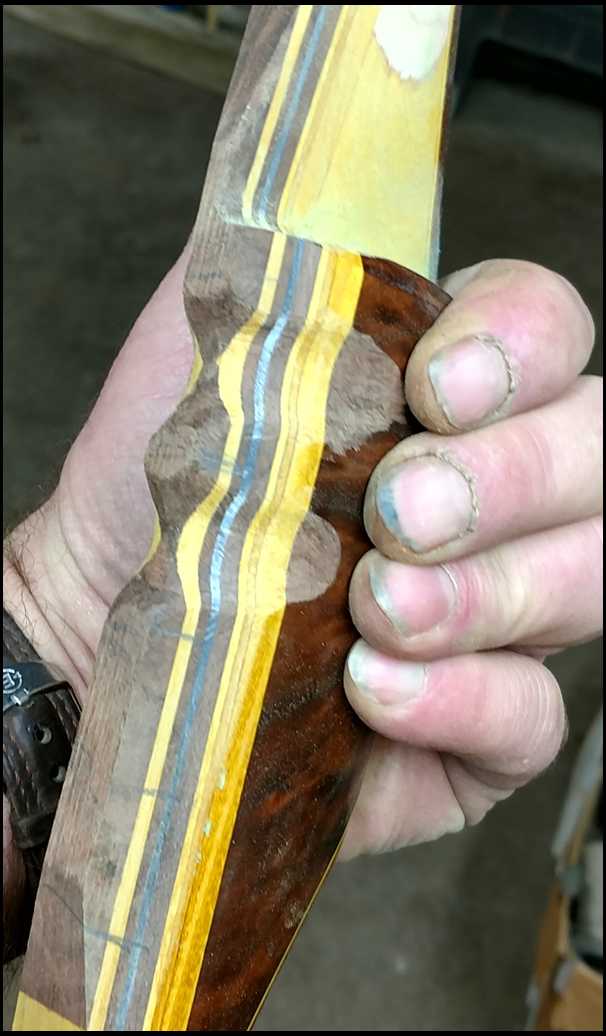
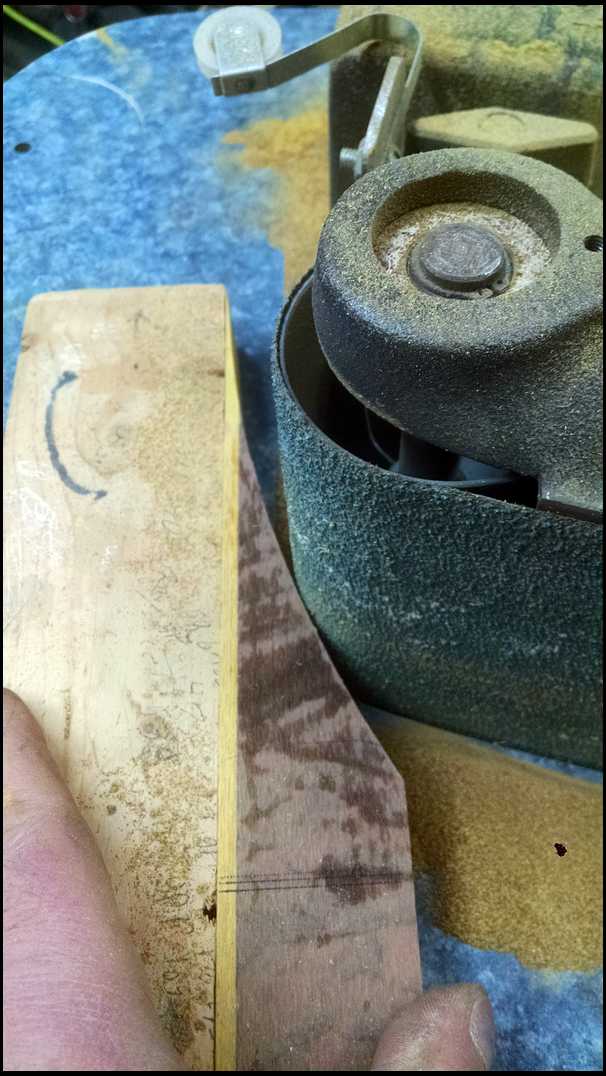
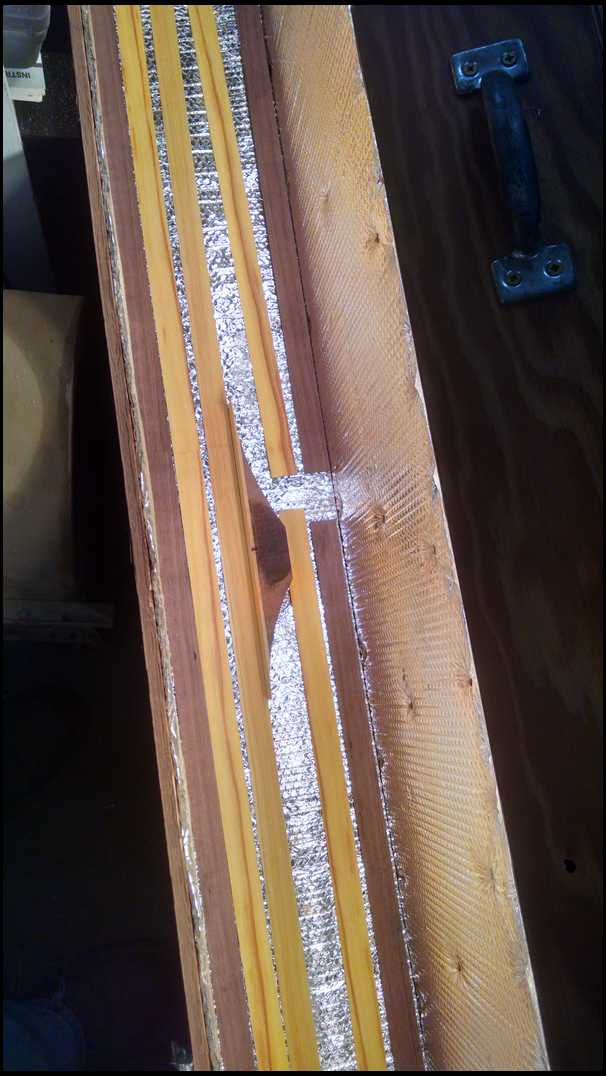
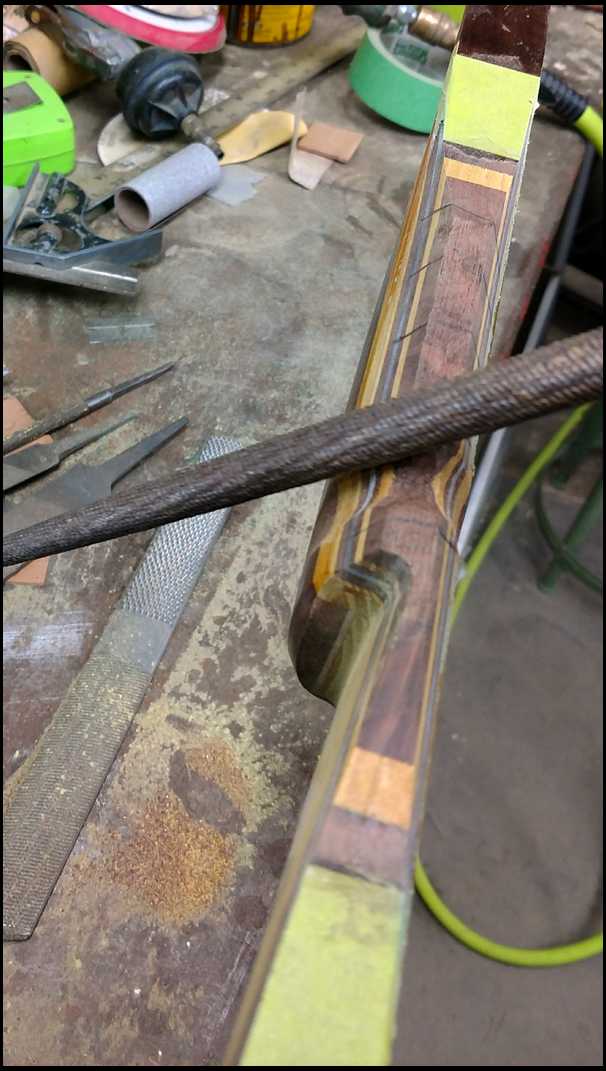
I run my finger up and down the ramps feeling for any bumps or dips. When grinding the ramps,for me it's all feel,looks and sound to get them where I want them. Must be a bodyman thing :) JF
|
|
| From: bodymanbowyer
|
|
|
|
|
|
|
| Date: 13-Jan-17 |
|
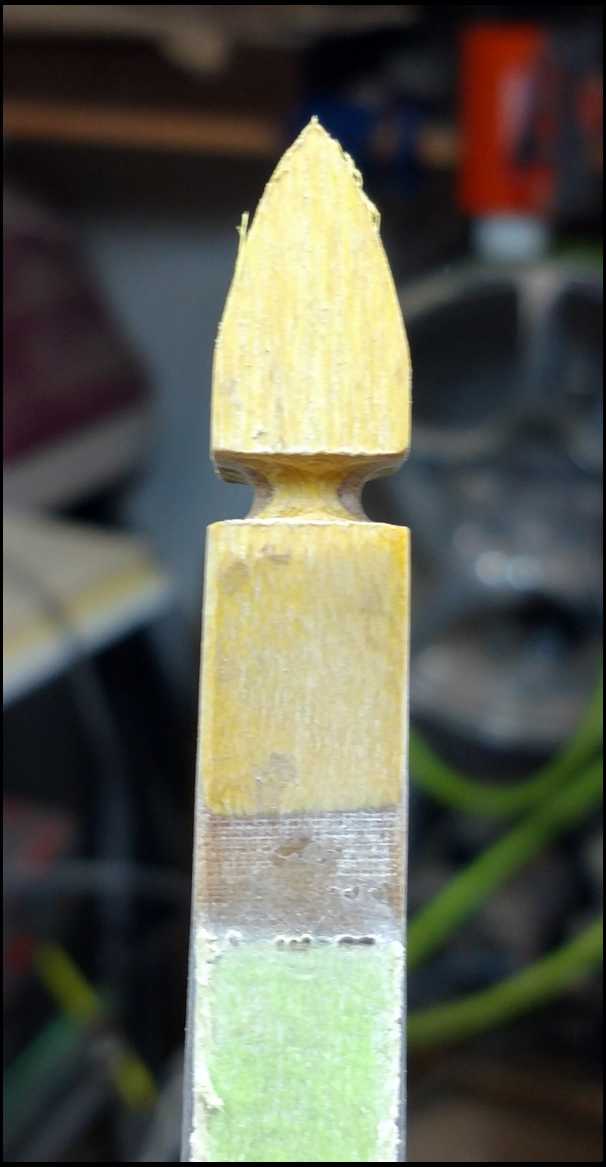
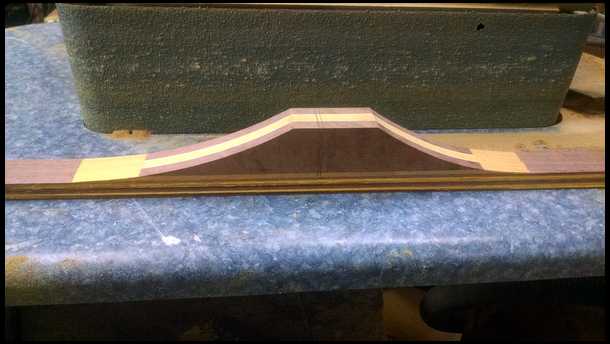
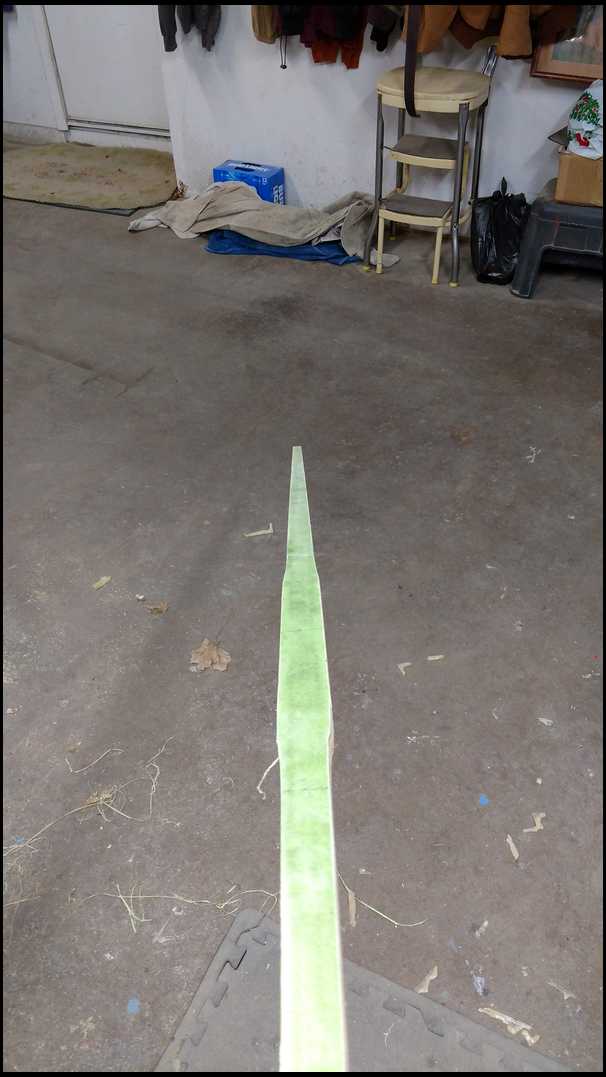
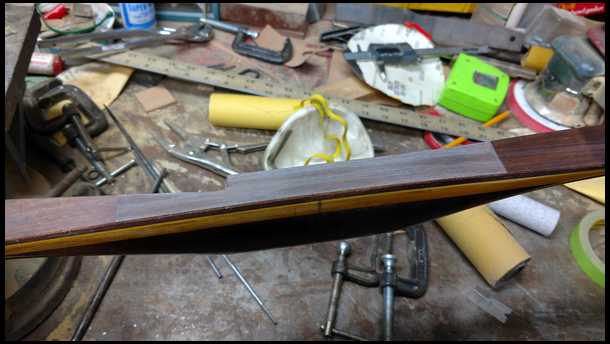
Nice long gentle tapers on the fade-outs. This is so there is no bumbs, blending to the limbs. The ends of the fade-outs will take a slight bend when bow is strung. Nice even transition. JF
|
|
| From: bodymanbowyer
|
|
|
|
|
|
|
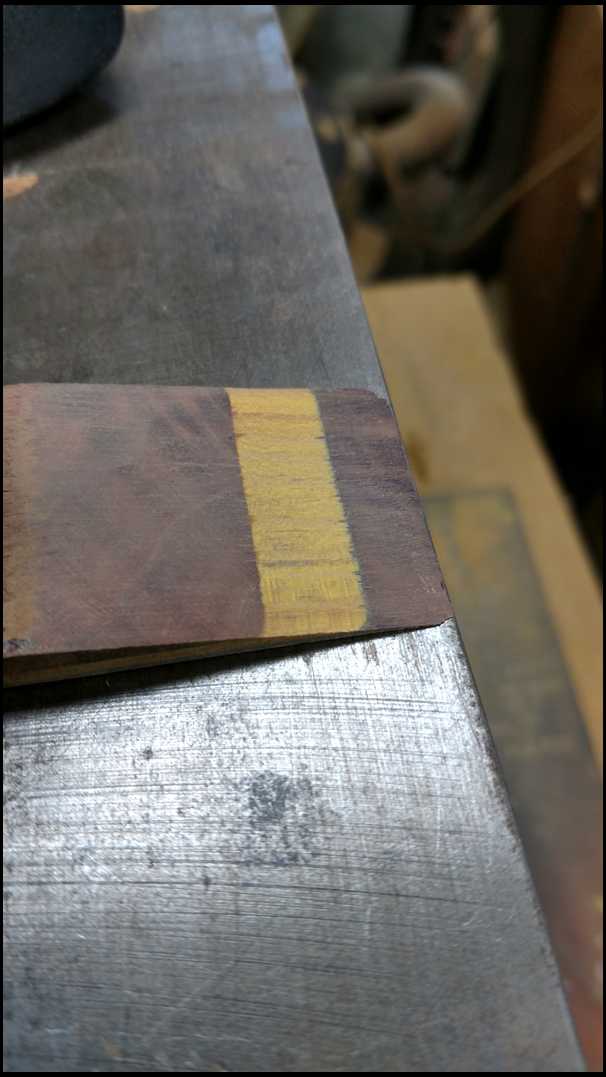
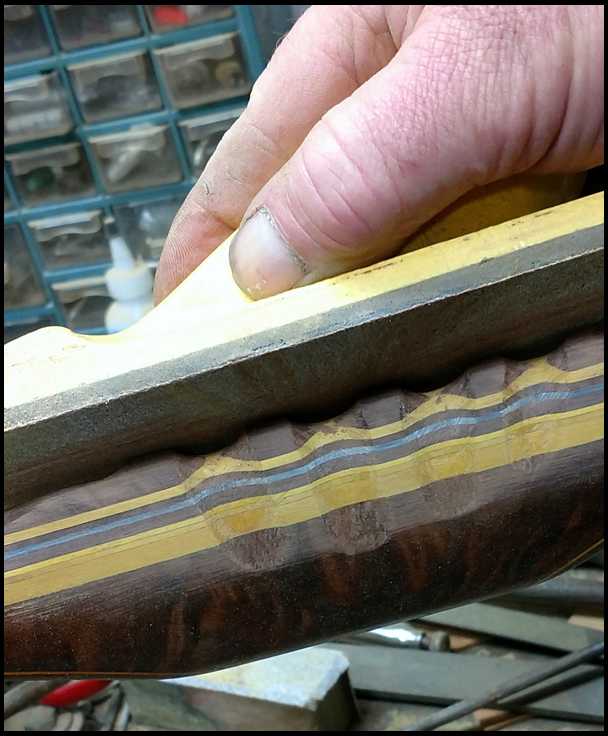
| Date: 13-Jan-17 |
|
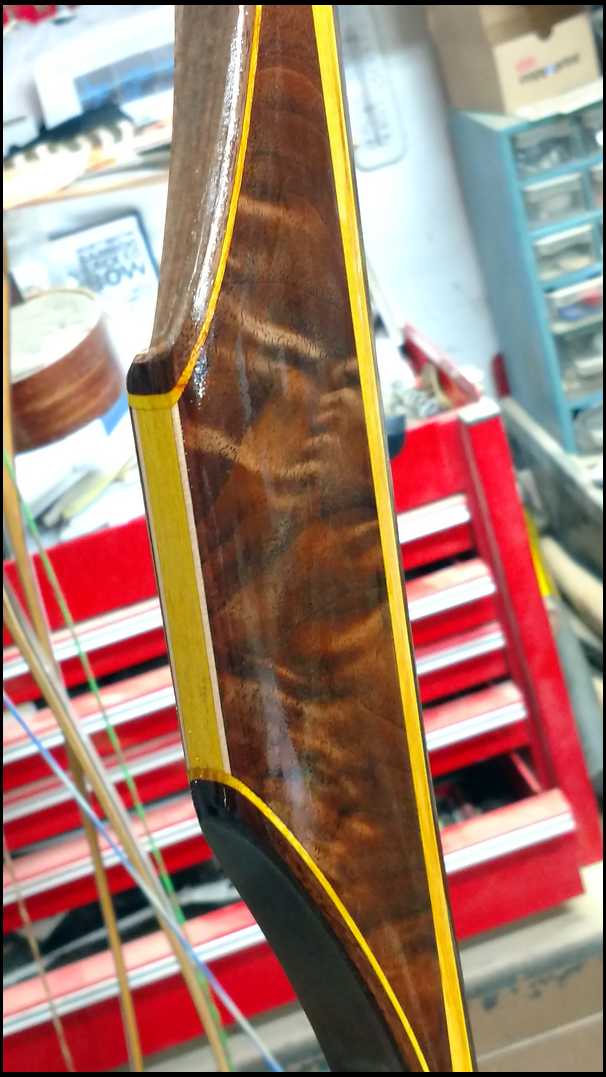
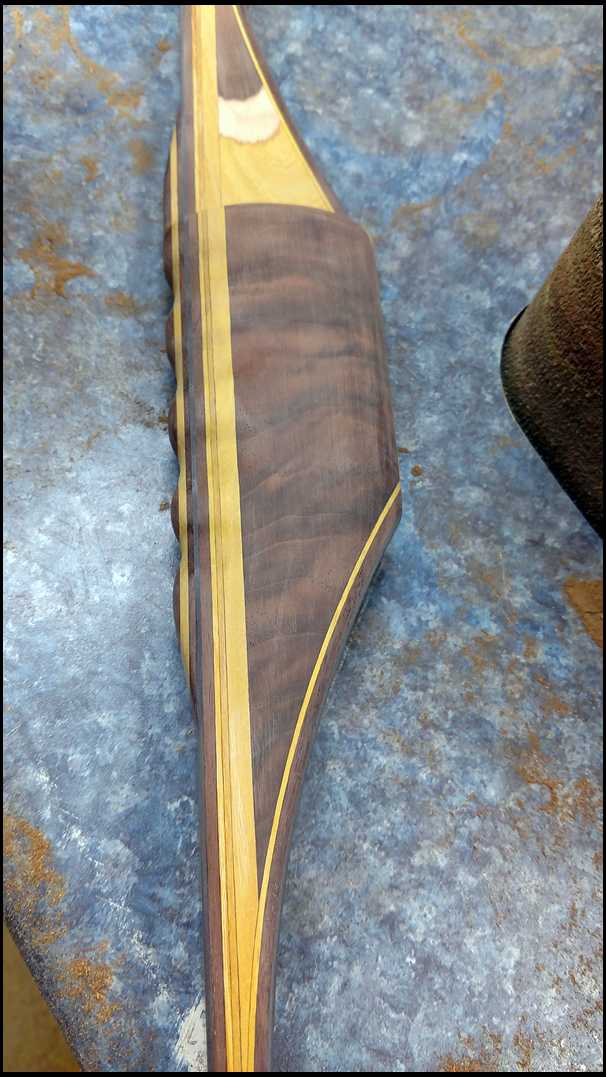
Just getting a feel for what I've done so far. Wait till you see the tru-oil picture. I put a little bit on the side to see the wood grain pop :) JF
|
|
| From: bodymanbowyer
|
|
|
|
|
|
|
| Date: 13-Jan-17 |
|
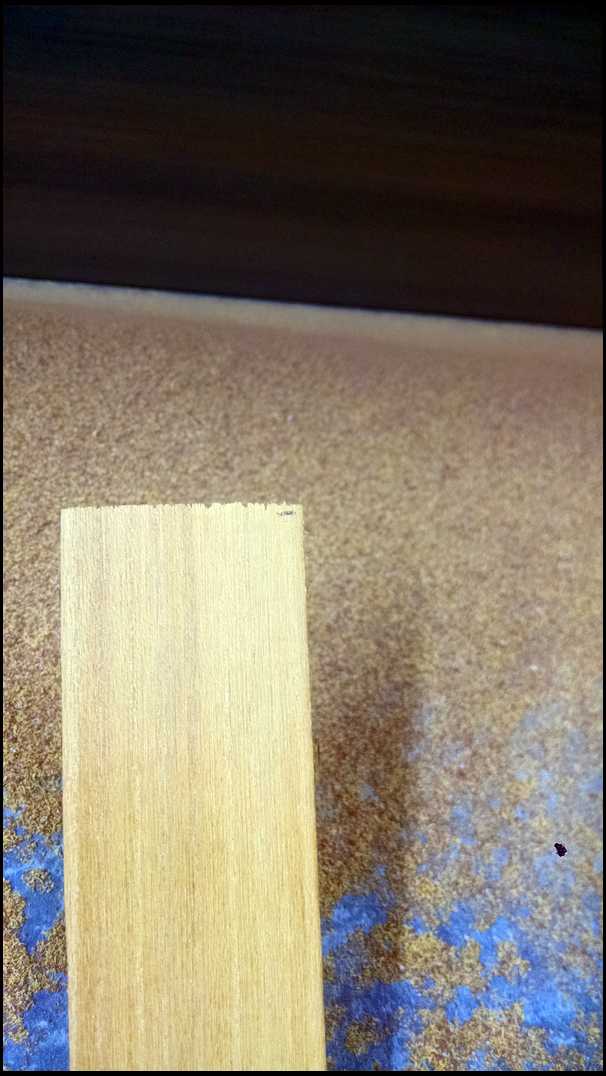
All the lines are nice and square. I must have everything adjusted right ;) JF
|
|
| From: bodymanbowyer
|
|
|
|
|
|
|
| Date: 13-Jan-17 |
|
Bodork, you had to mention about screw ups. I had originally ground my stack to .468 Duh that was without glass. I need .368 without glass plus two .050 glass makes .468 So I had to re grind my parallels to get it right. Double check everything :) JF
|
|
| From: bodymanbowyer
|
|
|
|
|
|
|
| Date: 13-Jan-17 |
|
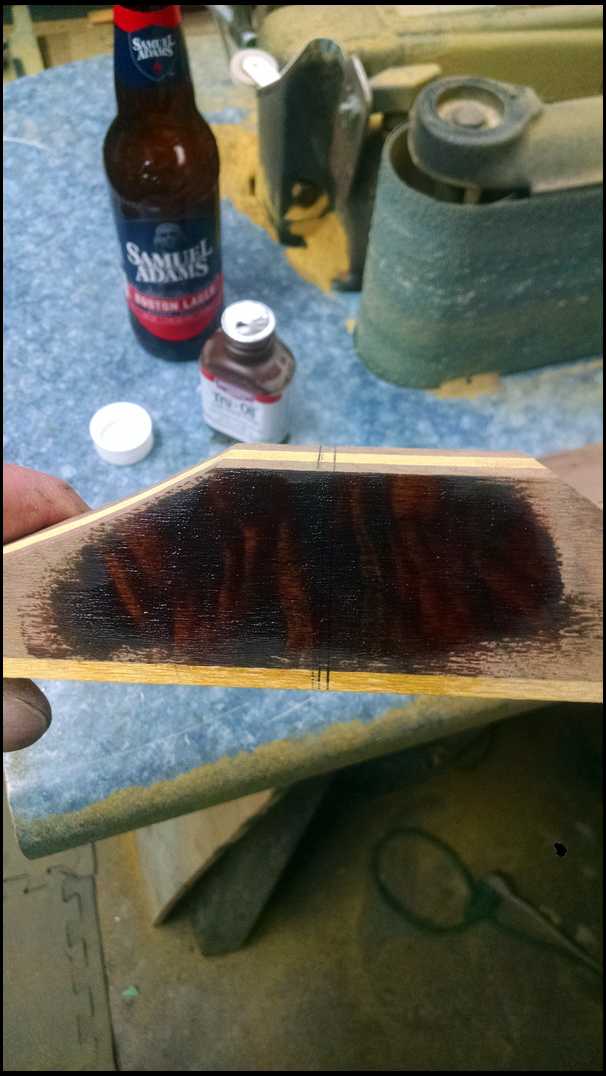
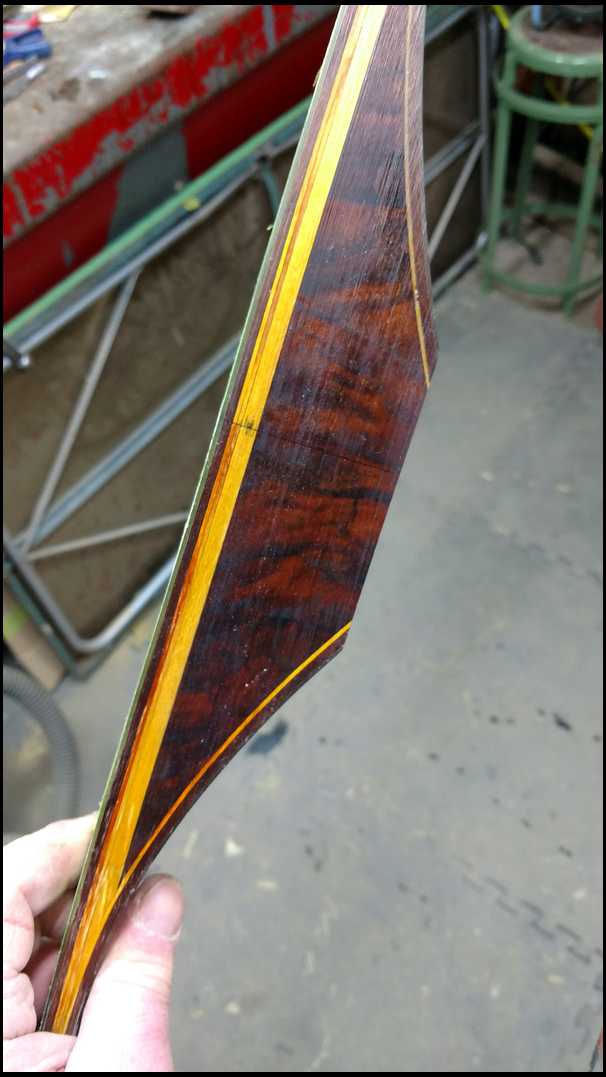
This, burl or curly Walnut, what ever you want to call it, is gonna really pop when it get a finish on it. WOW. JF
|
|
| From: bodymanbowyer
|
|
|
|
|
|
|
| Date: 13-Jan-17 |
|
Looks like a kit bow ready to add glass and ship ;) lol. JF
|
|
| From: SoDak Jake
|
|
|
|
|
|
|
| Date: 13-Jan-17 |
|
This is better than anything on TV.
|
|
| From: Buzz
|
|
|
|
|
|
|
| Date: 13-Jan-17 |
|
Very nice work.
Thanks for the thread.
|
|
| From: CD
|
|
|
|
|
|
|
| Date: 13-Jan-17 |
|
I can only dream....
|
|
| From: Bob Rowlands
|
|
|
|
|
|
|
| Date: 14-Jan-17 |
|
Dang this is a nice series. Thanks so much!
|
|
| From: Knifeguy
|
|
|
|
|
|
|
| Date: 14-Jan-17 |
|
Way to go Jeff. More...Lance.
|
|
| From: sig9
|
|
|
|
|
|
|
| Date: 14-Jan-17 |
|
Sam was why he had to regrind stack. lol Gonna be another beautiful bow Jeff. I love your buildalongs. You show so much detail and explain everything so well. Those bodyshop hands can tell so much more on just feel than a lazer measuring device. sig9
|
|
| From: mamba-ny
|
|
|
|
|
|
|
| Date: 14-Jan-17 |
|
Thanks for this buildalong.I think most people can understand the cost of a bow after seeing the work that goes into one.
|
|
| From: BenM
|
|
|
|
|
|
|
| Date: 14-Jan-17 |
|
Looking good! Thanks for taking the time
|
|
| From: Flinger1
|
|
|
|
|
|
|
| Date: 14-Jan-17 |
|
Looking good JF! Tru oil pic is sweet!
|
|
| From: Stickbow Felty
|
|
|
|
|
|
|
| Date: 14-Jan-17 |
|
Can't wait to see the rest. Thanks
|
|
| From: Matt Ewing
|
|
|
|
|
|
|
| Date: 14-Jan-17 |
|
Nice! Can't wait to see more.
|
|
|
|
| From: Crow
|
|
|
|
|
|
|
| Date: 14-Jan-17 |
|
Very nice , thankyou for doing the build along.
|
|
| From: bodork
|
|
|
|
|
|
|
| Date: 14-Jan-17 |
|
Nice build along Jeff! Good point to run your fingers up and down the ramps to feel for bumps and dips. I put my thumb along the belly and forefinger goes up the ramp. You can feel bumps with your eyes closed. I also press all the pieces together at the end of the fades like you to make sure the fade disappears into the limb lams without any gaps.
|
|
|
|
| From: bodymanbowyer
|
|
|
|
|
|
|
| Date: 15-Jan-17 |
|
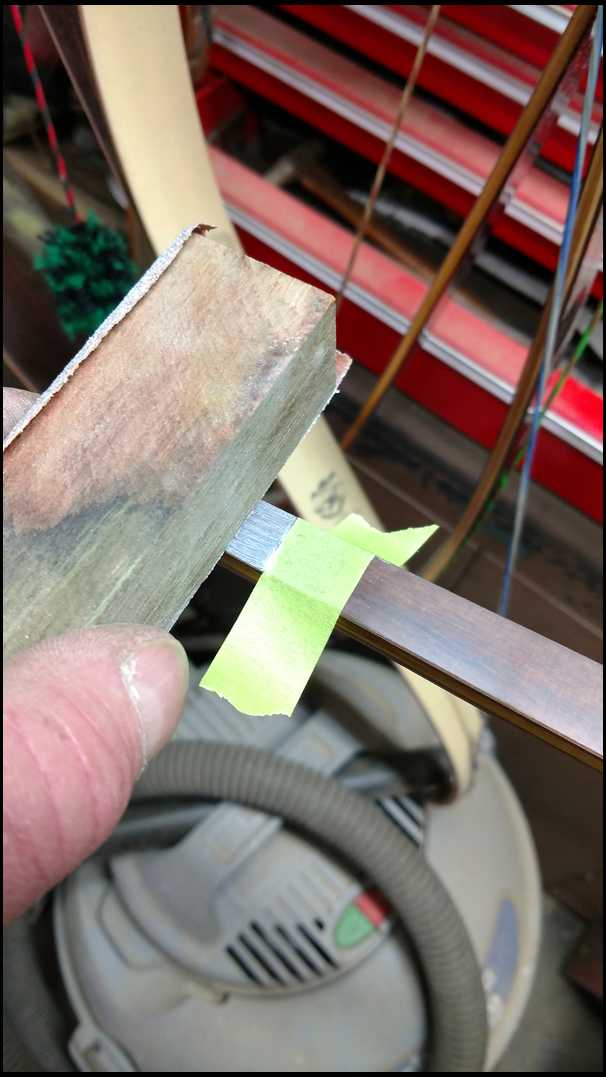
Oh yeah, I remember I got my stack reground and mark the thick ends of tapers that go towards the grip. I've messed up once and put a .001 taper in the wrong way. .002 is easier to see the difference. JF
|
|
| From: bodymanbowyer
|
|
|
|
|
|
|
| Date: 15-Jan-17 |
|
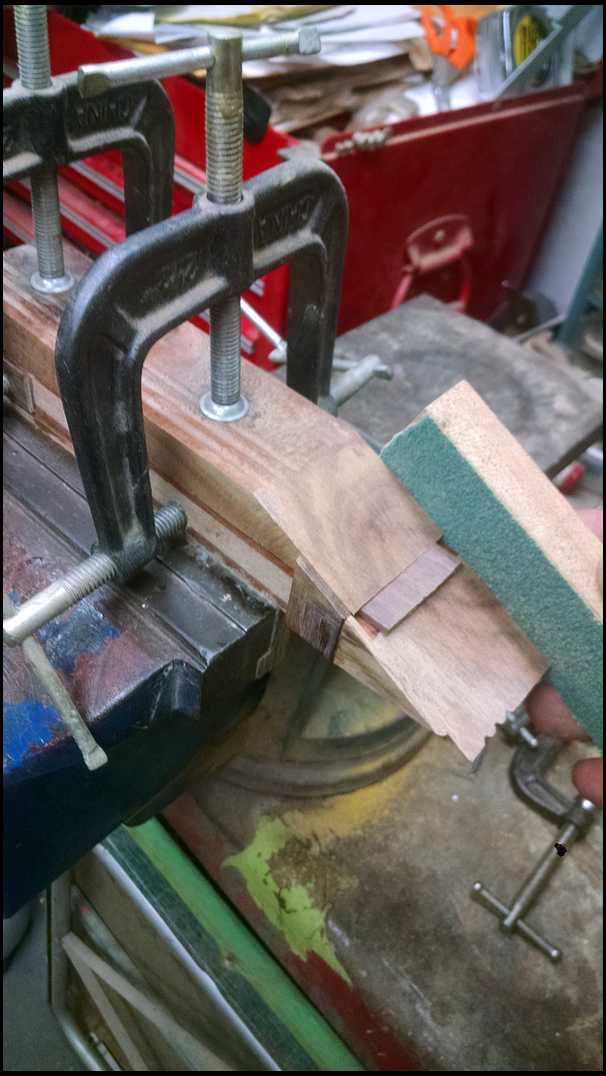
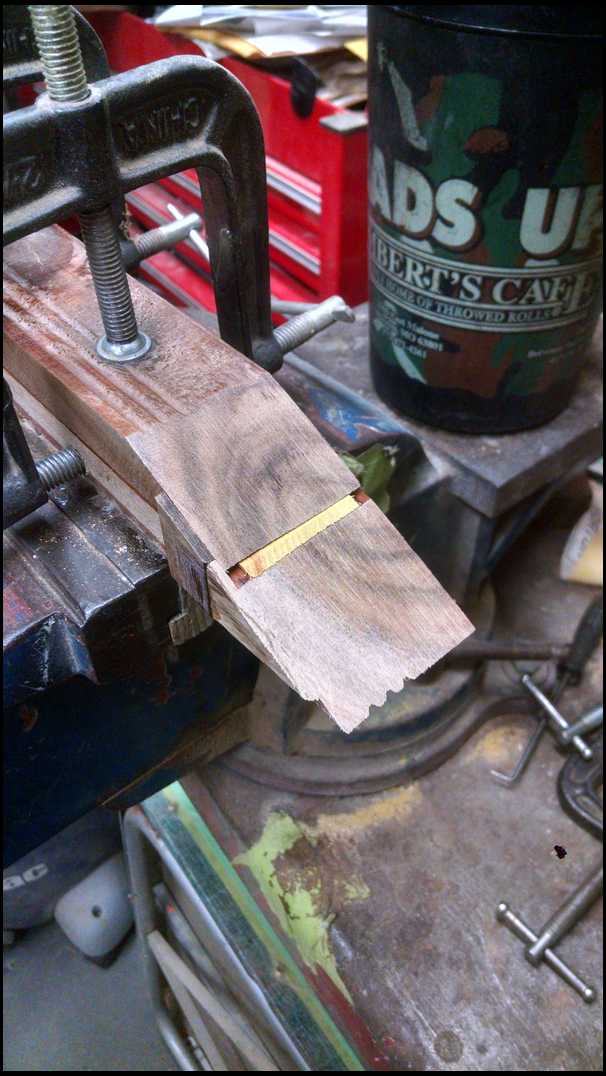
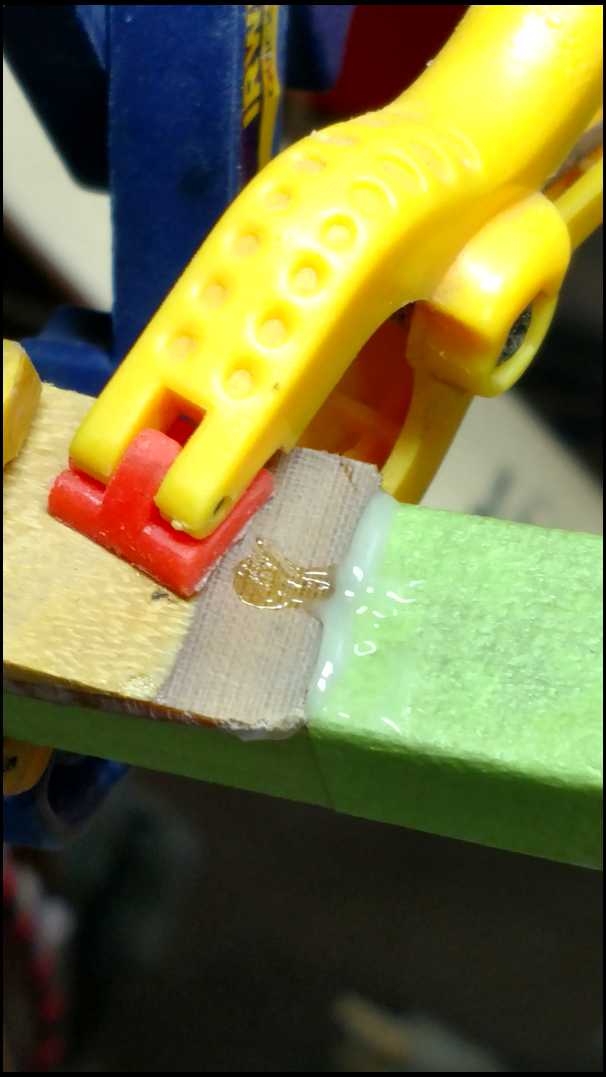
Two of the Walnut tapers will get a beveled and butt glued, clamped to a STRAIGHT EDGE. I use gorilla gel super glue. JF
|
|
|
|
| From: bodymanbowyer
|
|
|
|
|
|
|
| Date: 15-Jan-17 |
|
I use 36grit and try to keep it flat, on the lamination only,SA much as I can. To make the jig last. I've had it quite a while. JF
|
|
| From: bodymanbowyer
|
|
|
|
|
|
|
| Date: 15-Jan-17 |
|

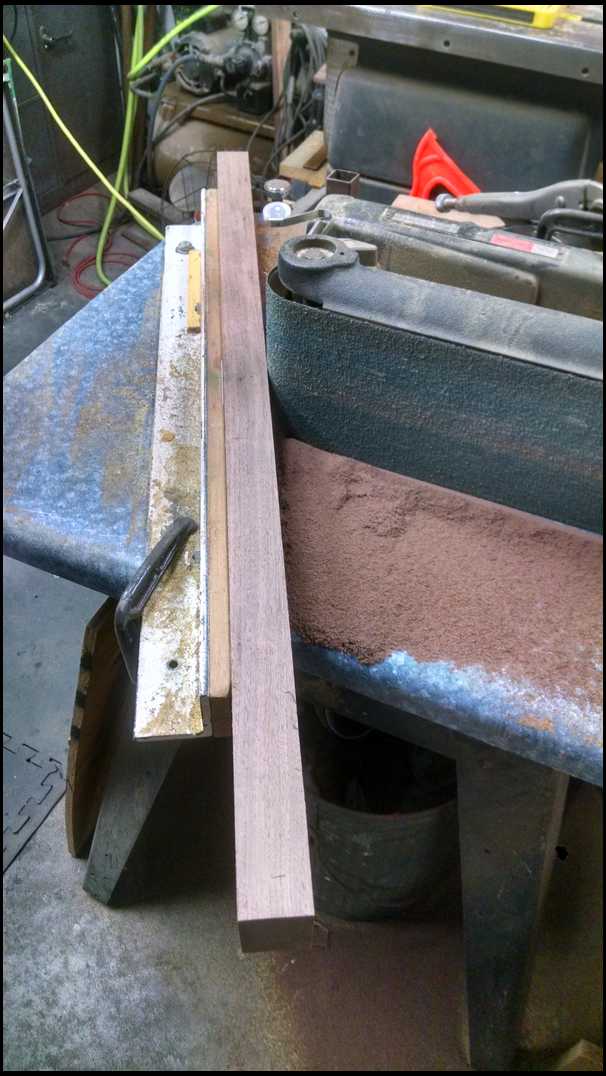
Place them on the STRAIGHT EDGE and check to see how the butt up. If needed I can adjust them in the jig to change. But I've done a lot on this jig and have it marked where they need to be clamped, to sand. JF
|
|
| From: bodymanbowyer
|
|
|
|
|
|
|
| Date: 15-Jan-17 |
|

Hmm, always cut the red wire lol:)
|
|
|
|
|
|
| From: bodymanbowyer
|
|
|
|
|
|
|
| Date: 15-Jan-17 |
|
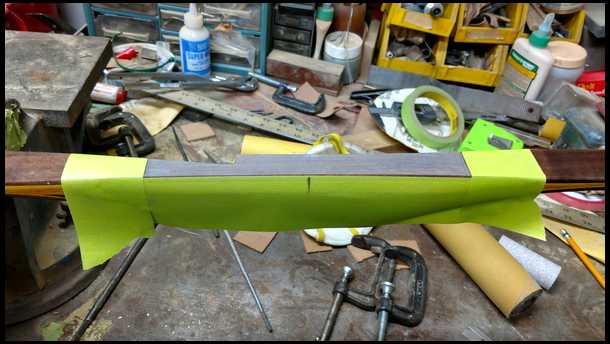
I put plastic around it and a white plastic block on top and clamp. For got that picture, oops. JF
|
|
| From: Stoner
|
|
|
|
|
|
|
| Date: 15-Jan-17 |
|
Jeff, gotta be a craftsman thing to feel the surface & edges. I do the same thing when running a molding detail in stone. Thanks for the GREAT build a long. John
|
|
| From: bodymanbowyer
|
|
|
|
|
|
|
| Date: 15-Jan-17 |
|
Bevel sand and glue all the laminations that need to be full length. JF
|
|
| From: bodymanbowyer
|
|
|
|
|
|
|
| Date: 15-Jan-17 |
|

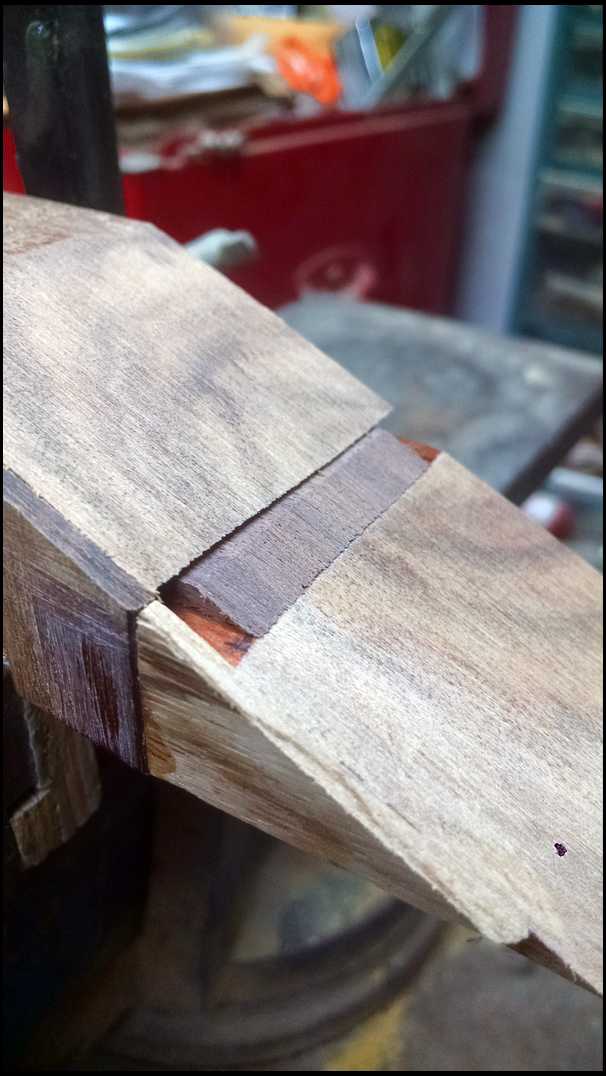
After all 3 laminations are dry. I'll sand the joint with 36grit stick it sandpaper, same I used to bevel them. JF
|
|
| From: bodymanbowyer
|
|
|
|
|
|
|
| Date: 15-Jan-17 |
|
Allrighty who Left the gate open ;)
|
|
| From: bodymanbowyer
|
|
|
|
|
|
|
| Date: 15-Jan-17 |
|
Smooth and and stuck together.
|
|
|
|
|
|
| From: bodymanbowyer
|
|
|
|
|
|
|
| Date: 15-Jan-17 |
|
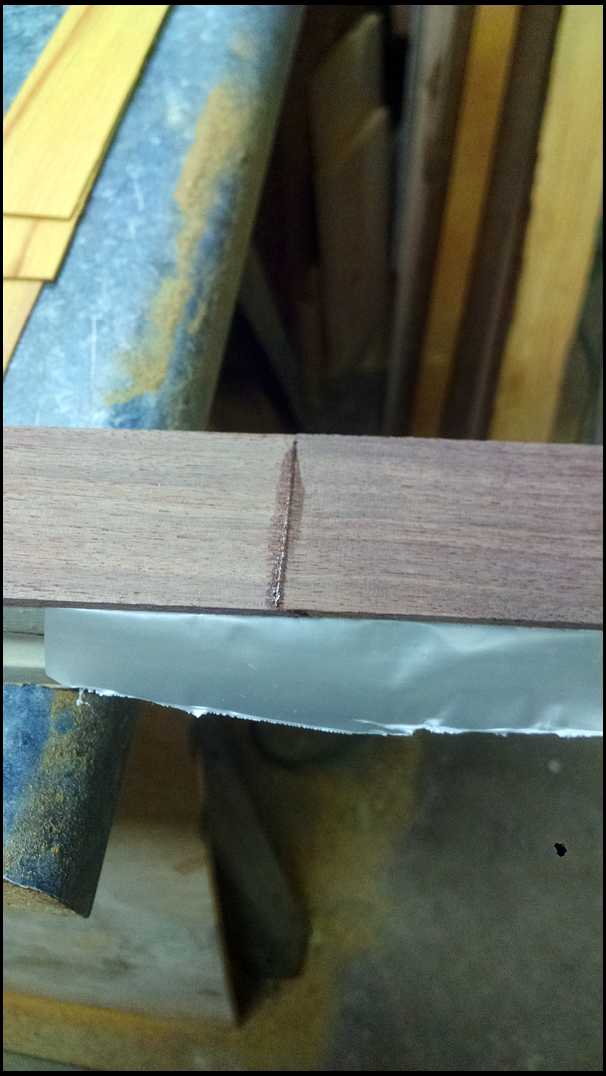
This is my STRAIGHT EDGE, it used to be some old frame measuring equipment. I put a peice of old junk .060 glass in the middle. That's where I glue and sand the joints.
|
|
| From: bodymanbowyer
|
|
|
|
|
|
|
| Date: 15-Jan-17 |
|
Take a little 150 grit an lighty sand the stringy wood fibers off the edges. Some woods have it some grind clean. This is to keep them from breaking of later when I start spreading glue. Then blow off good. JF
|
|
| From: bodymanbowyer
|
|
|
|
|
|
|
| Date: 15-Jan-17 |
|
I'm taking a break my wife said there's some homemade Apple pie calling my name. Stay tuned for more details on this buildalong. JF
|
|
| From: longbows101
|
|
|
|
|
|
|
| Date: 15-Jan-17 |
|
Great build, and some very good pics. Get some milk with that pie.
|
|
| From: bodymanbowyer
|
|
|
|
|
|
|
| Date: 15-Jan-17 |
|
Mike'bodork' I had another mistake in grinding my lams. That caught before gluing the butts together. I had a big divot on one side of the Osage, I must have looked up at my wife when she got home er something that made me wiggle in the middle. So I made up a new pair of tapers. $!++ Happens. You have to keep good consitration when grinding laminations :) JF
|
|
| From: Bob Rowlands
|
|
|
|
|
|
|
| Date: 15-Jan-17 |
|
Fine thread. Best of what leatherwall is about. Doin. Thanks again.
|
|
| From: mgerard
|
|
|
|
|
|
|
| Date: 15-Jan-17 |
|
JF, how much does the pics and text slow you down? It still seems like your moving like lightening to me! I have questions, but I'm waiting for more pictures to see if I can answer them :>) When I see what craftsman like you achieve I always remember, "Those who can, do, those who can't, teach" (I'm a retired elementary teacher) :>)
|
|
| From: bodymanbowyer
|
|
|
|
|
|
|
| Date: 15-Jan-17 |
|
Mgerard, I'm much better doing, then teaching. It's hard to put good words to what,how and why I'm doing some things. Jf
|
|
| From: Barber
|
|
|
|
|
|
|
| Date: 15-Jan-17 |
|
Jeff, I'm enjoying the build along. Going to be another nice bow !
|
|
| From: Archre167
|
|
|
|
|
|
|
| Date: 15-Jan-17 |
|
It has already been said,but I"ll say it again. This is a GREAT build along. Very well done
|
|
| From: muddyIA
|
|
|
|
|
|
|
| Date: 16-Jan-17 |
|
You cleaned your camera lens! Excellent stuff
|
|
| From: PaPa Doc
|
|
|
|
|
|
|
| Date: 16-Jan-17 |
|
Great so far,!
|
|
| From: bodork
|
|
|
|
|
|
|
| Date: 16-Jan-17 |
|
Glad you showed to bevel and pre glue the full length lams. Drives me nuts to see a nice bow with a big gap in the lams where they slid apart at glue up. Yea, a leather grip will hide it but it is still there!
|
|
| From: bodymanbowyer
|
|
|
|
|
|
|
| Date: 16-Jan-17 |
|
OK, my belly is full of Apple pie :) Blow off the dust from the glue table and brush and brush and blow. JF
|
|
| From: bodymanbowyer
|
|
|
|
|
|
|
| Date: 16-Jan-17 |
|
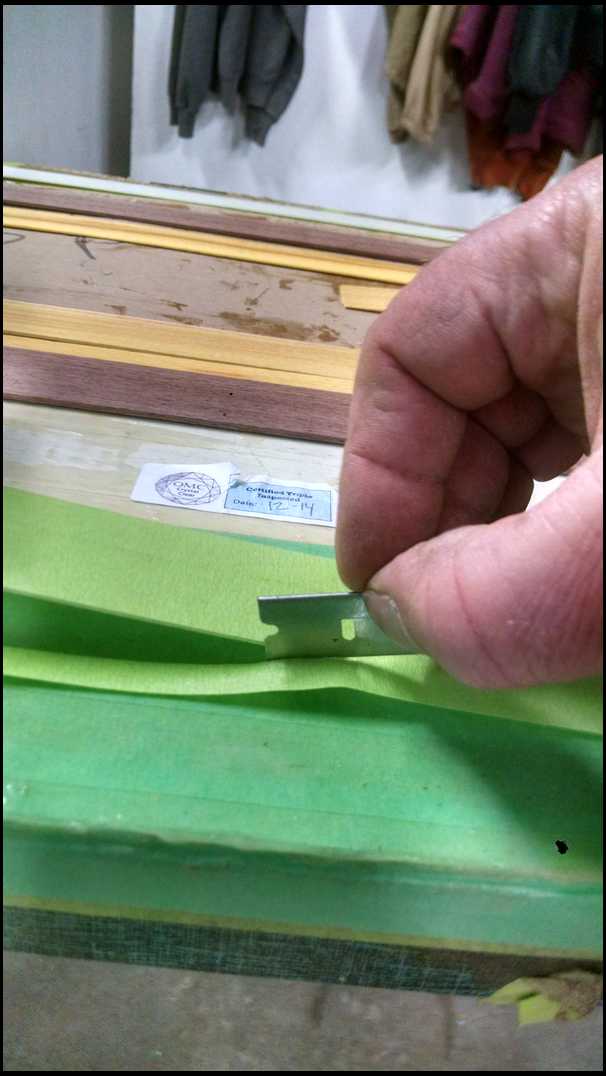
Cut the belly glass in two after they are both covered with masking tape. I prefer the automotive bodyrepair taper. Keep the razorblade at a low angle so you DON'T graphics a strand of the glass. JF
|
|
| From: bodymanbowyer
|
|
|
|
|
|
|
| Date: 16-Jan-17 |
|
Grab a strand of glass, sorry.
|
|
| From: bodymanbowyer
|
|
|
|
|
|
|
| Date: 16-Jan-17 |
|

There is a difference. It peels off nice later, after baking. JF
|
|
| From: bodymanbowyer
|
|
|
|
|
|
|
| Date: 16-Jan-17 |
|
All the pieces are blown off and ready to glue up. If you get water in your air lines. Put a in line filter on the end at your blowgun. JF
|
|
| From: bodymanbowyer
|
|
|
|
|
|
|
| Date: 16-Jan-17 |
|
I warm up everything except the glass, while I mix glue. JF
|
|
| From: bodymanbowyer
|
|
|
|
|
|
|
| Date: 16-Jan-17 |
|
Mixing smooth-on epoxy 8.5oz 1to1. JF
|
|
| From: bodymanbowyer
|
|
|
|
|
|
|
| Date: 16-Jan-17 |
|
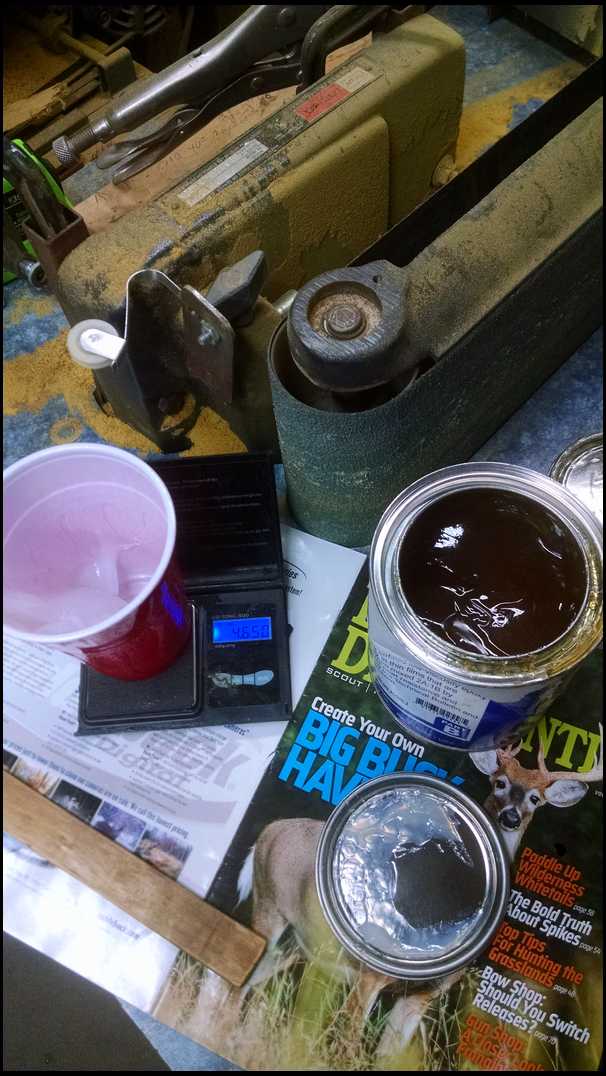
Part B. I just use some hardwood scraps for mixing and application. JF
|
|
| From: bodymanbowyer
|
|
|
|
|
|
|
| Date: 16-Jan-17 |
|

8.5oz mix well and scrape the sides and bottom. Mix mix mix. JF
|
|
| From: bodymanbowyer
|
|
|
|
|
|
|
| Date: 16-Jan-17 |
|
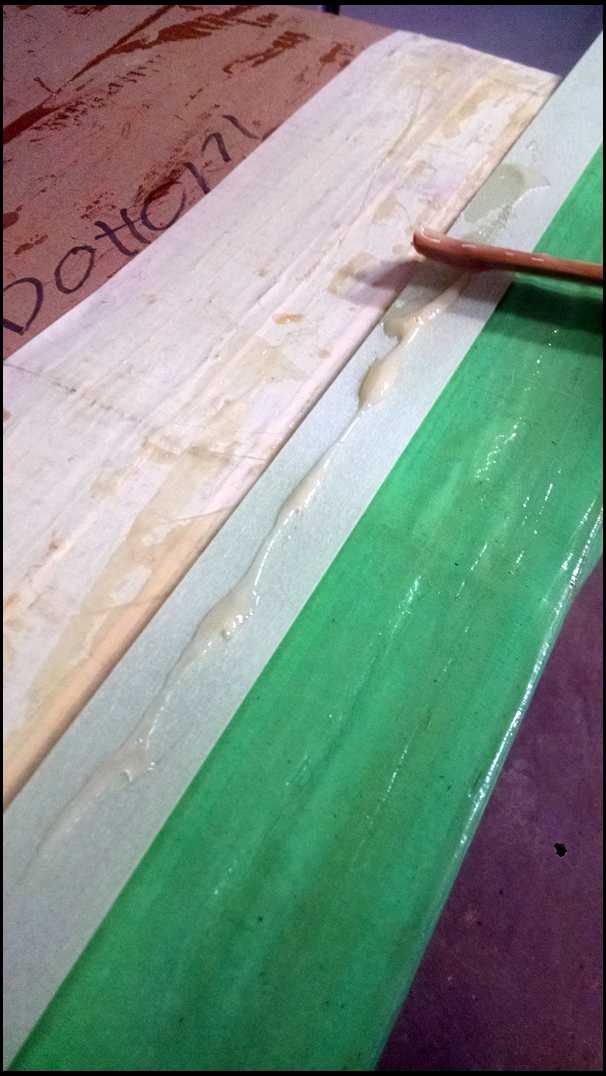
Back glass first. Every side gets buttered with epoxy. Use enough on each piece to leave a even shine. JF
|
|
| From: bodymanbowyer
|
|
|
|
|
|
|
| Date: 16-Jan-17 |
|
Set on the lower half of the form. I clamp mine in a vise. With a stick supporting the outer end. Because of space in my shop. JF
|
|
| From: bodymanbowyer
|
|
|
|
|
|
|
| Date: 16-Jan-17 |
|

Every piece gets epoxy. I premark all the center's on the edge to keep alignment. JF
|
|
| From: bodymanbowyer
|
|
|
|
|
|
|
| Date: 16-Jan-17 |
|

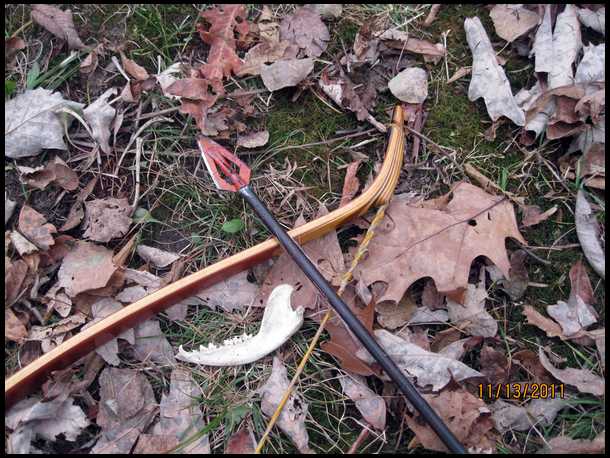
Oh yeah I built some arrows too, while I had time in between gluing;) I don't know where that picture came from. JF
|
|
| From: bodymanbowyer
|
|
|
|
|
|
|
| Date: 16-Jan-17 |
|
It's hard to take pictures of the glue up while I go. It would make my phone very sticky. I put a little extra epoxy at the ends of the fades, not much. Just a little bit more. JF
|
|
| From: bodymanbowyer
|
|
|
|
|
|
|
| Date: 16-Jan-17 |
|
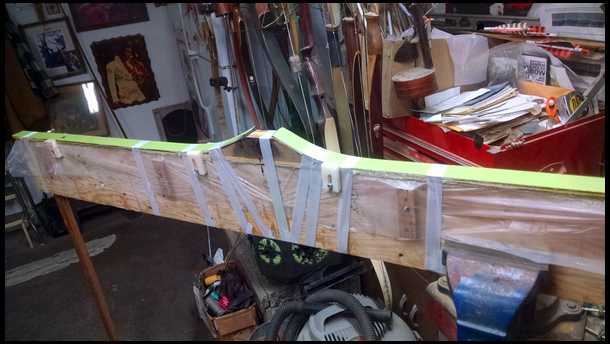
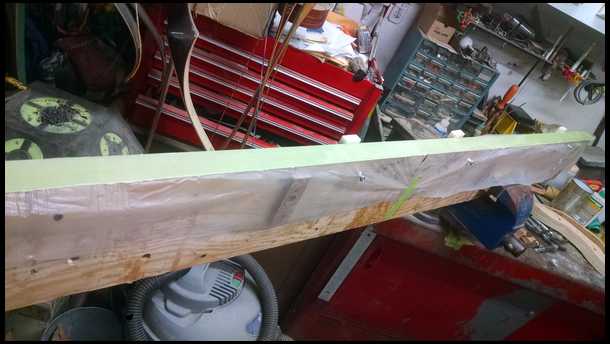
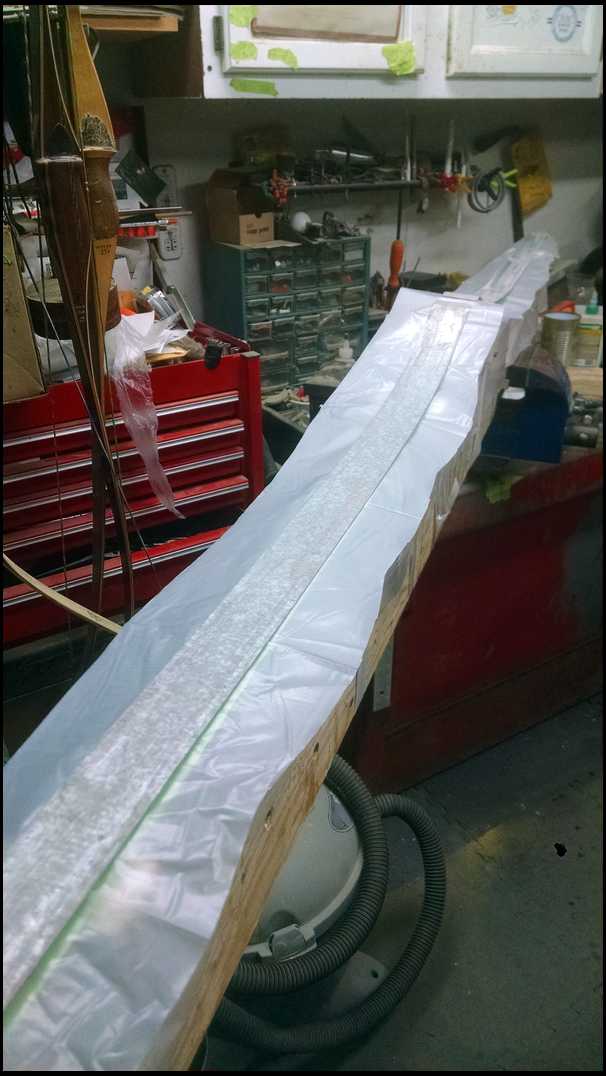
When I put epoxy on the belly glass I do it on the other side of the table,so I don't get glue on the tape side. I started taping everything down tight. Starting at the riser. Then the limb ends , working my way to the belly ramps. I already know how much to let stick up at the top of riser,from past experience. You can do a dry run and mark,so you'll know. JF
|
|
| From: bodymanbowyer
|
|
|
|
|
|
|
| Date: 16-Jan-17 |
|
I always put some 3 mil plastic on my form and I wax my form, earlier,just leave the wax on. Car wax. I also put some spacers on top of the riser to keep the ends of the wood and glass from bending over, that will cause a gap at the top of the belly ramps if you don't. JF
|
|
| From: bodymanbowyer
|
|
|
|
|
|
|
| Date: 16-Jan-17 |
|
Tape down the metal pressure strips. They are the same width as the form. About 20gauge sheet metal,cut on a sheer. They even the pressure of the hose. The hose is woven,it has lumps. JF
|
|
| From: bodymanbowyer
|
|
|
|
|
|
|
| Date: 16-Jan-17 |
|
Forgot I put another peice of plastic down before the hose, just in case. To keep any glue from getting on the hose. JF
|
|
| From: bodymanbowyer
|
|
|
|
|
|
|
| Date: 16-Jan-17 |
|
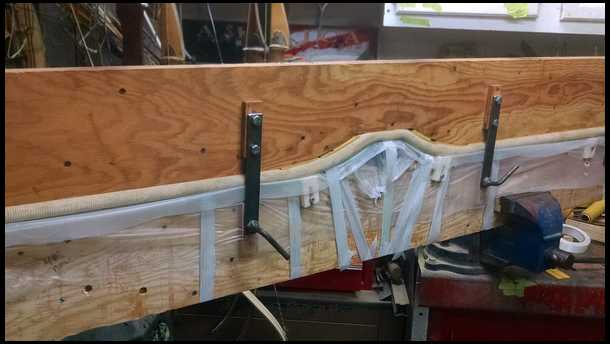
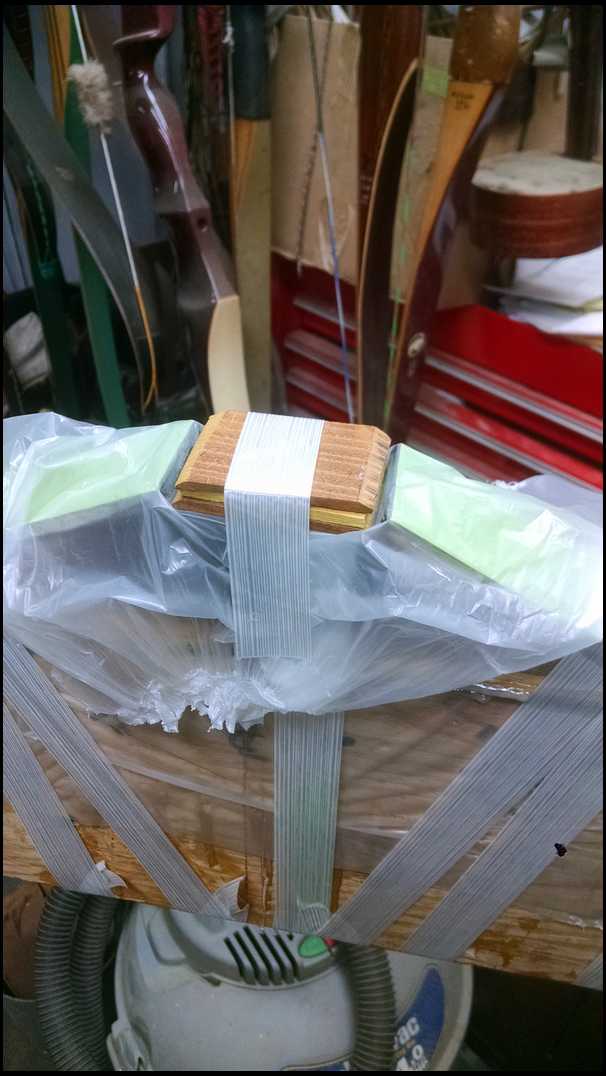
Now the top half of the form. I put a couple extra shims between the top of form and hose to keep the gap tighter between hose and belly laminations. This form was made for a bigger longer riser. I can adapt :) JF
|
|
| From: bodymanbowyer
|
|
|
|
|
|
|
| Date: 16-Jan-17 |
|
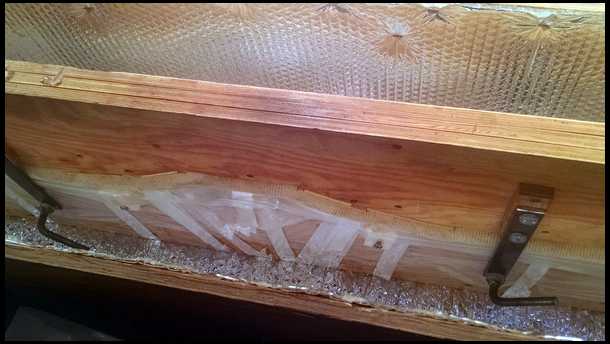
60psi in the hose and into the oven. My oven runs up to 180° shuts off and turns back on at 150° for 4hours. The glue kicks in about an hour. JF
|
|
| From: bodymanbowyer
|
|
|
|
|
|
|
| Date: 16-Jan-17 |
|
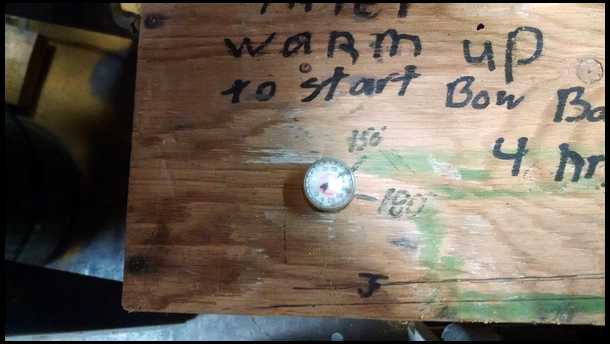
Man, this buildalong takes more time then doing it. I added a thermometer so I can always see what's going on. JF
|
|
| From: bodymanbowyer
|
|
|
|
|
|
|
| Date: 16-Jan-17 |
|
Let it cool down before you let the air out of the hose and open the form. JF
|
|
|
|
| From: bodymanbowyer
|
|
|
|
|
|
|
| Date: 16-Jan-17 |
|
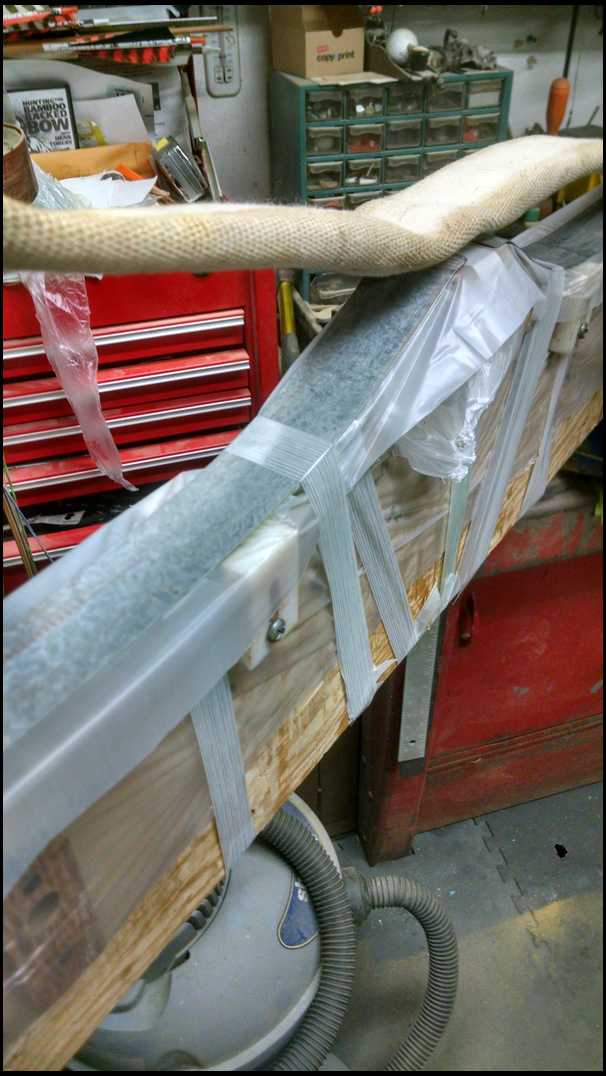
Cut the filiment tape on both sides and start u wrapping. JF
|
|
|
|
| From: bodymanbowyer
|
|
|
|
|
|
|
| Date: 16-Jan-17 |
|
There, isn't this pretty ;) stay tuned till tomorrow. To be continued :) JF
|
|
| From: cedar shooter
|
|
|
|
|
|
|
| Date: 16-Jan-17 |
|
Thank you sir I really enjoy your buildalongs. Rick
|
|
| From: Oldbowyer
|
|
|
|
|
|
|
| Date: 16-Jan-17 |
|
So Brother when you get done playing with this thing, when are you going to step out of your box and start building one of those Grizzlies???:)
|
|
|
|
| From: bodork
|
|
|
|
|
|
|
| Date: 16-Jan-17 |
|
This is really giving me the itch
|
|
| From: Matt Ewing
|
|
|
|
|
|
|
| Date: 17-Jan-17 |
|
Say it ain't so Jeff. Your going to build one of those weird curve things? :-)
|
|
| From: bodymanbowyer
|
|
|
|
|
|
|
| Date: 17-Jan-17 |
|
Yep my favorite a 59 grizzly a clone or my renditon with different woods. JF
|
|
| From: Bernie Bjorklund
|
|
|
|
|
|
|
| Date: 17-Jan-17 |
|
I'm not a bow builder, but I'm sure enjoying this thread! My son has built several bows for me and I'm always amazed at the amount of talent and patience is involved in these projects.
Bernie (formerly Catalpa)
|
|
| From: Chas
|
|
|
|
|
|
|
| Date: 17-Jan-17 |
|
This is a fun ride, haven't watched a build-a-long before. Thanks Jeff!
|
|
| From: ron w
|
|
|
|
|
|
|
| Date: 17-Jan-17 |
|
Looking good........
|
|
| From: jk
|
|
|
|
|
|
|
| Date: 17-Jan-17 |
|
Big respect!
|
|
| From: Jeff Durnell
|
|
|
|
|
|
|
| Date: 17-Jan-17 |
|
Glad I checked back in. I friggin LOVE it! That conglomerate of glue gorbs and lams don't look much like a bow yet does it? LOL... I enjoy that part. I can't wait to grind that crap off of there when comes off the form, but enjoy doing so. Just wait.... it'll come... there's a bow in there.... a GOOD one.
|
|
| From: Longcruise
|
|
|
|
|
|
|
| Date: 17-Jan-17 |
|
First thing I do when the goobers are off is get the tape off if it's clear glass. Just gotta know if there are any glue issues!
Only found a problem once and that was many years ago. Lately I have enough confidence to believe that it's all ok under the colored glass. But still there's that nagging fear!!!
|
|
| From: bodymanbowyer
|
|
|
|
|
|
|
| Date: 17-Jan-17 |
|
Longcruise, I here. It's hard to wait. Jeff D, you and I know there's a bow in that UGLY mess :) JF
|
|
| From: Stickbow Felty
|
|
|
|
|
|
|
| Date: 17-Jan-17 |
|
Jeff do you make take down recurves also?
|
|
| From: Stickbow Felty
|
|
|
|
|
|
|
| Date: 17-Jan-17 |
|
Jeff do you make take down recurves also?
|
|
| From: bodymanbowyer
|
|
|
|
|
|
|
| Date: 17-Jan-17 |
|
No, take downs of any bow,stick pretty. Just my rendition of a Hill,or a Northerner Mist style. My style :) A 1959 clone will be coming. JF
|
|
| From: bodymanbowyer
|
|
|
|
|
|
|
| Date: 17-Jan-17 |
|
Dang spell check. The above message was for stickbow felty :) JF
|
|
| From: Stoner
|
|
|
|
|
|
|
| Date: 17-Jan-17 |
|
Jeff, my last MI. deer on our north 40 was take with a Static Kodiak. After seeing Direwolf make one, I have wanted to do the same. Also maybe a all wood Grumley Deerslayer. Can't wait to finish building my new shop so I can let the creative juices flow again......Till then I will live through your build a long thread. Carry on. John
|
|
| From: bodymanbowyer
|
|
|
|
|
|
|
| Date: 17-Jan-17 |
|
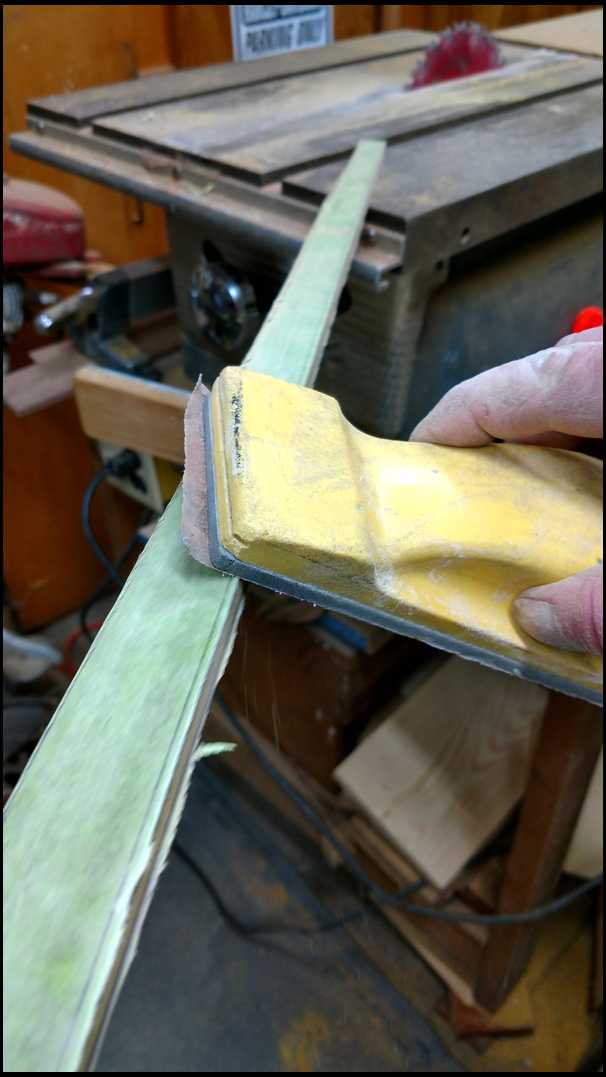
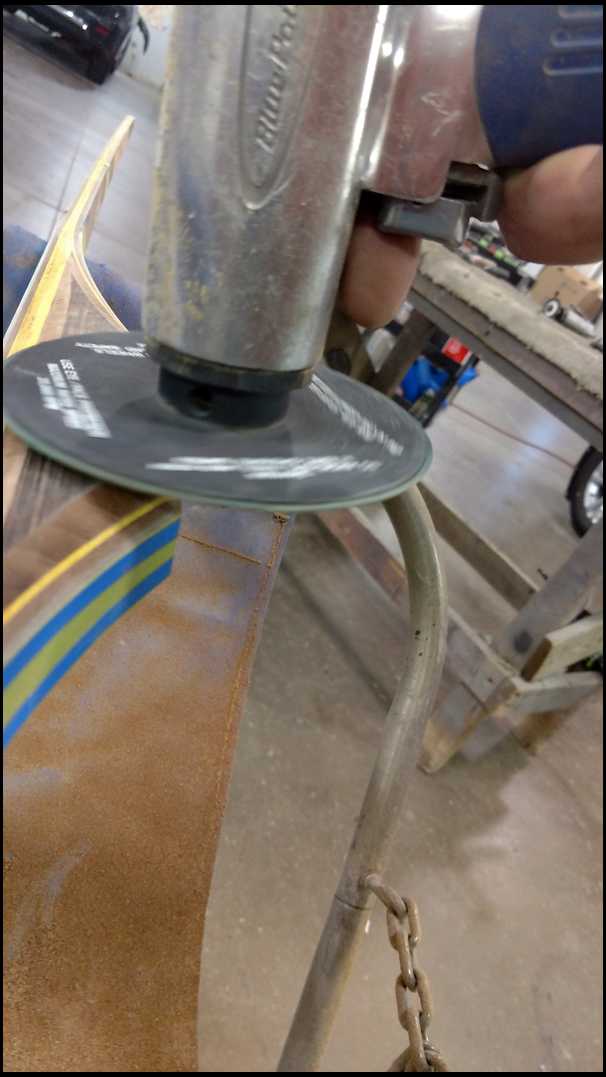
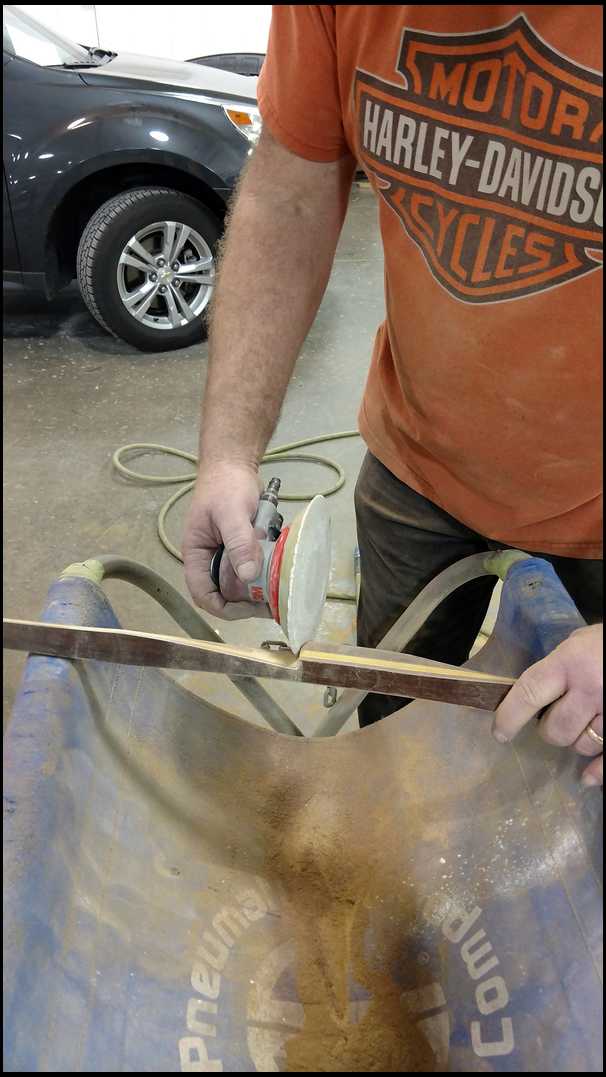
Allrighty I see where I left off. I gotta get this snit off the sides :) yuck. I switched the belt over on the edge grinder to a 24grit. So this won't take long,or burn. JF
|
|
| From: bodymanbowyer
|
|
|
|
|
|
|
| Date: 17-Jan-17 |
|
And knock down the stick out on top of the riser. To be extra careful not to pull a glass strand. Grind from glass towards wood direction. JF
|
|
| From: bodymanbowyer
|
|
|
|
|
|
|
| Date: 17-Jan-17 |
|

I nock the fuzzy tape edge off with some 80grit. Moving the block from glass towards wood direction and down towards the tip. Like you sharpening a knife. This will remove the tape that is rolled up on the edge. If this makes sense :) JF
|
|
|
|
|
|
| From: bodymanbowyer
|
|
|
|
|
|
|
| Date: 17-Jan-17 |
|
John I know how you feel about those static tip Bears. I just love them too.Oldbowyer made a take down version. He built one before I got to it :) it's coming my way to shoot it it and check it out. I'm gonna build one some day. First will be a 59 grizzly clone, great shooting bows both of them. JF
|
|
| From: bodymanbowyer
|
|
|
|
|
|
|
| Date: 17-Jan-17 |
|
Ow I'll transfer my center marks back around the bow to the back. I always keep track of my center. I'll mark out to 33"for nock grooves from center, and mark 68 1/2" to cut of the excess limb length. This helps in my tight work space. JF
|
|
|
|
| From: bodymanbowyer
|
|
|
|
|
|
|
| Date: 17-Jan-17 |
|
Cut away on my miter saw, slow and steady. If it splinters the edge a little it's OK. Because that will all get ground and sanded away later. Usually there isn't much splintering. 1/16" maybe. Jf
|
|
| From: Stoner
|
|
|
|
|
|
|
| Date: 17-Jan-17 |
|
Oop's, my bad. Mine is a 53' the last year for statics. 59' is when Bear went to rosewood handles. John
|
|
| From: Oldbowyer
|
|
|
|
|
|
|
| Date: 17-Jan-17 |
|
Still say that curly walnut would have built a nice curvy thing! LOL
|
|
| From: bodymanbowyer
|
|
|
|
|
|
|
| Date: 17-Jan-17 |
|
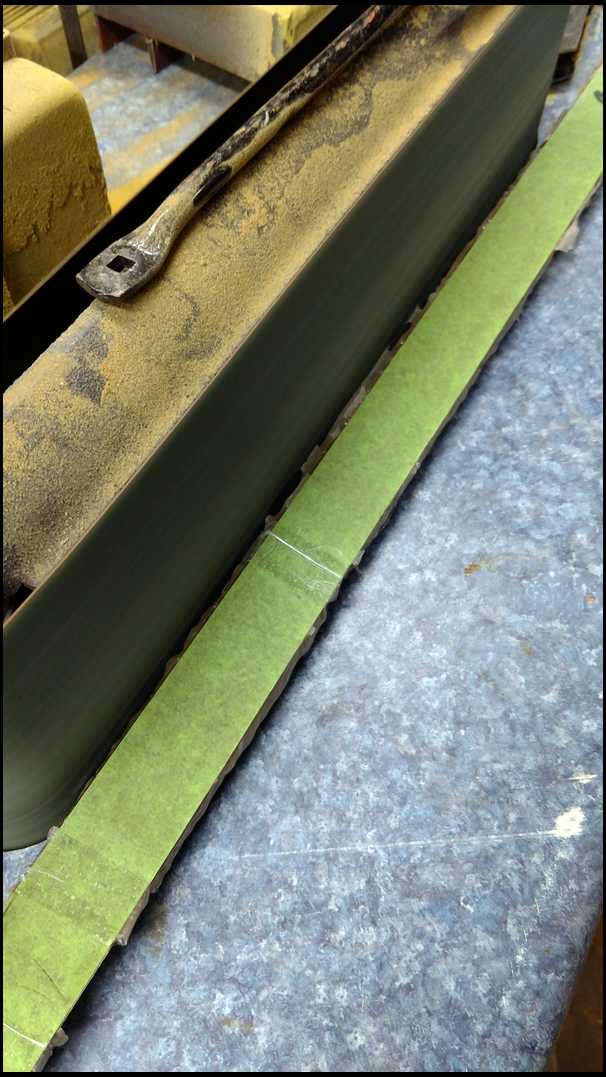
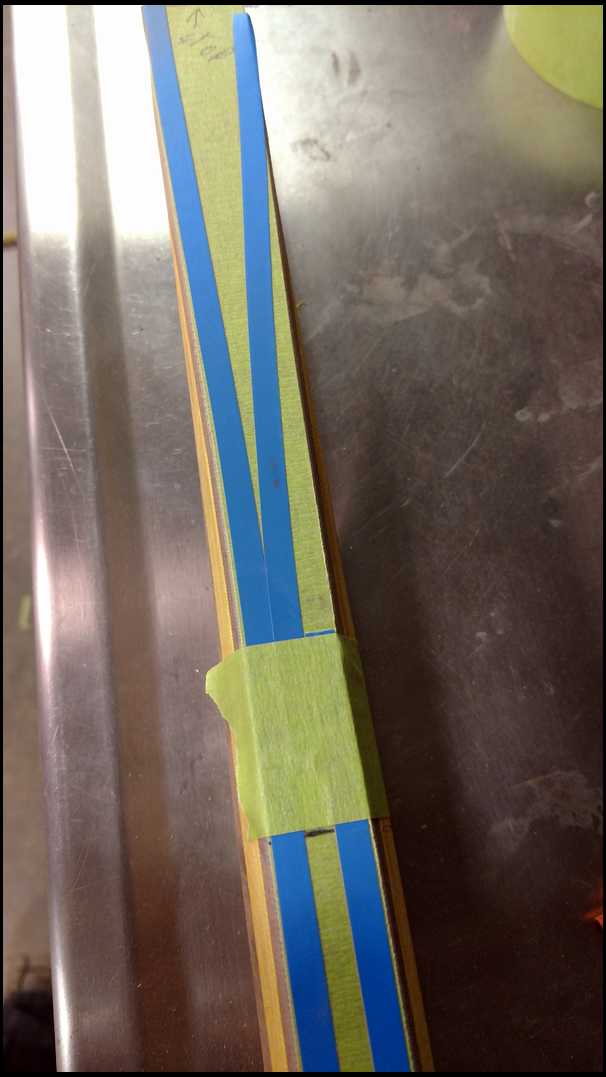
Mark the fade ends on the tape. So when cutting and grinding, you'll know where to STOP. JF
|
|
|
|
| From: bodymanbowyer
|
|
|
|
|
|
|
| Date: 17-Jan-17 |
|
I'll use one of my other bows as a pattern. My Maqokita Revenge bow will do. JF
|
|
| From: bodymanbowyer
|
|
|
|
|
|
|
| Date: 17-Jan-17 |
|
Trace and cut, on the table saw. Cut close to the traced line. The rest will get removed on the edge grinder, later. JF
|
|
| From: bodymanbowyer
|
|
|
|
|
|
|
| Date: 17-Jan-17 |
|
I missed a little tracing on the left but I know where I need to be. Oops. JF
|
|
| From: bodymanbowyer
|
|
|
|
|
|
|
| Date: 17-Jan-17 |
|
Both ends have the bulk of the excess material cut off. JF
|
|
| From: bodymanbowyer
|
|
|
|
|
|
|
| Date: 17-Jan-17 |
|
I can only cut so far on my saw. Because I mark the profile on the back of the bow. If I could mark it on the belly, I could cut farther,with the back down on the table saw. That would require me to make a different pattern :) JF
|
|
| From: bodymanbowyer
|
|
|
|
|
|
|
| Date: 17-Jan-17 |
|
I missed taking a picture of grinding to the line on my edge grinder. I keep cross sanding the tape off so I can see my line better. JF
|
|
|
|
| From: bodymanbowyer
|
|
|
|
|
|
|
| Date: 17-Jan-17 |
|
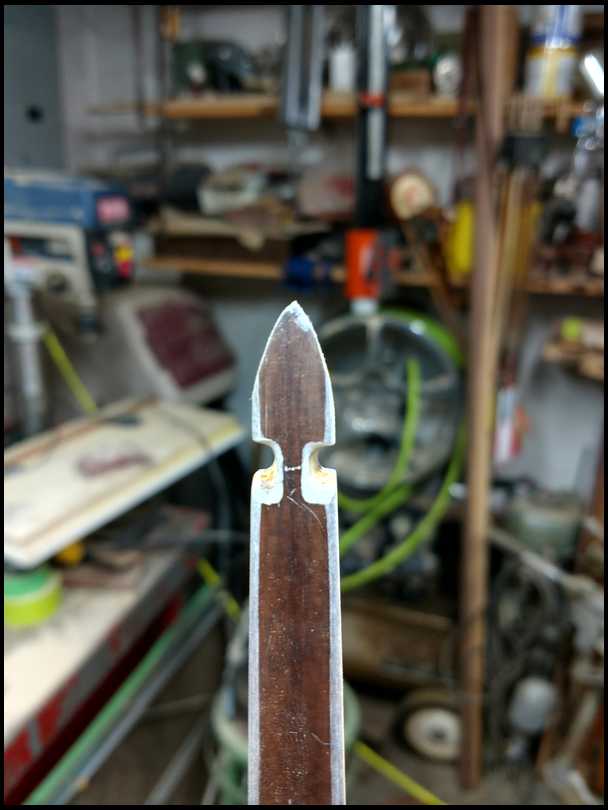
Now I have my limb profile, close enough to get some nock grooves filed in. JF
|
|
| From: bodymanbowyer
|
|
|
|
|
|
|
| Date: 17-Jan-17 |
|
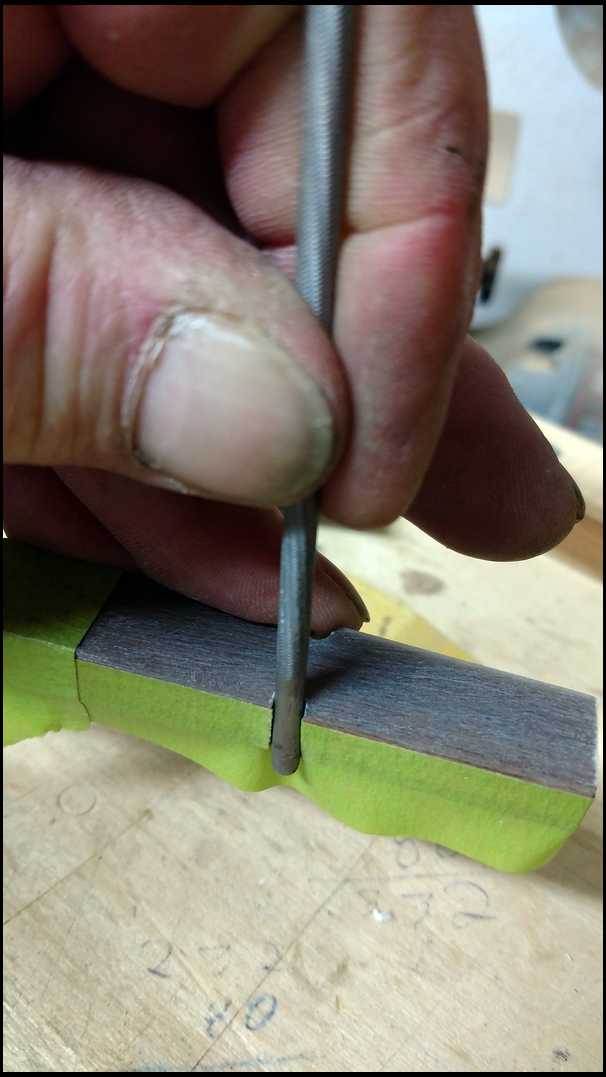
Going by the marks I made earlier I'll use a 5/52 chainsaw file. Straight across for now. File starting just above the mark. Just to the depth of the file for now. My limb tips are still alittle wider then where they're going to end up.
|
|
| From: bodymanbowyer
|
|
|
|
|
|
|
| Date: 17-Jan-17 |
|
A 1/8" thick peice of rubber strip, will pad the vise. I also have made some plywood jaw covers too. Using another file held on the bottom groove will aid in keeping the next groove to be filed, lined up. JF
|
|
| From: bodymanbowyer
|
|
|
|
|
|
|
| Date: 17-Jan-17 |
|
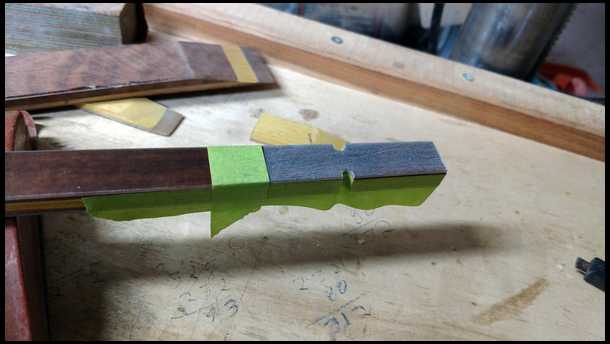
Now the string grooves are riffed in for now. When I go to brace the bow I'll just barely smooth the glass edges, cuz it will cut the string. I don't want to round them over to much yet on the back,cuz I'll be putting on tip overlays.
|
|
| From: bodymanbowyer
|
|
|
|
|
|
|
| Date: 17-Jan-17 |
|
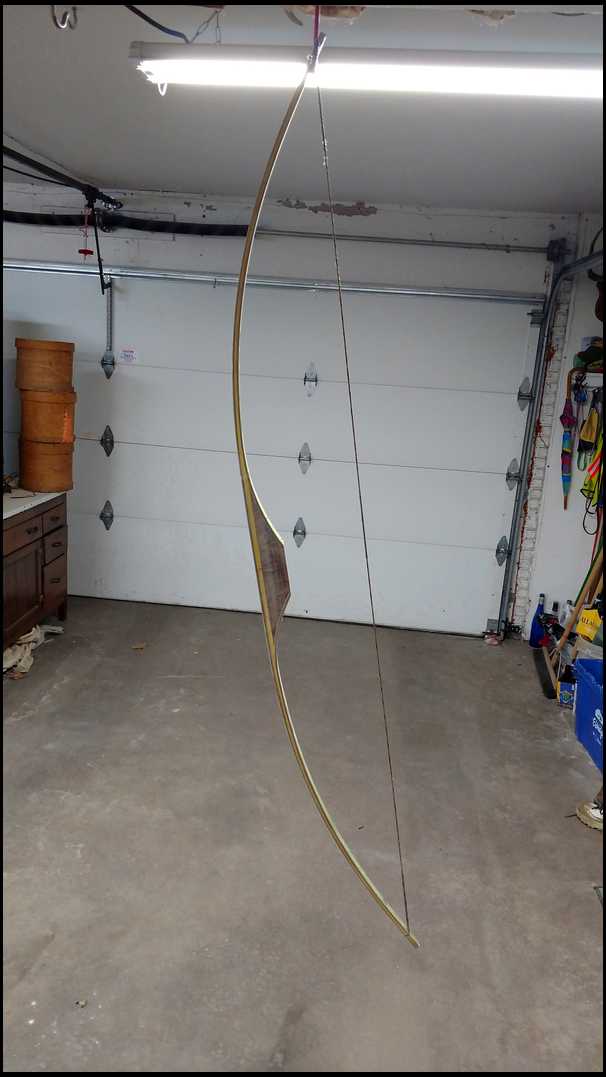
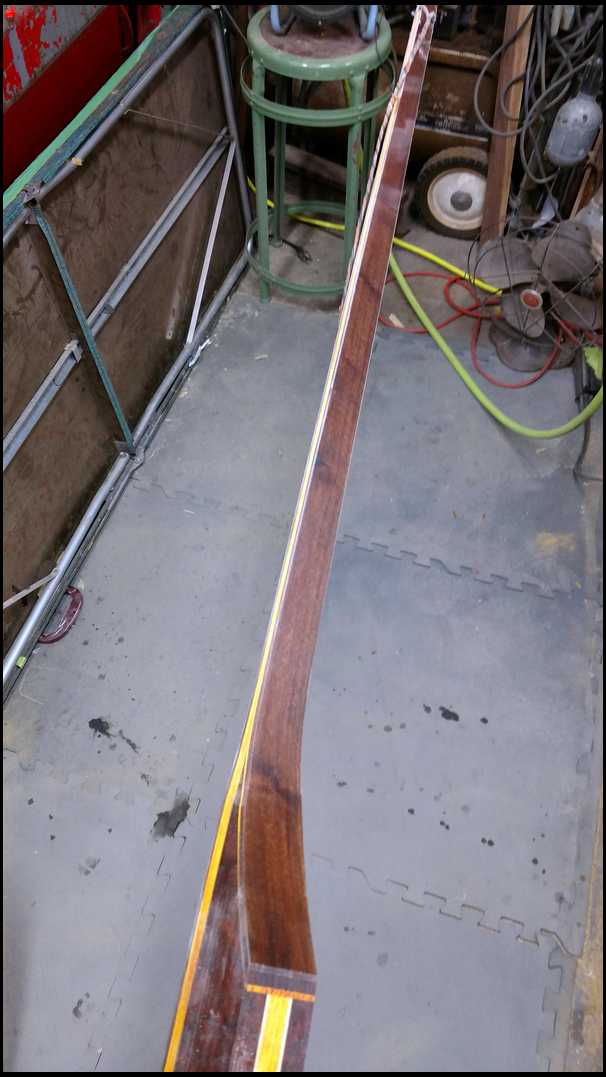
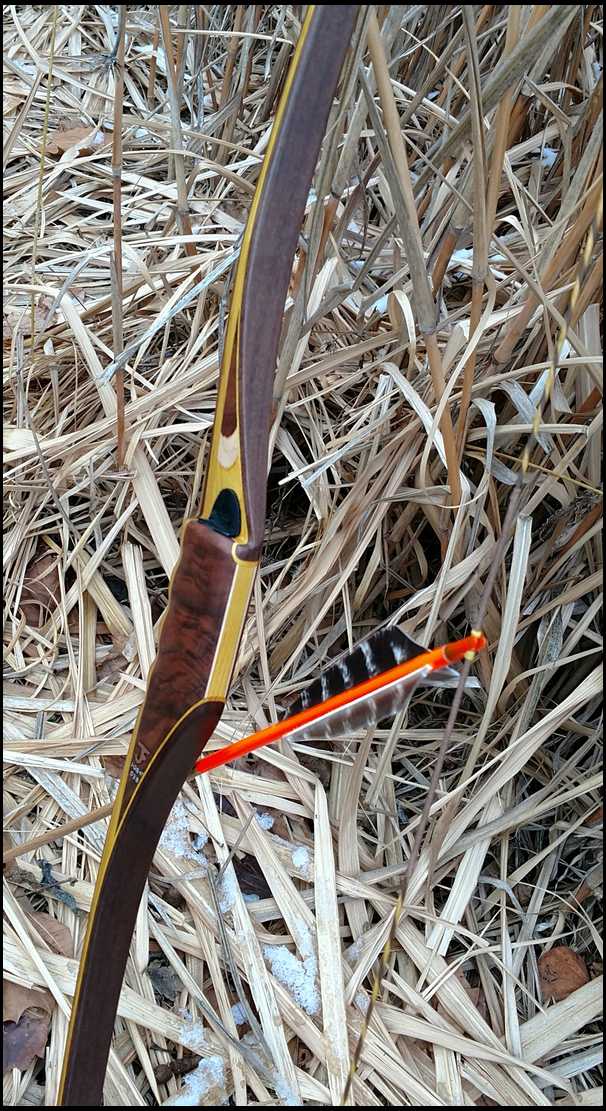
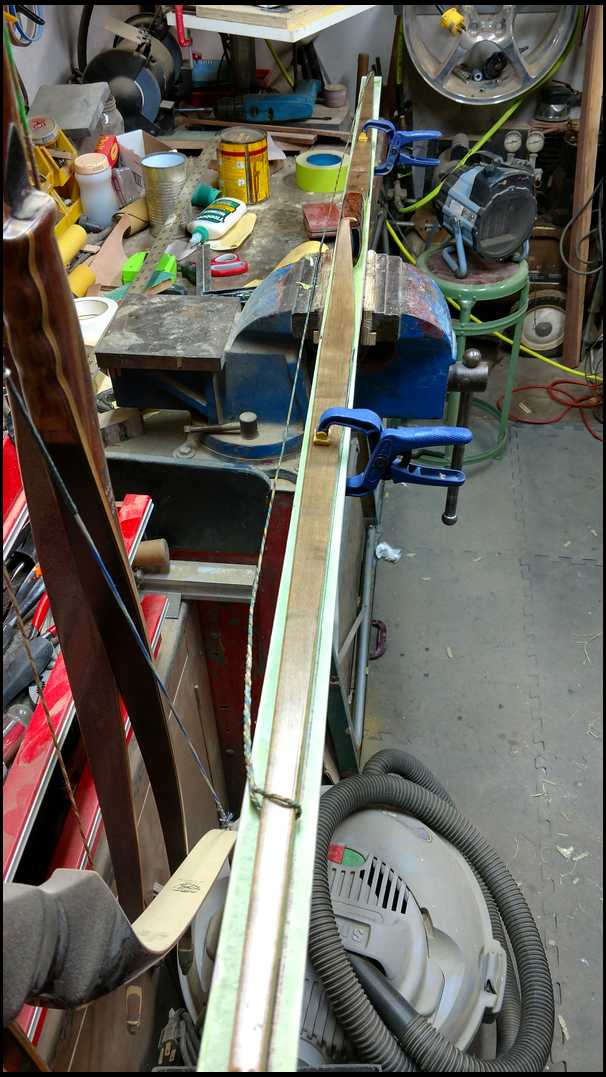
Here it is. First bracing at 7" I'm pretty lucky the bottom is 3/16 stiffer so far. I make my own strings and this one has braced a couple other bows. But it's days are numbered. 62# @ 28" I'll be going down to 55-57# . When I shape the riser completely the #s will drop some,cuz t it will let the bow bend more into the belly ramps at least a 1" to a 1 1/4-1/2. After the riser is completely shaped I'll finish tillering and working the poundage down. JF
|
|
| From: bodymanbowyer
|
|
|
|
|
|
|
| Date: 17-Jan-17 |
|
First shot, I'll need to be shooting to the right because the arrow is pointing left a lot. This bow is hitting hard :) JF
|
|
| From: bodymanbowyer
|
|
|
|
|
|
|
| Date: 17-Jan-17 |
|
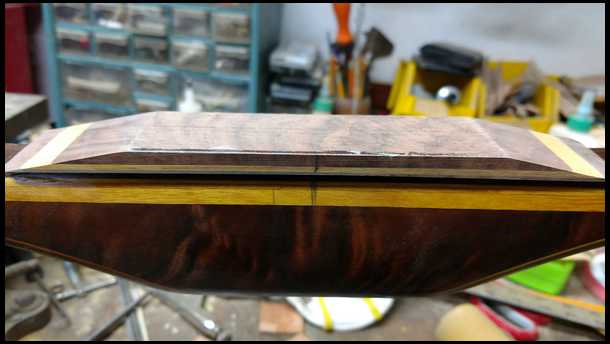
I can't wait. I've got to wipe some tru-oil on it to see the wood colors. WOW! Definitely looking good, I'm loving it. Tomorrow I will shape the riser,at lunch time at work. Have a good night everybody. JF
|
|
| From: bodork
|
|
|
|
|
|
|
| Date: 17-Jan-17 |
|
Jeff, you forgot to mention that it's very important to lightly run your fingers along the limb edge after you profile it so you can pick up any fiberglass splinters in your hand.
|
|
|
|
|
|
| From: TravisB
|
|
|
|
|
|
|
| Date: 17-Jan-17 |
|
This is awesome! Thanks! Really want to learn how to do this in my retirement. 9 more years!??
|
|
| From: TravisB
|
|
|
|
|
|
|
| Date: 17-Jan-17 |
|
This is awesome! Thanks! Really want to learn how to do this in my retirement. 9 more years!??
|
|
| From: bodymanbowyer
|
|
|
|
|
|
|
| Date: 17-Jan-17 |
|
You right bodork :) keep your fingers OFF THE EDGES. It's not a shiny new paint job. It WILL STICK you. That why I run some 80grit down the glass edges from riser to tips, NOT back and forth. That could raise a fiver glass splinter fro the edge of the sand paper. So riser to tips lighty and it will be good. It won't take much to tame the edges down. If you want to run your fingers down the corners, your on your own :) it WILL hurt. JF
|
|
| From: bodymanbowyer
|
|
|
|
|
|
|
| Date: 17-Jan-17 |
|
Oh yeah, my first line of the thread, should have been to wear safety glasses and a dust mask. JF
|
|
| From: JamesV
|
|
|
|
|
|
|
| Date: 18-Jan-17 |
|
Bodyman..................
Any estimate of the total number of hours in this build?????
This is a very interesting and detailed build along, thanks for posting.
James
|
|
| From: bodymanbowyer
|
|
|
|
|
|
|
| Date: 18-Jan-17 |
|
James, I'm thinking it only seems like a lot of time to build a bow. Doing the complete buildalong, definitely takes a lot more time :) it's worth it :) to me showing how I do it. Maybe it'll spark a interest in some new people. Or maybe I'll get suggestions from others to learn a better way of doing something. It's all fun. JF
|
|
| From: Longcruise
|
|
|
|
|
|
|
| Date: 18-Jan-17 |
|
I have a feeling that there is more for me to learn here than to teach, but there is one thing I would throw out to you.
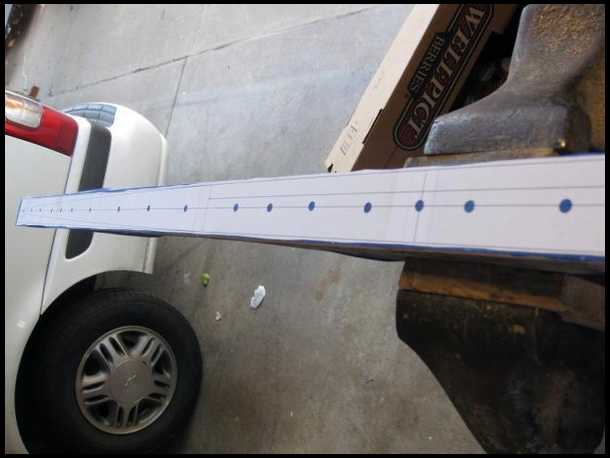
I noticed that you used a previously built bow to do your frontal profile. That's a good idea if you have the profile you want handy or want to repeat the same profile with each bow.
Since I'm a bit of an experimenter [sometimes to detriment :)] I use a freeby cad program to design profiles and seldom repeat them. I draw a centerline down the back of the bow and then use a hole punch to make holes in the center line of the profile. That allows glueing the profile pattern onto the back of the bow using the center line and the show thru holes to maintain a straight alignment.
Here's a couple pics. Probably not a very good explanation.
|
|
|
|
| From: bodymanbowyer
|
|
|
|
|
|
|
| Date: 18-Jan-17 |
|
That makes sense :) thanks. JF
|
|
| From: Easykeeper
|
|
|
|
|
|
|
| Date: 18-Jan-17 |
|
Great thread, thank you for taking the time!
|
|
| From: Dry Bones
|
|
|
|
|
|
|
| Date: 18-Jan-17 |
|
Been out for a few days Jeff, That bow is Really coming together. If I get caught up on homework, and it slacks in the rain department, I am going to get a few arrows through Southern Lightning.
-Bones
|
|
| From: Flinger1
|
|
|
|
|
|
|
| Date: 18-Jan-17 |
|
Those wood combos are nice man!!!
|
|
| From: bodymanbowyer
|
|
|
|
|
|
|
| Date: 18-Jan-17 |
|
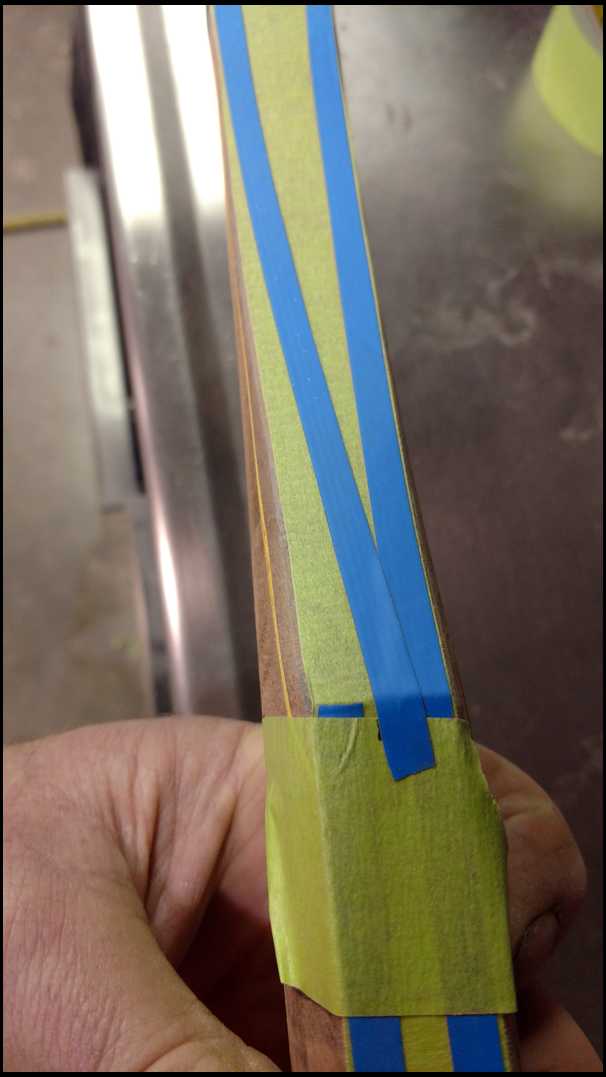
OK :) I like to always keep track of the center. I'll remask the riser area,so I can layout the riser profile, without shelf. JF
|
|
|
|
| From: bodymanbowyer
|
|
|
|
|
|
|
| Date: 18-Jan-17 |
|
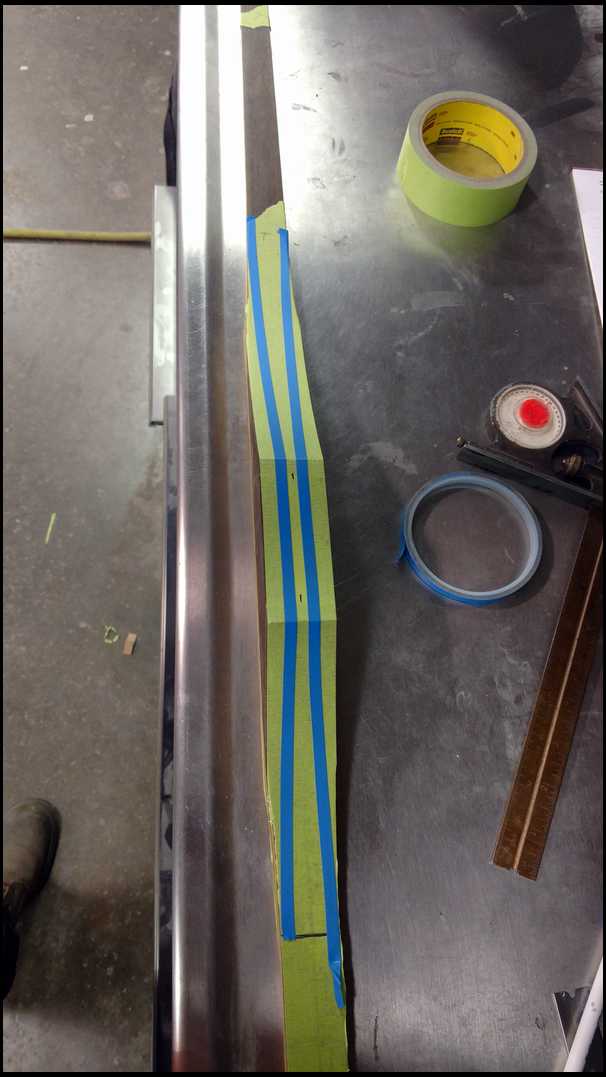
I use another color tape to layout the riser shape. JF
|
|
| From: bodymanbowyer
|
|
|
|
|
|
|
| Date: 18-Jan-17 |
|
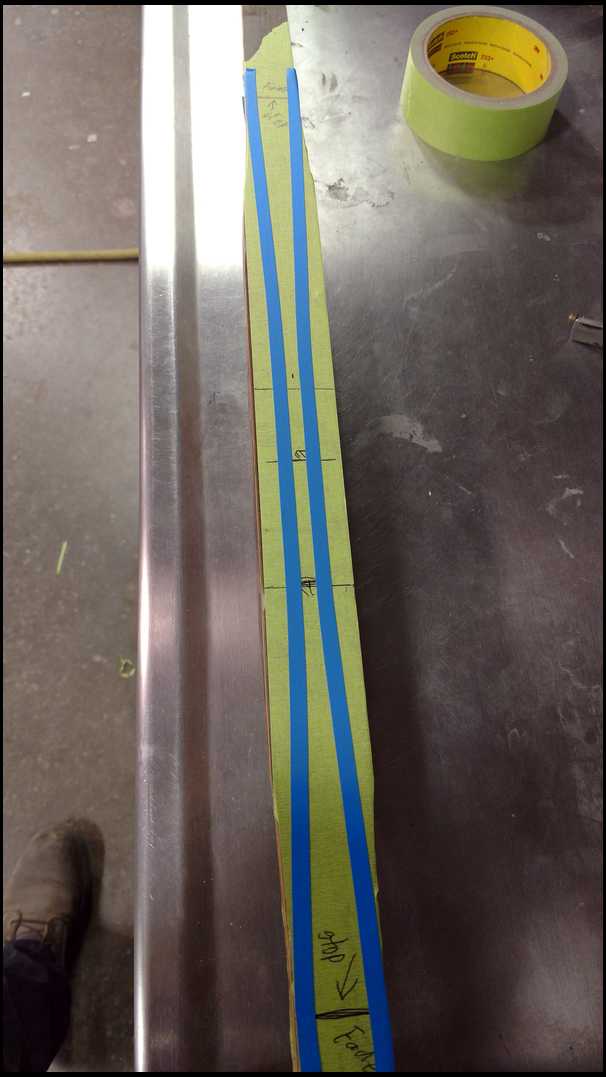
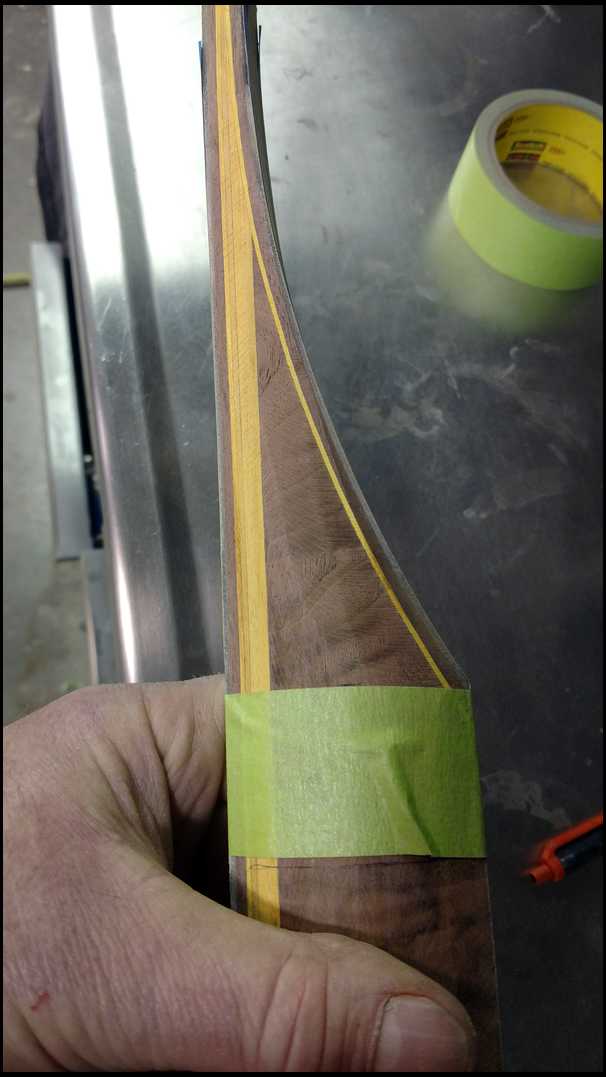
Back and belly,all done by eyeballing it. JF
|
|
| From: bodymanbowyer
|
|
|
|
|
|
|
| Date: 18-Jan-17 |
|

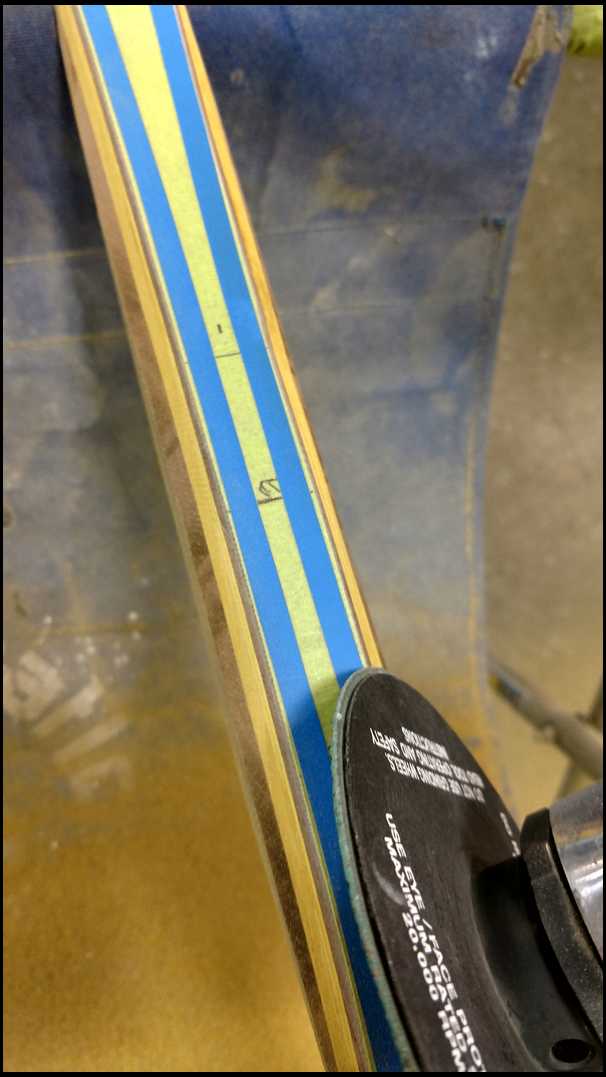
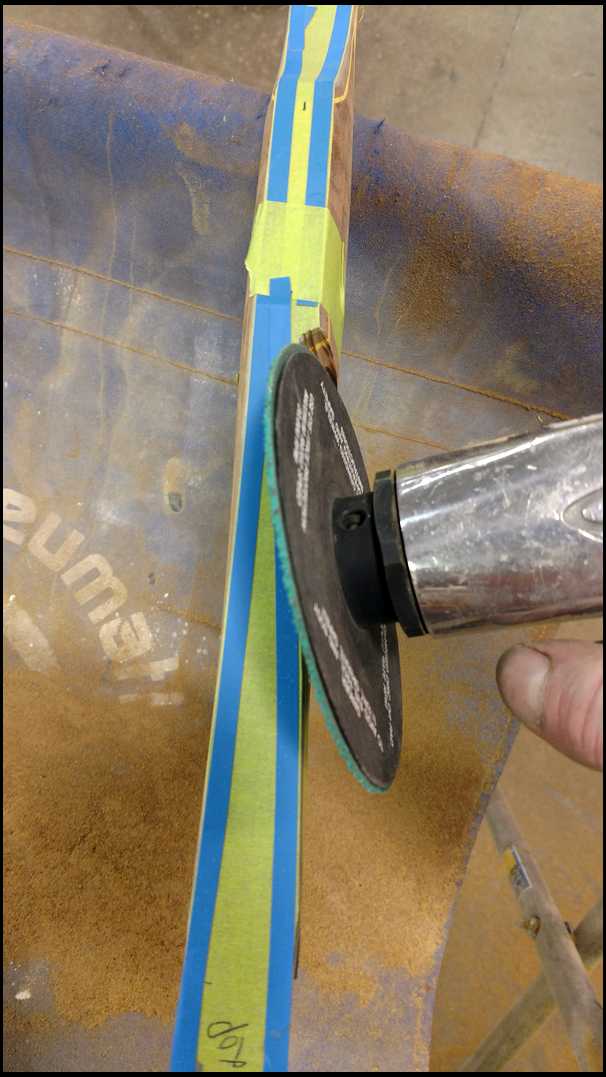
I mark my ends of the fades with a line and stop. I use my reversible 5" grinder with 24grit. Always grind from glass to wood. I grind to the line on a low angle. JF
|
|
|
|
| From: bodymanbowyer
|
|
|
|
|
|
|
| Date: 18-Jan-17 |
|

Both sides ground to the line on the back. JF
|
|
| From: bodymanbowyer
|
|
|
|
|
|
|
| Date: 18-Jan-17 |
|
Belly side grind the same way. JF
|
|
| From: bodymanbowyer
|
|
|
|
|
|
|
| Date: 18-Jan-17 |
|
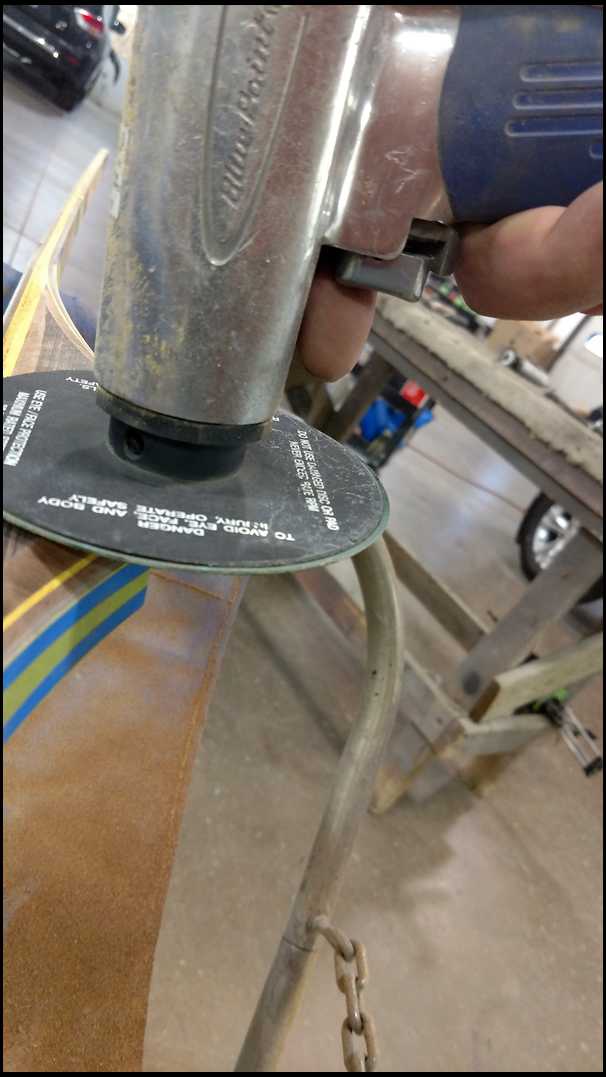
Now grind, with the flat of the grinder disc, working the sides flat and narrower. JF
|
|
|
|
|
|
| From: bodymanbowyer
|
|
|
|
|
|
|
| Date: 18-Jan-17 |
|
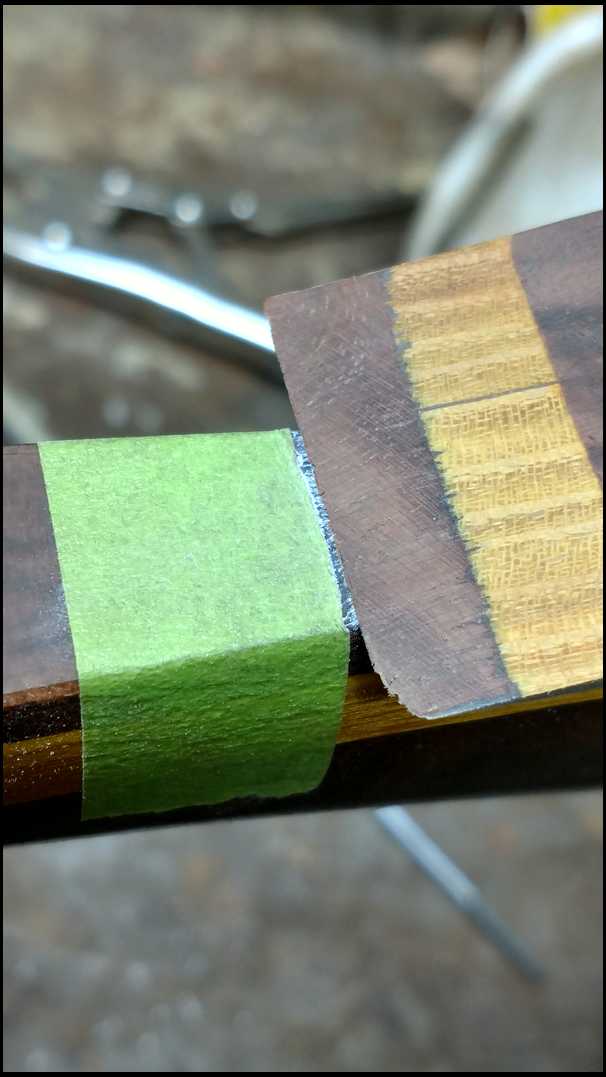
Now layout the shelf on the correct side. I use tape and measure a 1 1/2" up from center line, for the shelf a slight raised curve. JF
|
|
|
|
|
|
| From: bodymanbowyer
|
|
|
|
|
|
|
| Date: 18-Jan-17 |
|
Now this is where my reversible air grinder comes in handy. So I can always grind from glass to wood. JF
|
|
|
|
|
|
| From: cedar shooter
|
|
|
|
|
|
|
| Date: 18-Jan-17 |
|
That green 3m tape is some good stuff. Rick
|
|
|
|
|
|
| From: bodymanbowyer
|
|
|
|
|
|
|
| Date: 18-Jan-17 |
|
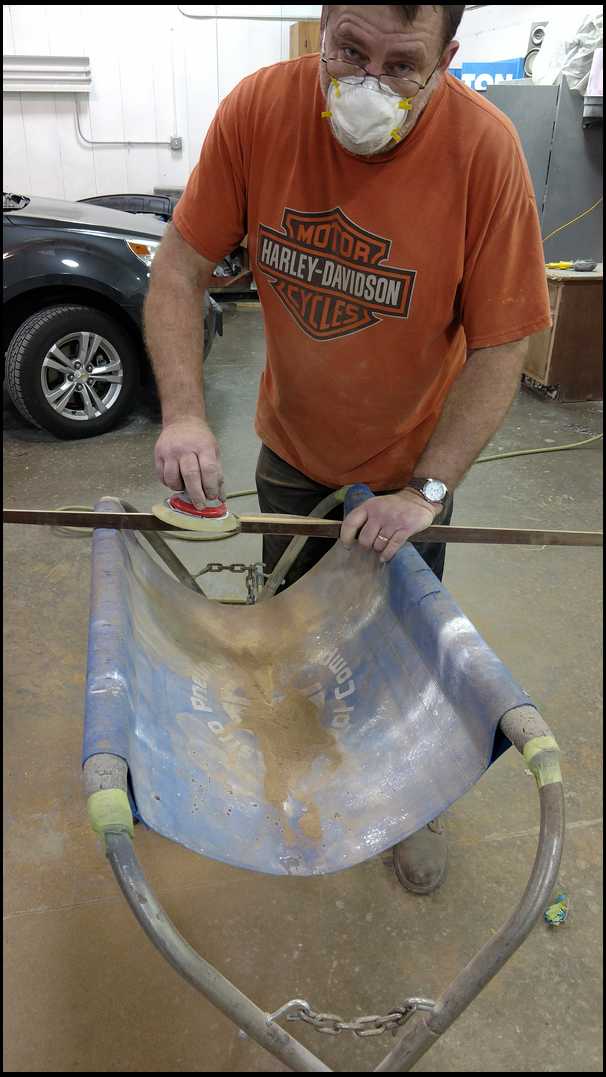
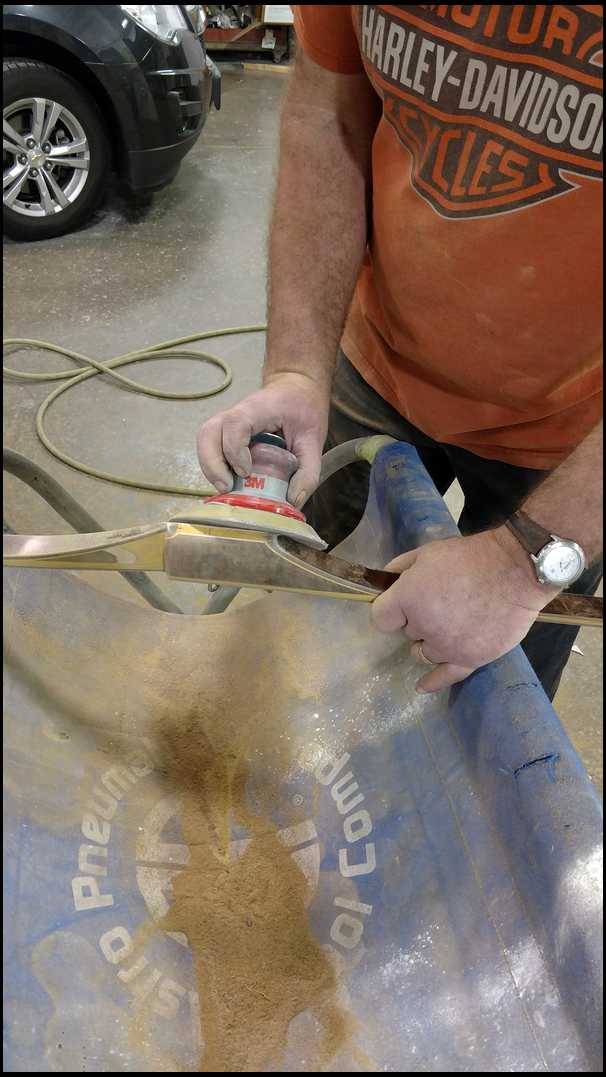
After it's all fuffed in with the grinder, I switch to my DA with 80grit and blend and smooth out the grinder marks. Don't take it to small with the grinder, leave some for the DA sander. JF
|
|
| From: bodymanbowyer
|
|
|
|
|
|
|
| Date: 18-Jan-17 |
|
I don't know what fuffed is put I know what riffed in is. My coworker was able to get some still action pictures for me. JF
|
|
| From: bodymanbowyer
|
|
|
|
|
|
|
| Date: 18-Jan-17 |
|
The edge of the DA gets into the corners well and leaves it slightly rounded. Just like it was filed. JF
|
|
| From: bodymanbowyer
|
|
|
|
|
|
|
| Date: 18-Jan-17 |
|
Round over the palm side of the grip, I like a flat about a 1/2" the round the corners. I also round the end of the glass and blend it to the flat of grip. JF
|
|
| From: bodymanbowyer
|
|
|
|
|
|
|
| Date: 18-Jan-17 |
|
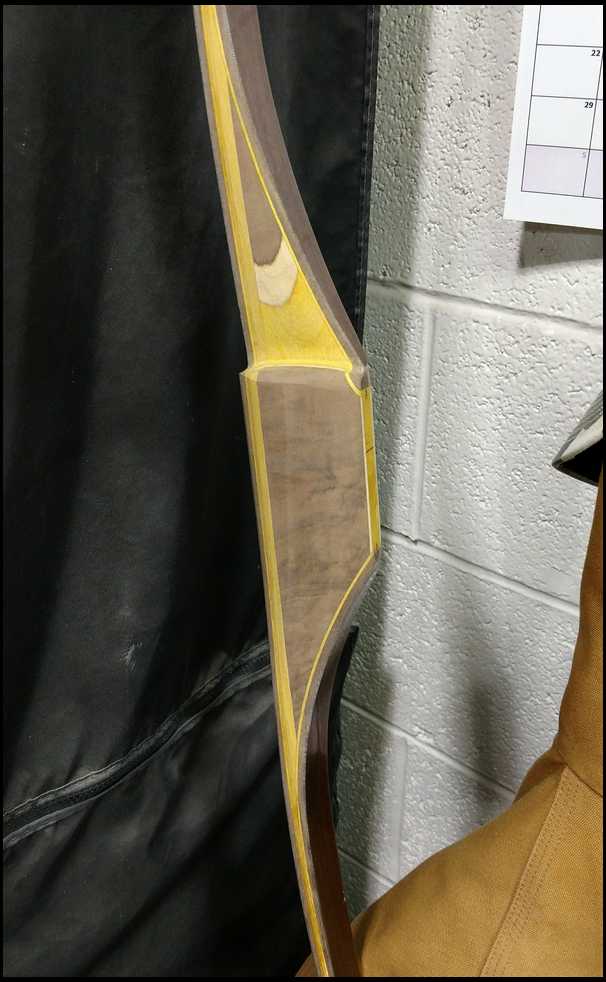
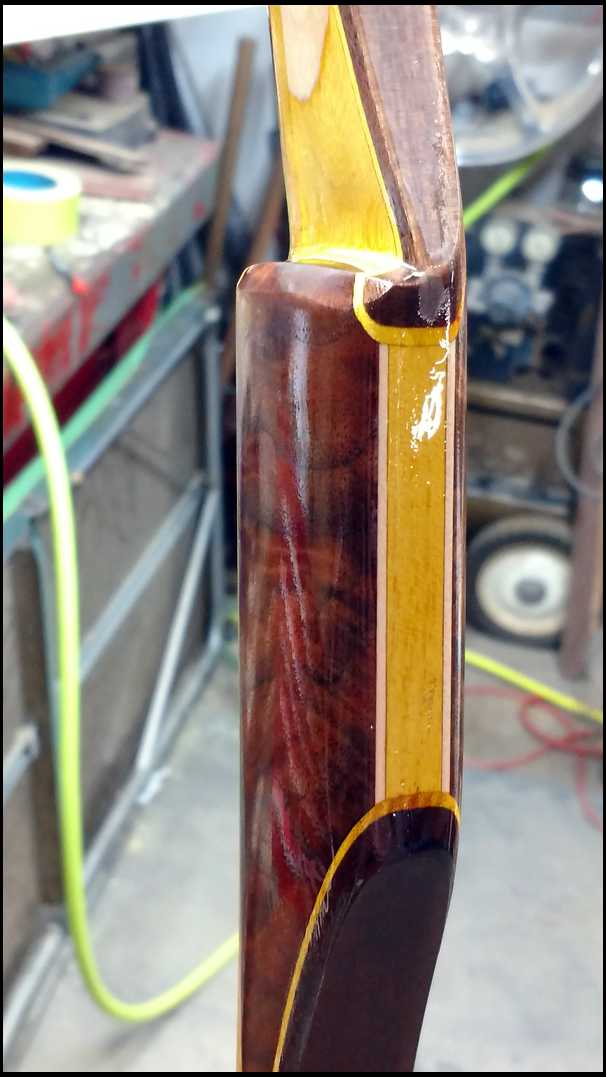
Looks good, till I get the grip and tip overlays glued on. Then there will be more fine sanding till I like the shape and deep sanding marks are gone. 80-150- 320. Then I'll start the Big Jim's gloss epoxy fill coats. JF
|
|
| From: bodymanbowyer
|
|
|
|
|
|
|
| Date: 18-Jan-17 |
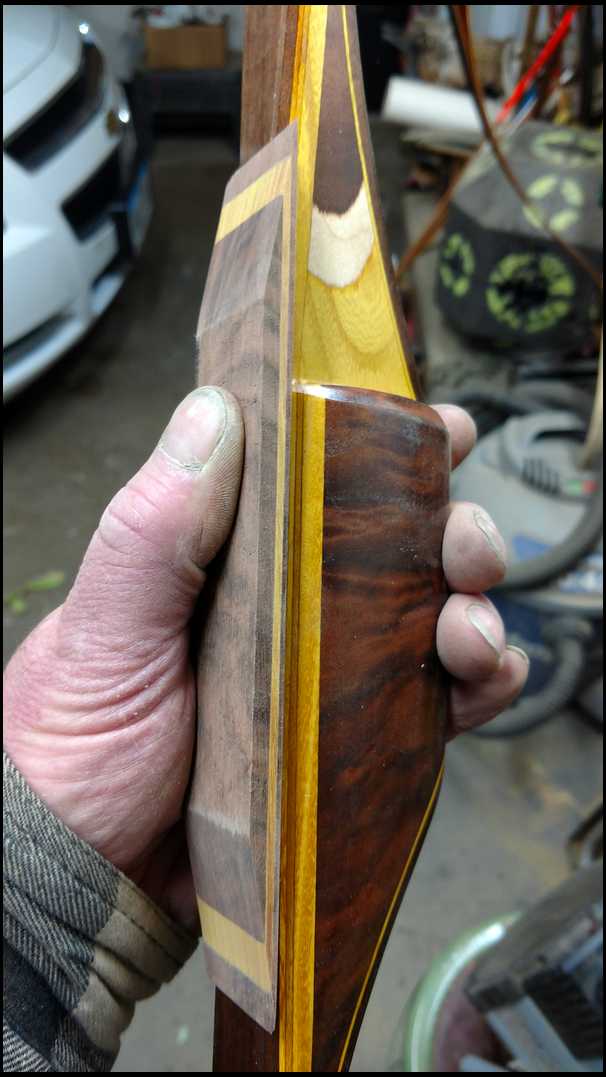
|
When I got home, I couldn't wait. I had to put on a couple coats of Big Jim's gloss epoxy sealer. So I can see the wood grain pop. A little premature but it will get sanded more when I get the overlays on. It looks sweet. Maybe Matt won't want it ;) JF
|
|
|
|
|
|
| From: bodymanbowyer
|
|
|
|
|
|
|
| Date: 18-Jan-17 |
|
Tomorrow night I'll get working on the overlays. So stay tuned. JF
|
|
| From: BenM
|
|
|
|
|
|
|
| Date: 18-Jan-17 |
|
Looks great
|
|
|
|
| From: LBshooter
|
|
|
|
|
|
|
| Date: 18-Jan-17 |
|
Beautiful looking bow and what a talent to have been blessed with. Thanks for posting, it's fun to follow.
|
|
| From: Nemah
|
|
|
|
|
|
|
| Date: 18-Jan-17 |
|
Pretty cool stuff Jeff! I'm learning a lot! Richard
|
|
| From: Knifeguy
|
|
|
|
|
|
|
| Date: 18-Jan-17 |
|
Wow Jeff, Seeing this makes me appreciate mine even more! I think I'll use it for the next FS when it quits raining enough for me not to get soaked. Lance.
|
|
| From: PaPa Doc
|
|
|
|
|
|
|
| Date: 19-Jan-17 |
|
Good job!
|
|
| From: SoDak Jake
|
|
|
|
|
|
|
| Date: 19-Jan-17 |
|
Damn good looking.
|
|
| From: Longcruise
|
|
|
|
|
|
|
| Date: 19-Jan-17 |
|
Waiting to see if you cover that beautiful grain with a piece of leather. ;)
|
|
| From: bodymanbowyer
|
|
|
|
|
|
|
| Date: 19-Jan-17 |
|
No leather grip will cover up my wood bows, nope not me. I love the look of wood :) JF
|
|
| From: Bfulldraw
|
|
|
|
|
|
|
| Date: 19-Jan-17 |
|
Probably the best buildalong I have seen. Very nice job with the pics. Peaks my interest to try it myself.
|
|
| From: CD
|
|
|
|
|
|
|
| Date: 19-Jan-17 |
|
Awesome!!!
|
|
|
|
| From: muddyIA
|
|
|
|
|
|
|
| Date: 19-Jan-17 |
|
Whoever ordered that one is getting what they paid for. Love that osage, absolutely LOVE it.
|
|
| From: Renegade
|
|
|
|
|
|
|
| Date: 19-Jan-17 |
|
That is looking Great...
|
|
| From: Matt Ewing
|
|
|
|
|
|
|
| Date: 19-Jan-17 |
|
Its mine and yes I want it! Jeff has been great to work with.
|
|
| From: bodymanbowyer
|
|
|
|
|
|
|
| Date: 19-Jan-17 |
|
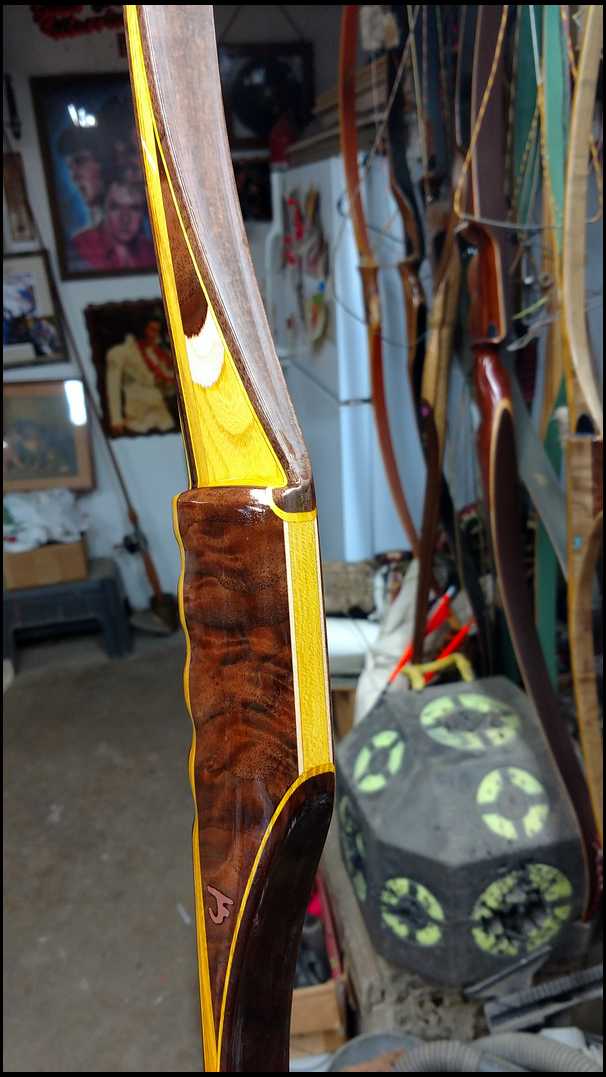
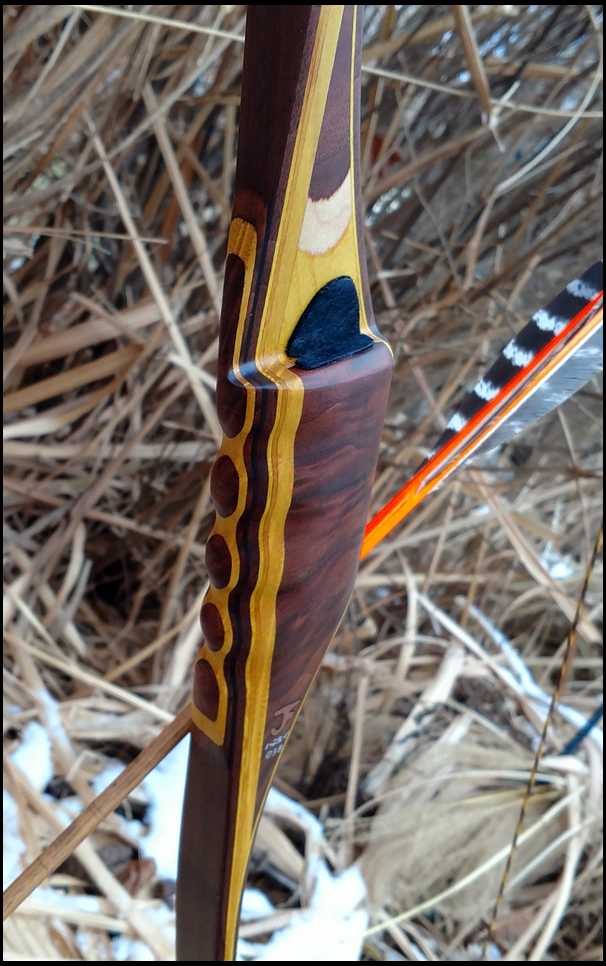
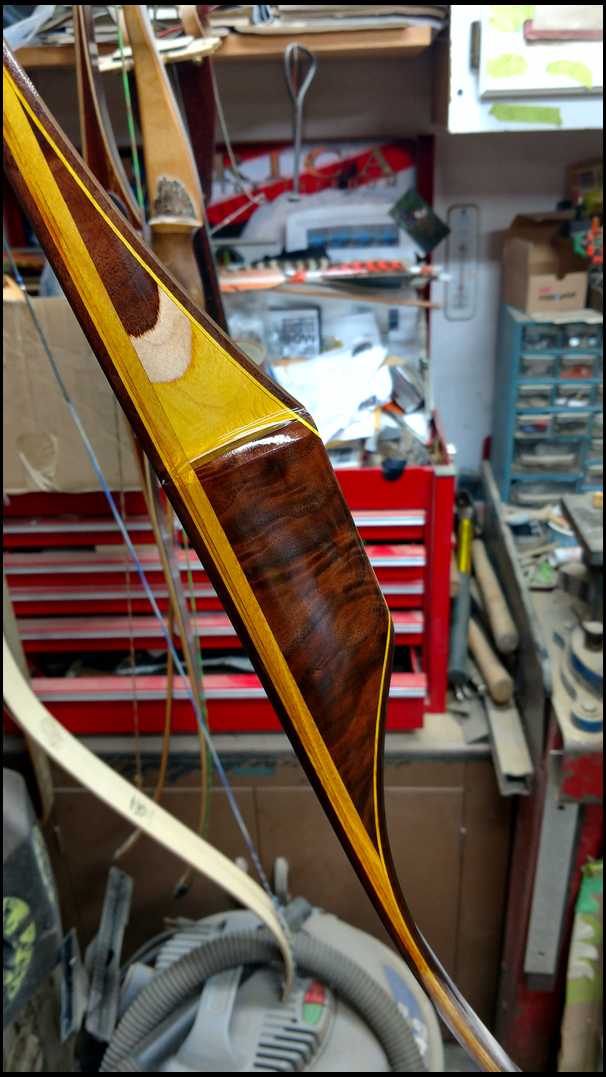
Thanks Matt :) you've been helpful, in knowing what you want. We were trying to figure out what overlays to use. We came up with, walnut,Osage, walnut,for the grip overlay. The grip overlay will have finger grooves,by request. JF
|
|
| From: bodymanbowyer
|
|
|
|
|
|
|
| Date: 19-Jan-17 |
|
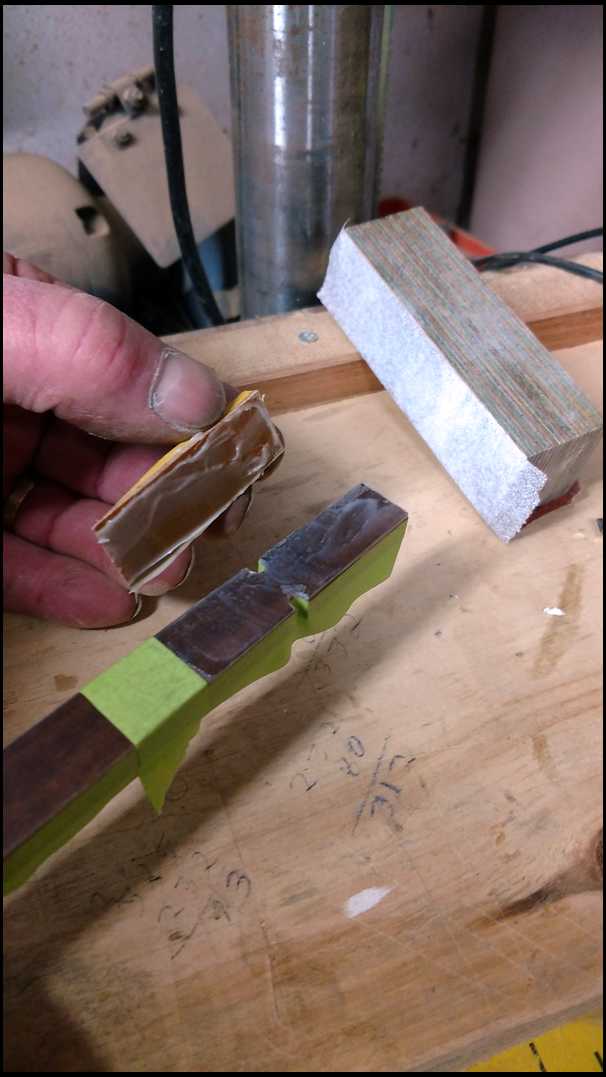
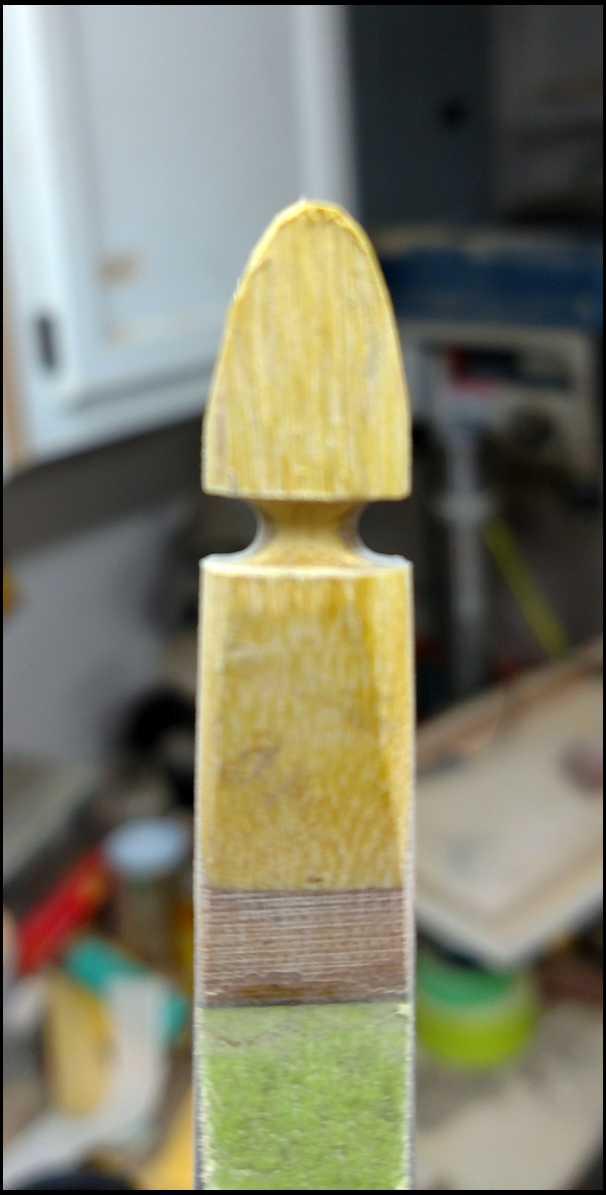
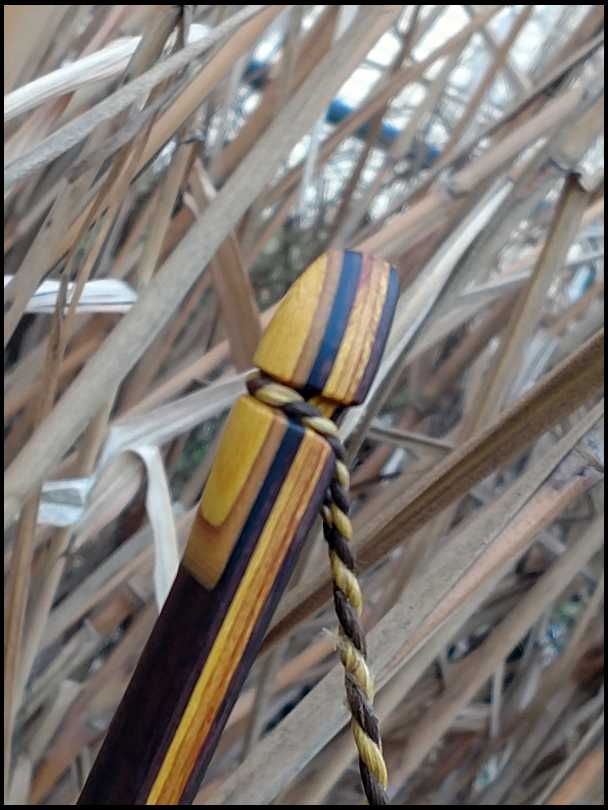
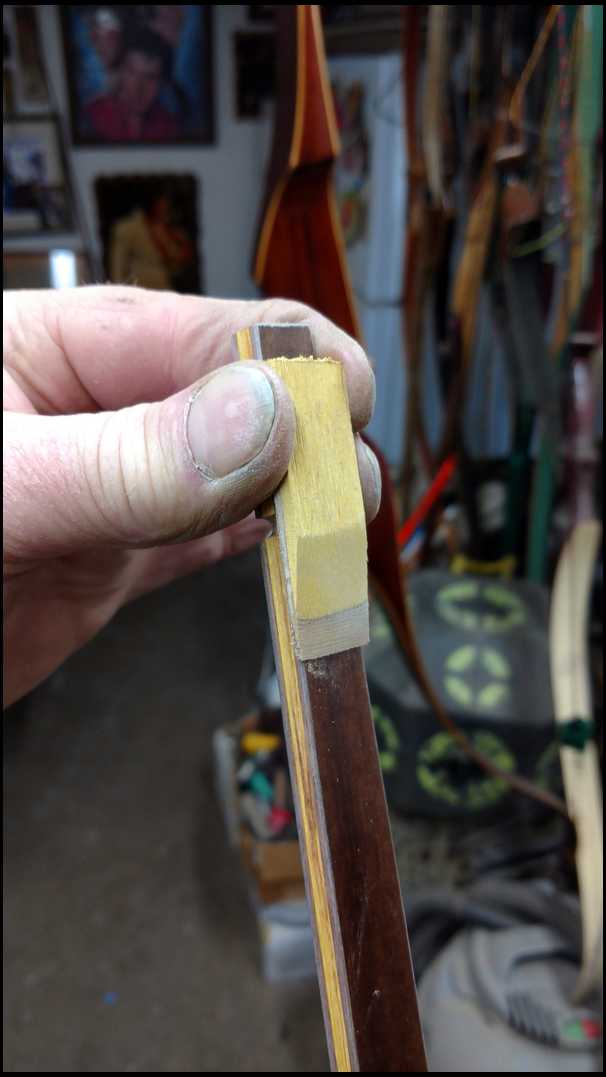
The tip overlay will be a 1/16 tan phenolic and Osage. The Osage will change closer color to the phenolic in time. The tips will be plenty strong for no stretch string, like the bcyx that the bow will have.
|
|
| From: bodymanbowyer
|
|
|
|
|
|
|
| Date: 19-Jan-17 |
|
All glued together with smooth on epoxy. Clamped in the vise with straight boards and a couple extra clamps. This will cure 24 hours. The tip overlay is in the picture too. JF
|
|
| From: bodymanbowyer
|
|
|
|
|
|
|
| Date: 19-Jan-17 |
|
I did switch the grit on my belt sander to 36grit, but I should have switched to 40grit. That way the thin edges don't look like fuzzy feathers. So I sanded them by had with some 80grit. Before they were glued. Something I learned through trial and error :) JF
|
|
| From: bodymanbowyer
|
|
|
|
|
|
|
| Date: 19-Jan-17 |
|
Out off the clamps and ready to clean up the edges with the edge grinder. JF
|
|
| From: Oldbowyer
|
|
|
|
|
|
|
| Date: 19-Jan-17 |
|
Looks good and looks like Mr. Ewing is pleased with it!
When you get done playing with that maybe you can move on to one of those curvy things LOL. Put a box in the mail today has your name on it for a little motivation :)
|
|
| From: bodymanbowyer
|
|
|
|
|
|
|
| Date: 19-Jan-17 |
|
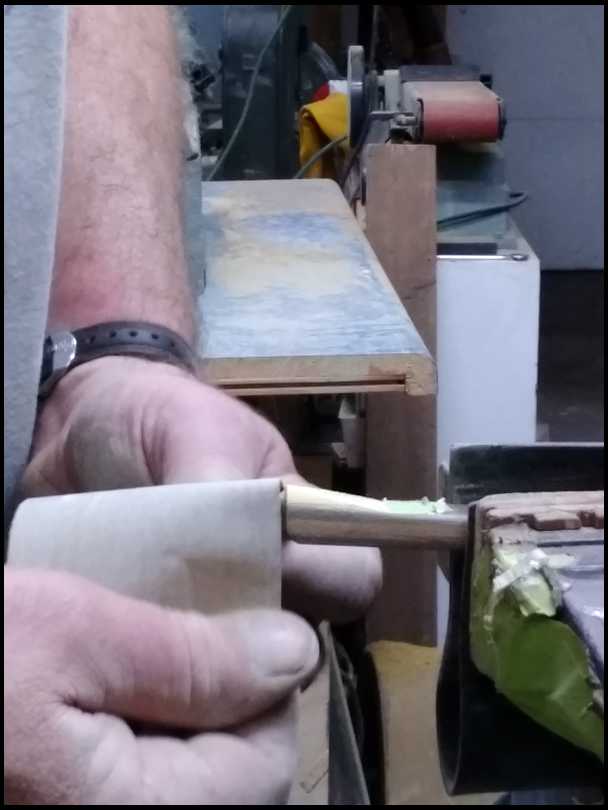
Pre bevel the leading edges and finish sand smooth, so you won't have to do much sanding close to the glass. Jf
|
|
| From: bodymanbowyer
|
|
|
|
|
|
|
| Date: 19-Jan-17 |
|
Bevaling the grip overlay. I use the squared to hub, backer board. This keeps it cutting square and more to hold on to. Keep an eye on your fingers, right Papadoc :) JF
|
|
| From: bodymanbowyer
|
|
|
|
|
|
|
| Date: 19-Jan-17 |
|

Bevaling the grip overlay. I use the squared to hub, backer board. This keeps it cutting square and more to hold on to. Keep an eye on your fingers, right Papadoc :) JF
|
|
| From: bodymanbowyer
|
|
|
|
|
|
|
| Date: 19-Jan-17 |
|
Ready to glue after I remove the tape on the back. I tape the back so I won't have to sand glue off it. Hint coming with next picture. JF
|
|
| From: bodymanbowyer
|
|
|
|
|
|
|
| Date: 19-Jan-17 |
|
I used cheap masking tape, to show that all masking tape is NOT the same. You can buy cheap tape and spend more time peeling little pieces off, or by better green Autobody painters tape. I know what I'd do :) JF
|
|
| From: bodymanbowyer
|
|
|
|
|
|
|
| Date: 19-Jan-17 |
|
This is the tape you want. Thumbs up for the good stuff. JF
|
|
| From: bodymanbowyer
|
|
|
|
|
|
|
| Date: 19-Jan-17 |
|
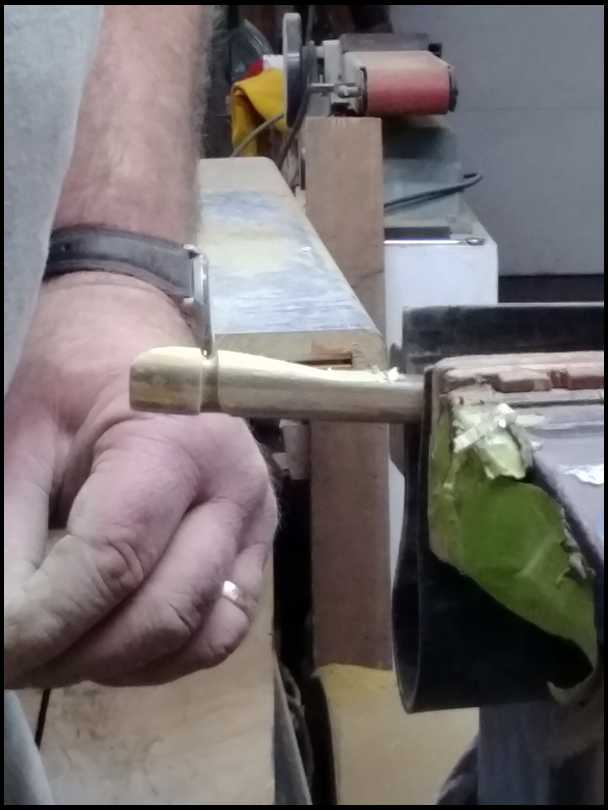
When I straightened up the leading edge. I hold it against a piece of square edged steel. Let just a tiny bit hang over and strike sand the edge off. If this makes any sense. JF
|
|
|
|
| From: bodymanbowyer
|
|
|
|
|
|
|
| Date: 19-Jan-17 |
|
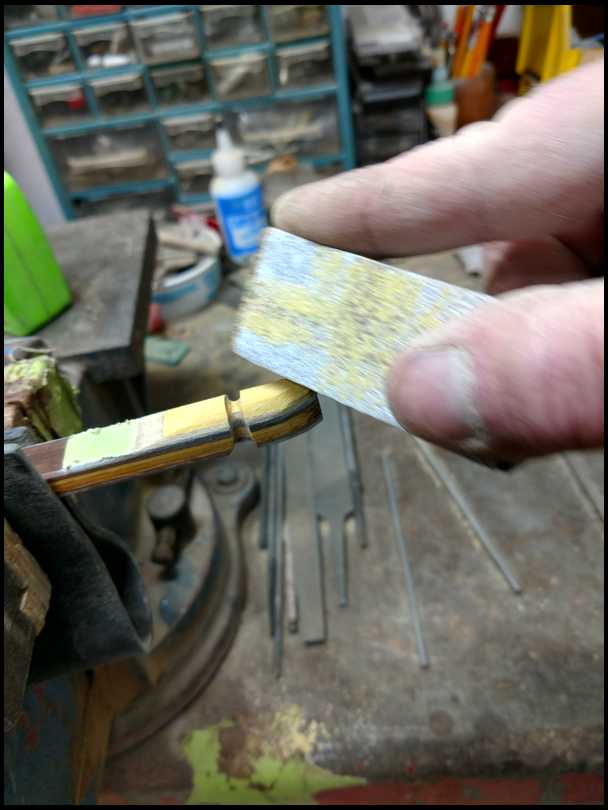
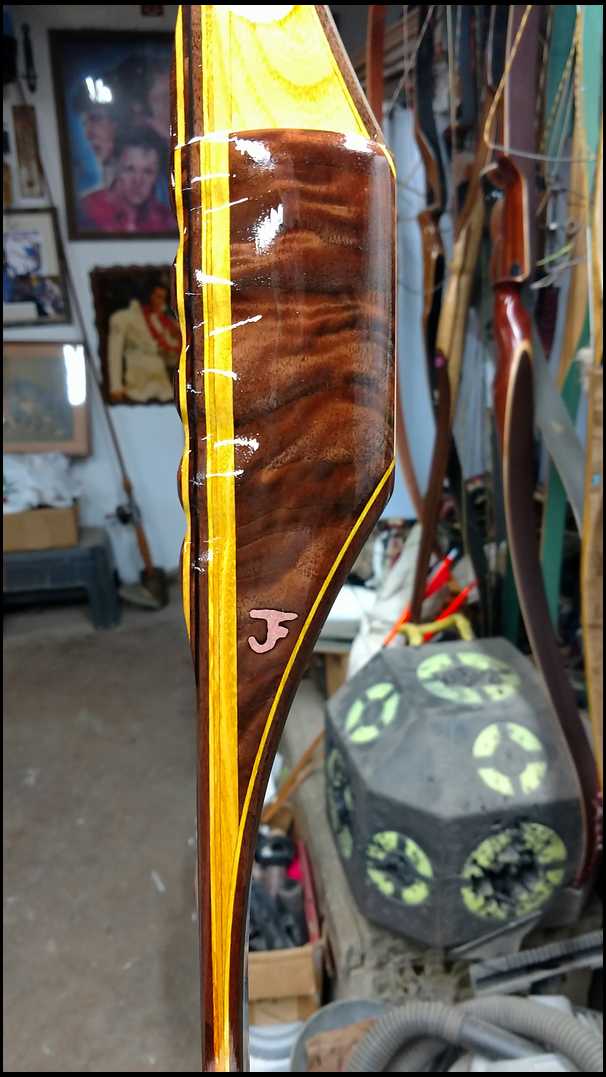
Just to give us an idea of what it'll look like. JF
|
|
| From: bodymanbowyer
|
|
|
|
|
|
|
| Date: 19-Jan-17 |
|
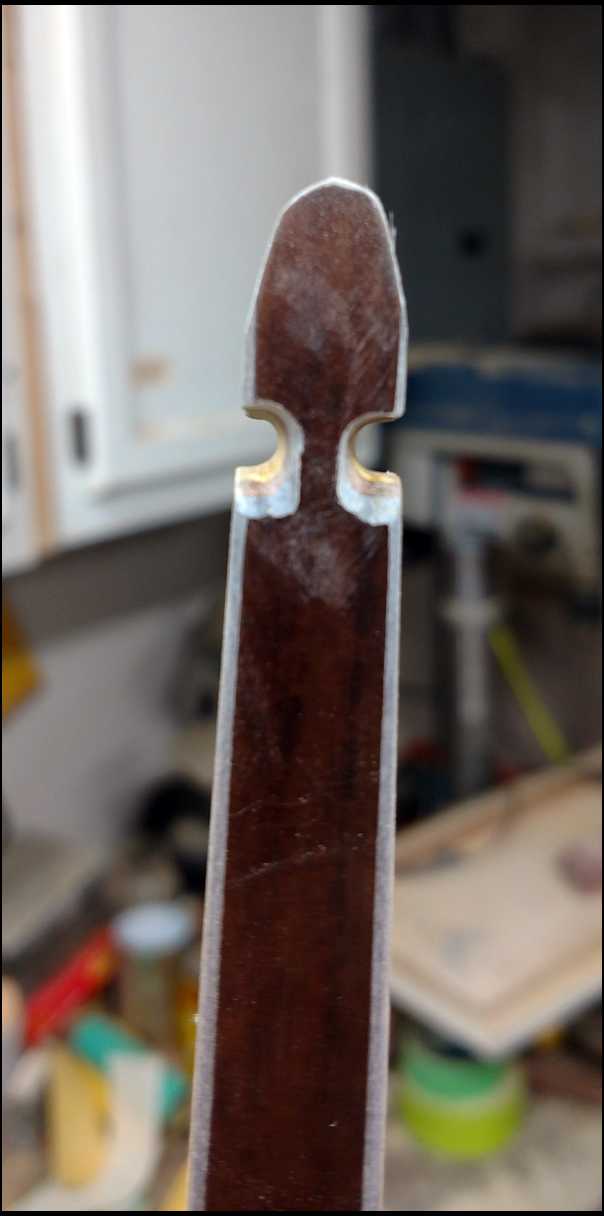
Tip overlay. All the leading edges are a very fine edge to blend smoothly into the glass. JF
|
|
| From: bodymanbowyer
|
|
|
|
|
|
|
| Date: 19-Jan-17 |
|
Tomorrow night or this weekend I'll get these glued on. More steps and pictures coming :) JF
|
|
|
|
| From: Dry Bones
|
|
|
|
|
|
|
| Date: 19-Jan-17 |
|
Jeff, another real nice looking bow. Matt, I don't think there is anyway I would let Jeff keep that one, and in case you have not had the pleasure of one of his. They shoot every bit as good as they look.
-Bones
|
|
| From: 6feathers
|
|
|
|
|
|
|
| Date: 20-Jan-17 |
|
nice job! This has been a great build along.
|
|
| From: Matt Ewing
|
|
|
|
|
|
|
| Date: 20-Jan-17 |
|
I have no doubt bones and I am sorry your bow is no longer the best looking one. Lol :-)
|
|
| From: Dry Bones
|
|
|
|
|
|
|
| Date: 20-Jan-17 |
|
HA!! All in the eyes of the beholder my friend. :-D Any bow of Jeff's is a real beaut. I doubt he could honestly pick just one that is the best looking. All have their own flair and character. AND they all just flat out SHOOT nice.
-Bones
|
|
| From: bodymanbowyer
|
|
|
|
|
|
|
| Date: 20-Jan-17 |
|

:) thanks guys. You'll have to stop your get me blushing :) OK where was I. Oh yeah get ready to glue on some overlays. Mark my center of the riser, so I'll know where to position the grip overlay. JF
|
|
| From: bodymanbowyer
|
|
|
|
|
|
|
| Date: 20-Jan-17 |
|
Wow I never thought of putting a overlay on the fence ;) JF
|
|
| From: bodymanbowyer
|
|
|
|
|
|
|
| Date: 20-Jan-17 |
|
I use the green masking tape to out line where I want to stop sanding. JF
|
|
| From: bodymanbowyer
|
|
|
|
|
|
|
| Date: 20-Jan-17 |
|
Same for the tips. I measure 1" down from the string grooves. And mask a line straight across. JF
|
|
| From: bodymanbowyer
|
|
|
|
|
|
|
| Date: 20-Jan-17 |
|
Now sand the flat surface up to the tape line carefully with stick-it 80grit. I like all the stick-it sandpaper on a continuous roll. Ruff it all up until the shine is gone. JF
|
|
|
|
| From: bodymanbowyer
|
|
|
|
|
|
|
| Date: 20-Jan-17 |
|
Sanded and ready to wipe the dust off with denatured alcohol. Then mask the edges,to keep the glue off the sides. JF
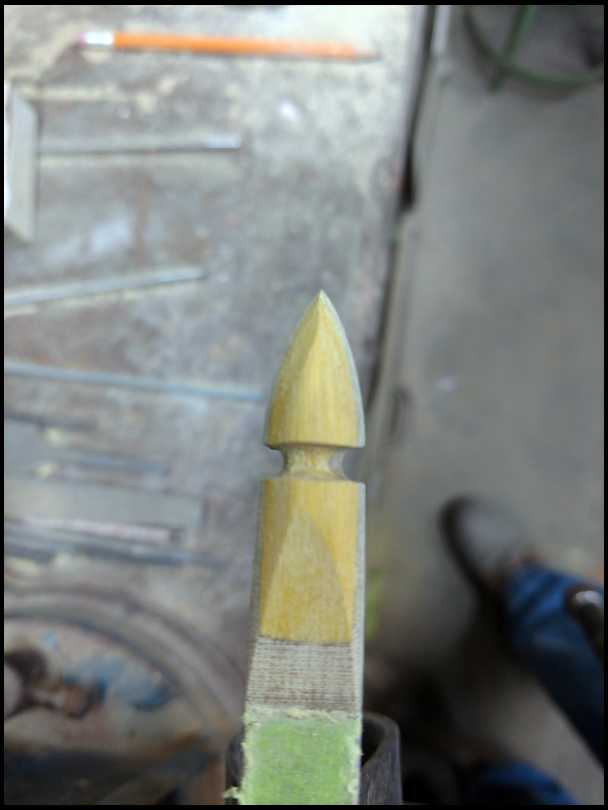
|
|
|
|
| From: bodymanbowyer
|
|
|
|
|
|
|
| Date: 20-Jan-17 |
|
The smooth part of the file works great for pushing the tape into the string grooves. JF
|
|
| From: bodymanbowyer
|
|
|
|
|
|
|
| Date: 20-Jan-17 |
|
Ready for some smooth-on epoxy. A 1/2 mixed should be enough. Coat all mateing surfaces. JF
|
|
| From: bodymanbowyer
|
|
|
|
|
|
|
| Date: 20-Jan-17 |
|
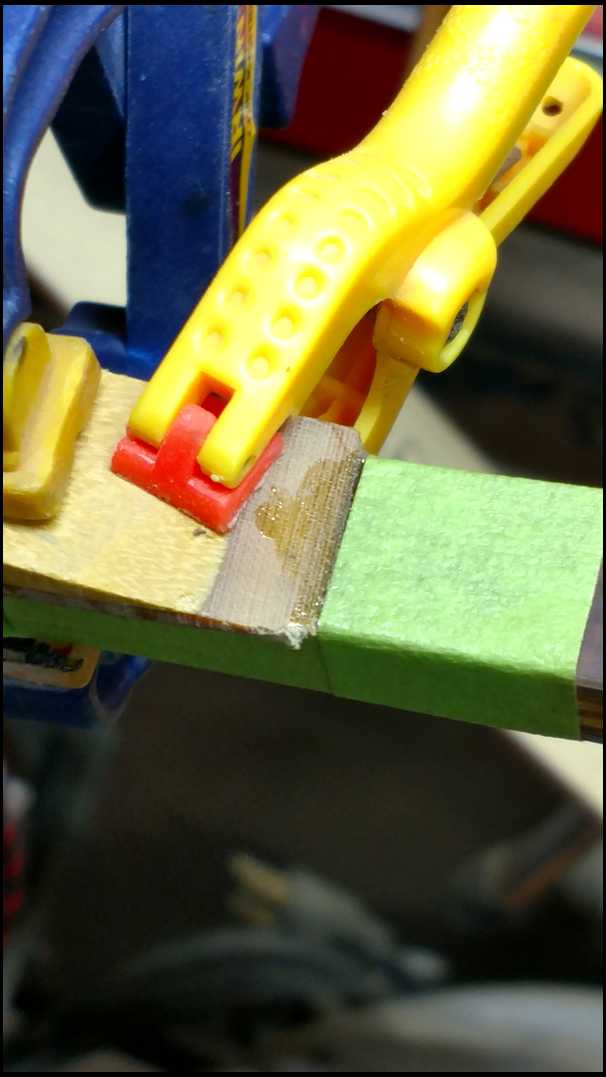
1/2 oz of smooth-on or gorilla gel super glue. I'm using smooth-on.
|
|
|
|
| From: bodymanbowyer
|
|
|
|
|
|
|
| Date: 20-Jan-17 |
|
OK, clampit Jethro. Wipe the excess that ooses out where the overlays meet the flat tape. JF
|
|
|
|
|
|
| From: bodymanbowyer
|
|
|
|
|
|
|
| Date: 20-Jan-17 |
|
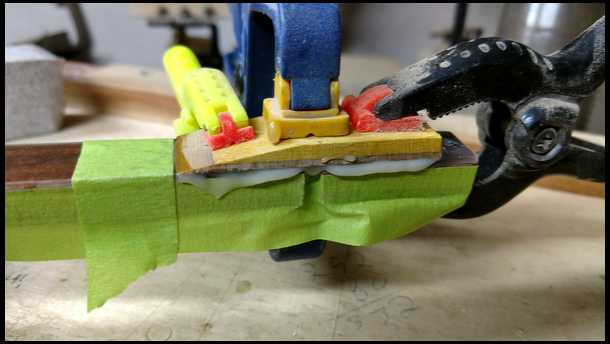
Use a variety of soft foot clamps. You don't want to dent the wood. Only apply enough pressure to hold tight, not super tight. JF
|
|
| From: bodymanbowyer
|
|
|
|
|
|
|
| Date: 20-Jan-17 |
|
Cure over night. So stay tuned for more updates tomorrow. Thanks for watching. JF
|
|
| From: bodymanbowyer
|
|
|
|
|
|
|
| Date: 21-Jan-17 |
|
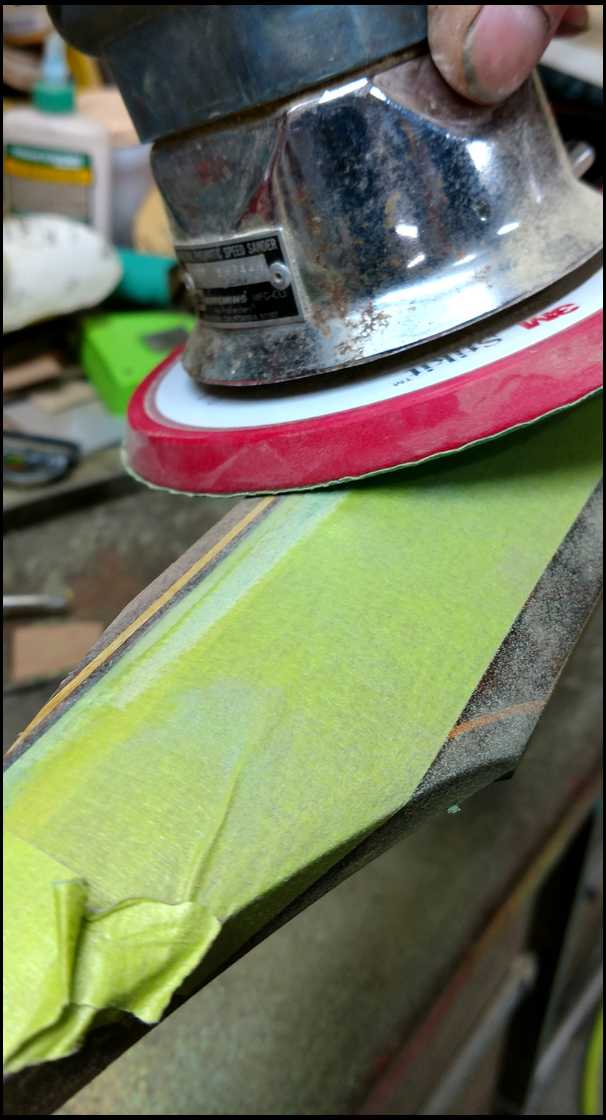
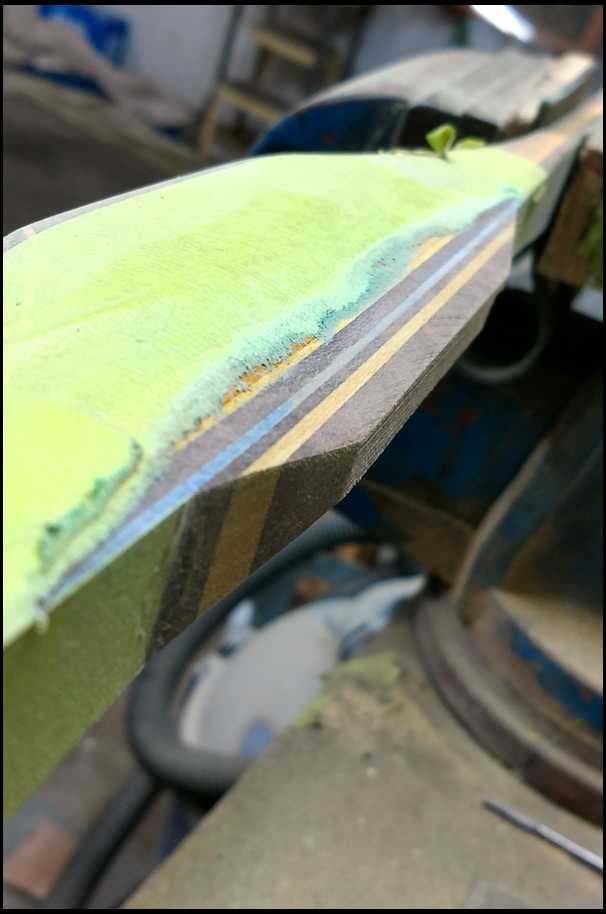
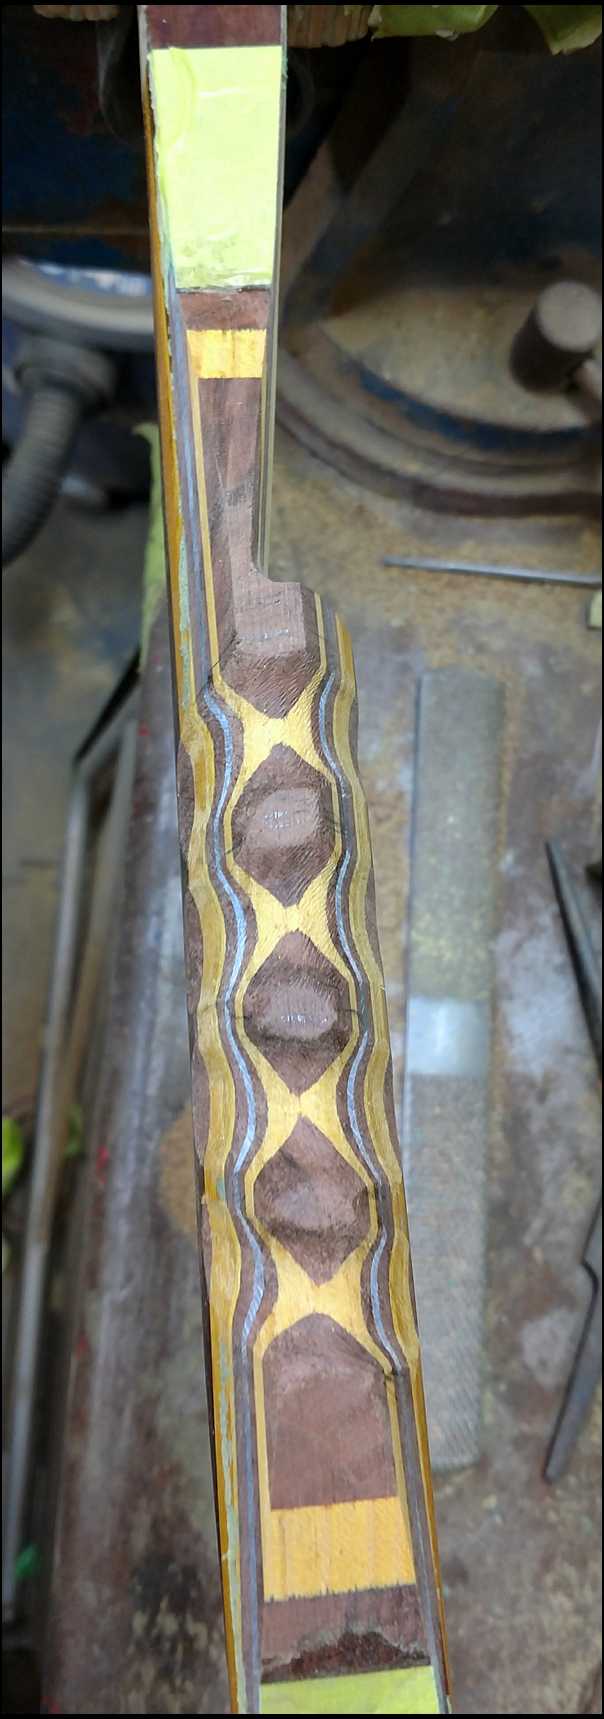
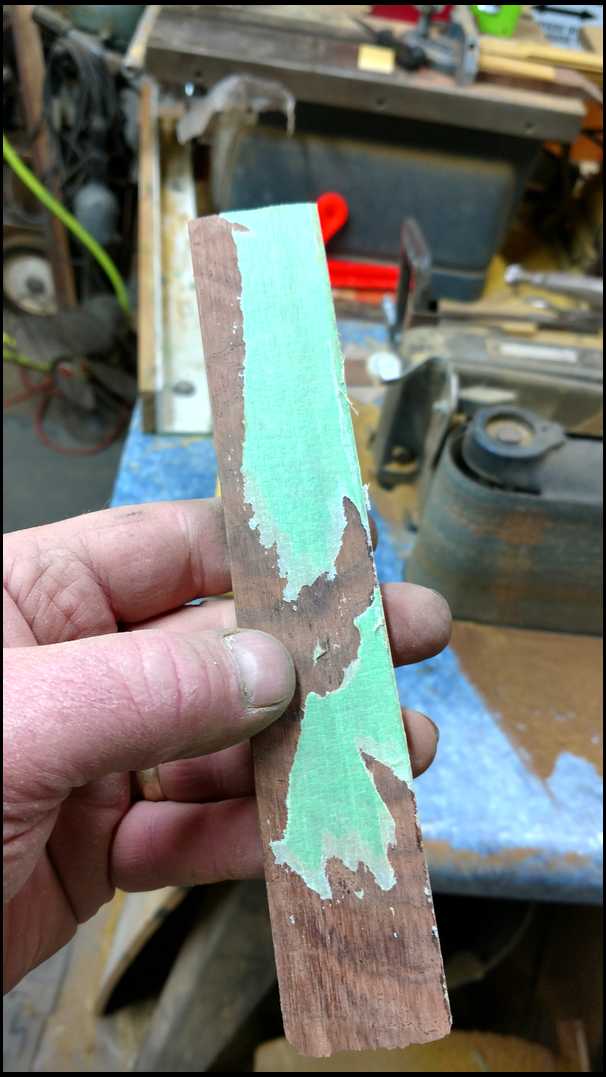
Sanded the excess with the edge of the belt sander, then with the DA with 80grit. Down to where the tape just starts to peel. JF
|
|
|
|
|
|
| From: bodymanbowyer
|
|
|
|
|
|
|
| Date: 21-Jan-17 |
|
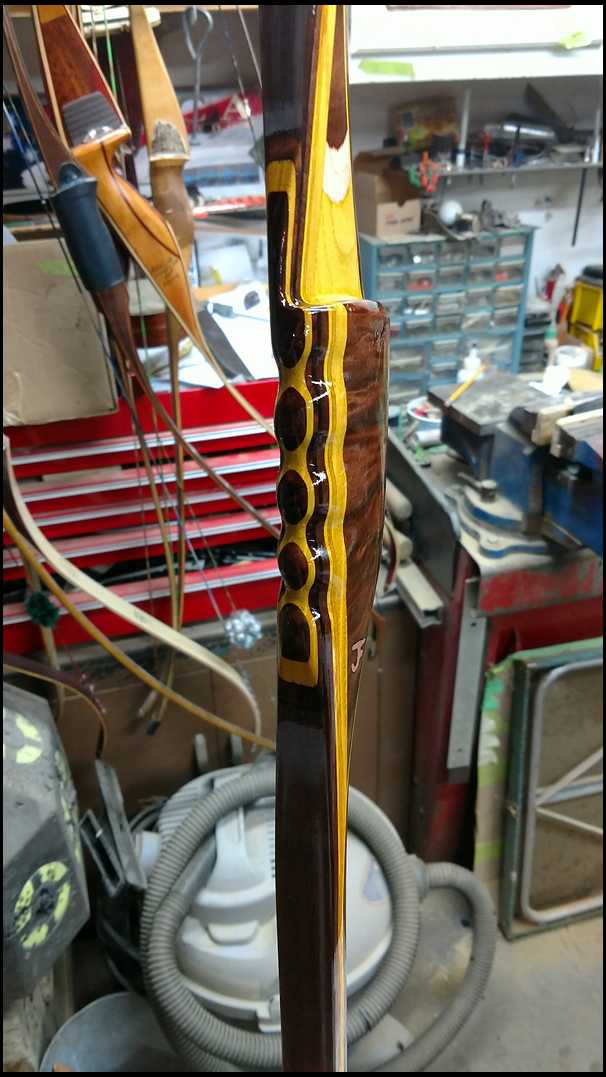
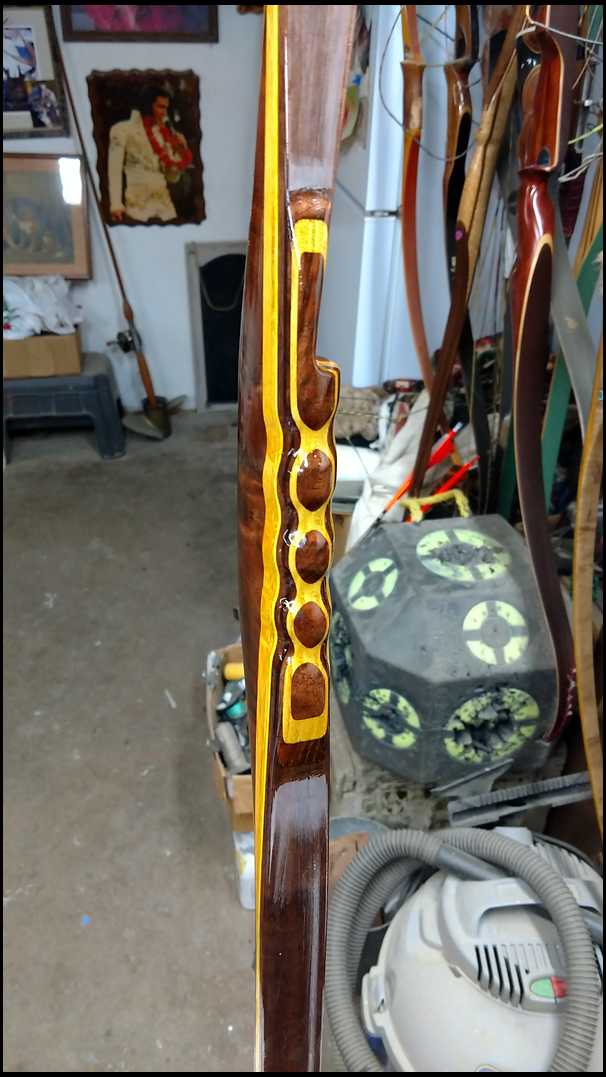
Now grip like you hold it and Trace between each finger the way they lay. Index down 2 straight across and the pinky angled up. JF
|
|
| From: bodymanbowyer
|
|
|
|
|
|
|
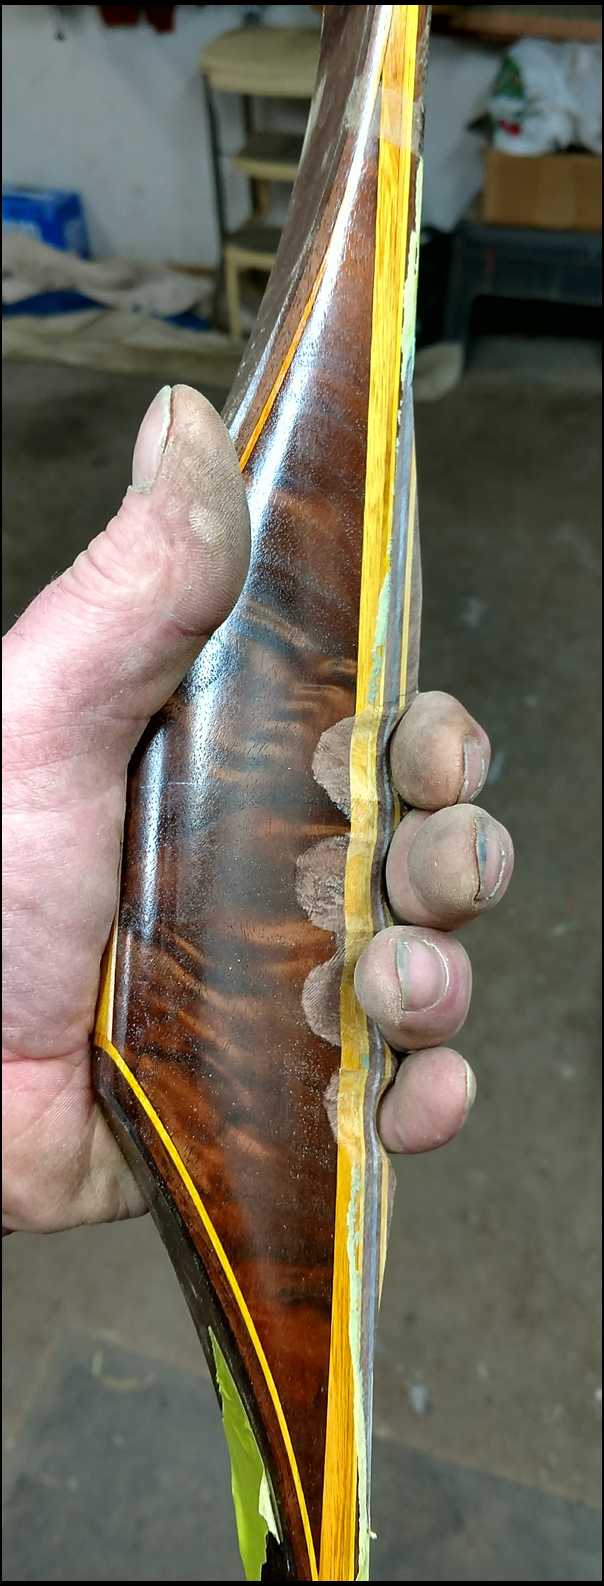
| Date: 21-Jan-17 |
|
Clamp in vice with a thick strip of rubber behind that I have glued on some wood to the jaws. The other end I clamp to a rubber block. JF
|
|
| From: bodymanbowyer
|
|
|
|
|
|
|
| Date: 21-Jan-17 |
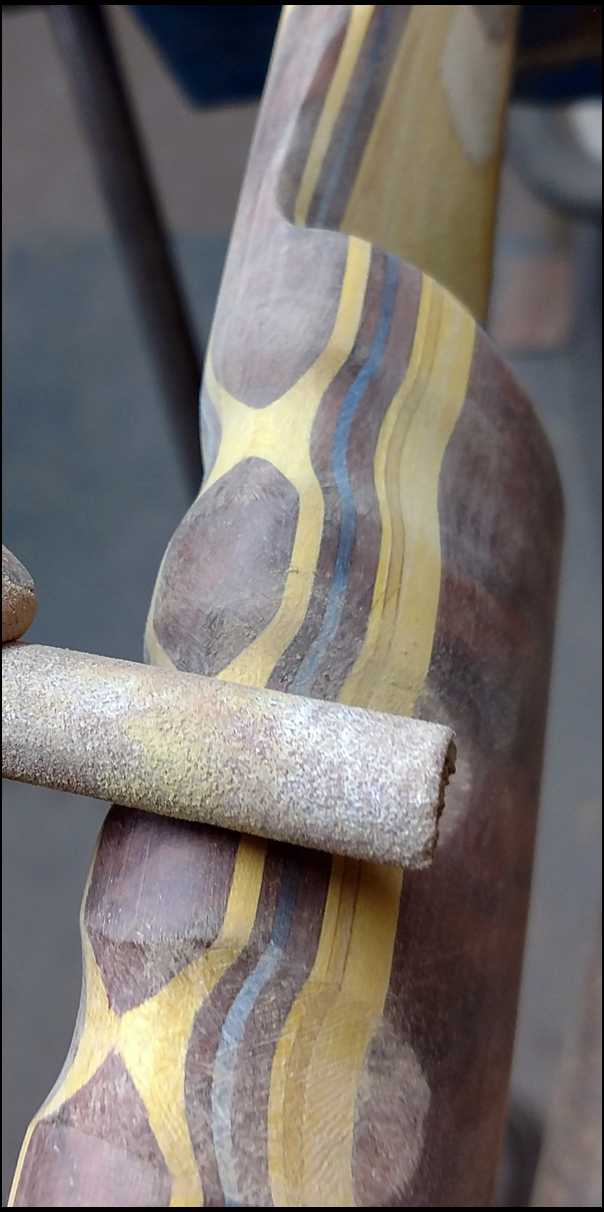
|
Now I'll use some files :) JF
|
|
| From: bodymanbowyer
|
|
|
|
|
|
|
| Date: 21-Jan-17 |
|
Back and forth, diagonal,roll side ways. What ever it takes. Med light strokes. JF
|
|
|
|
| From: CD
|
|
|
|
|
|
|
| Date: 21-Jan-17 |
|
Really cool!
|
|
|
|
|
|
|
|
|
|
| From: bodymanbowyer
|
|
|
|
|
|
|
| Date: 21-Jan-17 |
|

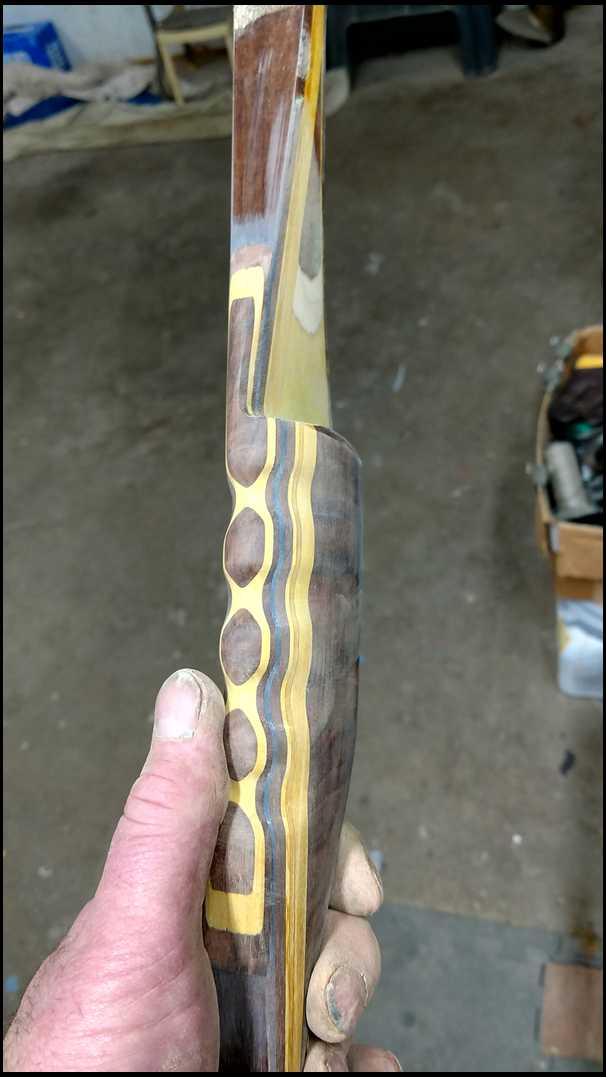
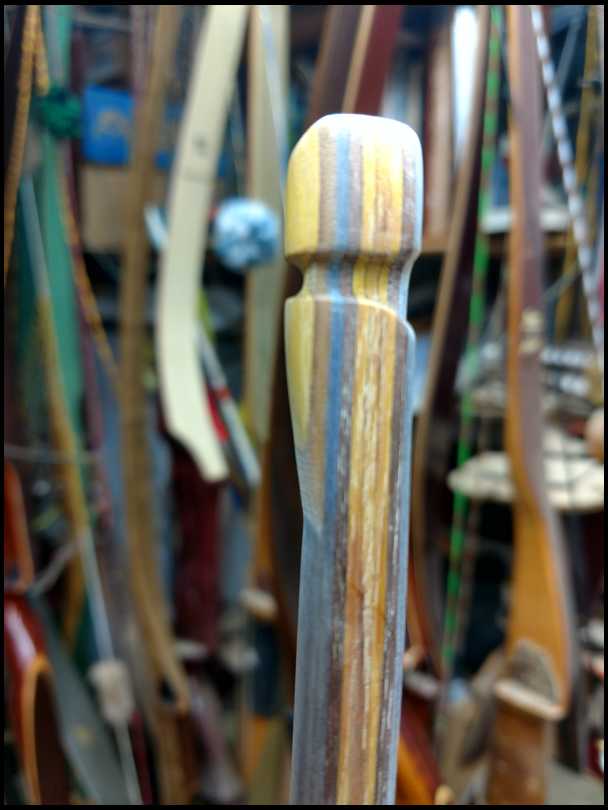
Now smooth out with a smoother file and then rolled up 80grit, 150grit and 220grit I try and sand with the grain. This can mean some short strokes. JF
|
|
| From: bodymanbowyer
|
|
|
|
|
|
|
| Date: 21-Jan-17 |
|
Oops sorry, right before the last step I round over the back of the grip with 80grit on a long block. JF
|
|
| From: bodymanbowyer
|
|
|
|
|
|
|
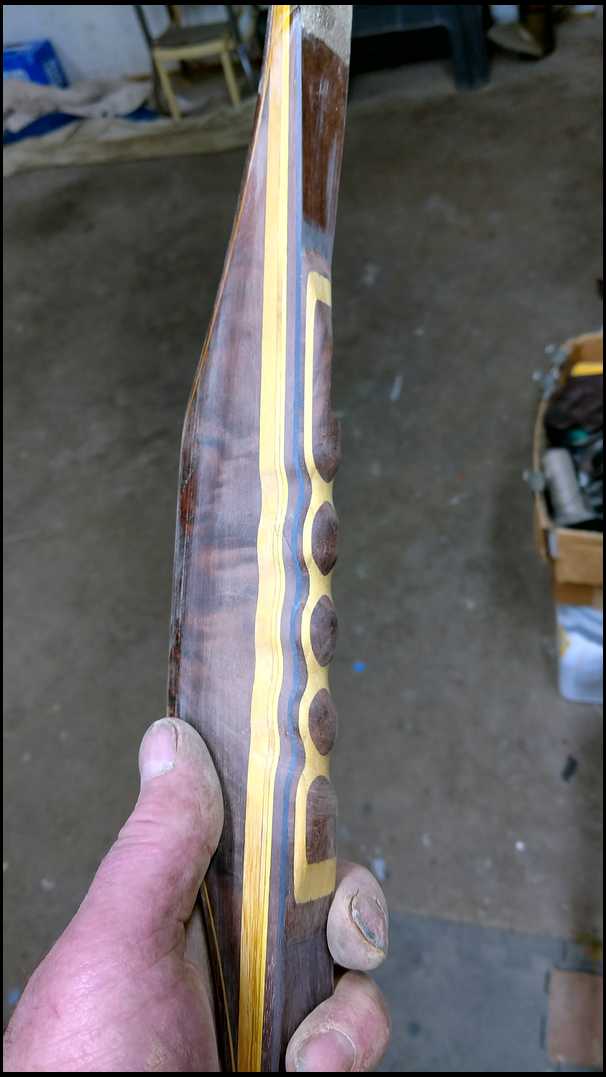
| Date: 21-Jan-17 |
|
Sand the figures grooves smooth,sand sand sand. JF
|
|
|
|
| From: bodymanbowyer
|
|
|
|
|
|
|
| Date: 21-Jan-17 |
|
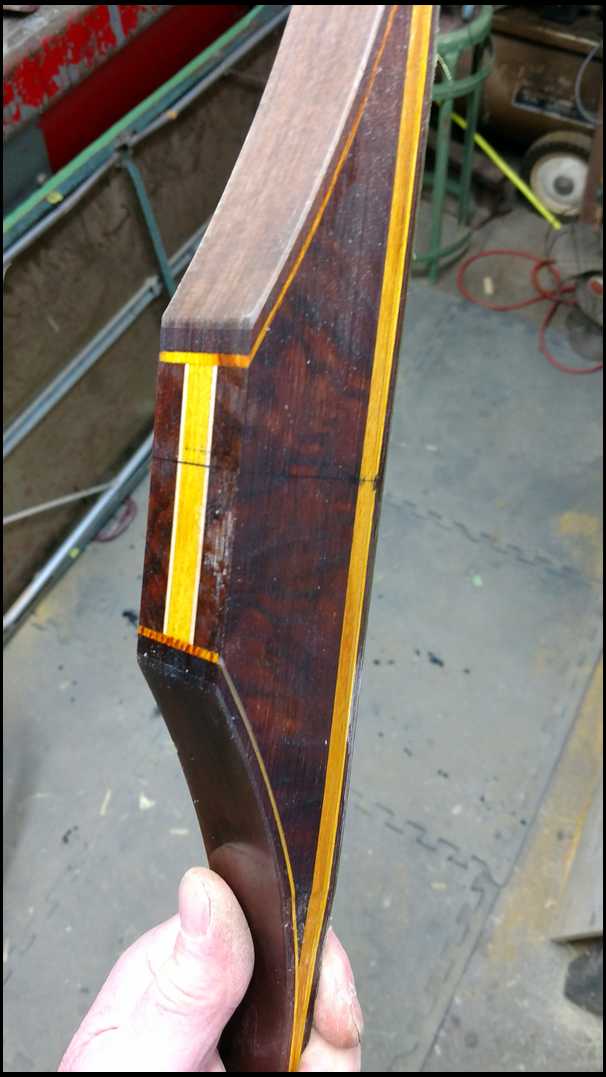
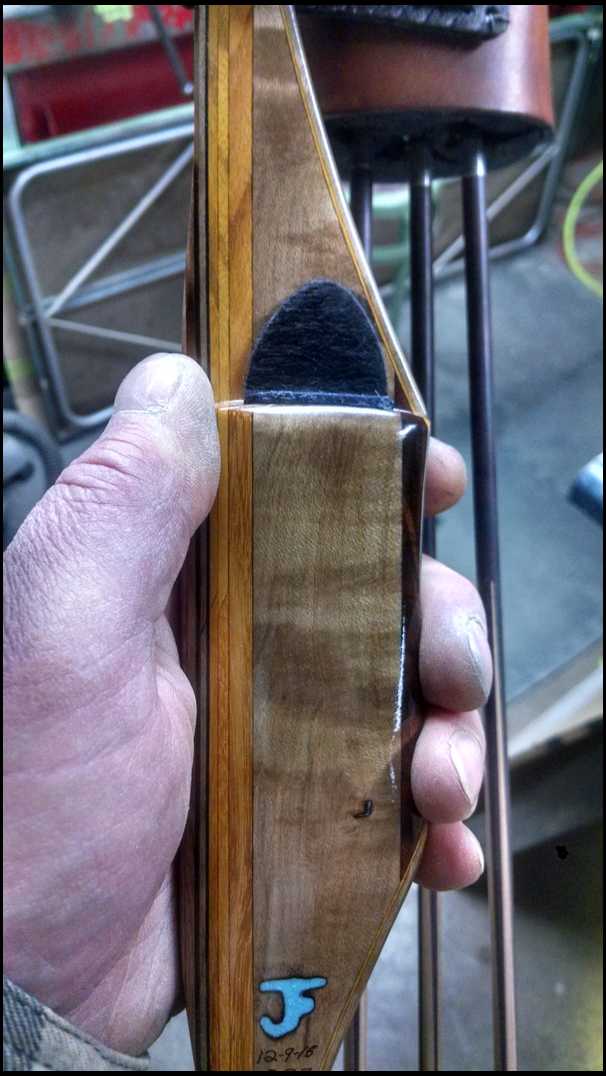
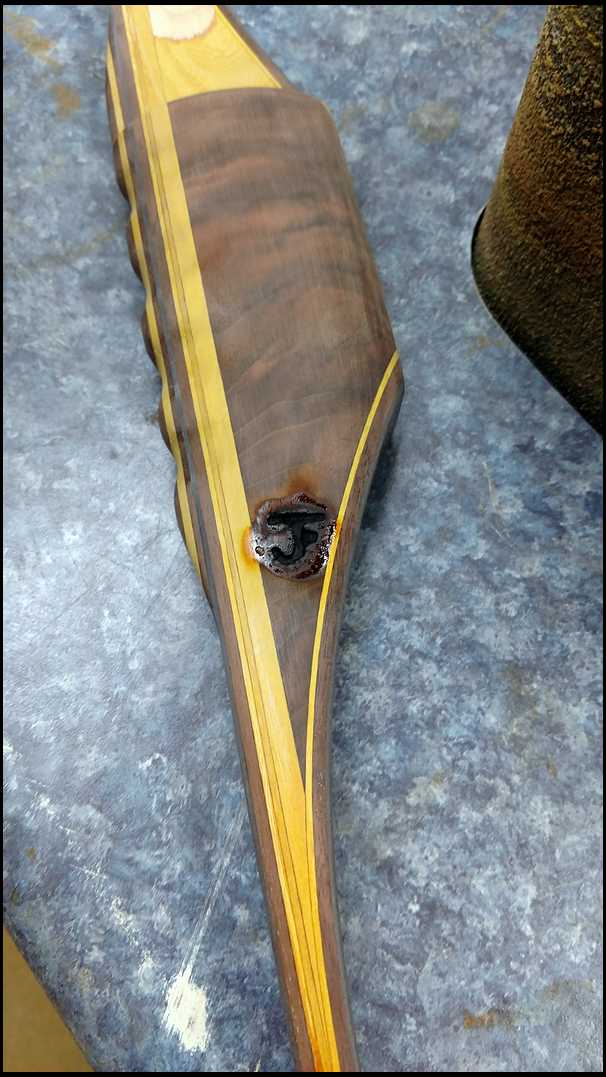
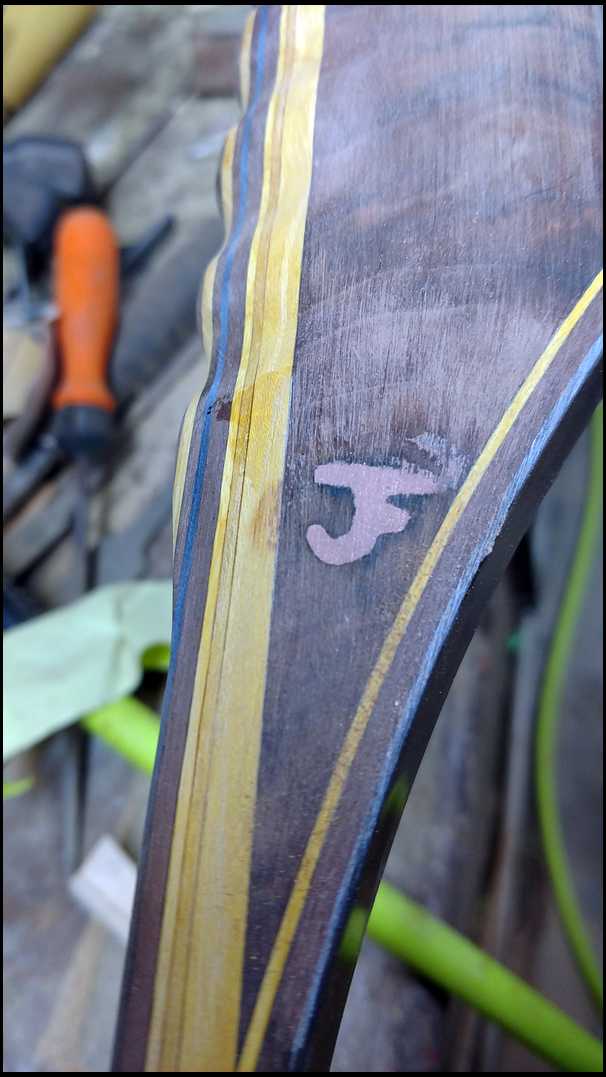
This bow is ready for my brand. JF
|
|
|
|
| From: Rick 3
|
|
|
|
|
|
|
| Date: 21-Jan-17 |
|
Man i love the finder grooves. That thing came out beautiful. Can't wait to see it all finished...
|
|
| From: Jim Keller
|
|
|
|
|
|
|
| Date: 21-Jan-17 |
|
Looking good Jeff. I never liked finger grooves until I tried a bow that had them. That bow changed that for me. I like them now! Thanks for the build along. I'm really enjoying it. Jim
|
|
| From: Matt Ewing
|
|
|
|
|
|
|
| Date: 21-Jan-17 |
|
I still can't believe its mine! Very nice Jeff
|
|
| From: Stoner
|
|
|
|
|
|
|
| Date: 21-Jan-17 |
|
HOLY KATZ! I am so glad there will not be a leather grip, love the finger grooves and the osage strip....whole package. OUTSTANDING JOB! John
|
|
| From: Bob Rowlands
|
|
|
|
|
|
|
| Date: 21-Jan-17 |
|
Finger grooves are the cats @$$. Superb series here. Best of leatherwall. Thanks!
|
|
| From: Oldbowyer
|
|
|
|
|
|
|
| Date: 21-Jan-17 |
|
Looking good JF. The contrasting woods look awesome in the finger grooves.
|
|
| From: bodymanbowyer
|
|
|
|
|
|
|
| Date: 21-Jan-17 |
|
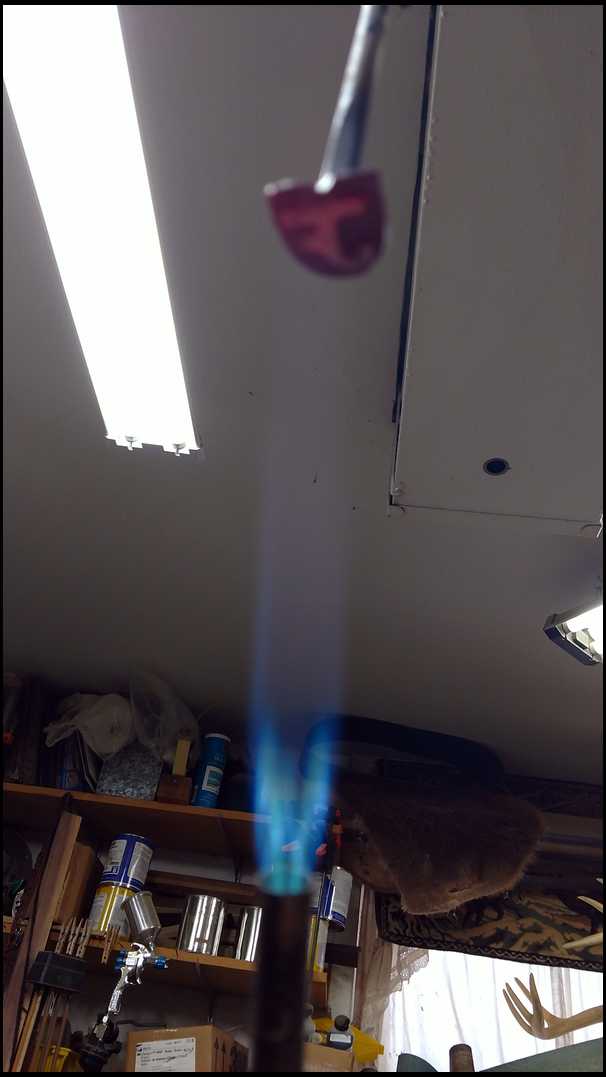
Let's heat things up some ;) JF
|
|
|
|
| From: bodymanbowyer
|
|
|
|
|
|
|
| Date: 21-Jan-17 |
|
I smell smoke, burnt walnut to be exact ;) JF
|
|
| From: bodymanbowyer
|
|
|
|
|
|
|
| Date: 21-Jan-17 |
|
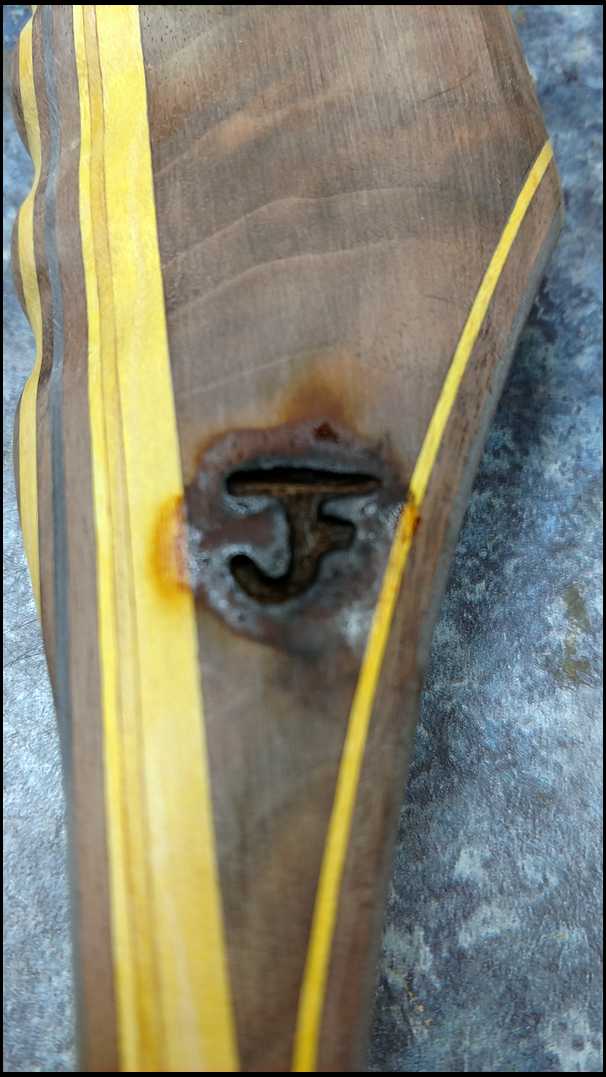
Scrape out the loose ash down to solid wood. JF
|
|
| From: bodymanbowyer
|
|
|
|
|
|
|
| Date: 21-Jan-17 |
|
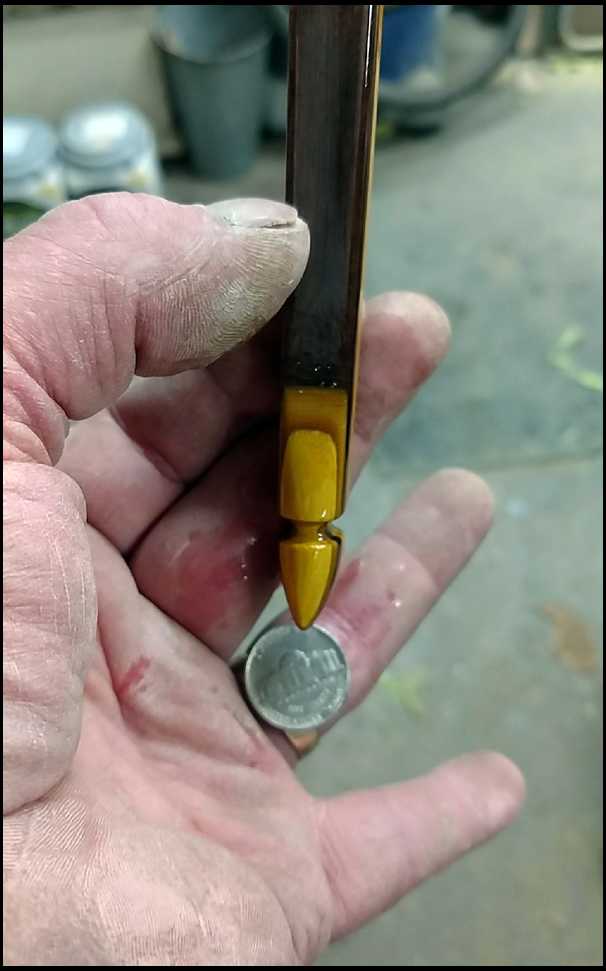
3 choices on the brand. Plain, turquoise or copper. JF
|
|
| From: bodymanbowyer
|
|
|
|
|
|
|
| Date: 21-Jan-17 |
|
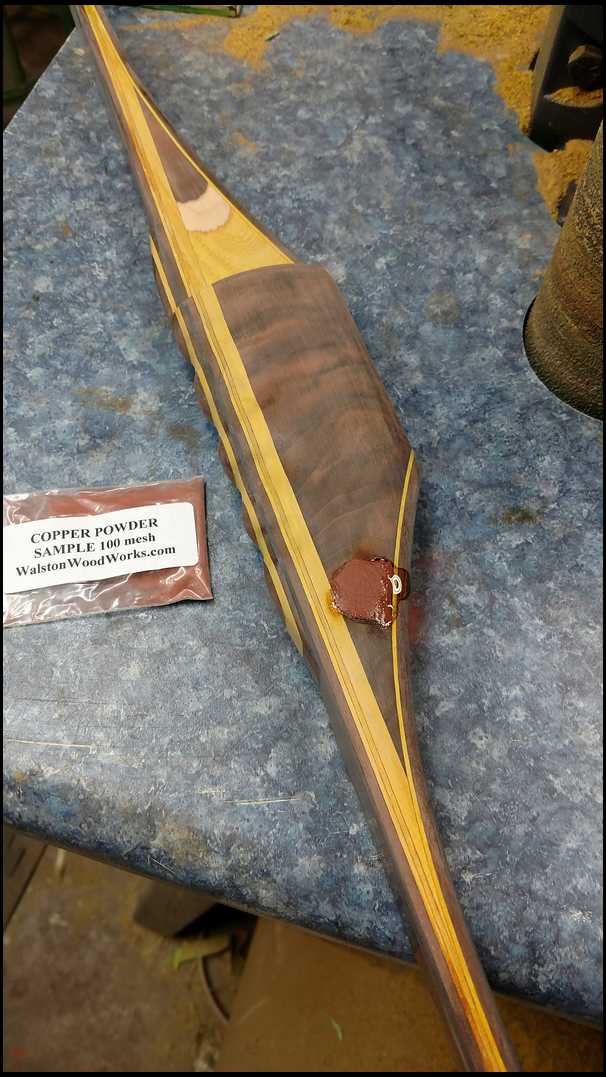
We chose copper. It's a copper powder, bodork told me about. Sprinkle on level and zap with super glue. JF
|
|
| From: muddyIA
|
|
|
|
|
|
|
| Date: 21-Jan-17 |
|
Great series.
|
|
| From: Dry Bones
|
|
|
|
|
|
|
| Date: 21-Jan-17 |
|
Jeff, you went to far. LOL putting that copper on Matt's bow. Now I will never here the end of this. :-D SURE does look good.
-Bones
|
|
| From: Longcruise
|
|
|
|
|
|
|
| Date: 21-Jan-17 |
|
Well, Jeff, I was not liking the riser overlay.... Until I saw it with the finger grooves! Very very nice.
|
|
| From: bodymanbowyer
|
|
|
|
|
|
|
| Date: 21-Jan-17 |
|
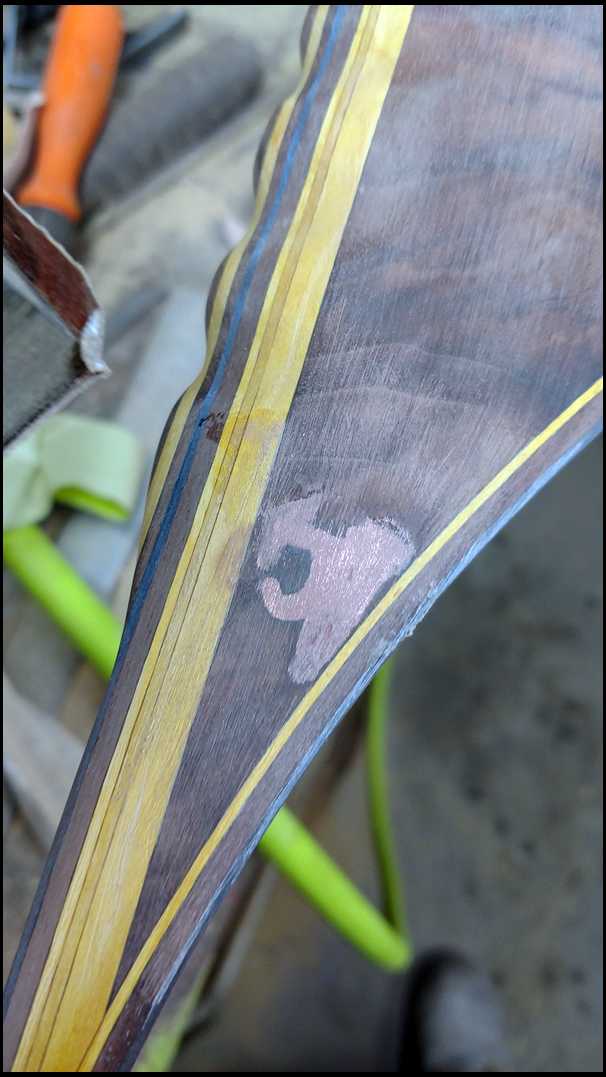
Start sanding with 80grit on a very short wood block. JF
|
|
| From: bodymanbowyer
|
|
|
|
|
|
|
| Date: 21-Jan-17 |
|
Then finish it off with 220grit . JF
|
|
| From: bodymanbowyer
|
|
|
|
|
|
|
| Date: 21-Jan-17 |
|

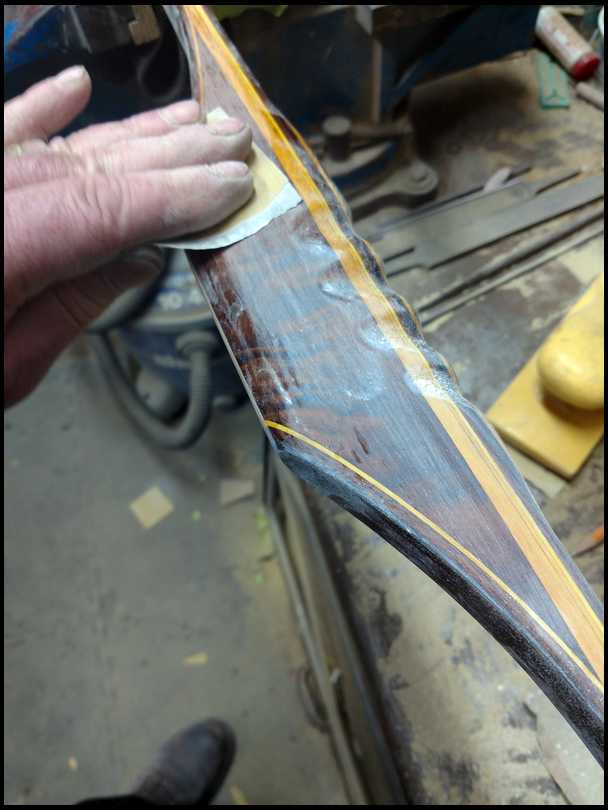
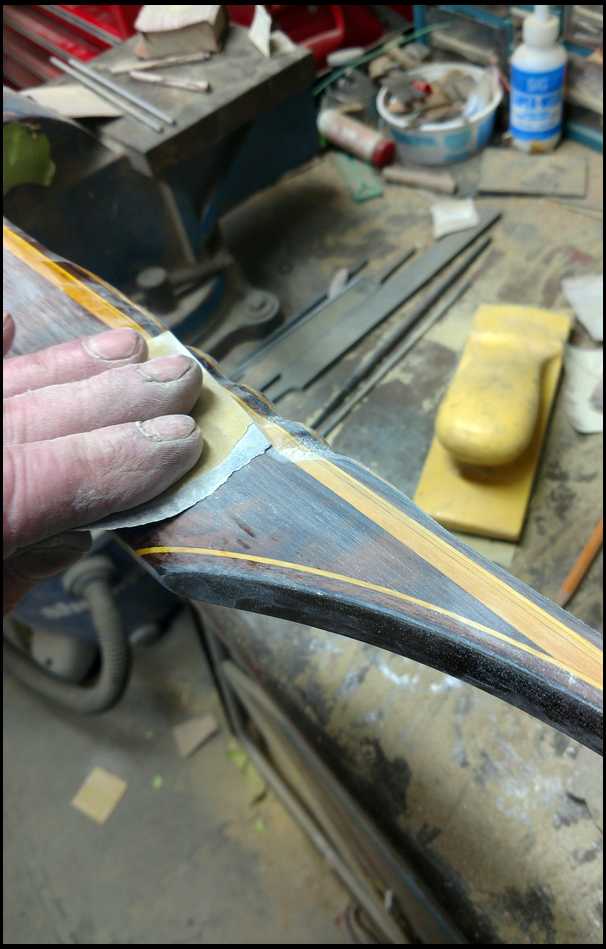
The riser is ready to seal out to the fadeouts. The rest of the limbs and tips aren't ready yet . The riser will take several coats to get it sealed and filled. So here goes coat #1 if Big Jim's Buffalo gloss epoxy thinned down 1-1-3. This will soak down to the bottom of the open grain and fill to the top. After about 5-7 coats. Then dry 3-5 days and sand with 320grit and coat again if it's not smooth yet. Nemah has told me of another epoxy I'm going to try, on another bow. Probably mine or grandson will be the guinea pig :). JF
|
|
| From: bodymanbowyer
|
|
|
|
|
|
|
| Date: 21-Jan-17 |
|
I put a coat on with a 1 1/2" gray foam brush. Wait an 45min to an hour between coats. I keep my mixed epoxy in the freezer to keep it from setting. I can use all of my mixed epoxy until it's gone. I've never had to waste any. Be sure and seal the can in 3-4 Ziploc bags and push the air out of each one. Or it will stink up the freezer :) JF
|
|
| From: Barber
|
|
|
|
|
|
|
| Date: 21-Jan-17 |
|
Jeff, its looking awesome !!!!
|
|
|
|
|
|
| From: bodymanbowyer
|
|
|
|
|
|
|
| Date: 21-Jan-17 |
|
I'll be working on the tip overlays tomorrow and adjusting the poundage and till. Stay tuned it ain't over yet :) JF
|
|
| From: mgerard
|
|
|
|
|
|
|
| Date: 21-Jan-17 |
|
Jeff, the symmetry of the osage in the overlays and finger grooves is amazing. I usually prefer aged osage but the bright yellow makes a great contrast. Again, excellent build a long, and thanks for sharing.
|
|
| From: Matt Ewing
|
|
|
|
|
|
|
| Date: 21-Jan-17 |
|
Its ok bones the next one will beat mine!
|
|
| From: CD
|
|
|
|
|
|
|
| Date: 22-Jan-17 |
|
Thanks so much for sharing this build with us... I know it is a lot of trouble, but I LOVE IT!!!
|
|
| From: Flinger1
|
|
|
|
|
|
|
| Date: 22-Jan-17 |
|
Lookin' sweet JF!!!
|
|
| From: Dry Bones
|
|
|
|
|
|
|
| Date: 22-Jan-17 |
|
Still partial to dance with the one I got. But that is a nice looking stick. Jeff, Congrats.
-Bones
|
|
| From: bodymanbowyer
|
|
|
|
|
|
|
| Date: 23-Jan-17 |
|
Oh my I'm on the third page. I better catch up. JF
|
|
| From: bodymanbowyer
|
|
|
|
|
|
|
| Date: 23-Jan-17 |
|
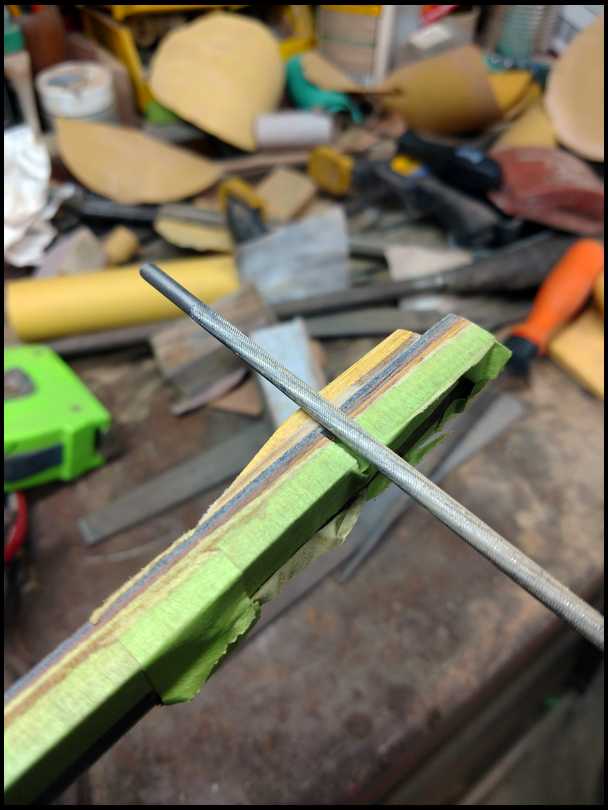
Tip overlays, cleaned up the edges of the glue on my edge grinder to remove the ooze. Now ready to file, with a 5/32 chainsaw file. Straight across, like the first string groove,I did on the limbs. Stop when the tape starts to peel. JF
|
|
|
|
| From: bodymanbowyer
|
|
|
|
|
|
|
| Date: 23-Jan-17 |
|
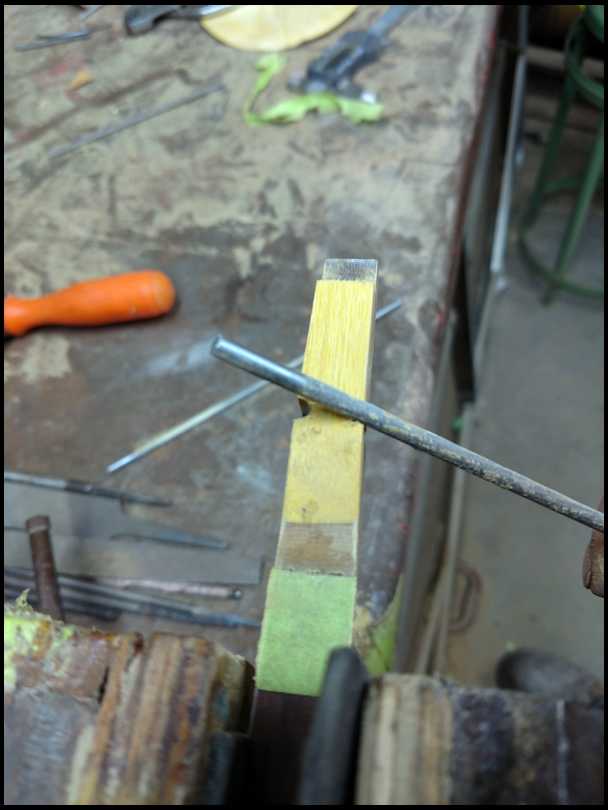
Then file across to the other side. JF
|
|
| From: bodymanbowyer
|
|
|
|
|
|
|
| Date: 23-Jan-17 |
|
To the depth of the file keep the upper corners round. I skipped a picture oh well you get the picture. The overlays started out a total of .220 thick. I stopped just as I got close to the phenolic.. JF
|
|
| From: bodymanbowyer
|
|
|
|
|
|
|
| Date: 23-Jan-17 |
|
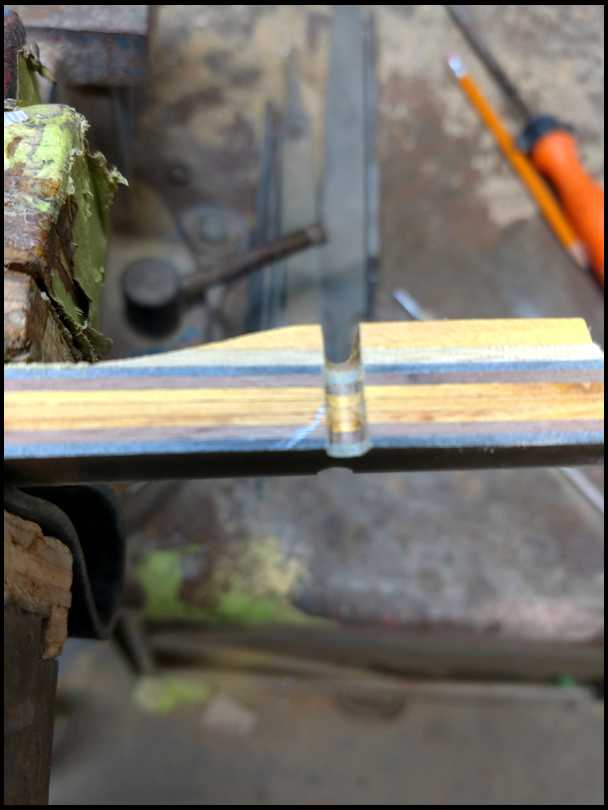
Now is kind of the tricky part. File the lower edge without hitting the top of the string groove. This is to round the edge off to make it smoother so it's softer on the string at brace and return after the shot. It will make the string last. JF
|
|
| From: bodymanbowyer
|
|
|
|
|
|
|
| Date: 23-Jan-17 |
|
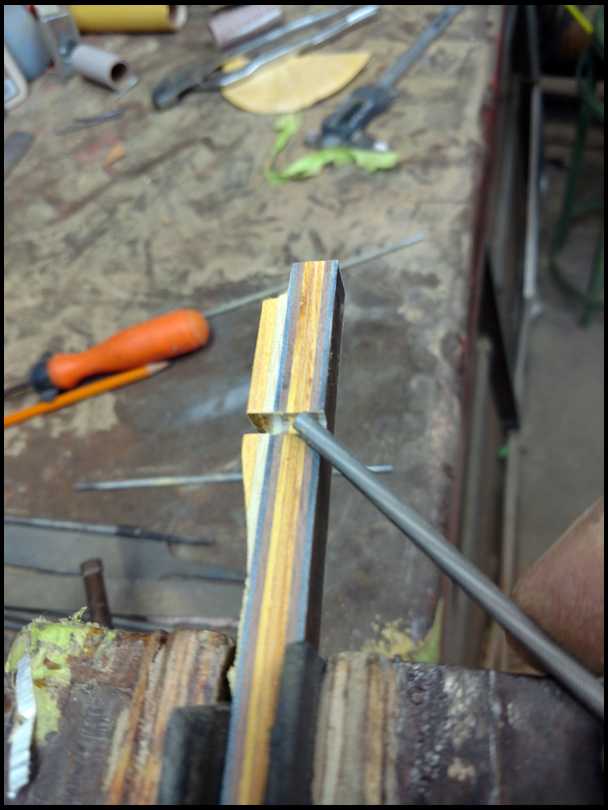
I marked it so you can see what I'm doing. Little short strokes and keep an angle so it doesn't touch the upper side. JF
|
|
|
|
|
|
| From: bodymanbowyer
|
|
|
|
|
|
|
| Date: 23-Jan-17 |
|
Now do the other side. Make good use of some rubber padded jaws in the vise and maybe support the other end,so it stays steady. Jf
|
|
|
|
| From: bodymanbowyer
|
|
|
|
|
|
|
| Date: 23-Jan-17 |
|
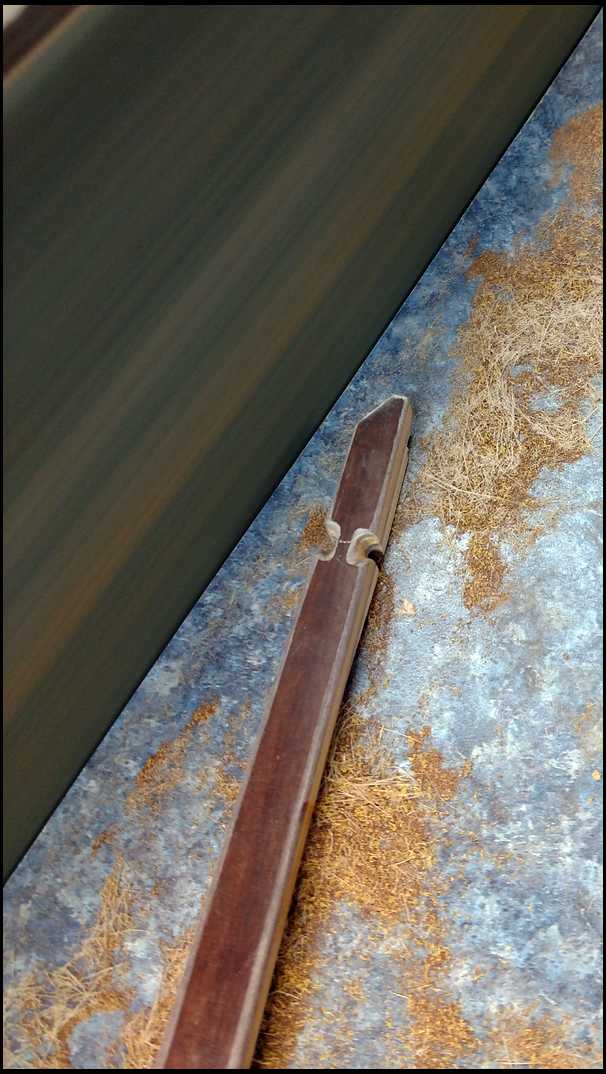
Both sides done, now ruff shape some points. Round for the bottom limb, for walking maybe,and pointed for the top, Incase you run out of arrows. And you need one more jab ;) JF
|
|
|
|
|
|
|
|
|
|
|
|
| From: bodymanbowyer
|
|
|
|
|
|
|
| Date: 23-Jan-17 |
|
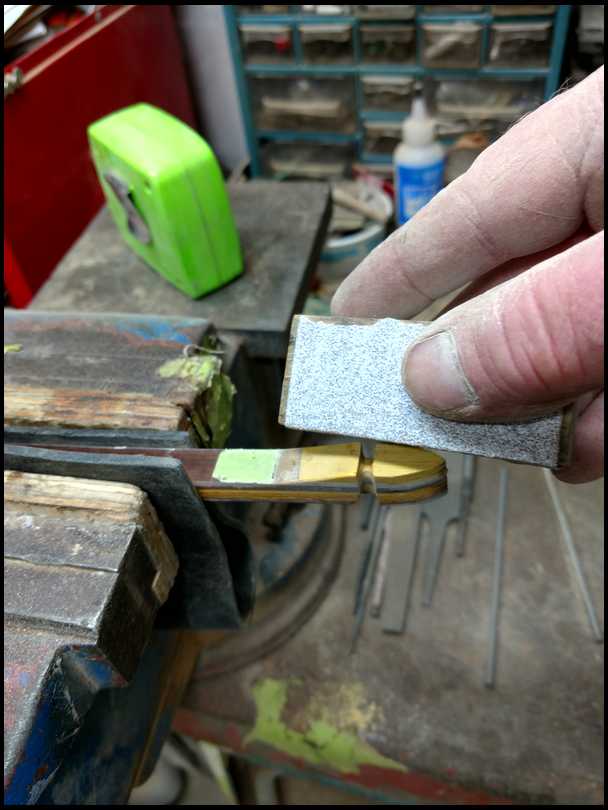
Back to the vice. Small block with 80grit stick-it. Sand lengthwise to shape. And I use a without the block, like shining shoes. What ever it takes to get the shape you want. The progress to finer grits. Jf
|
|
|
|
|
|
|
|
| From: bodymanbowyer
|
|
|
|
|
|
|
| Date: 23-Jan-17 |
|
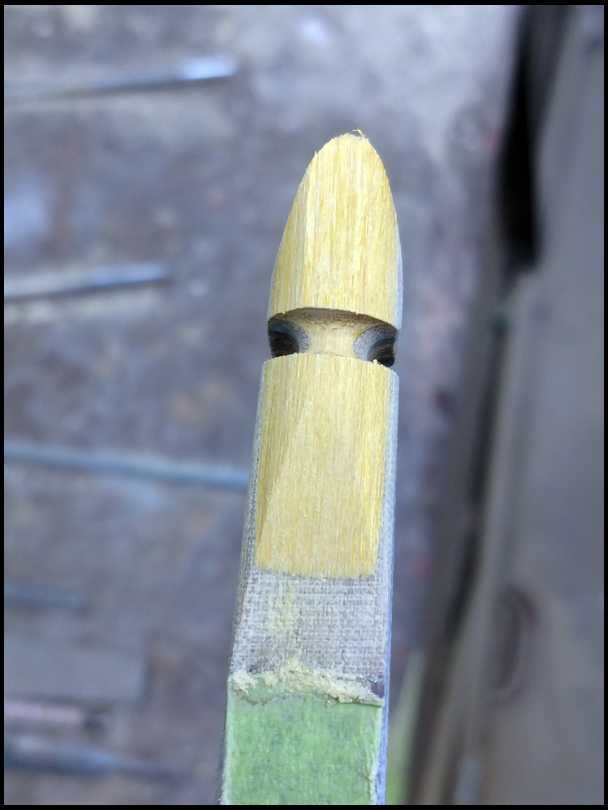
Bottom. Ready for a shoe shine, with finer grit. JF
|
|
|
|
| From: bodymanbowyer
|
|
|
|
|
|
|
| Date: 23-Jan-17 |
|

I'm learning how to use my delayed picture timer :) JF
|
|
|
|
| From: bodymanbowyer
|
|
|
|
|
|
|
| Date: 23-Jan-17 |
|
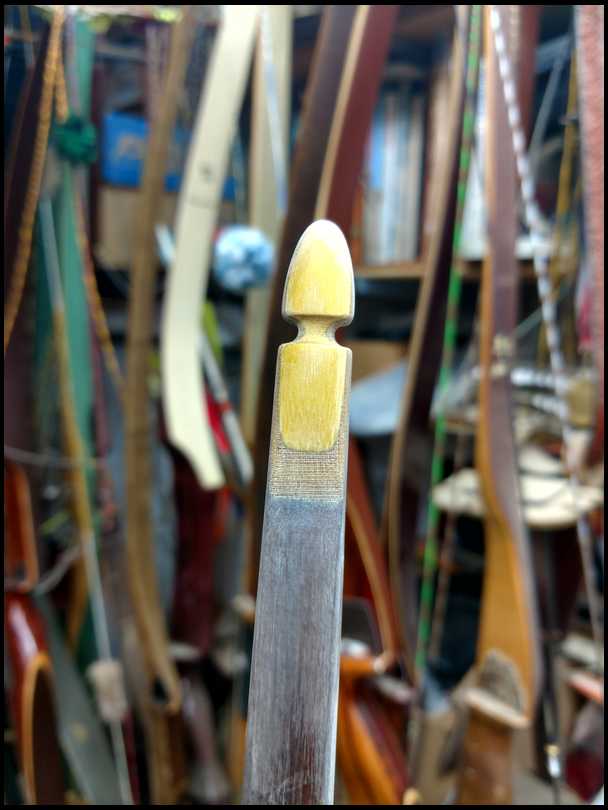
Looks smooth, getting ready for epoxy sealer. JF
|
|
|
|
| From: bodymanbowyer
|
|
|
|
|
|
|
| Date: 23-Jan-17 |
|
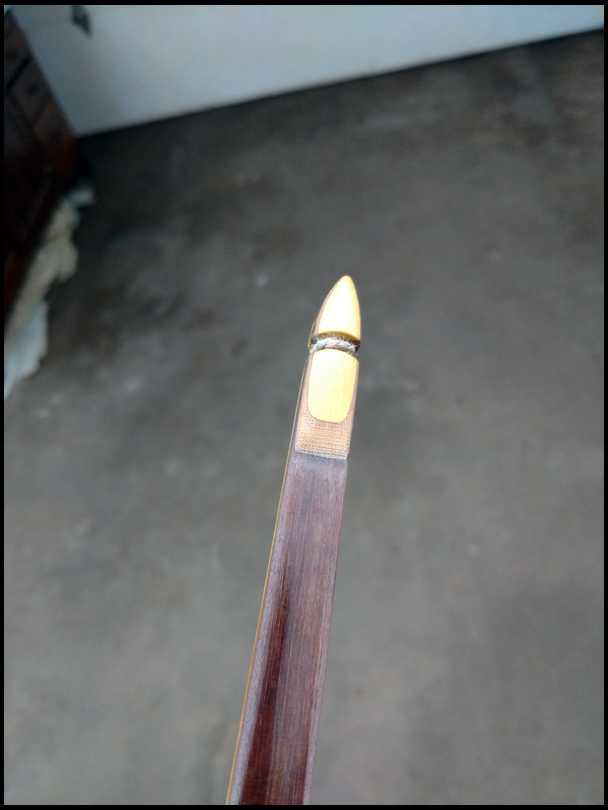
Top limb, ready to defend yourself if needed ;) JF
|
|
| From: bodymanbowyer
|
|
|
|
|
|
|
| Date: 23-Jan-17 |
|
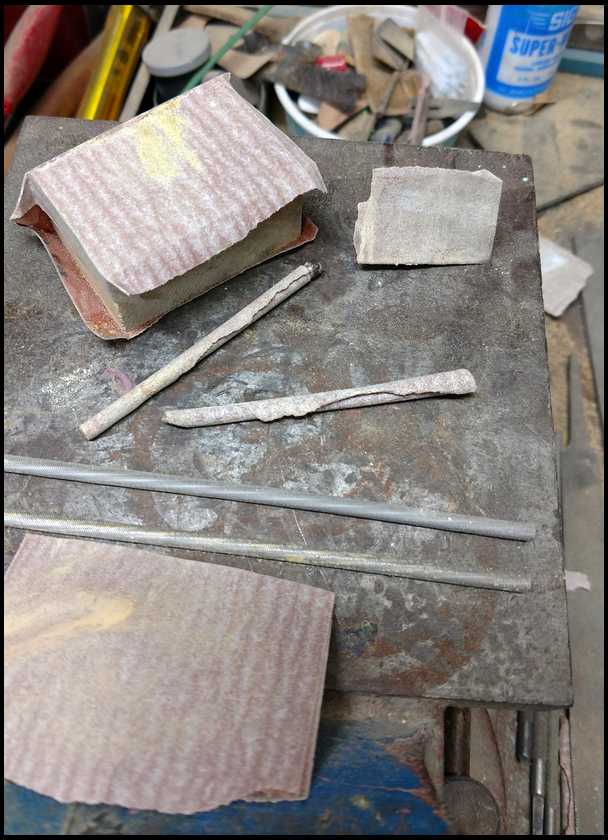
These are the tools I use to shape the tip, besides the edge grinder or belt sander. The belt sander grit is 36grit, so you don't leave any burn marks. JF
|
|
| From: bodymanbowyer
|
|
|
|
|
|
|
| Date: 23-Jan-17 |
|
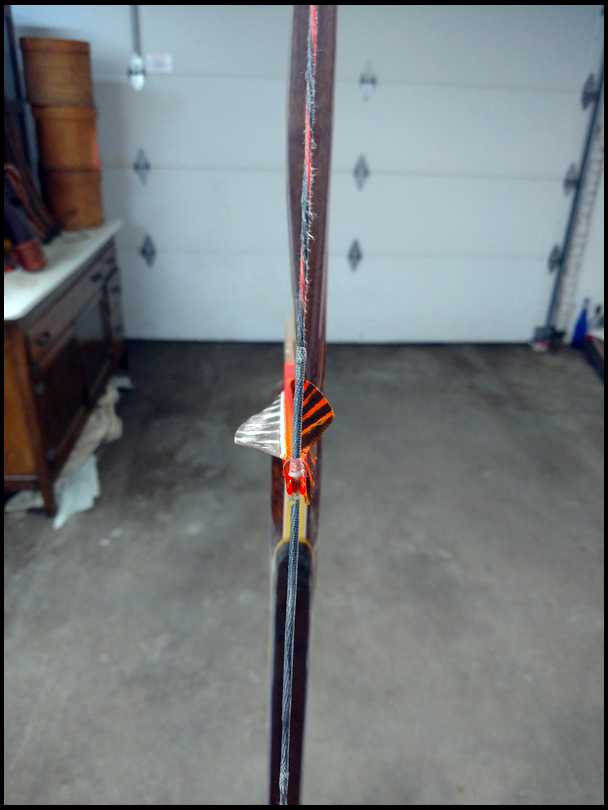
Center shot, about a 1/16 it from center. JF
|
|
| From: bodymanbowyer
|
|
|
|
|
|
|
| Date: 23-Jan-17 |
|
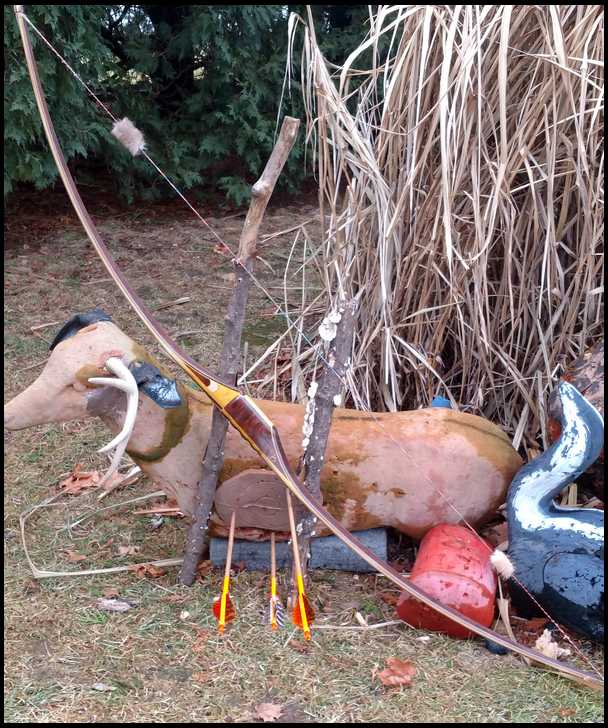
Till is a 1/8 stiffer bottom. I like them close to even. 1/8 is good. JF
|
|
| From: bodymanbowyer
|
|
|
|
|
|
|
| Date: 23-Jan-17 |
|
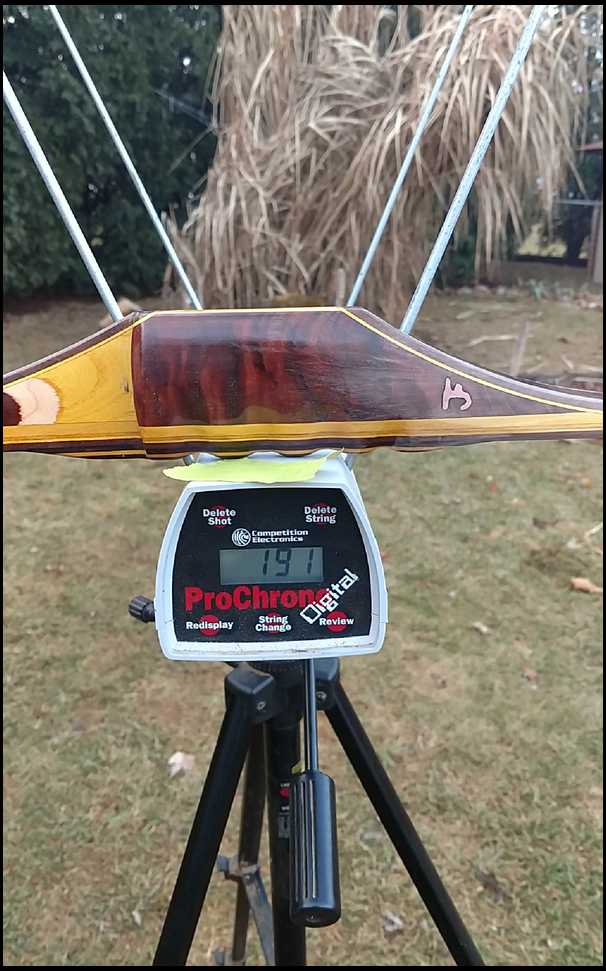
Not to shabby for a 57# bow and a 476 grain arrow. I know it's not 10gpp, but it's still quiet. JF
|
|
|
|
| From: bodymanbowyer
|
|
|
|
|
|
|
| Date: 23-Jan-17 |
|
This bow is ready to Big Jim's Buffalo gloss epoxy sealer. I use enough to fill the grain up to flush and sand smooth. Sand in a couple days. Stay tuned,more to come. JF
|
|
| From: bodymanbowyer
|
|
|
|
|
|
|
| Date: 23-Jan-17 |
|
Oops 'seal' with Big Jim's Buffalo gloss epoxy sealer. JF
|
|
| From: Matt Ewing
|
|
|
|
|
|
|
| Date: 23-Jan-17 |
|
= speed :-) unbelievable Jeff, great work!
|
|
| From: Barber
|
|
|
|
|
|
|
| Date: 24-Jan-17 |
|
Jeff, that is another fine bow you have there ! I would have a hard time turning loose a bow that nice, I would have a garage full of bows if I could build one like that.
|
|
| From: Danny
|
|
|
|
|
|
|
| Date: 24-Jan-17 |
|
I have enjoyed your build along.I have built a few longbows.And I like your bow.You have shown just how many steps are involved from start to finish.
|
|
| From: Dry Bones
|
|
|
|
|
|
|
| Date: 24-Jan-17 |
|
Not sure what Matt will be hunting with that bow, but a 57# Freeman is stout enough to take out a Rhino.. Well, maybe. Really Nice and Congrats to both of you.
-Bones
|
|
| From: Zig
|
|
|
|
|
|
|
| Date: 24-Jan-17 |
|
I would rate this as the best post on any subject I have ever had the pleasure of viewing! Very interesting! Nice job!!
|
|
| From: Stalker
|
|
|
|
|
|
|
| Date: 24-Jan-17 |
|
Thank you so much for sharing!!!
|
|
| From: Den
|
|
|
|
|
|
|
| Date: 24-Jan-17 |
|
Jeff, awesome job on the bow and buildalong camera work, I've been following closely since the beginning, Thank you!!! Den
|
|
| From: bodymanbowyer
|
|
|
|
|
|
|
| Date: 24-Jan-17 |
|
Thanks guys for following along with me. There is one way to make a bow, but this ,for now,is what I've learned. It ain't over till the bow gets a final clear coat, sprayed on. And of course boxed and shipped. The next time you think your bowyer is taking so long. Look back at all the steps. Or buy won off the shelf or a used one :) JF
|
|
| From: RonG
|
|
|
|
|
|
|
| Date: 24-Jan-17 |
|
I have been watching Jeff, Absolutely a beautiful job, your bows will match or better anyone's. Something to be proud of.........RonG
|
|
| From: bodymanbowyer
|
|
|
|
|
|
|
| Date: 24-Jan-17 |
|
Thanks Ron and all of you for the encouragement :) makes a guy feel good. :) JF
|
|
| From: Matt Ewing
|
|
|
|
|
|
|
| Date: 24-Jan-17 |
|
Hopefully everything in North America! Bones. At least an elk someday.
|
|
| From: longbows101
|
|
|
|
|
|
|
| Date: 24-Jan-17 |
|
Outstanding tutorial! The pics. and explanations are incredible. Thanks for taking so much time in doing this. Nice bow by the way ! She's a beauty.
|
|
| From: bigdog21
|
|
|
|
|
|
|
| Date: 25-Jan-17 |
|
great work and thanks for showing use.
|
|
| From: CD
|
|
|
|
|
|
|
| Date: 25-Jan-17 |
|
I love it!
|
|
| From: BowAholic
|
|
|
|
|
|
|
| Date: 25-Jan-17 |
|
Could you (or have you already) done a thread showing your tools? I'm particularly interested in the thickness sander... thanks!
|
|
| From: bodymanbowyer
|
|
|
|
|
|
|
| Date: 25-Jan-17 |
|
Bowaholic, I added to a thread I think nemah started. I need a new laminations grinder. I went over some information on that thread. Is that the equipment you want to know about? JF
|
|
| From: BowAholic
|
|
|
|
|
|
|
| Date: 25-Jan-17 |
|
yes... I think so. It looked like you had a belt sander conversion that you used to true boards and sand down lams? I would like to have a way to taper without buying any more tools right now. thanks!
|
|
| From: BenM
|
|
|
|
|
|
|
| Date: 25-Jan-17 |
|
Nice work!
|
|
| From: neargeezer
|
|
|
|
|
|
|
| Date: 27-Jan-17 |
|
What a great build along and bow!
|
|
| From: Archre167
|
|
|
|
|
|
|
| Date: 27-Jan-17 |
|
This was the best ride along ever! Don't think it could be done any better. Thank you for taking us thru it with you.
|
|
| From: bodymanbowyer
|
|
|
|
|
|
|
| Date: 29-Jan-17 |
|
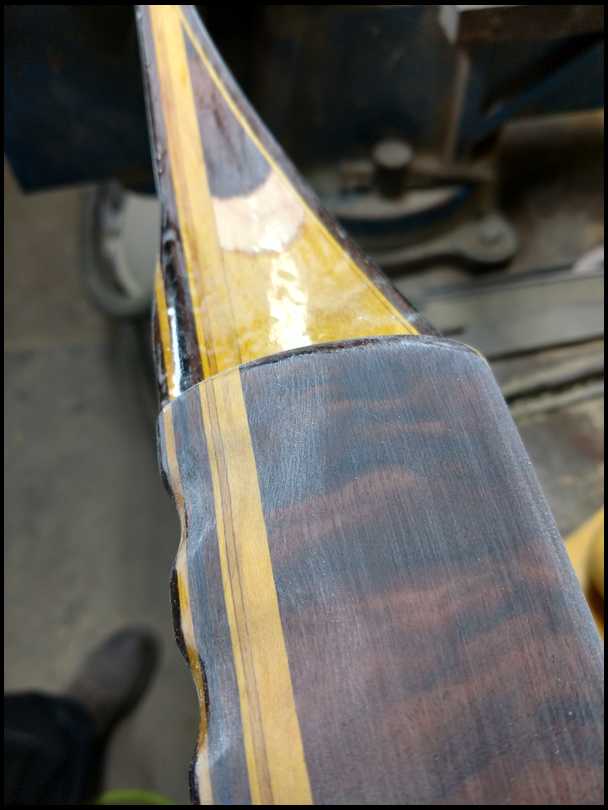
Ok, time to finish this bow. Back when I started sealing the grain and filling it. I put on five coats, one hour between each. That dried for 3 days I the sanded it with 320grit. I blew it off. My air blower has a inline water filter at the blow gun. I don't want any oily water getting on the bow. Wipe down with denatured alcohol, blow off again and tack off, with a tack rag, lightly. Now I'll put on three more coats of Big Jim's Buffalo gloss epoxy. I still have some left from a few days ago,in the freezer. JF
|
|
|
|
|
|
| From: bodymanbowyer
|
|
|
|
|
|
|
| Date: 29-Jan-17 |
|
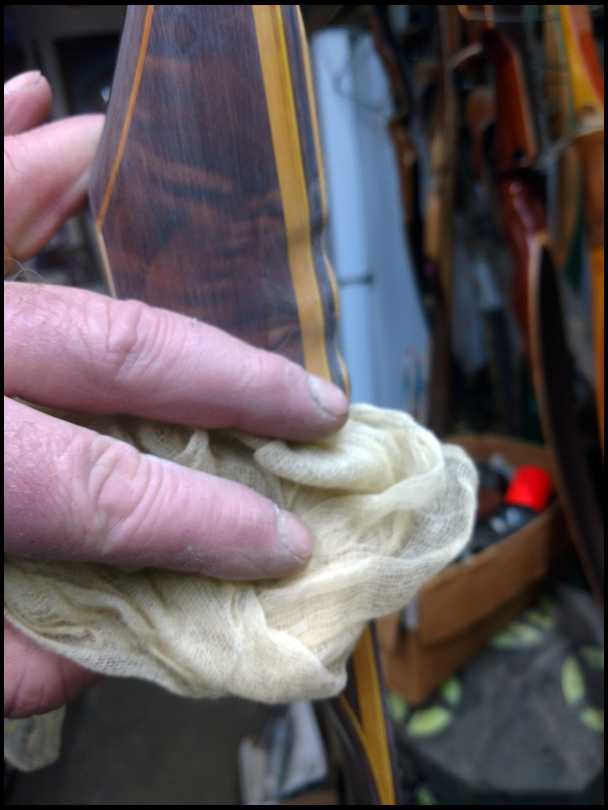
I have all ready wiped it down and blew it off, while it hangs. Now tack it down. To get ready for three more coats of epoxy sealer. Just being sure it's smooth. JF
|
|
| From: Dry Bones
|
|
|
|
|
|
|
| Date: 29-Jan-17 |
|
Just getting back in and lookin good Jeff.
-Bones
|
|
| From: bodymanbowyer
|
|
|
|
|
|
|
| Date: 29-Jan-17 |
|
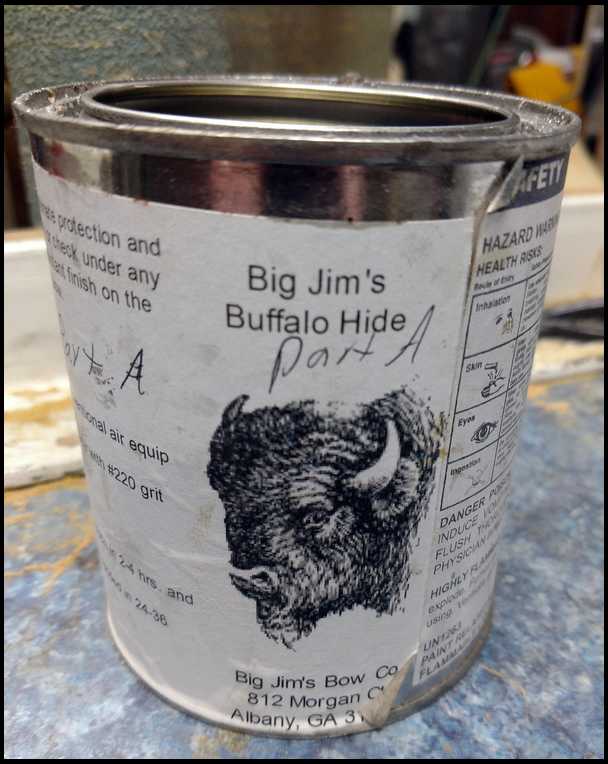
Here's what I'm using for my sealer filler. JF
|
|
| From: bodymanbowyer
|
|
|
|
|
|
|
| Date: 29-Jan-17 |
|
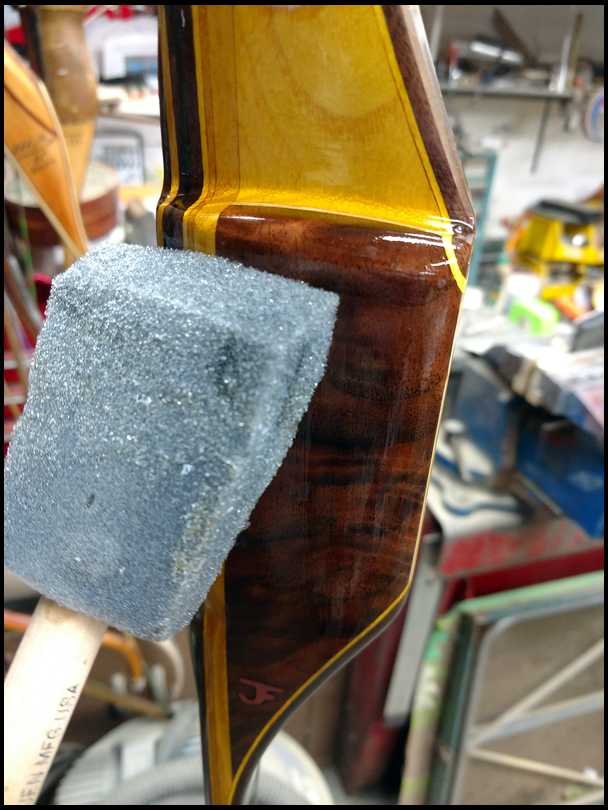
Putting on three more coats,1 hour between. Just on the wood. The glass will get a spray finish later when I spray the whole bow. JF
|
|
| From: bodymanbowyer
|
|
|
|
|
|
|
| Date: 29-Jan-17 |
|
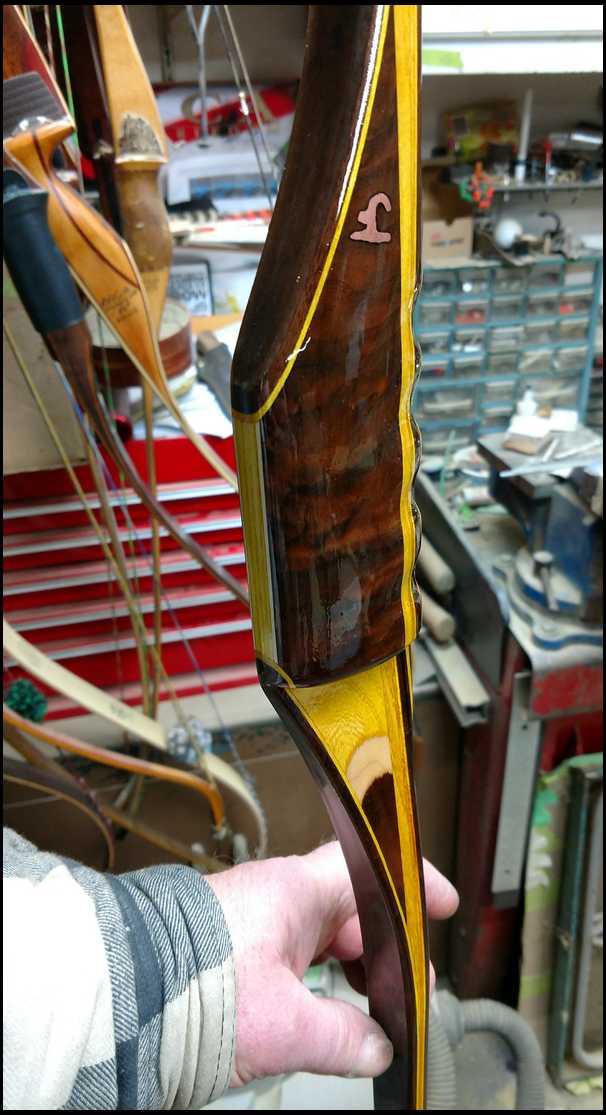
OK three more days of drying.
|
|
| From: bodymanbowyer
|
|
|
|
|
|
|
| Date: 29-Jan-17 |
|
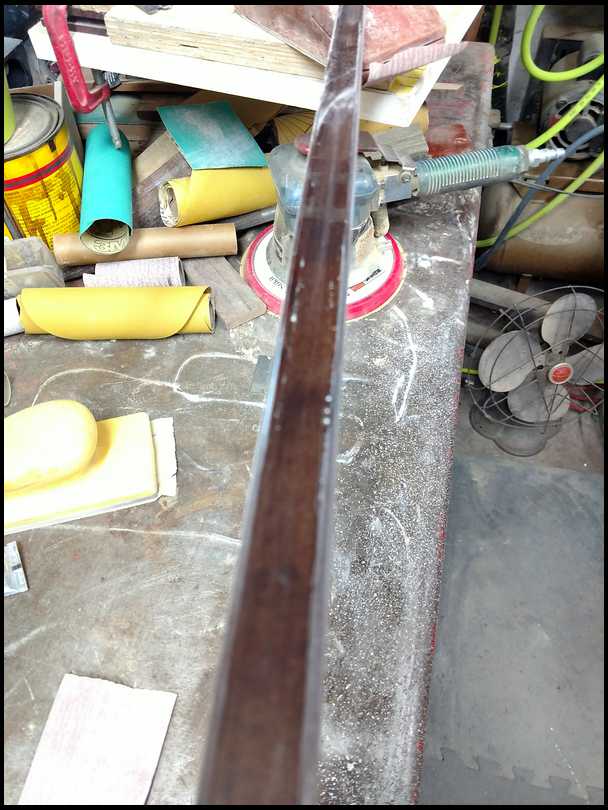
OK, it's been three days, really. Now I sand every part of he bow with 400 grit. Any epoxy that got on the glass sand it off,back to where glass meets wood. JF
|
|
|
|
| From: bodymanbowyer
|
|
|
|
|
|
|
| Date: 29-Jan-17 |
|
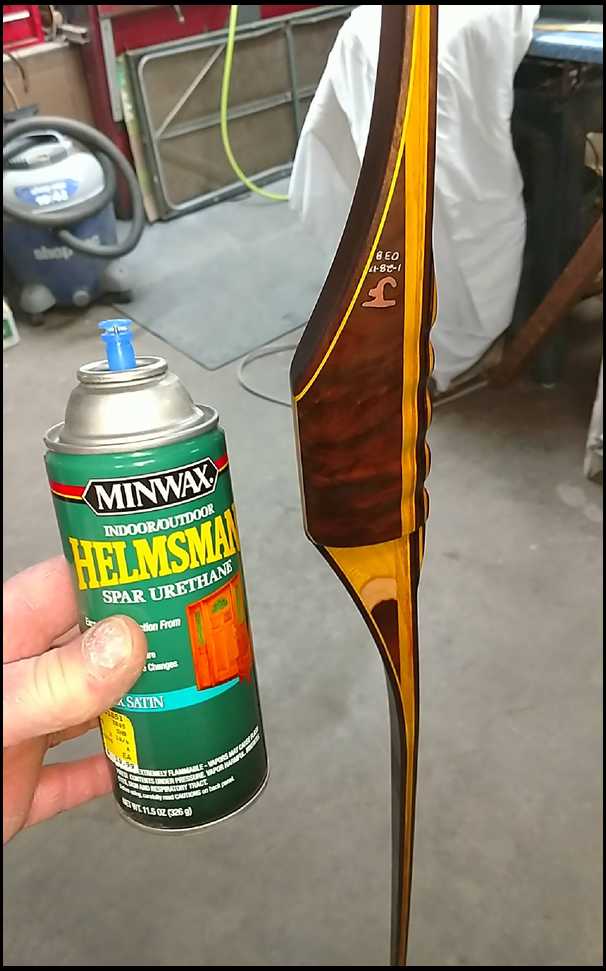
After it's all sanded and looks ready. Blow, wipe down, do all you writing on it. Let the writing dry. Hang blow off again and tack off. If you have sweaty hands wear rubber gloves,when doing your lettering. Now this is where all that filling and sanding pays off. JF
|
|
| From: bodymanbowyer
|
|
|
|
|
|
|
| Date: 29-Jan-17 |
|
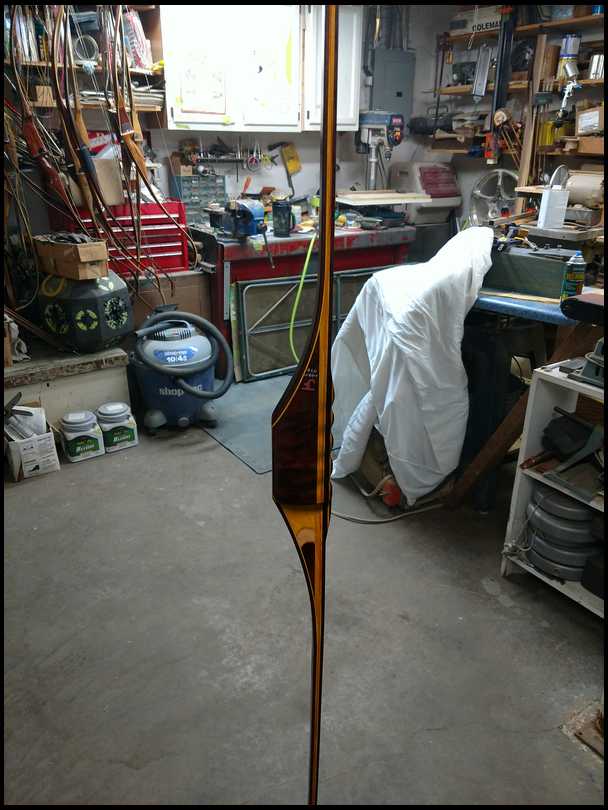
Three wet coats. I start spraying at the top and one continuous motion. Top to bottom, next side bottom to top, next side, top to bottom and then back up on the last side. I hold the can about 6" away and move sort of quick. JF
|
|
| From: bodymanbowyer
|
|
|
|
|
|
|
| Date: 29-Jan-17 |
|
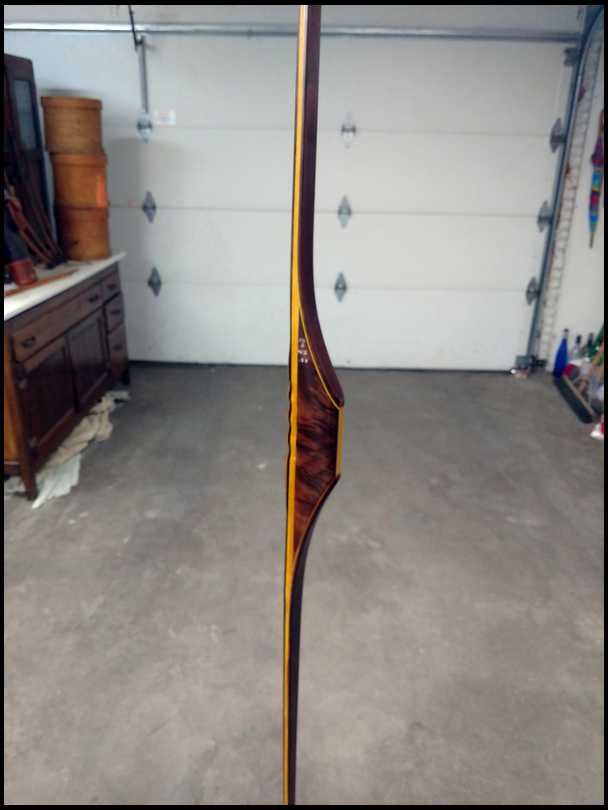
20-30minutes between coats. I hang most of my bows from the bottom string nock, when I spray my final three coats. And finally let it dry overnight. JF
|
|
| From: bodymanbowyer
|
|
|
|
|
|
|
| Date: 29-Jan-17 |
|
Allrighty, 24 hours later. It's ready for a 20 strand Bcyx 2 bundle string. A calfhair rest side plate. Some Beaver Ball string silencers, which a barely even needed, but they look really cool. I like satin finish on my bows, so they have NO reflection in the woods. If you don't use gloss as a sealer filler and you used satin or semi gloss from start to end, it'll end up milky looking. So use gloss for fill work. Don't hurry anything when it's drying time. Nothing will sand good and it just make a bigger mess. JF
|
|
|
|
|
|
|
|
|
|
|
|
|
|
| From: bodymanbowyer
|
|
|
|
|
|
|
| Date: 29-Jan-17 |
|
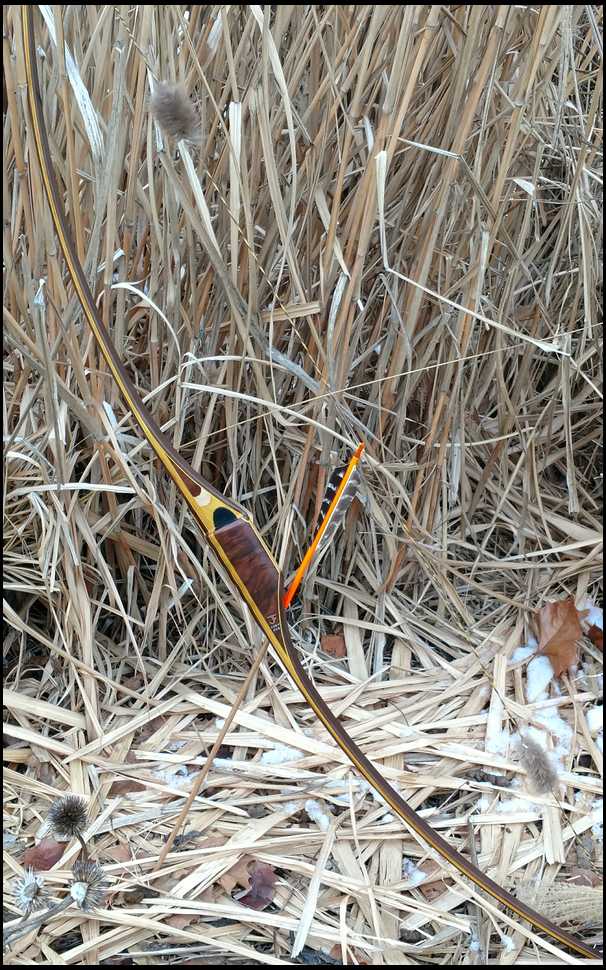
And there you have it. Ready for the range or the woods. Thank you everyone for following along and suggestions on different ways of building. It's all fun. JF
|
|
| From: bodymanbowyer
|
|
|
|
|
|
|
| Date: 29-Jan-17 |
|
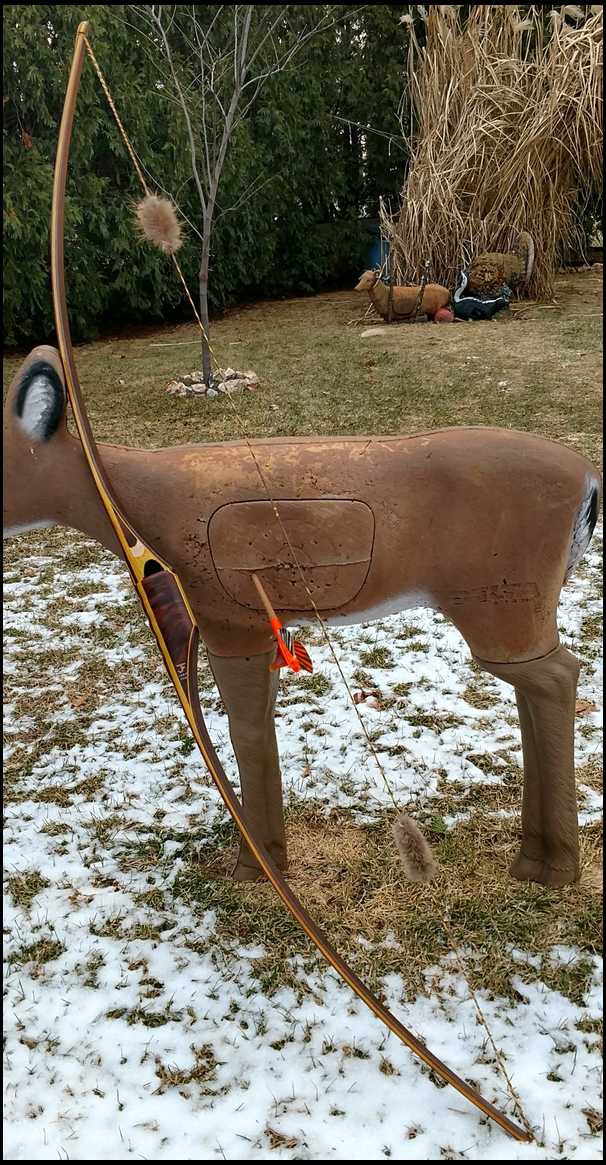
Oh yeah on more thing. I've got shoot it a couple times. 15 yards from my deck. It's a winner :) JF
|
|
| From: fishin coyote
|
|
|
|
|
|
|
| Date: 29-Jan-17 |
|
Looks great Jeff. Matt is going to be one happy camper.
Mike
|
|
| From: bodork
|
|
|
|
|
|
|
| Date: 29-Jan-17 |
|
Very nice bow and build along Jeff! Thanks for taking us a long! Have you ever tried thunderbird high solids lacquer filler? You can brush on a heavy coat and sand it off in an hour or two. It fills fast and sands fast too. Three coats will usually fill the grains in wenge. Mike
|
|
| From: Pip
|
|
|
|
|
|
|
| Date: 29-Jan-17 |
|
Great Job, that's a nice looking bow. Pip
|
|
| From: Barber
|
|
|
|
|
|
|
| Date: 29-Jan-17 |
|
Jeff, love the bow ! You did an awesome job, thanks for doing the build along. It was fun !
|
|
| From: Matt Ewing
|
|
|
|
|
|
|
| Date: 29-Jan-17 |
|
Thanks Jeff I can't wait to shoot it! That bow is what happens when you let an artist do his thing. I gave him a basic idea of what I like and he ran with it. Thanks again Jeff and great job!
|
|
| From: woodinhand
|
|
|
|
|
|
|
| Date: 29-Jan-17 |
|
Great job on the bow. Thanks for the build a long I know they are a lot of work, really enjoyed it.
|
|
|
|
| From: muddyIA
|
|
|
|
|
|
|
| Date: 29-Jan-17 |
|
Great looking project.
|
|
| From: Dry Bones
|
|
|
|
|
|
|
| Date: 03-Feb-17 |
|
Jeff another good looking bow, and appears to shoot well. :-D Just got back in and had to get all caught up.
-Bones
|
|
| From: bodymanbowyer
|
|
|
|
|
|
|
| Date: 04-Feb-17 |
|
This was all worth it. Matt loves it :) That to me is the best part :) JF
|
|
| From: Buzz
|
|
|
|
|
|
|
| Date: 04-Feb-17 |
|
Very nice.
Great job and thanks for the build along.
|
|
| From: CD
|
|
|
|
|
|
|
| Date: 04-Feb-17 |
|
Thanks for sharing this with us... the journey was absolutely amazing! And the bow looks GREAT! :)
Two thumbs up for sure!!!!!!!!!
CD
|
|
| From: Steve Milbocker
|
|
|
|
|
|
|
| Date: 04-Feb-17 |
|
Great looking bow Jeff and a fine job on the build a long.
|
|
| From: Matt Ewing
|
|
|
|
|
|
|
| Date: 12-Feb-17 |
|
To the top cause its amazing! This bow is everything a longbow should be. Quick quiet and fast. Thanks again Jeff I am amazed at your attention to detail!
|
|
| From: Chance
|
|
|
|
|
|
|
| Date: 19-Jun-17 |
|
beautiful artwork!
|
|
|
|
| From: Matt Ewing
|
|
|
|
|
|
|
| Date: 19-Jun-17 |
|
Its still awesome!
|
|
| From: 4nolz@work
|
|
|
|
|
|
|
| Date: 19-Jun-17 |
|
time to leave the temple Grasshopper
|
|
|
|
| From: Dry Bones
|
|
|
|
|
|
|
| Date: 01-Aug-17 |
|
With the Talk of threads without pics, I thought I would try to revive this one again. Lots of Quality work.
-Bones
|
|
| From: Dry Bones
|
|
|
|
|
|
|
| Date: 01-Aug-17 |
|
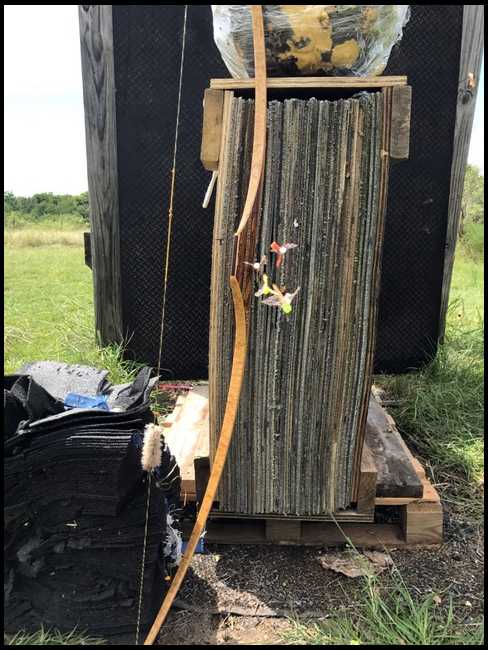
With a pic of another great Bodyman bow.
-Bones
|
|
| From: LBshooter
|
|
|
|
|
|
|
| Date: 01-Aug-17 |
|
Very nice work, a beauty.
|
|
|
|
If you have already registered, please sign in now
For new registrations Click Here
|
|
|
|