| From: Steve Moore
|
|
|
|
|
|
|
| Date: 23-Oct-08 |
|
Well, lets start the Eastern Red Cedar build a long.
Eastern Red Cedar is a wood that causes quite a debate among self bowyers. Some will tell you that ERC will make a fantastic self bow, Some will tell you it will only make backed bow (Rawhide, Sinew etc....) Others will insist that IT WILL NOT MAKE A BOW AT ALL......PERIOD!!!!. LOL...I met a gentlemen at this last years GLLI who insisted that you could not make an ERC selfbow. It was just not possiable. I explained to him that I have seen several and that as a matter of fact there was a lady here shooting that was shooting a ERC ELB that she made with Gary Davis. he still insisted that it could not be done. He was a pompus jerk though and you just cant talk sense to people like that so I gave up.
All of the bows mentioned above CAN be done. Mark St Louis has made a 100#+ ERC self war bow for Marlon (Goes by Heavy Bows). Thimo has made a self bow that was moderately heavy….maybe 80# I believe? However, Most ERC bows that I have seen have been backed with something. Our bow that we are making here will be backed with deer rawhide. My opinion (Cause I am a bowyer and as I mentioned above we all have our opinions) is that it will be a better bow backed as several bowyers I have spoken to agree that it is somewhat of an unpredictable wood, sometimes just letting go after 100 shots or so. Be that as it may backing will be in order for this bow.
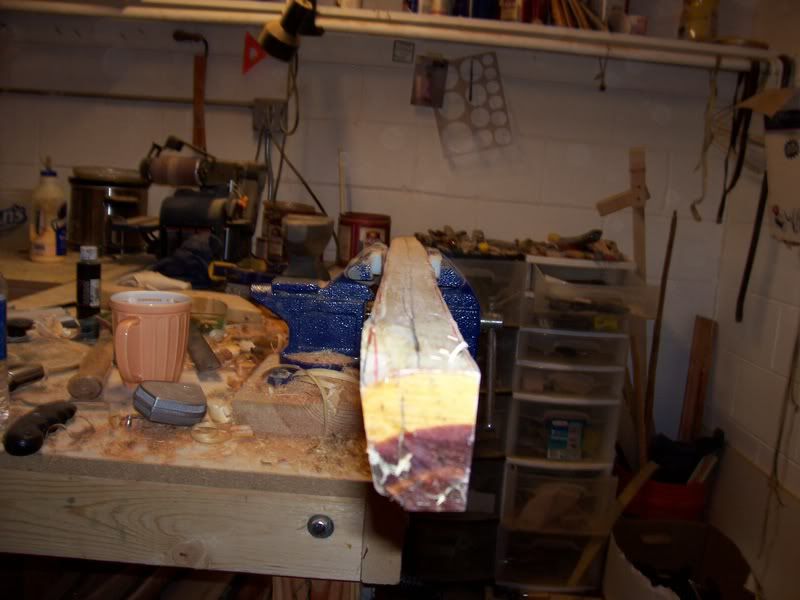
The first thing to over come was to find some ERC. Riley (Crow King) and I traded some primitive gear for some ERC staves.
Here is me happy to have ERC! harder to get then YEW!! 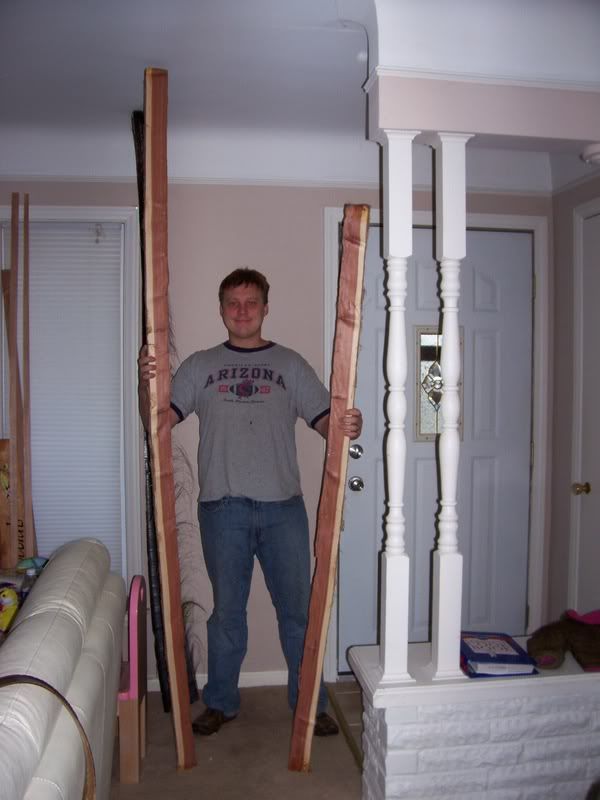
I received those last week but due to obligations I could not tear into them until today. I awoke this morning with nothing on my schedule except the bow. My wife and child have a bible study today so the house and shop are all mine!
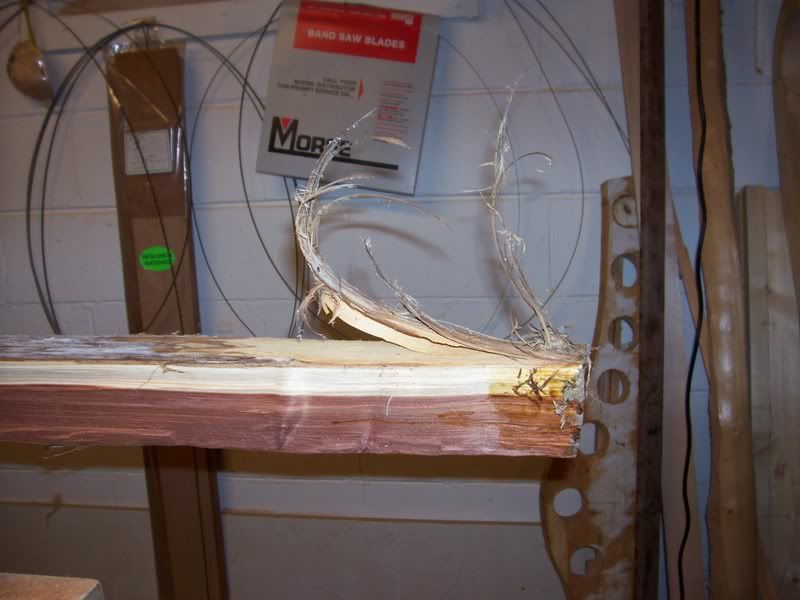
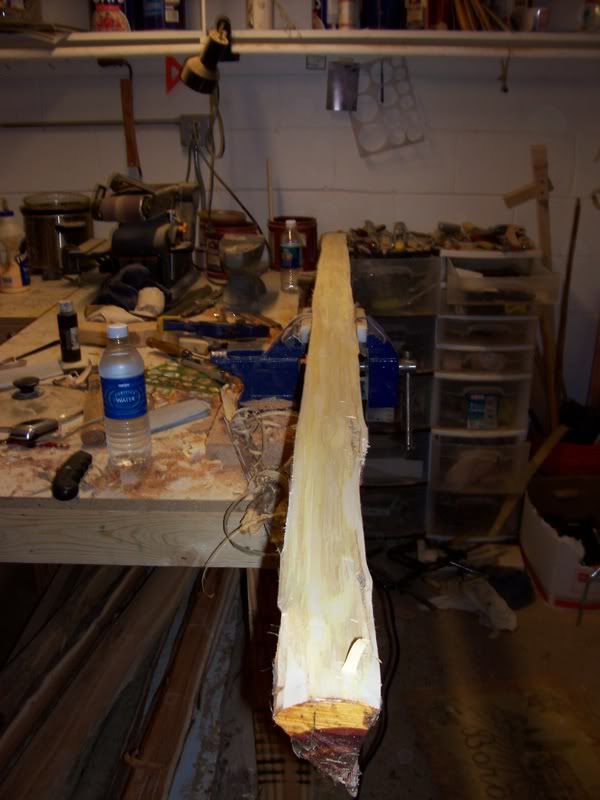
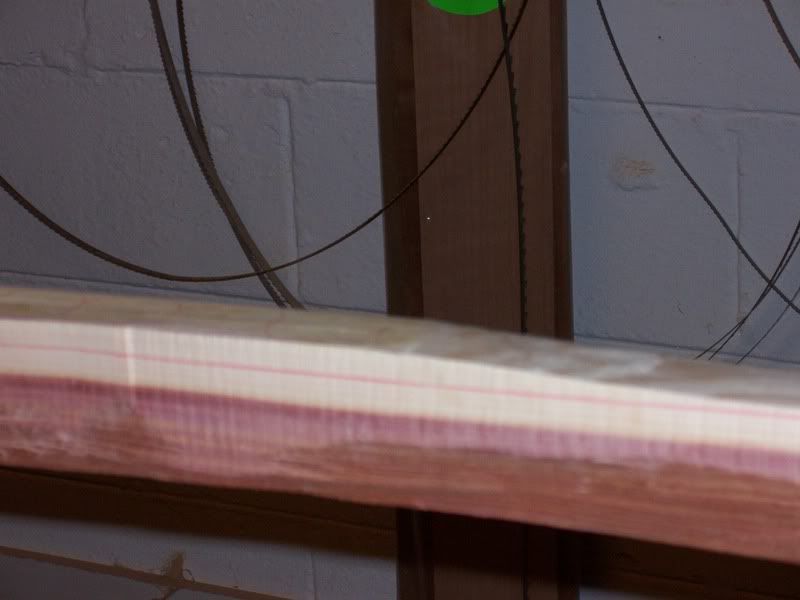
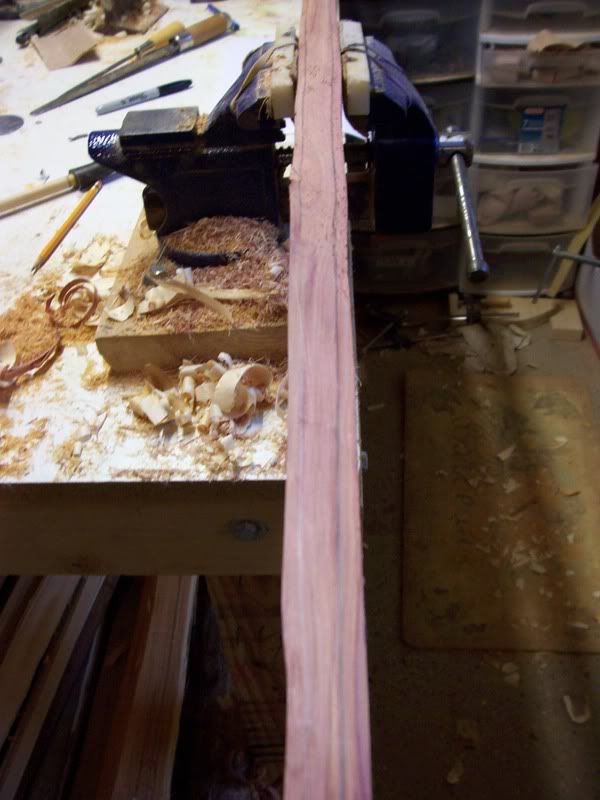
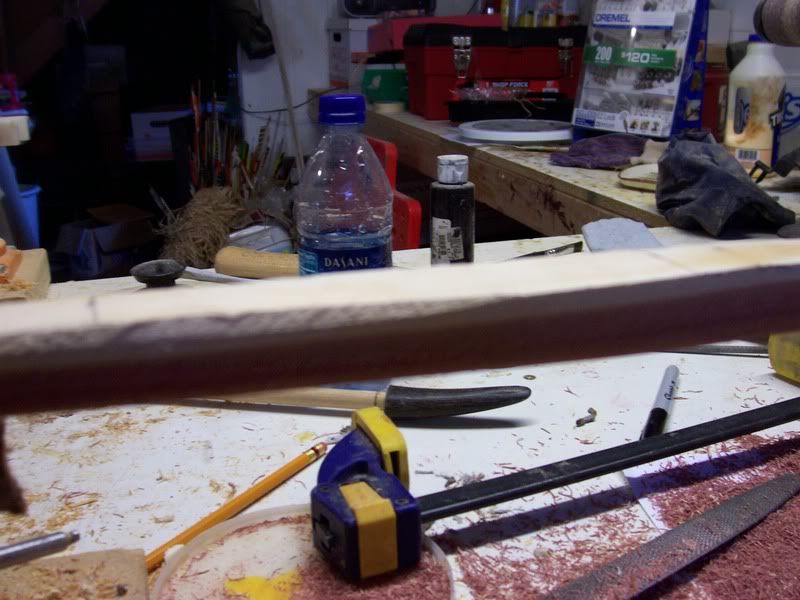
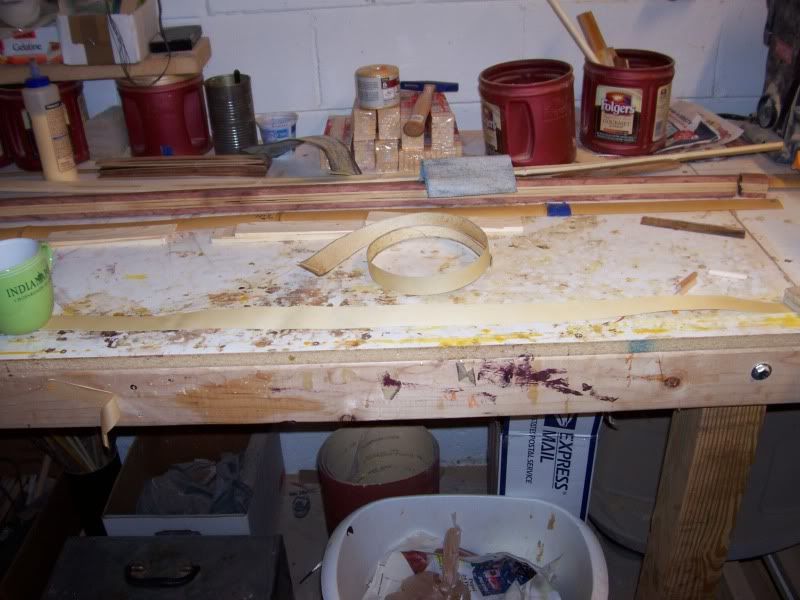
First Thing to do is to take a look at the stave. Its 77” long (The shorter of the 2 in the photo above), Has 7/8” of sap wood and a few knots. A great ERC stave! The finished bow will be 74” long. We will trim it later though as we start to rough the bow out. The sap wood will also need to be thinned out. The stave also has about 1" of natural deflex. Since this is my bow and I like bows with deflex we will probably just keep it as is.
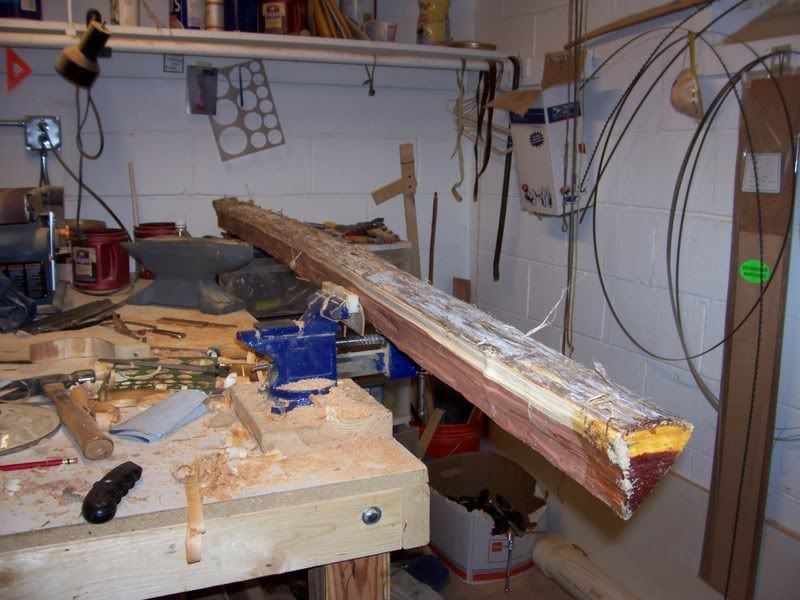
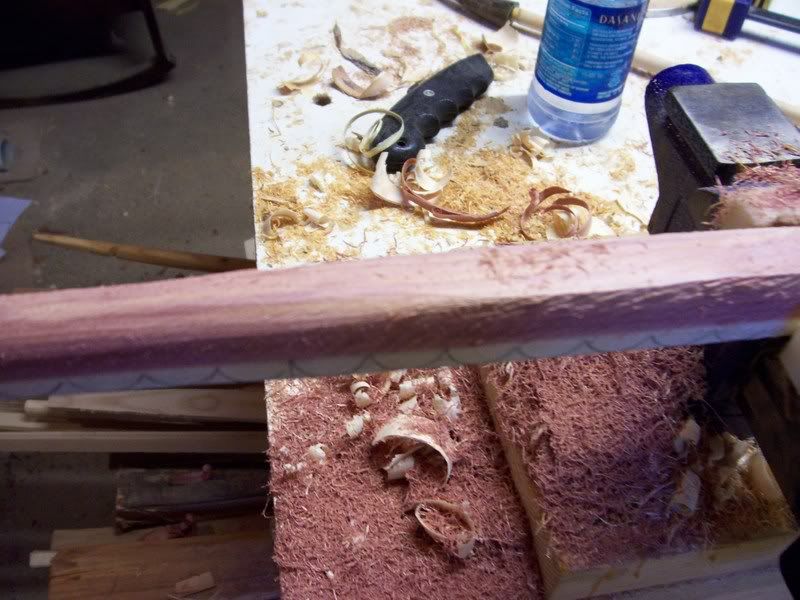
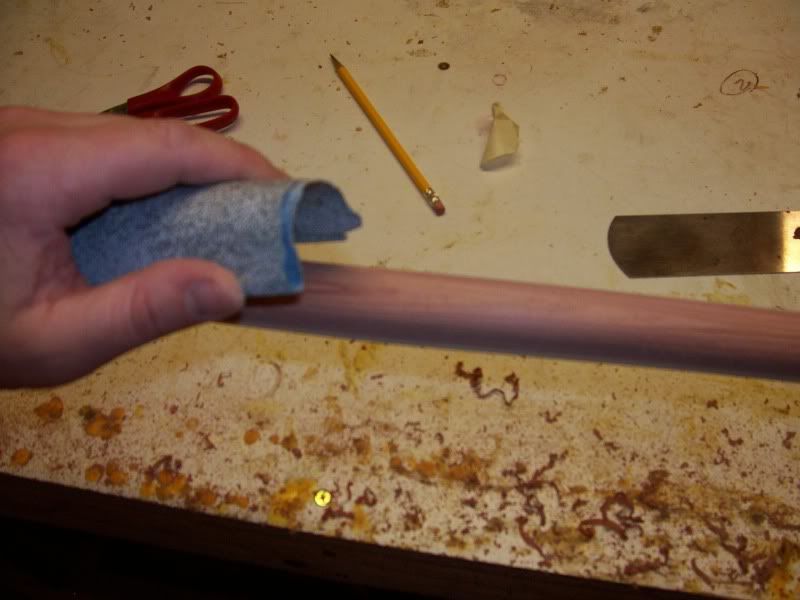
First things first. Remove the bark and cambium. You always want to pull towards you. This way you have control over the amount of wood you are removing and you do not pull up splinters (bow making 101). I use a dull draw knife for all my bark removal and chasing growth rings. That draw knife there is a veteran of over 300 bows and has never ever been sharpened. It will never need to be. The duller the better is what I find for these tasks. The goal here is to remove the bark and cambium with disturbing the sap wood much. Even though we will be thinning it out a lot its still good practice to keep growth ring violations to a minimal.
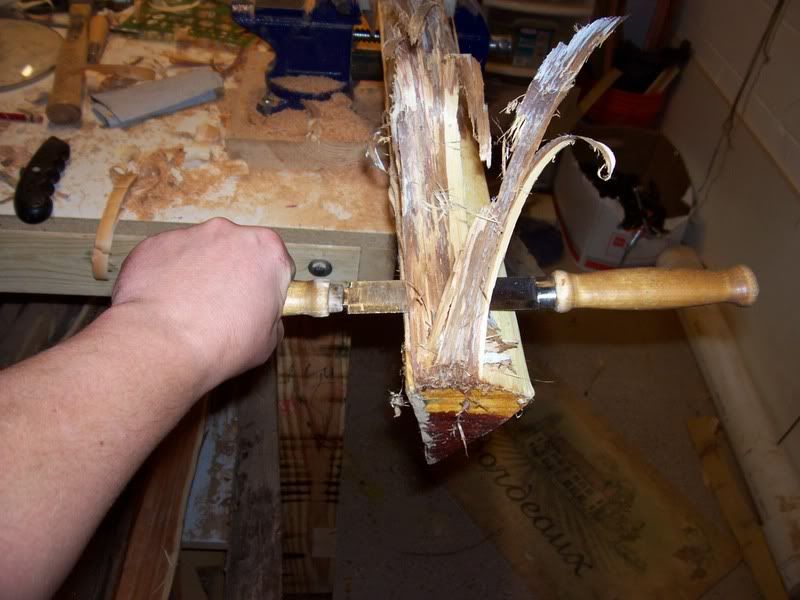

If you are going to work with cedar or yew wood you will run into dips and vallys A LOT. You will find cabinet scrapers a handy tool to have around while working with these woods, epically the goose neck scraper. Here is a pretty big dip that the draw knife cannot get to. Time for scrapers.
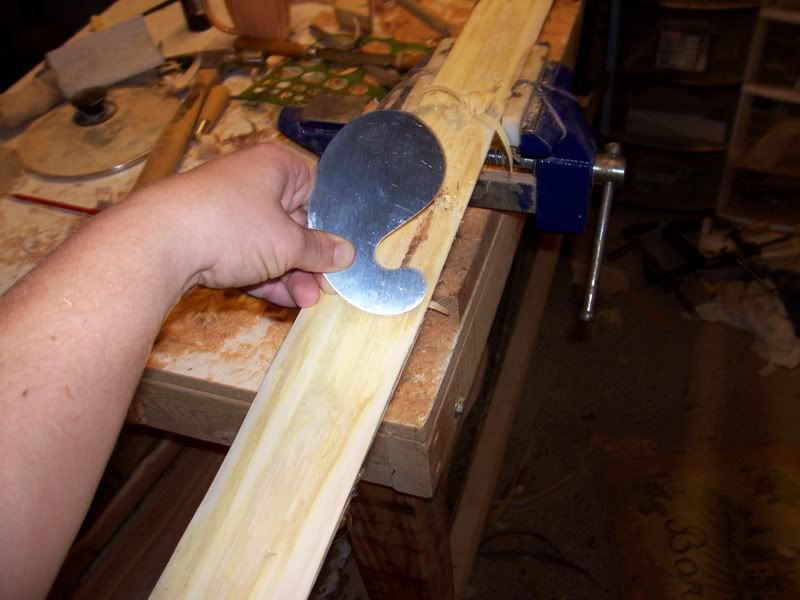
Do not be afraid to attack wood from all angles. Side to side as shown is a great efficient way to get rid of bark, cambium or sap wood in a valley. As shown:
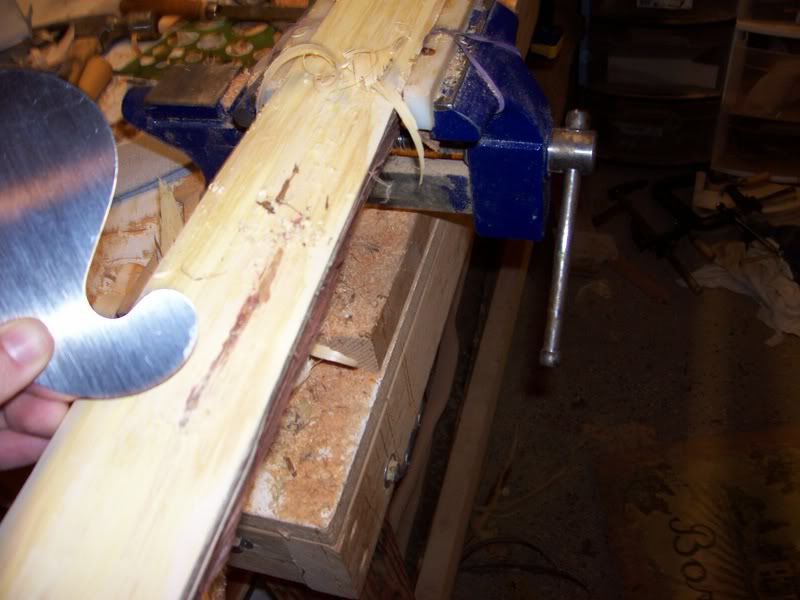
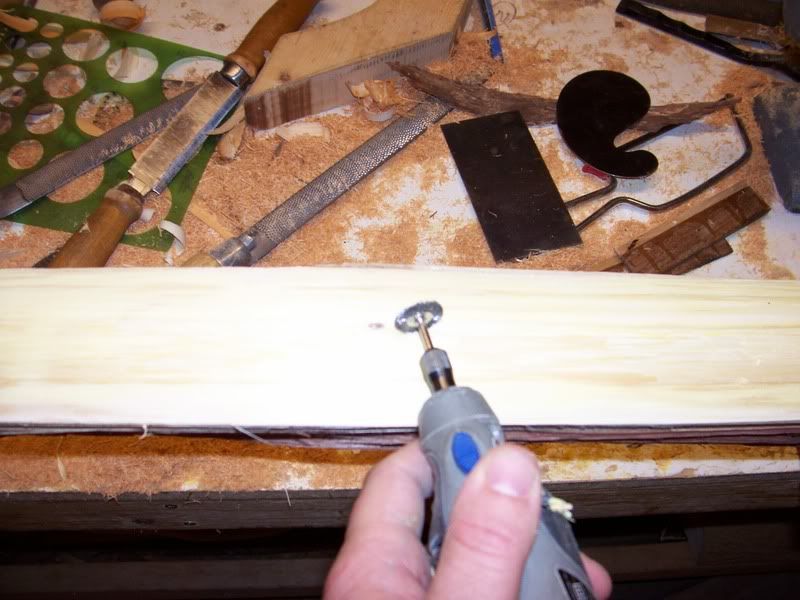
Another great tool for working around knots is a Dremmel. use a soft wire brush and you can clean up the knots with out violating growth rings as shown:
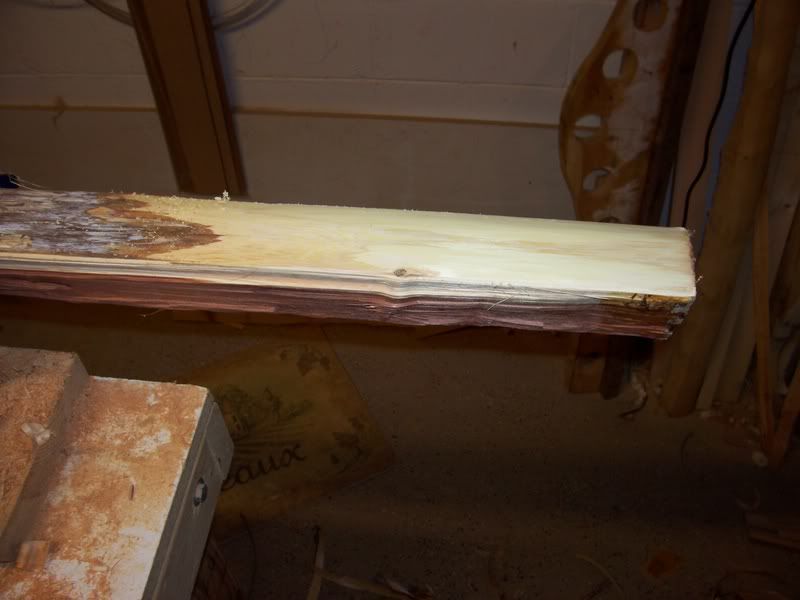
Now that the bark and cambium is off we can see what we are working with. Sometimes as in this case knots are un-avoidable. Osage, ash and other woods you can usually work around big knots. That is what makes a bow snaky for the most part….when you work around large knots the grain weaves in and out. Woods like cedar and yew are riddled with pin knots that just become part of the bow.
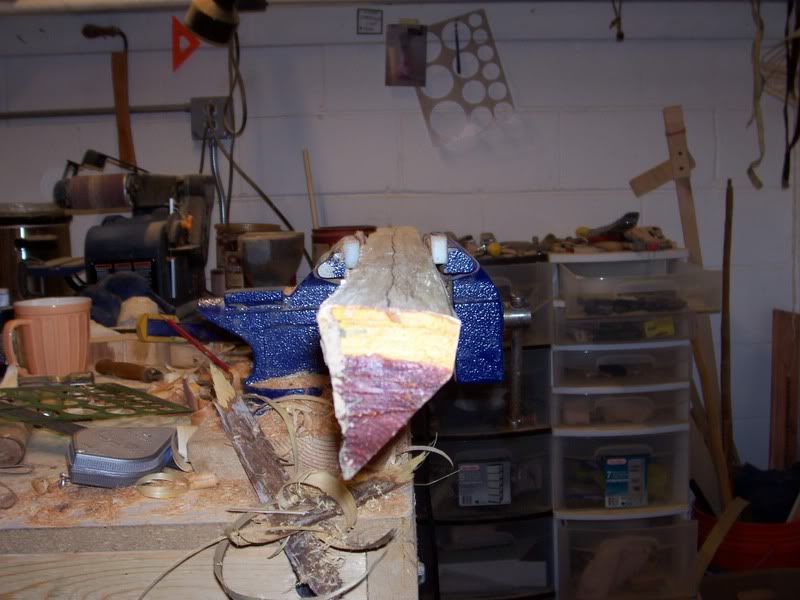
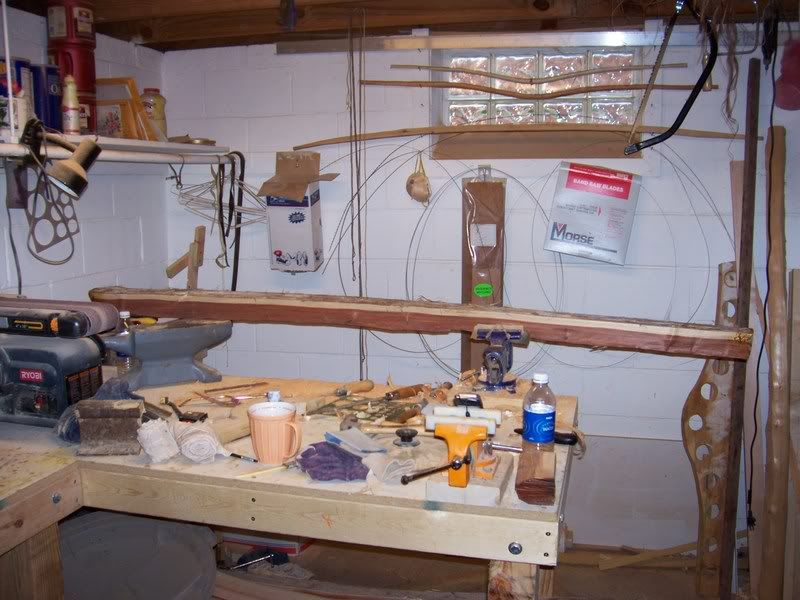
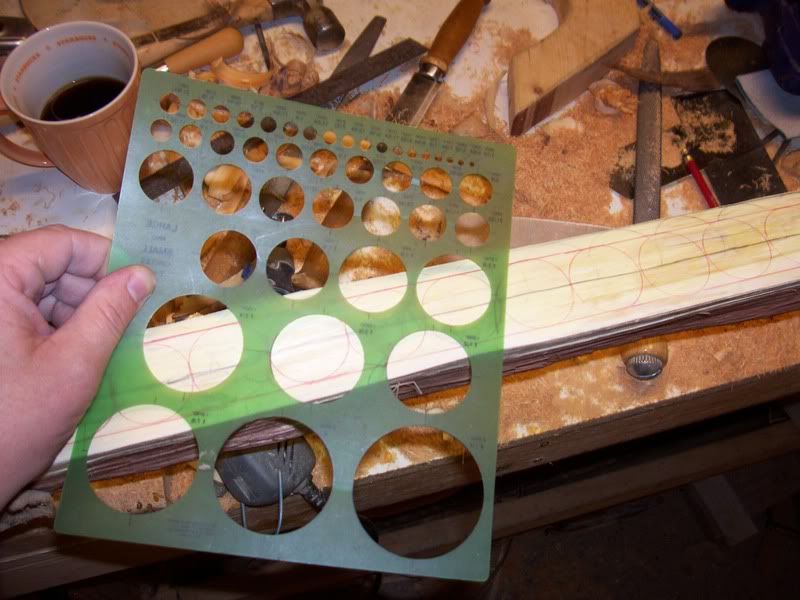
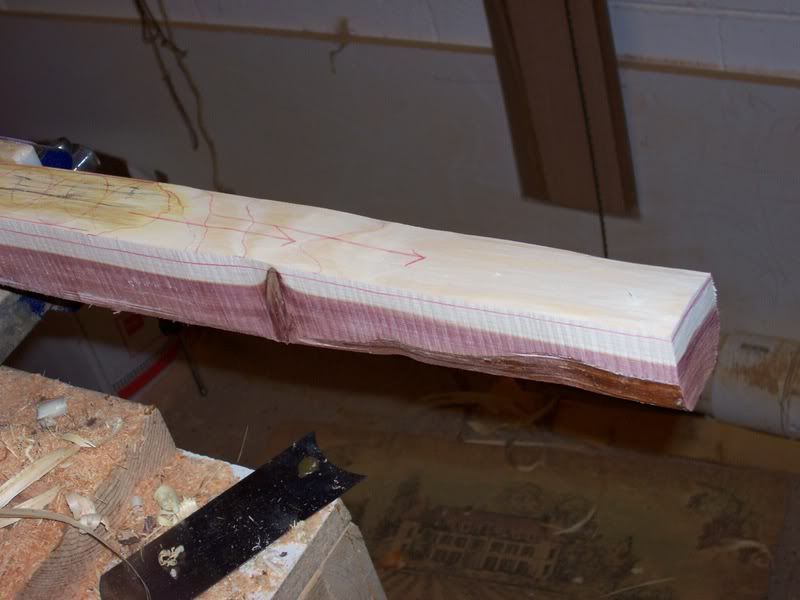
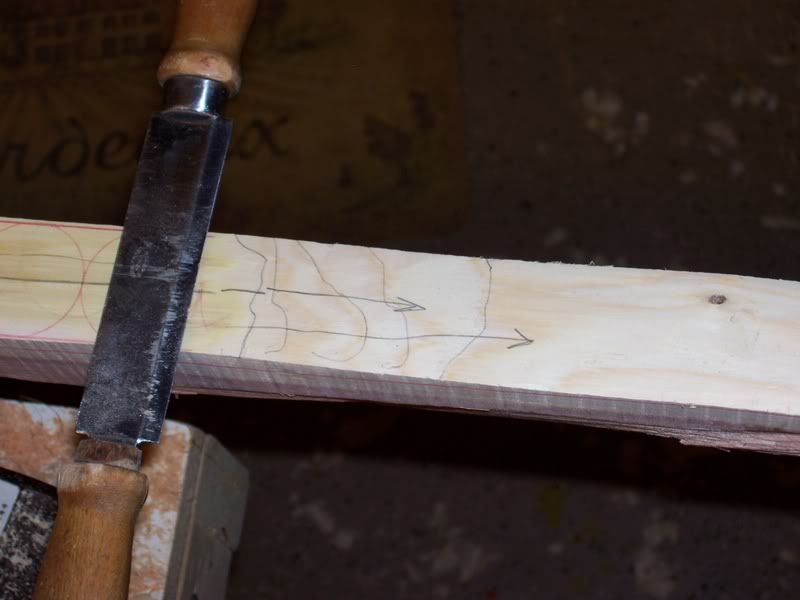
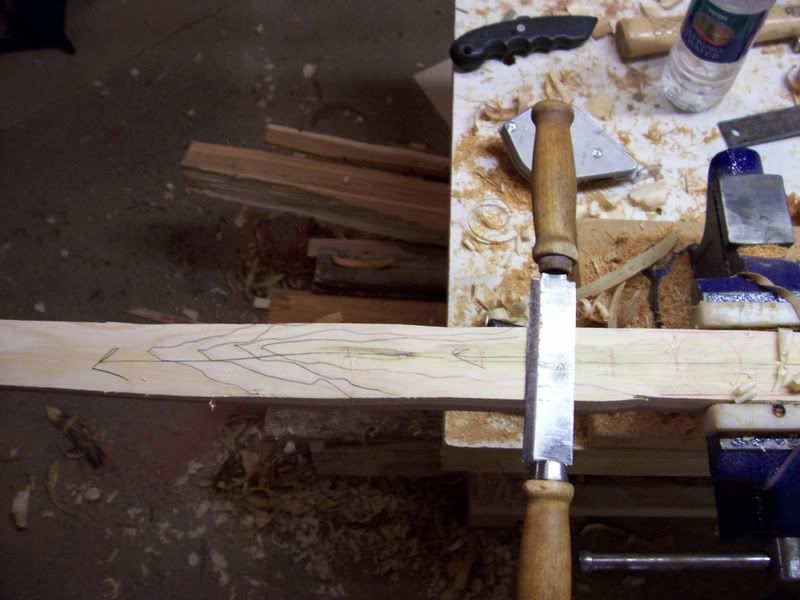
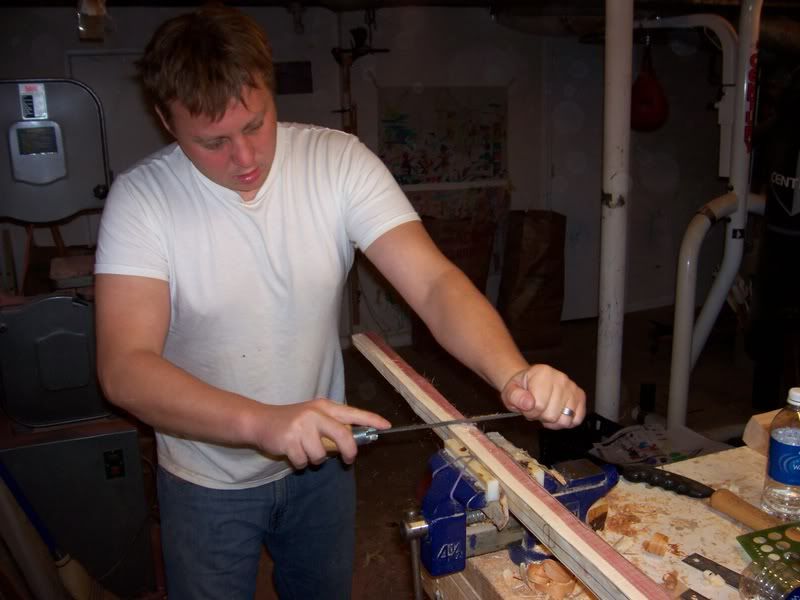
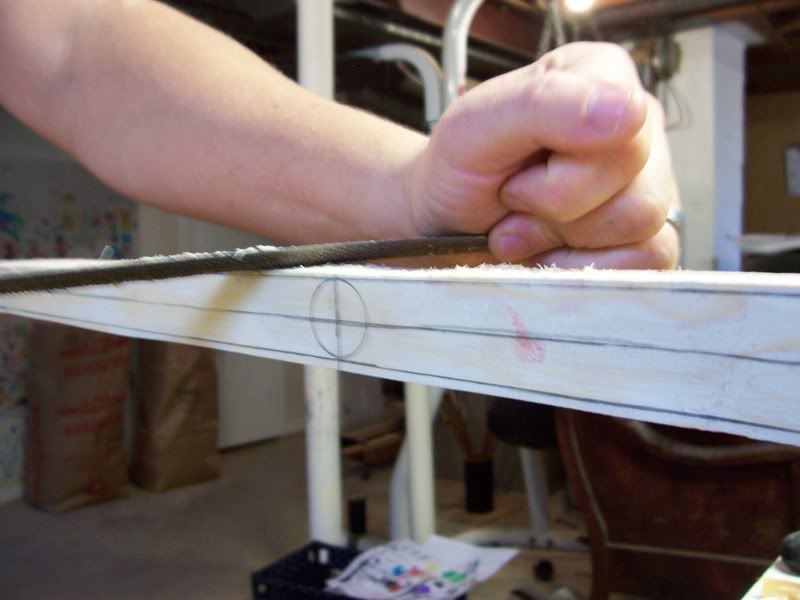
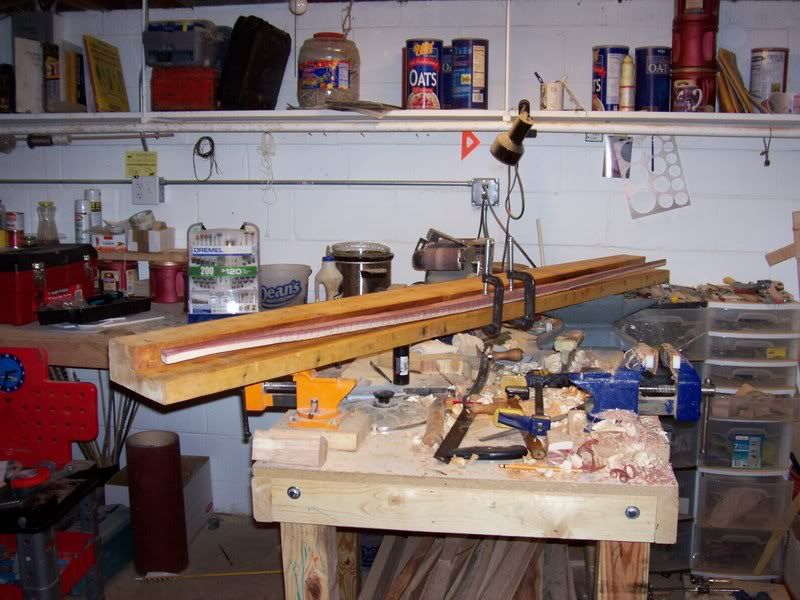
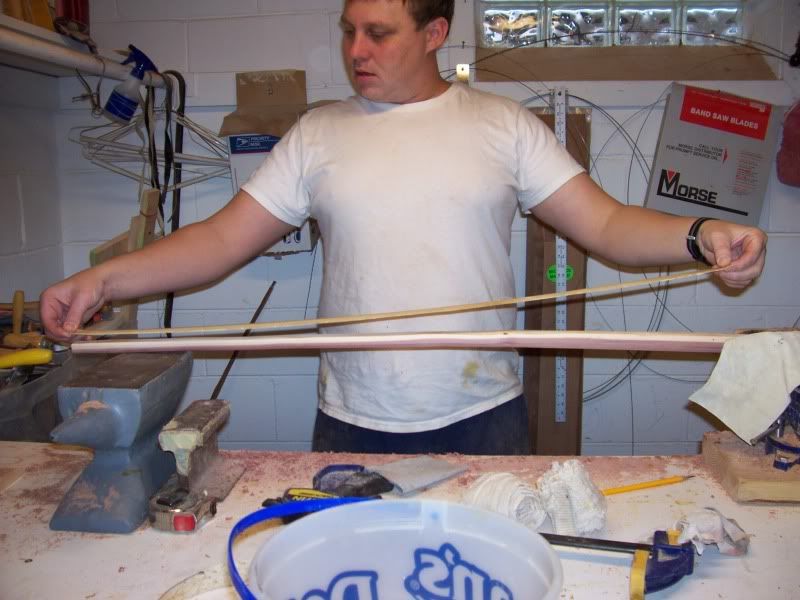
Now we lay out the center line of the bow. You need to follow the grain of the wood to establish the center line. You can usually see it with some practice if not if you are using wood that has been split the sides of stave can act as a rough guide to the shape of the bow. After laying out the center line I use a circle template to lay out the rough dimensions. We are making an English Longbow here so it will be pretty narrow. For these I usually make my rough out 1 3/8” wide the entire length. We next need to chase sap wood rings which is very time consuming. You want the stave roughed out enough so that you are not doing extra work and wide enough so that you have wiggle room.
Then you use the guide to do some bandsaw work.
After some sawing the whole shop smells soooooo good!! My wife will certainly be happy with the erc. It smells much better the horn!!
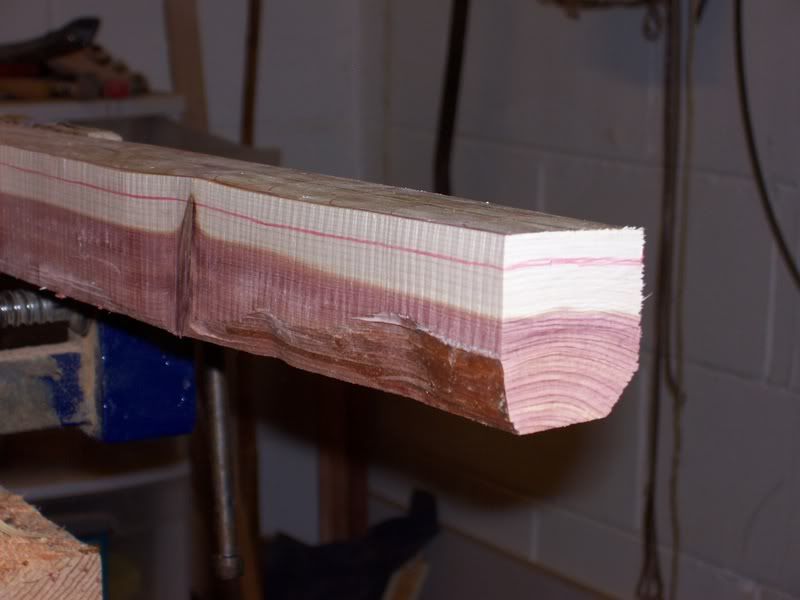
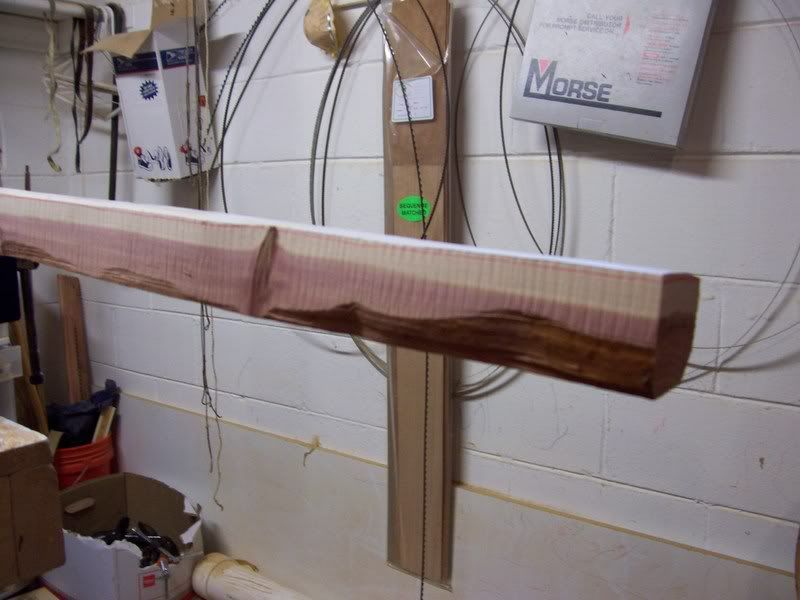
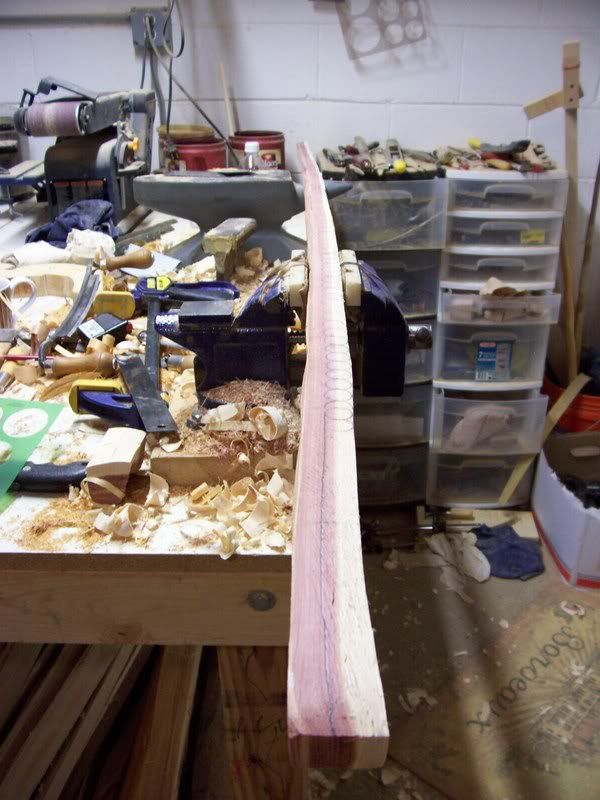
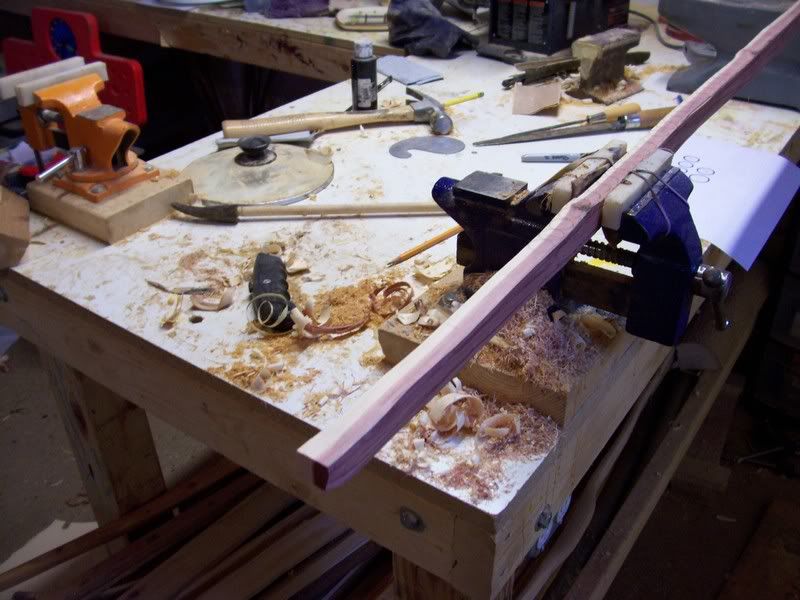
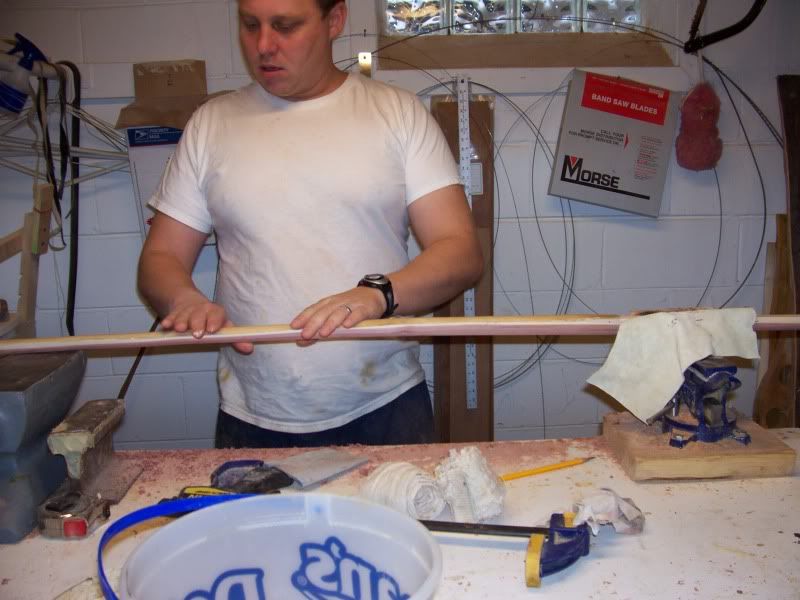
After bandsawing we end up with a stave that is workable. It is 1 3/8" wide the whole lenght:
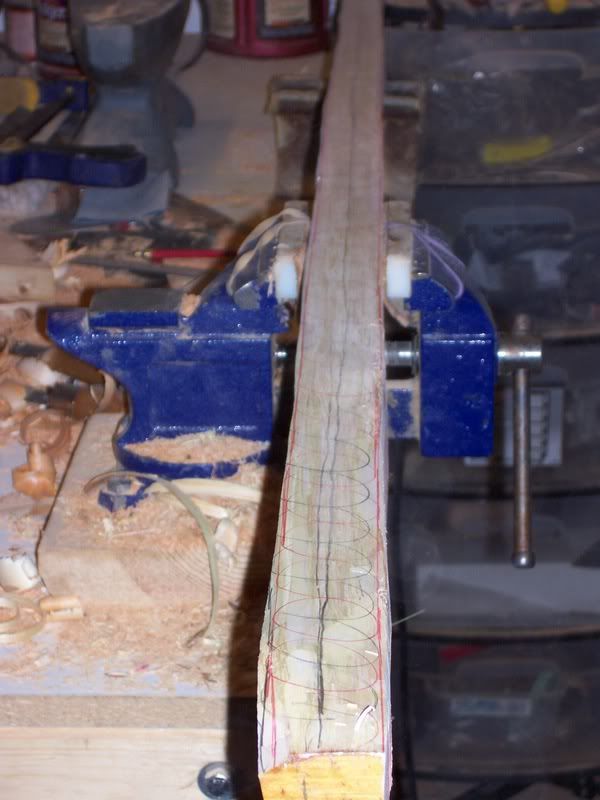
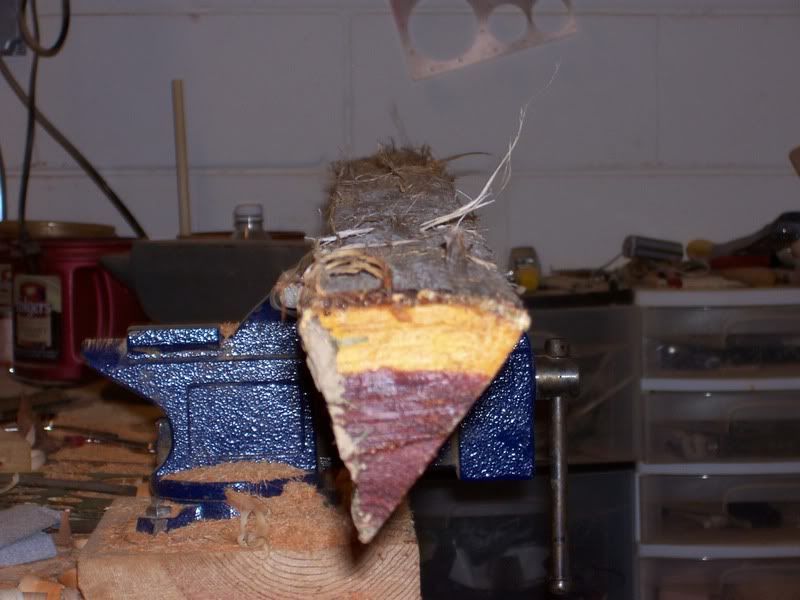
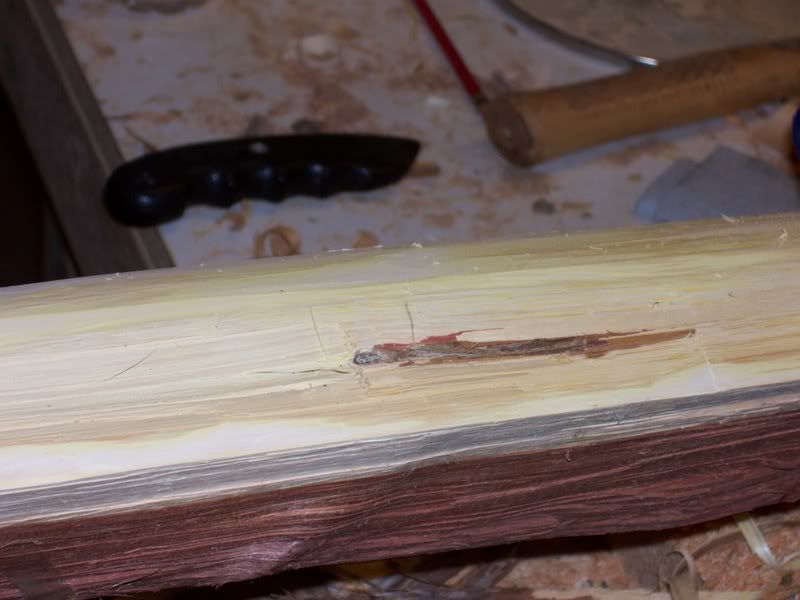
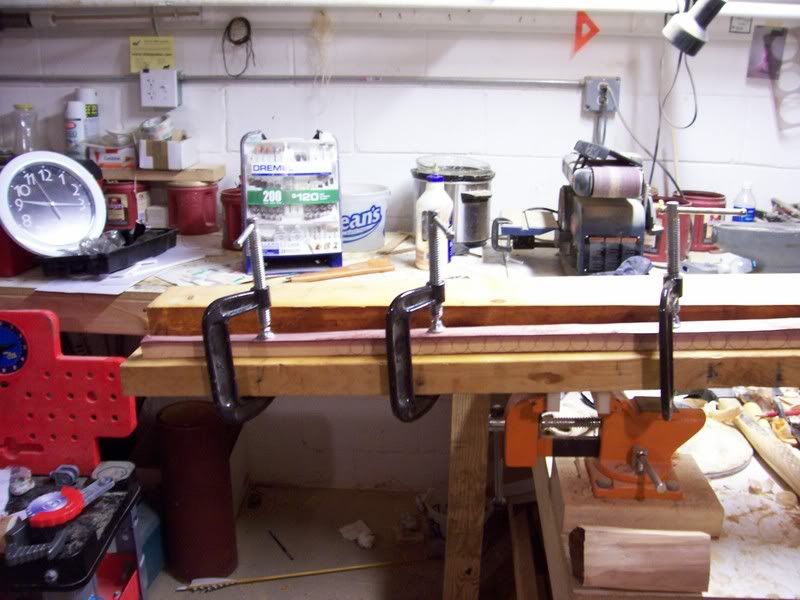
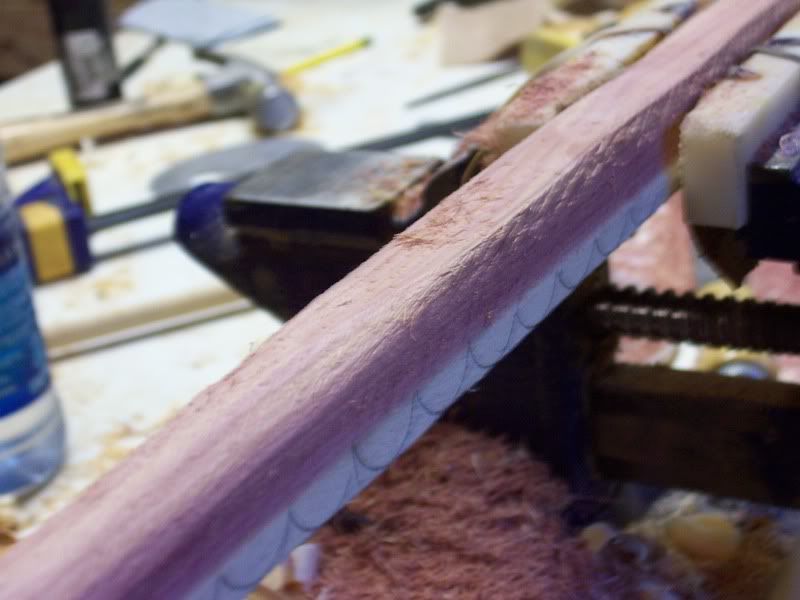
Here you can see the sap wood that needs to be removed. It is now 7/8” thick. That is just to much considering the tips of the bow will only be ½”. We will need to think it up. 3/8” is a good dimension. You can see my lines as markers to find a growth ring to follow. I always follow a growth ring even when backing a bow. It is just good practice not to violate growth rings. I have chased rings in yew that was over 60rpi. It is possible with practices and patience.
Thats it. Comming soon we will chase the rings and then lay out the bow!
Thanks for looking.
Steve
|
|
| From: Buzz
|
|
|
|
|
|
|
| Date: 23-Oct-08 |
|
Awesome, will be following this for sure. Thanks you Sir.
|
|
| From: Paul Newton
|
|
|
|
|
|
|
| Date: 23-Oct-08 |
|
Very nice. Thanks for sharing.
|
|
| From: badger
|
|
|
|
|
|
|
| Date: 23-Oct-08 |
|
Steve, good luck on this project I will be following it. ERC is my wood of choice for survival bows as it dries out very quickly. I have found it is good to be generous with the demensions and allow plenty of working limb, had several let go on me when I pushed them a bit. Keep the progress posted Steve
|
|
| From: heavybows
|
|
|
|
|
|
|
| Date: 23-Oct-08 |
|

Steve very nice stave. Marc made me one. I wonder if you hit higher than 120#. Marlon
|
|
| From: ephphatha
|
|
|
|
|
|
|
| Date: 23-Oct-08 |
|
Thanks you! This promises to be a good build along with lots of detail. I'm especially interested in it because I've been wanting to make an ELB out of ERC myself for a long time. I will be watching with great interest.
|
|
| From: Longbowsmith
|
|
|
|
|
|
|
| Date: 23-Oct-08 |
|
Thanks! Saved this to my favorites for a future project.
|
|
|
|
| From: Huntnwruss
|
|
|
|
|
|
|
| Date: 24-Oct-08 |
|
Enjoying the buildalong. Looking forward to seeing her fling some arrows.
Thanks for sharring and making the time.
Isn't it deer hunting season?
Russell
|
|
| From: Chessbum
|

|
|
|
|
|
|
| Date: 24-Oct-08 |
|

Some of Steve's bows at the 2008 Great Lakes Longbow Invitational. I remember that weekend Steve gave a bow to a newcomer to traditional archery. Pretty nice guy he is...
|
|
| From: Eric M. Funk
|
|
|
|
|
|
|
| Date: 24-Oct-08 |
|
Steve and his wife were one of the great additions to the Hoosier Fall Classic this year, Looking forward to having them attend the Memorial Day shoot coming in 2009 and he has offered to make a bow for our club for us to raffle off during the 2009 HF Classic.
Great people and good times, await us all, good thread Steave can't wait for the end product.
|
|
| From: Steve Moore
|
|
|
|
|
|
|
| Date: 24-Oct-08 |
|
Thanks fellas, Should turn out to be a good bow.
Badger, That wise advise. I think we will let this be a fully bending bow. We will take a tip from the English War Bow and let this bend full compass. That was we will ensure that the wood is not strained.
Marlon, Thanks for posting your bow. Any chance we can see a full draw on that? This one is gonna only be 55# @ 28". The enxt one we will shoot for a big heavy bow.
John, I just got a letter from that kid yesterday. he is still shooting and will be atending next years GLLI. I have you hickory Algonkian Bow roughed out for the January raffle. i will be postinjg progress of it soon.
Eric, Thanks for having us. It was a great time!
I have a few things that need to be done around here and then we will start chasing that sap wood down.
Steve
|
|
| From: Chessbum
|
|
|
|
|
|
|
| Date: 24-Oct-08 |
|
Left you a PM Steve. JohnV>
|
|
| From: FOREST ARCHER
|
|
|
|
|
|
|
| Date: 24-Oct-08 |
|
I see steve has half of the proper tools to build bows....#1 he has coffee, though he is lacking #2 ciggarettes. If the bow fails steve you better pick up a carton of smokes 8^) ...... don't keep us postponed too long, get to whittling and picture taking, the more of both the better...........Archer
|
|
| From: Steve Moore
|
|
|
|
|
|
|
| Date: 24-Oct-08 |
|
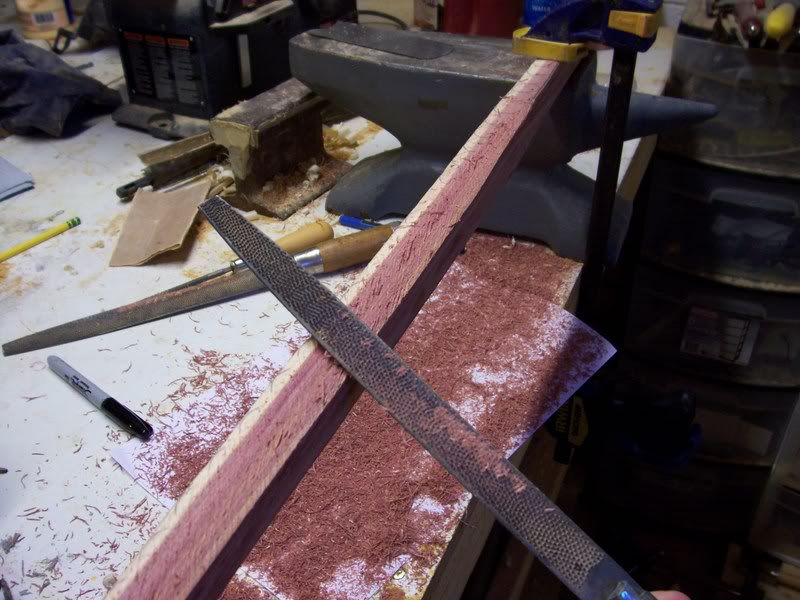
Ok, here we go. Chasing growth rings in Yew or ERC is pretty tough. First you need to master Osage or Black Locust. Those woods are EASY to cahse rings in. Yew and ERC……a bit tougher. You will need to arm yourself with the proper tools. I use my dull draw knife and cabinet scrapers. You really could make a whole bow with a dull draw knife and set of cabinet scarpers. Its always best to pick a ring that you are trying to get to and then slowly work your way down. Meaning, If you are trying to chase 2o tiny rings it is best to do maybe 5 at a time so that you do not get lost. Chase 5 rings the entire length of the bow moving in ONE direction, then start again and chase 5 more. If you try and do them all at once you will get lost!
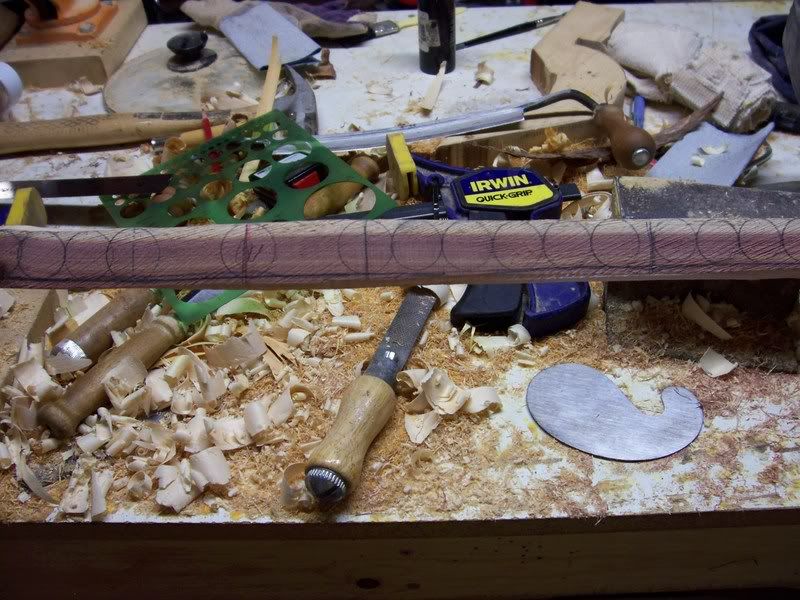
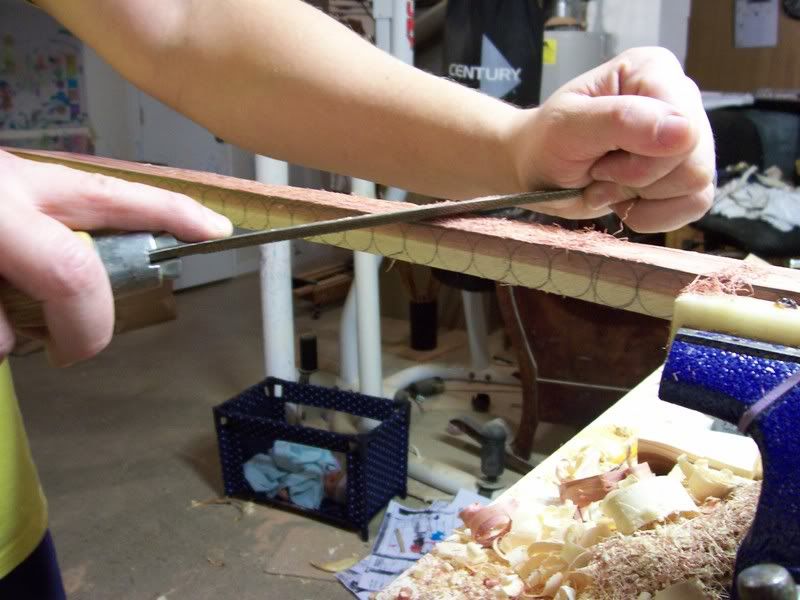
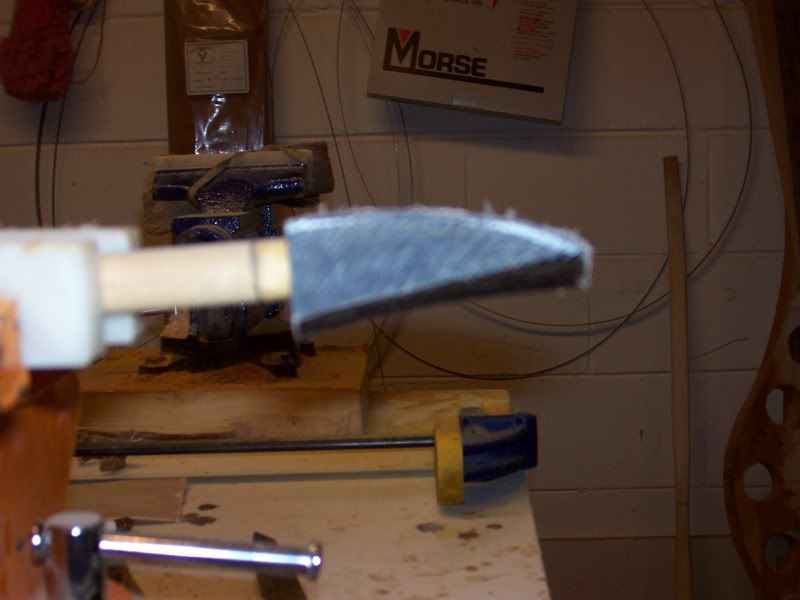
Best to mark your growth ring out and start to work. In this case we are only chasing 10 rings. We will d 5 at a time as shown here:
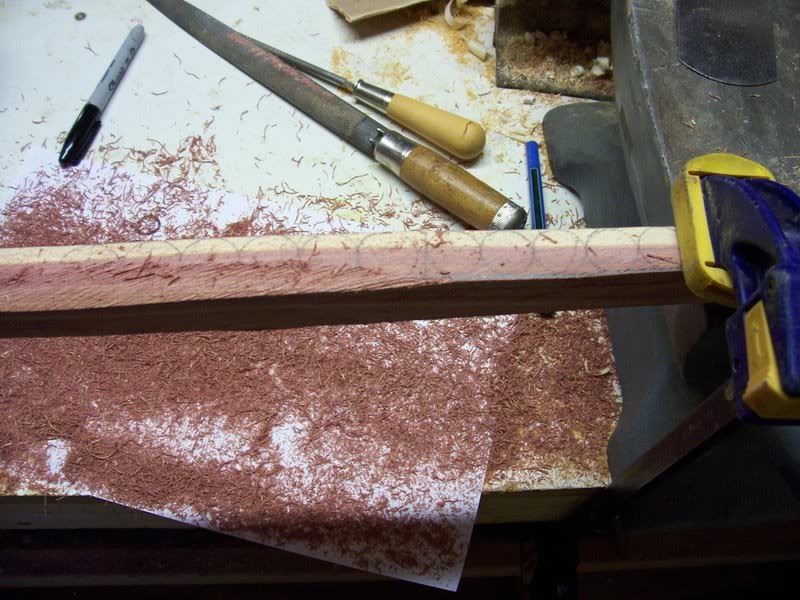
You cans see in those photos that I have outlined the rings so that you all can see them. Remember I am only working towards my body with the draw knife.
Here is another view. You can see where I have removed sap wood by the slope of the wood. You want your sap wood to start to look like steps in the wood. That way you minimize gouging:
Work in one direction all the way to the end of the stave. DO NOT work from both ends. You will get lost.
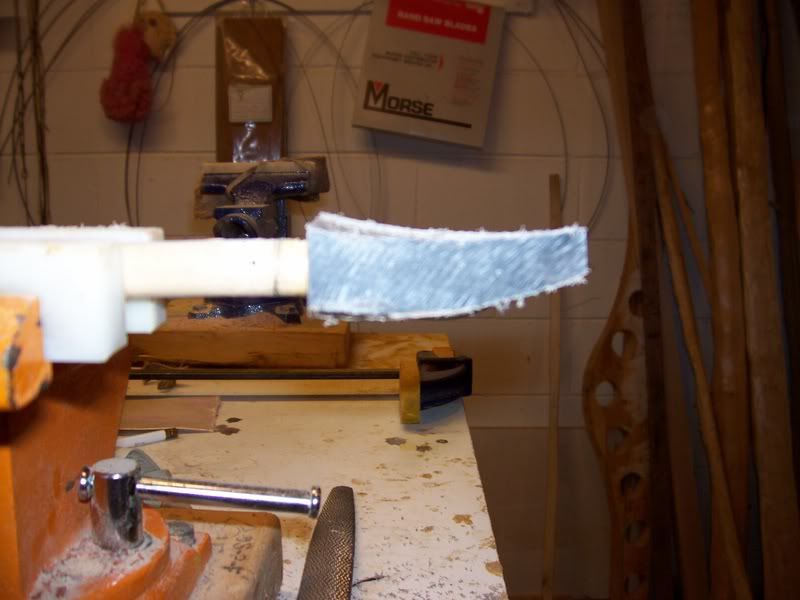
Here you can see that we are close to our chosen ring. There are maybe 4 more rings between where we are and where we need to be. At this point we will stop chasing rings and lay the bow out. I usually chase the rings deep enough where I am confident in the stave and what I am working with. Then I lay the bow out and get it roughed in. It’s a time saver as chasing these rings takes time. The less surface you are working the quicker and more accurate you can be. Here are some pics of the stave chased down:

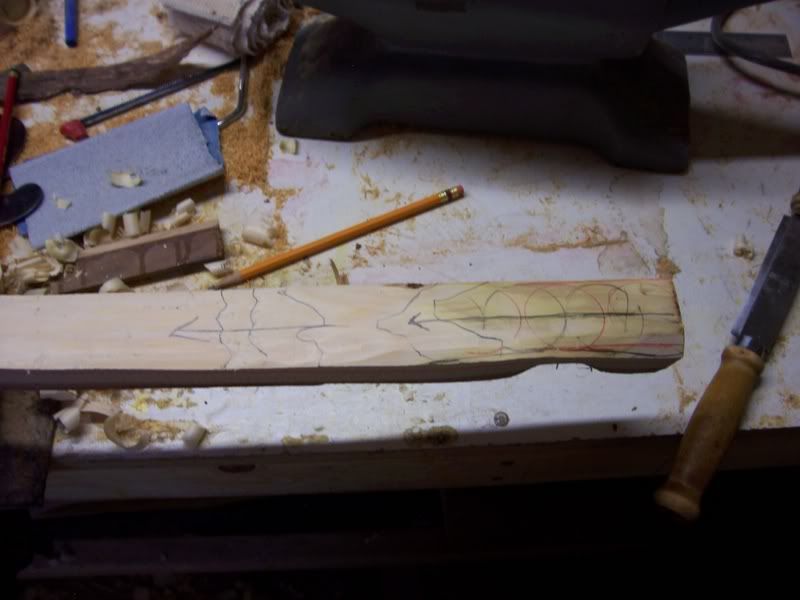
Now time to lay out the bow. We are going for a mid 50# ELB. There are plenty of schools of though on how to lay out a bend through the handle D bow of this style. This is mine:
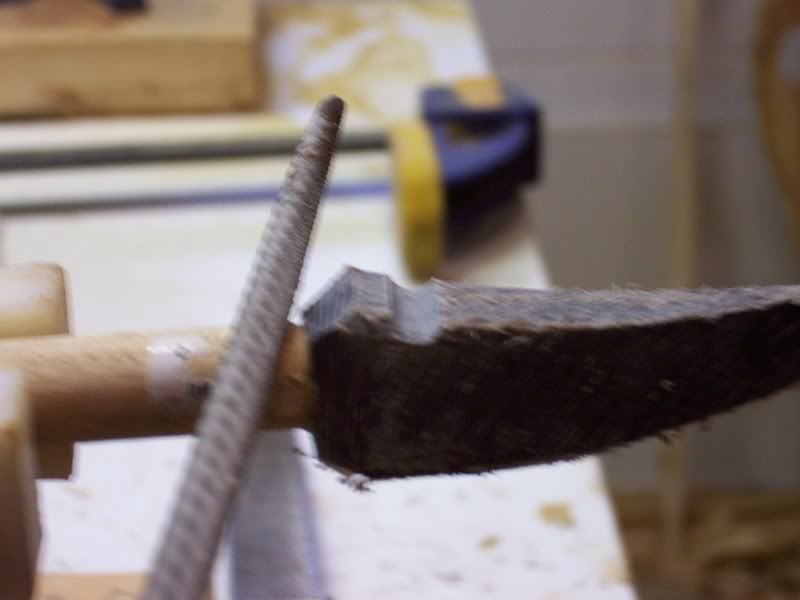
Get your centerline and mark it. Then out the limbs to either side of the centerline in 10” increments. Then from your Center mark the bow 2” to either side. At the center and the 2” mark make the bow 1 1/8” wide, then the next mark 15/16”, then the next mark 13/16, then the next mark ¾”, then taper that to the tips at 5/8”. This bow will have horn nocks. The standard for horn nocks is ½”. So if you make the tips 5/8” now you will have plenty of wood left over to fit your horn nocks. We will get to the depth later.
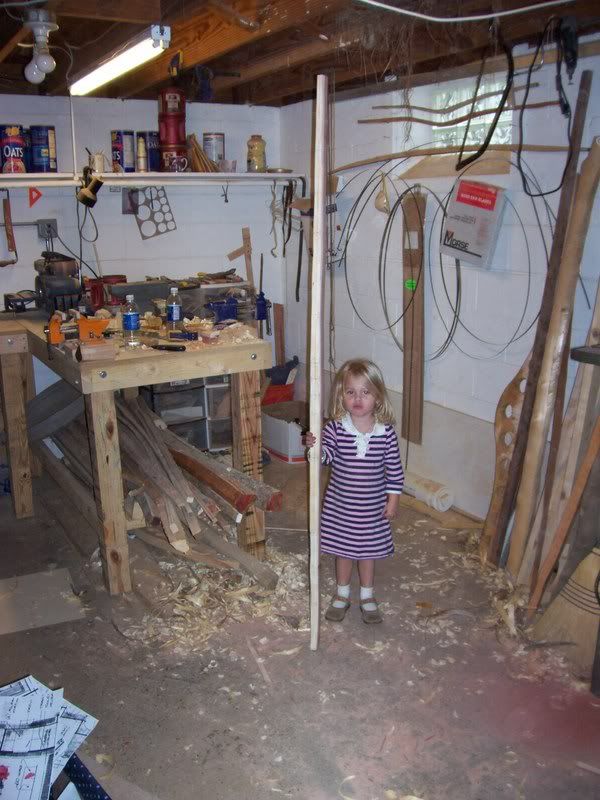
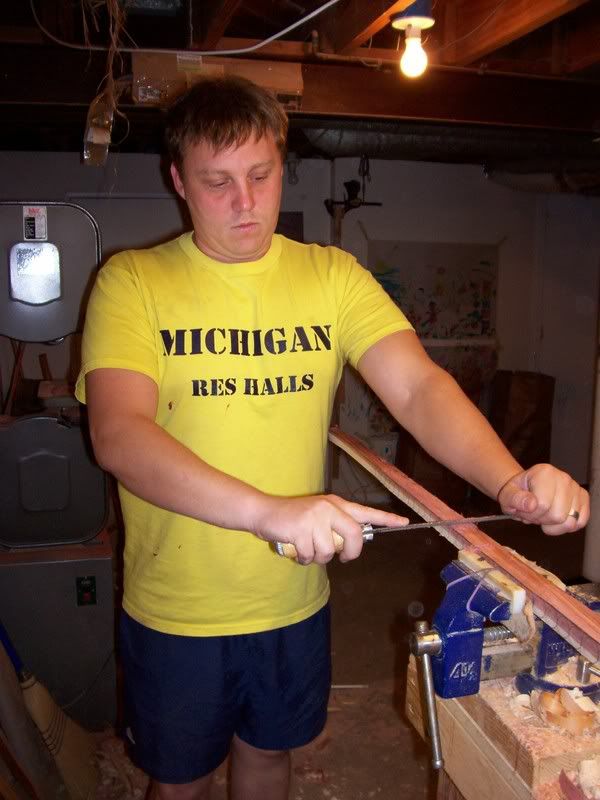
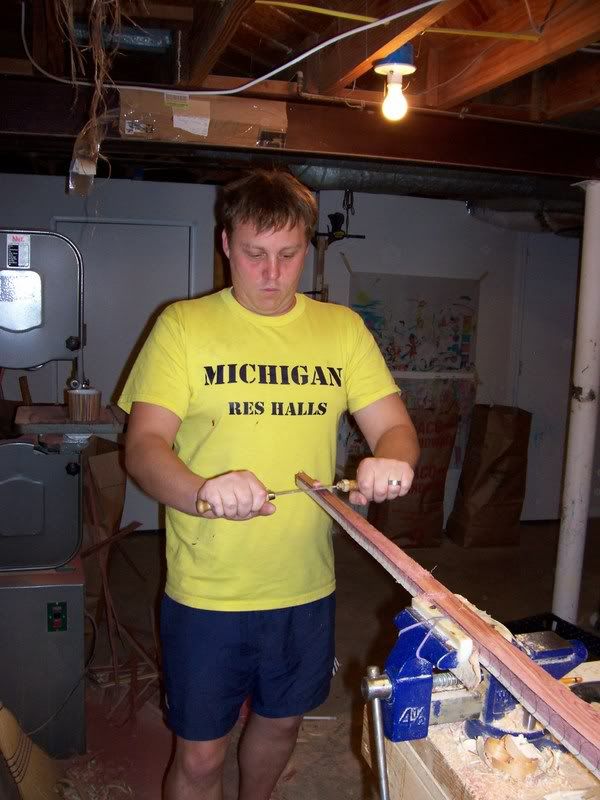
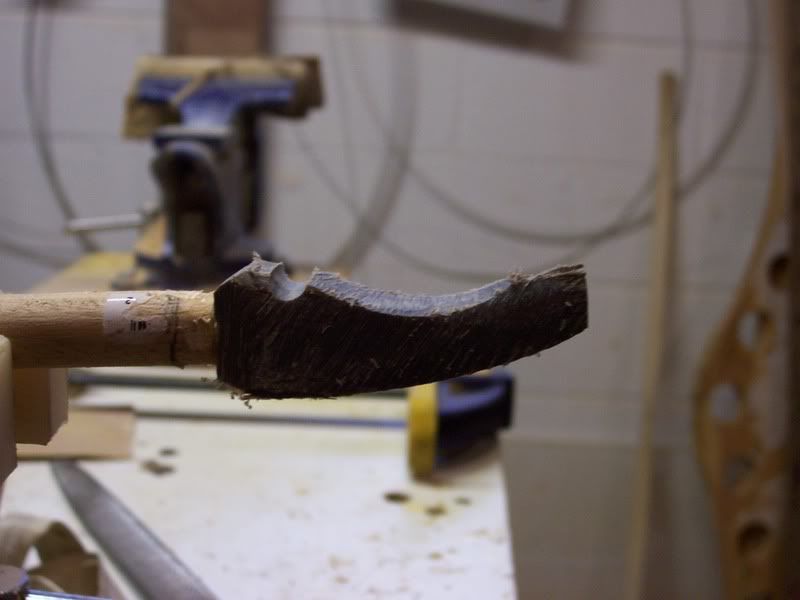
band saw about 1/8 off the lines you have marked and you will have something that is starting to look like a bow. Here is my apprentice showing you the bandsawed stave:
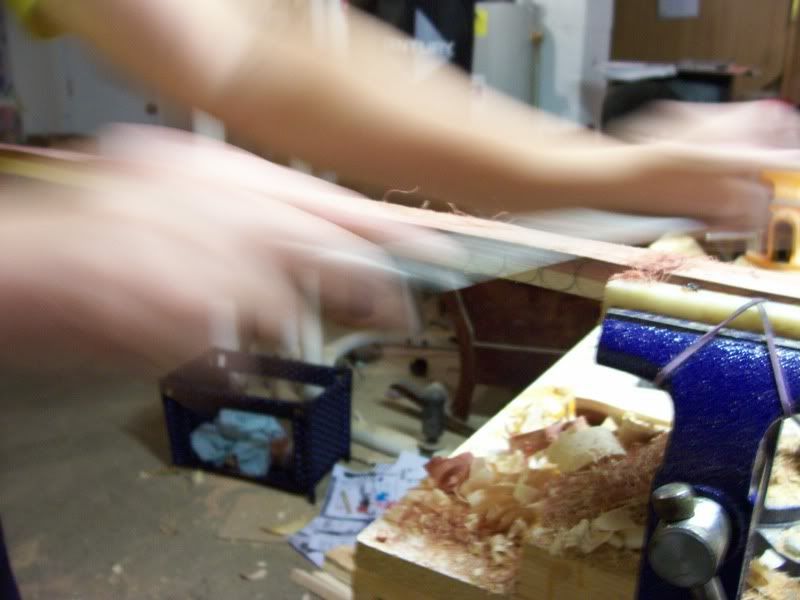
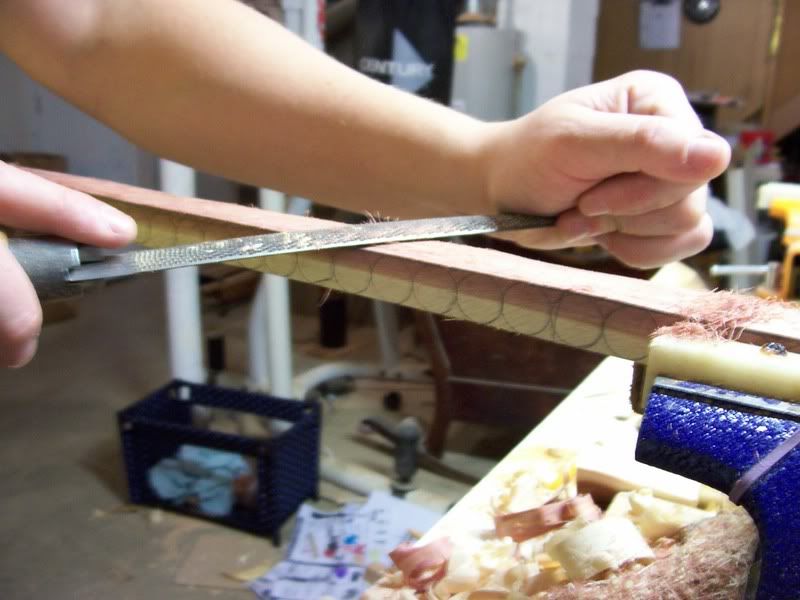
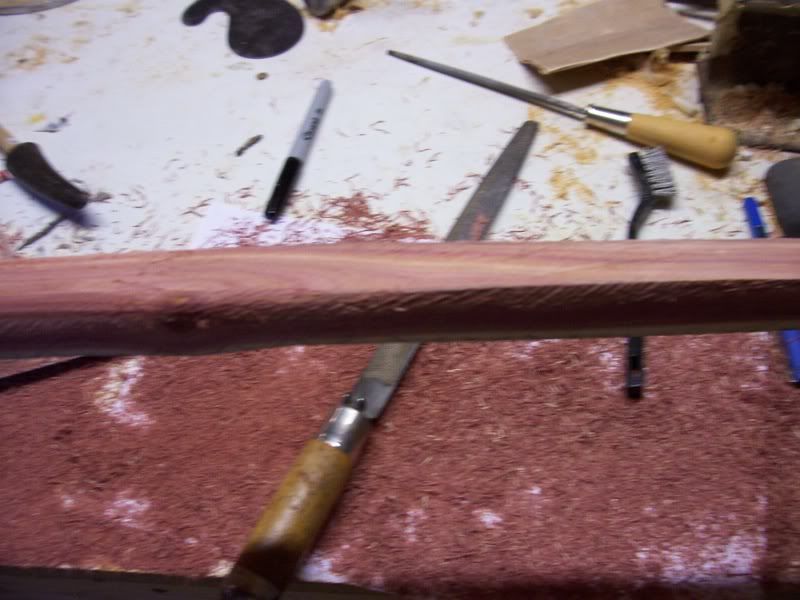
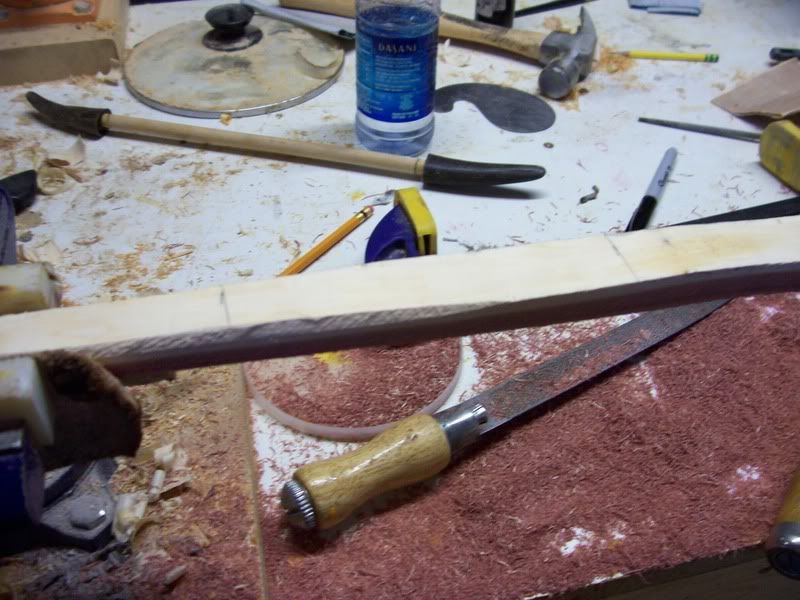
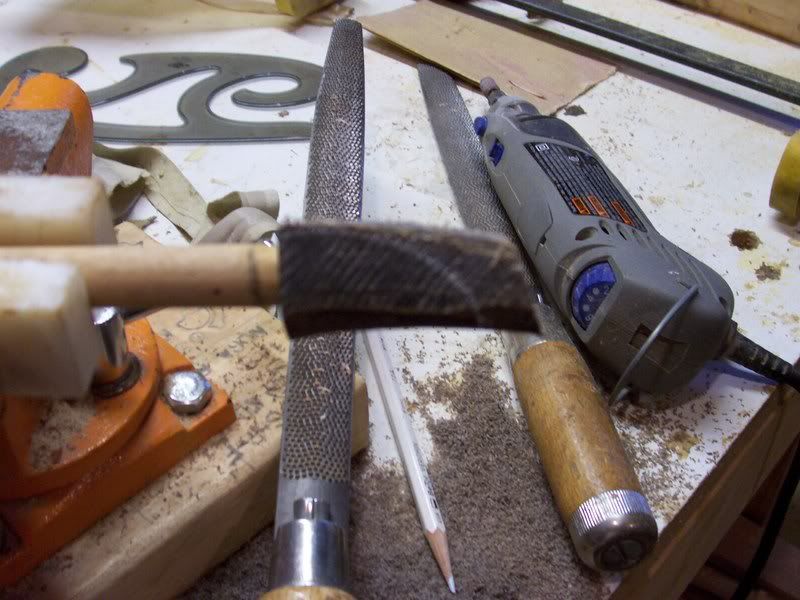
Then you will need to get closer to the line using hand tools. I like finishing this with the hand tools because you can get it real close without risking messing the stave up with the band saw. I have seen a LOT of premium bow wood go to the fire heap or to light weight bows because of a band saw. The 2 tools I use for this are my trusty drawknife again or a Nicholson rasp. Here you can see me using both. The drawknife removes a lot of wood if you are not careful. With practice you can remove paper thin shavings or huge chunks. Problem that most beginners have is that they remove huge chunks all the time. Be carfull with the drawknife it can be your best tool with practice but in a beginners hands……yikes! That’s when the rasps come in handy. The rasps are designed to cut on a certain angle……find that angle and you are hogging wood like a planer!
Here we are working towards the lines. After we get there we will finish chasing the sap wood. 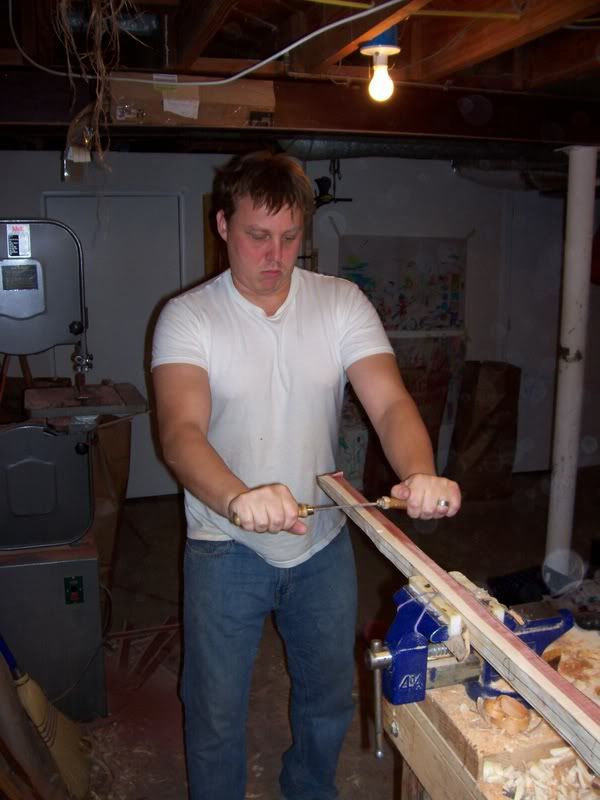
Next we will finish chasing the sap wood, lay out the depth, taper the belly and round the back and get our horn nocks started.
Thanks for following, Hope it helping.
Steve
|
|
| From: Steve Moore
|
|
|
|
|
|
|
| Date: 24-Oct-08 |
|
LOL.....forest archer. I quit smoking 3 years ago. I was a 2 pack a day smoker and weighed 265# of mostly fat. Now I run 18 miles a week and lift weights 5 days a week. Kick them things and you will be happy that you did.
If she breaks she breaks. i think it will be a good bow though. Nock on wood I have only lost 2 self bows in my whole career. one was a perfect yew stave elb that exploded 12" into the tillering process (no idea how or why) the other was a 36" Osage and sinew bow that I was drawing 24" on a constant basis......oppsss....
Steve
|
|
| From: Buzz
|
|
|
|
|
|
|
| Date: 24-Oct-08 |
|
Still awesome work, thanks.
|
|
| From: Newkirk Jerry
|
|
|
|
|
|
|
| Date: 24-Oct-08 |
|
Fantastic build along. I'm learning some good stuff here. Thanks
|
|
| From: FOREST ARCHER
|
|
|
|
|
|
|
| Date: 24-Oct-08 |
|
Well at least double up on the coffee :^) ....Really enjoying this thread, Good luck..............Archer
|
|
| From: Eric Krewson
|
|
|
|
|
|
|
| Date: 24-Oct-08 |
|
I have made a bunch of bows but have always been intregued by ERC. Never made a bow from it, love the build-along
|
|
| From: Steve Moore
|
|
|
|
|
|
|
| Date: 24-Oct-08 |
|
I got a fesh pot brewing right now. I am heading back down to get the rest of the stave roughed in. I will post more soon.
Feel free to ask any questions that you all would like. I am trying to be clear and detaild but am sure that I am missing some stuff.
Steve
|
|
| From: ephphatha
|
|
|
|
|
|
|
| Date: 24-Oct-08 |
|
Steve, is there a reason you use circles instead of just using a ruler and making marks? It seems like it would be difficult to get the circles centered on the center line, but it's pretty easy with a ruler, and it seems like it would be quicker, too.
|
|
| From: Steve Moore
|
|
|
|
|
|
|
| Date: 24-Oct-08 |
|
Yup, There is a reason. The circle template has the center of the circle marked on the edges. Using the circle template you can quickly lay out bows that have snake to them. Because you always have 2 points of refernce on your centerline......It also helsp you control tapers. Meaning no math or splittng fractions while laying the bow out. It allows you very presice measurments because it is broken down to the 1/16". You can use a ruler as well for the same thing but I do believe that after you use a circle template on a few bows you will never use a ruler again.
Steve
|
|
| From: ephphatha
|
|
|
|
|
|
|
| Date: 24-Oct-08 |
|
That makes sense. I'll have to give that a try. Thanks.
|
|
| From: oldman
|
|
|
|
|
|
|
| Date: 24-Oct-08 |
|
So that's how it's done. Great buildalong. Excellent pictures and text. Looking forward to the rest. Gil
|
|
| From: JJ
|
|
|
|
|
|
|
| Date: 24-Oct-08 |
|
This is great!
|
|
| From: Steve Moore
|
|
|
|
|
|
|
| Date: 24-Oct-08 |
|
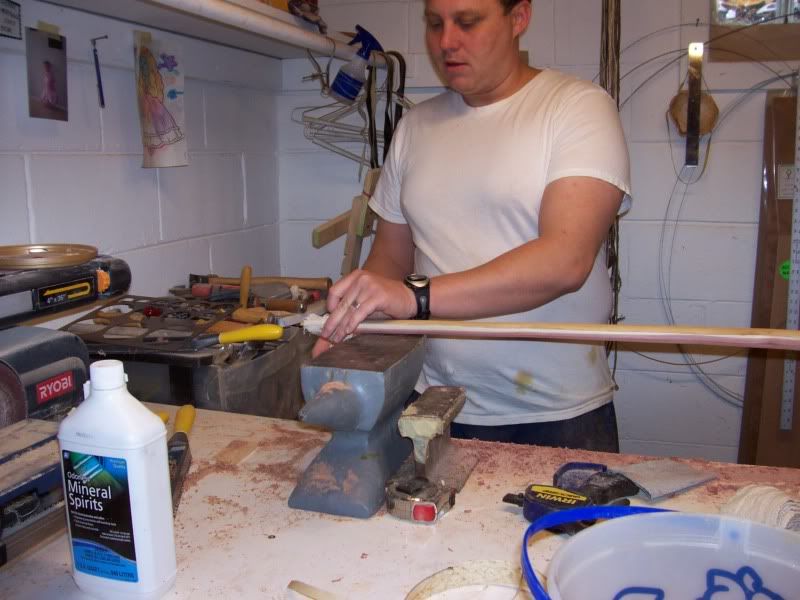
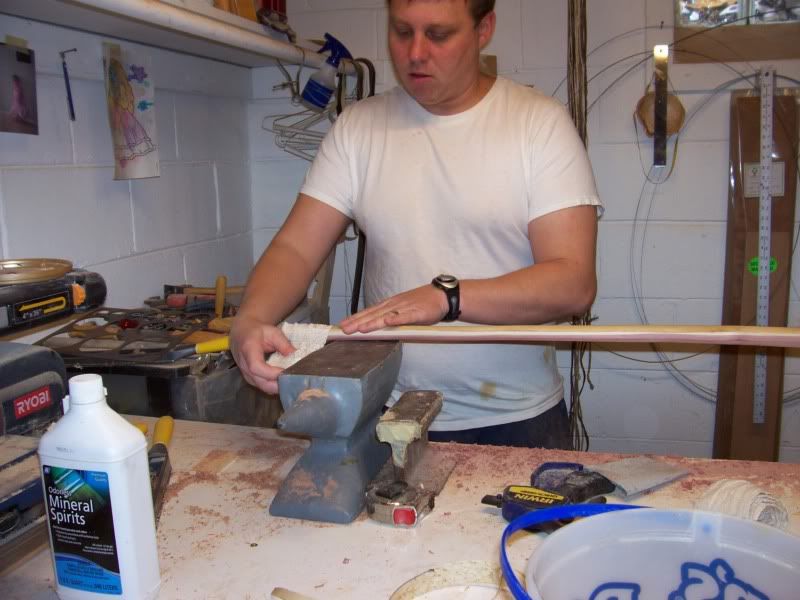
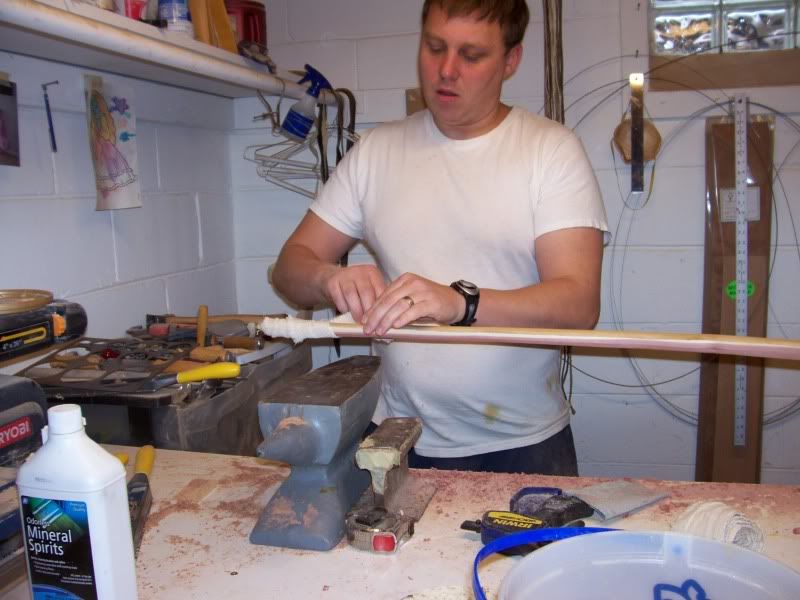
I had a great run in the pouring cold rain here in SW Michigan! After that I went back at it. I spent about an hour finishing up chasing the sap wood. We will not re visit that except to mention a few helpful items. I had to chase one ring at a time the rest of the way. The sap wood got really up and down and inconsistent. It took awhile. It ended up being on one growth ring but the sap wood is anywhere from 3/8” thick to 9/32”. That’s OK. A lot of time even in yew you have sap wood depth variation.
Here is a picture of the stave with the sap wood complete. You can also really notice other things about the stave once it gets closer to bow dimension. This stave has a bit of natural deflex and propeller twist. We will take care of that later.
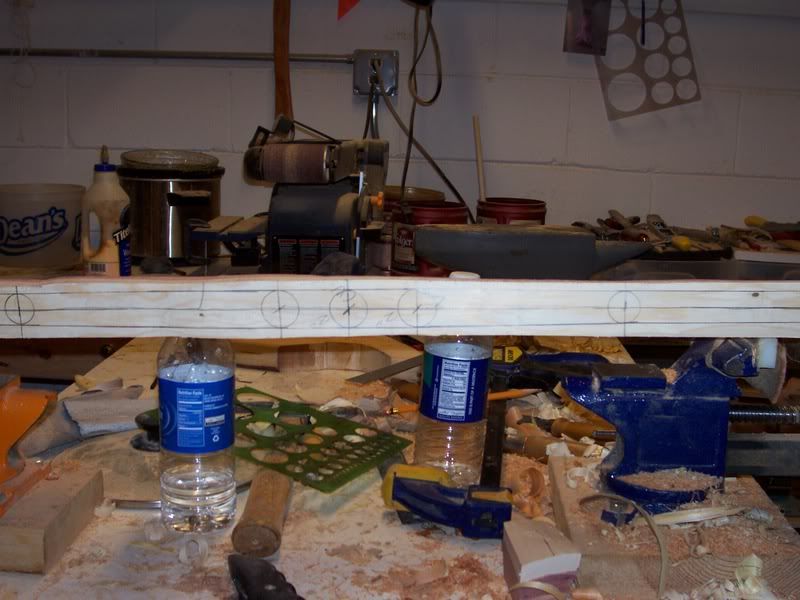
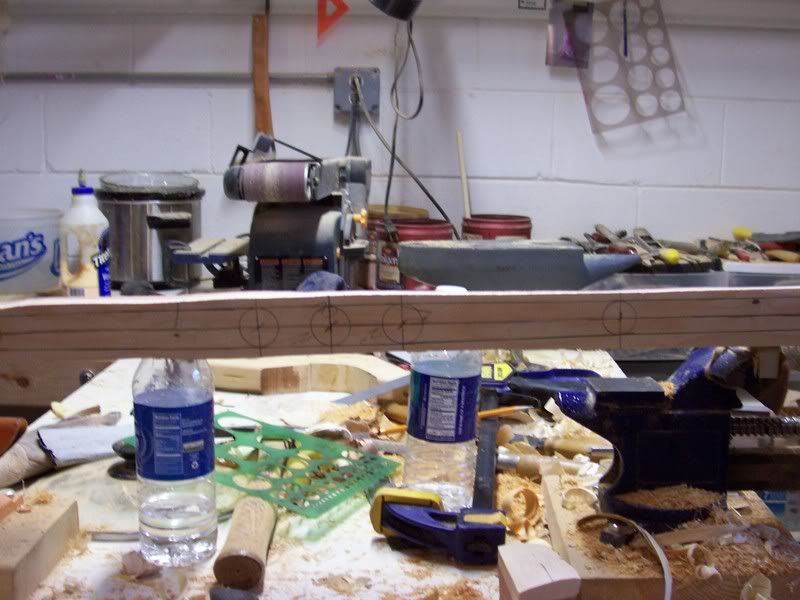
Now we need to lay out the depth of the bow. The width has already been established. I do not really mess around with the BLBS or whatever standards when making non-yew ELB’s. The reason is that sub prime bow woods will not nessecarily handel the rules of such a deep cross section. For bows like this I make them a bot wider and shallower. This is how I did it for this bow.
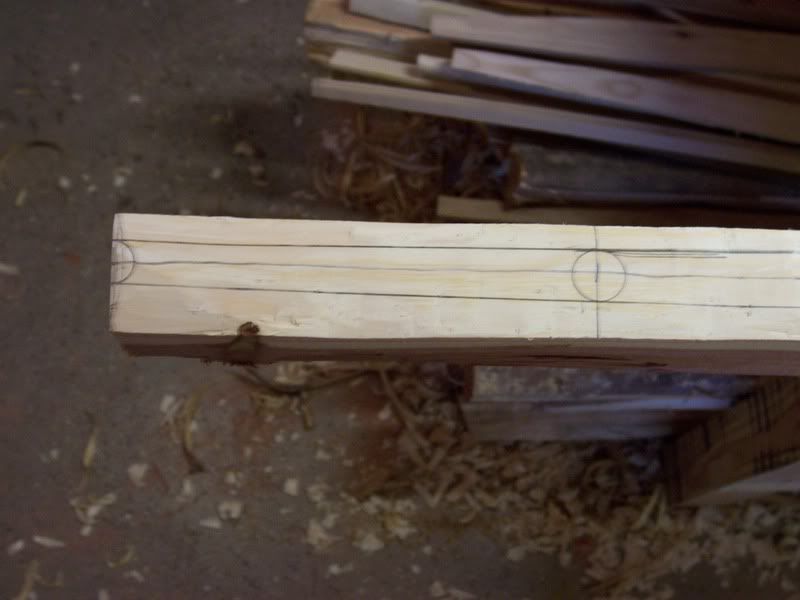
First take a look at this template: 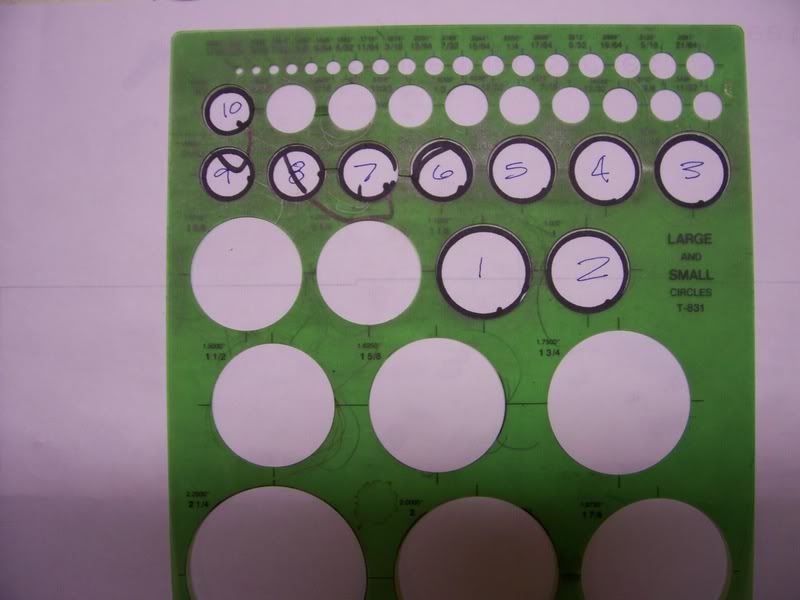
The #1 Circle is the witdth of the bow. #2 is the next largest. We will set our depth through the handle area (2” to either side of the centerline total of 4”) at 15/16” which is #3. I know this is a bit confusing in type but bear with me a bit……..Now you have established the center of the bow. The tip will want to be 5/8” deep. That means that between the 15/16” circle #3 and the 5/8” circle #10 you have 7 increments. The dimension from the edge of the handle to the limb tip on this bow is 35”. 35”/7=5” increments. Lay the bow out all the way in increments of 5”. Then start using the circle template to taper the limbs. Every 5” gets filled with the nect corresponding circle. Starting at the 7/8” and ending with the 5/8”. This allows you to get a consistant taper on wood that is wavy and snakey. If you are making lumber boards you can just taper it with a yard stick. With staves this is the best way that I have found. It sounds confusing but study the photos and you will understand the method and the why of it…..or….errrrrr the madness behind the method.
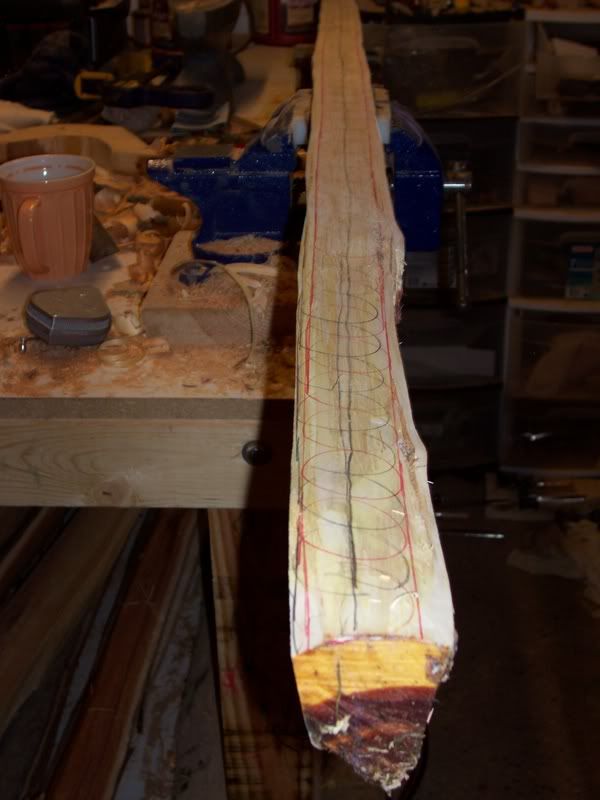
Here are some photos. You can see the circles and the 5” increments:
Next you use all those circles and the carpenters line lay out trick to follow the back of the bow establishing the taper profile while maintaining all the waves of the back of the bow. Very important!
Band saw off the excess wood using your lines. Stay 1/8” away from the lines and do the rest by hand using either the rasp or the draw knife.
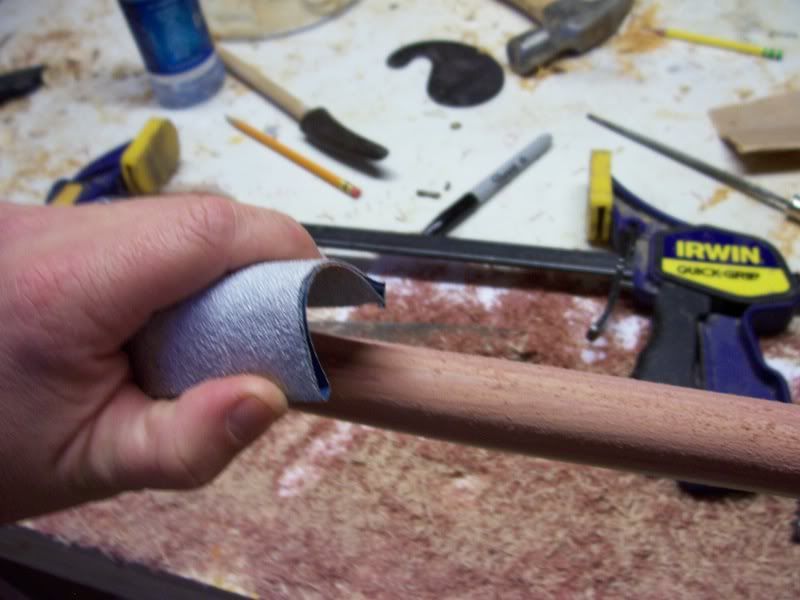
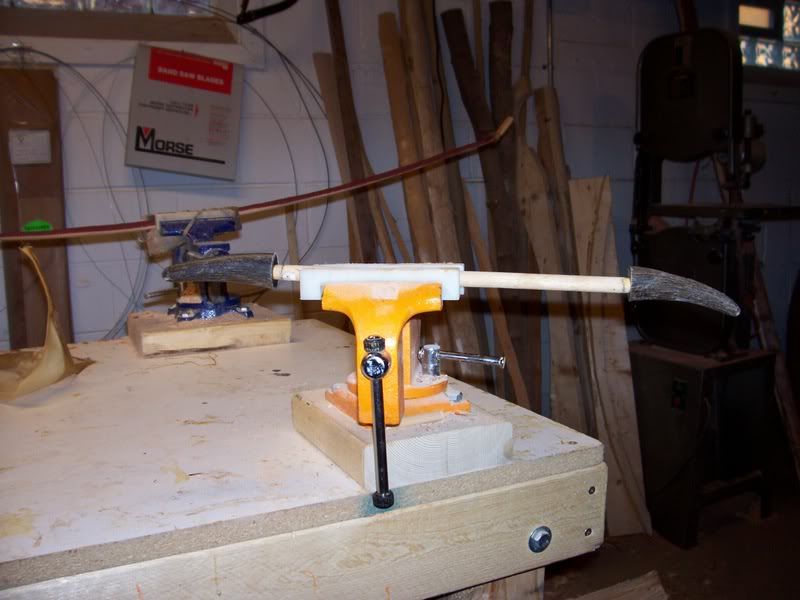
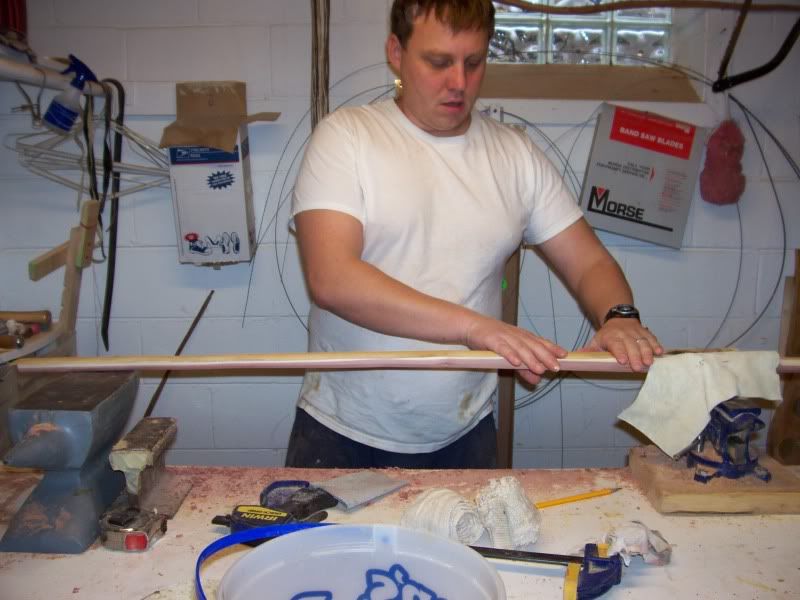
After following the line all the way down the bow you have a stave that is very close to bending dimensions. The final bow will have a D shaped cross section. Before we can do that we need to make some heat corrections. The heat corrections are easier to make with a square cross section. That way the clamps will hold nicely.
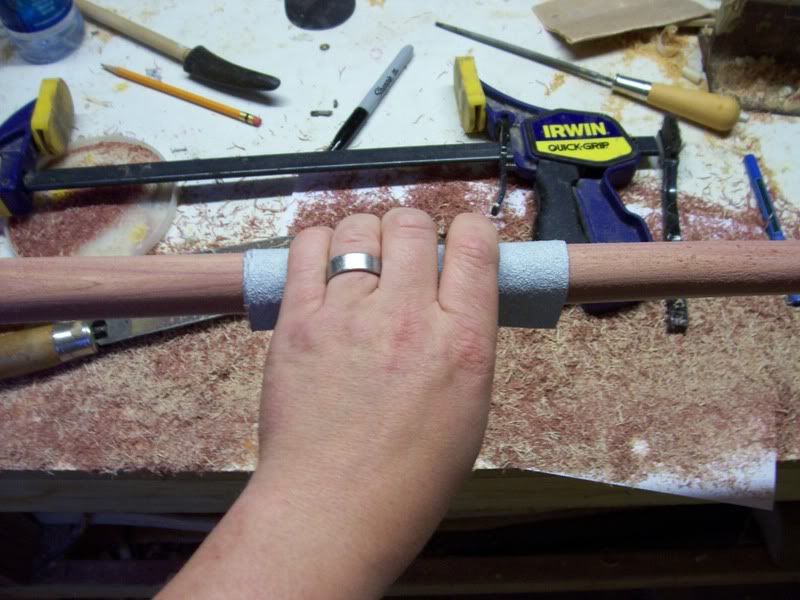
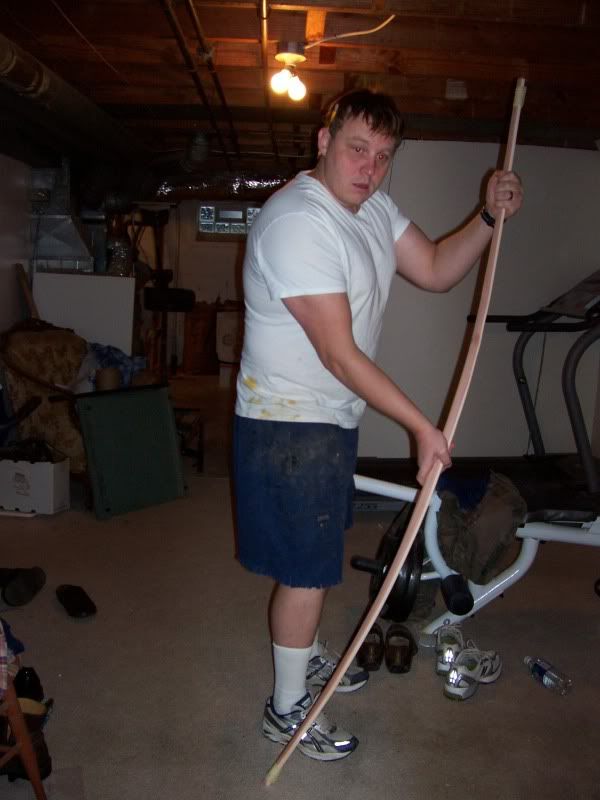
Here you can see the stave clamped to a caul. This is the time to do any heat corrections or reflex that you want to do. Some things are worth mentioning here regarding reflex. Us self bowyers take great pride in low set bows. Bows that we induce 3” of reflex in and end up still maintaining 1” of reflex are sought after prizes and marks of great achievement in the selfbow world. I have made plently like that and have to tell ya true. I like a nice straight bow or one with a bit of deflex or set. To me it makes a nicer shooting more inherently accurate bow……….NOTE: I say for me. A lot of people find that the faster the bow the better they shoot. I work the other way. For my personal bows I will sacrifice a few FPS gained with added reflex for the stability of the deflex bow. So….all that being said. We will make the correction to remove the propeller twist and remove some of the natural deflex.
Here is the bow prepared to do just that:
Next get your heat gun out and turn it up to 1000 Degres and start heating the limbs. I usually work 10” sections of wood for about 4-6 minutes, clamp it in place and move on.

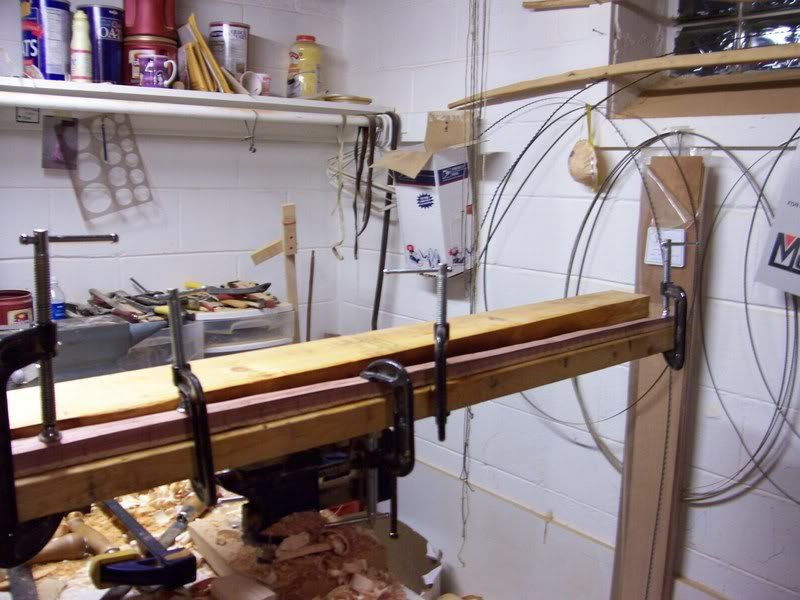
leave the bow clamped into position at least 12 hours. I usually do not start tillering until 24 hours after making correction.
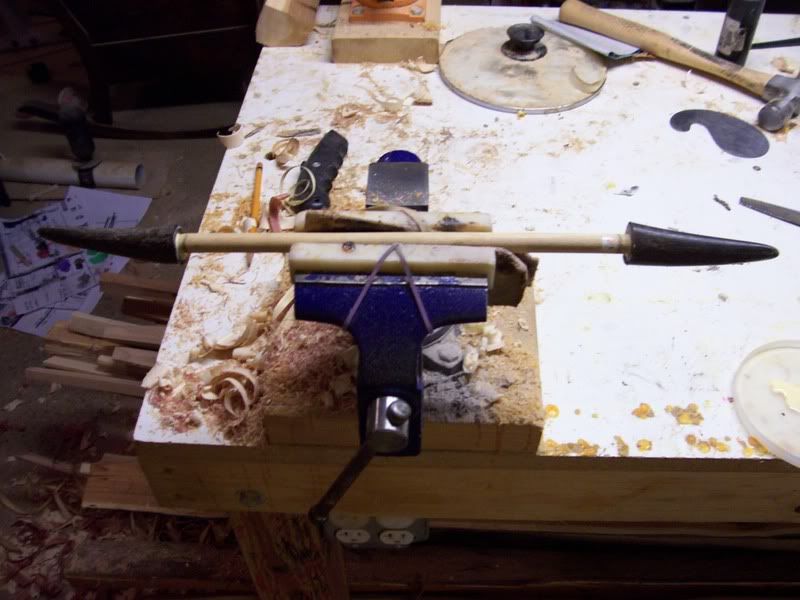
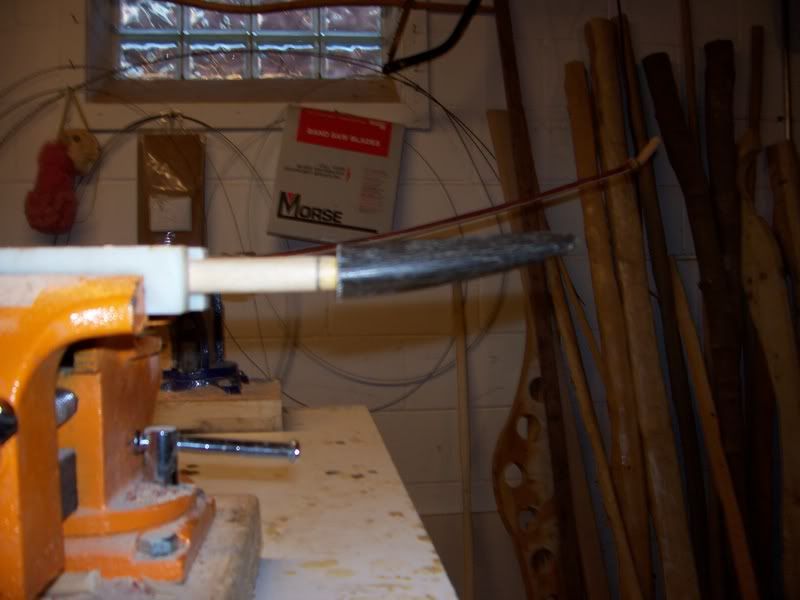
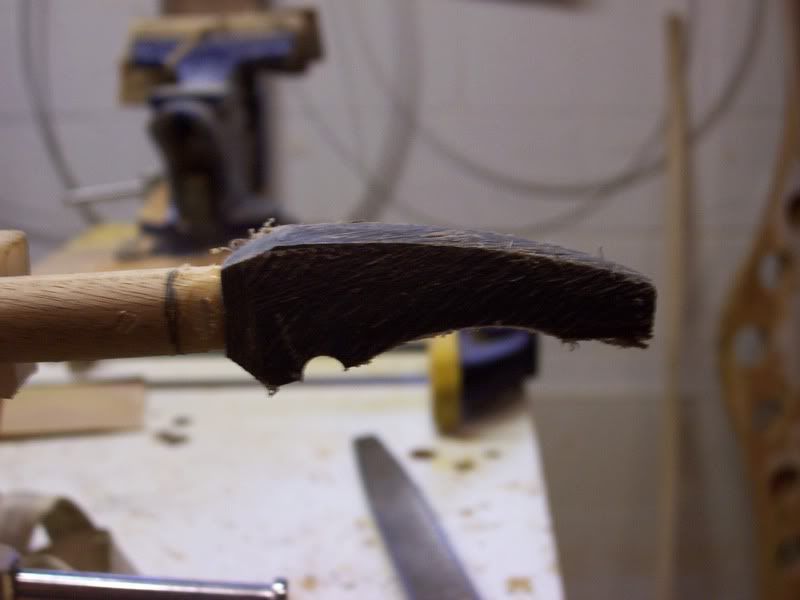
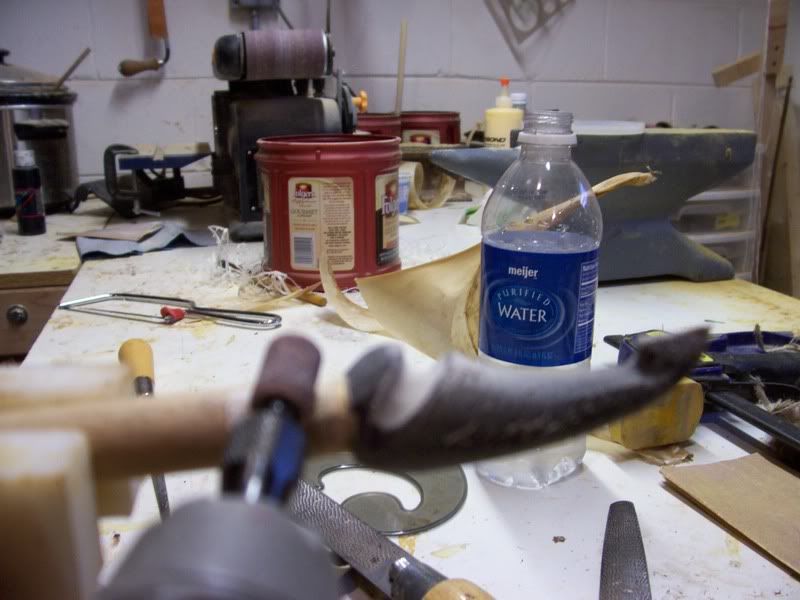
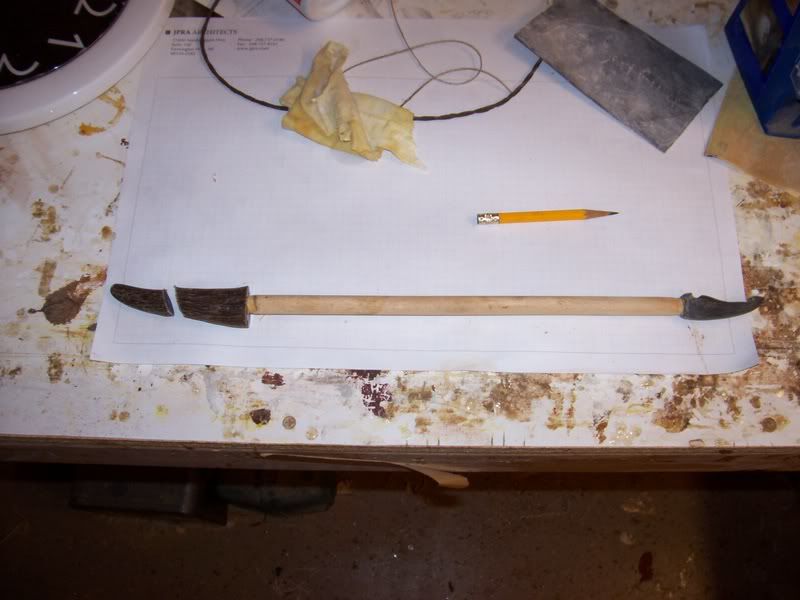
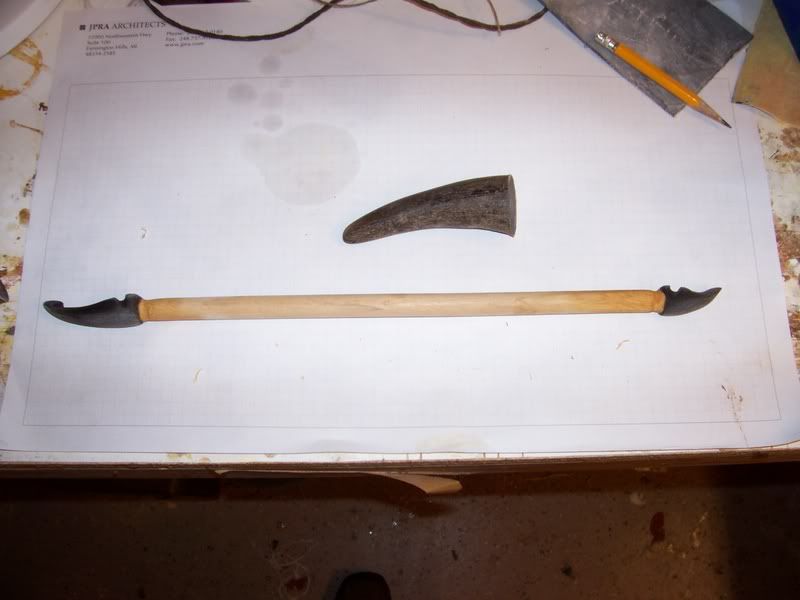
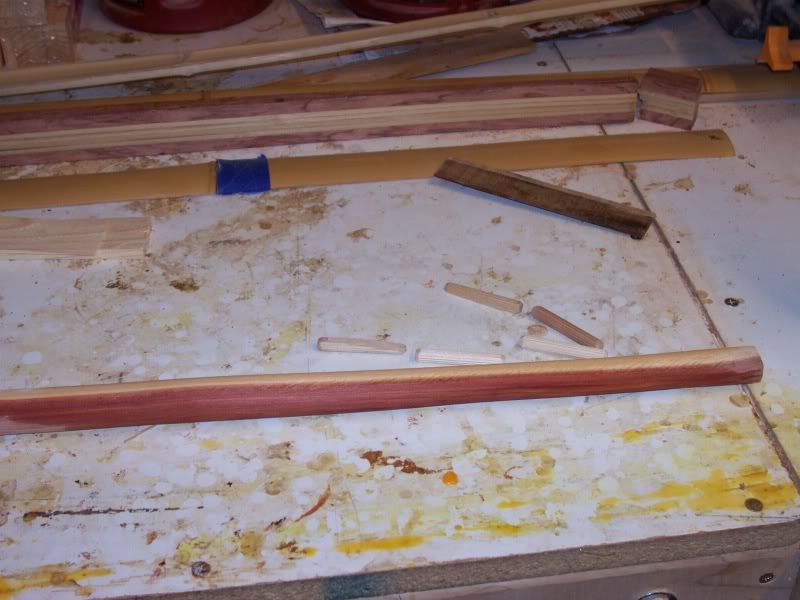
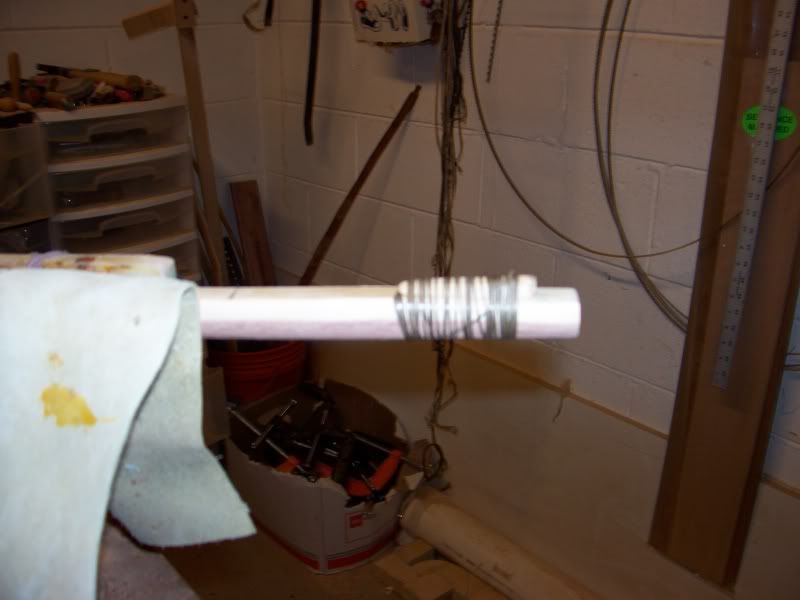
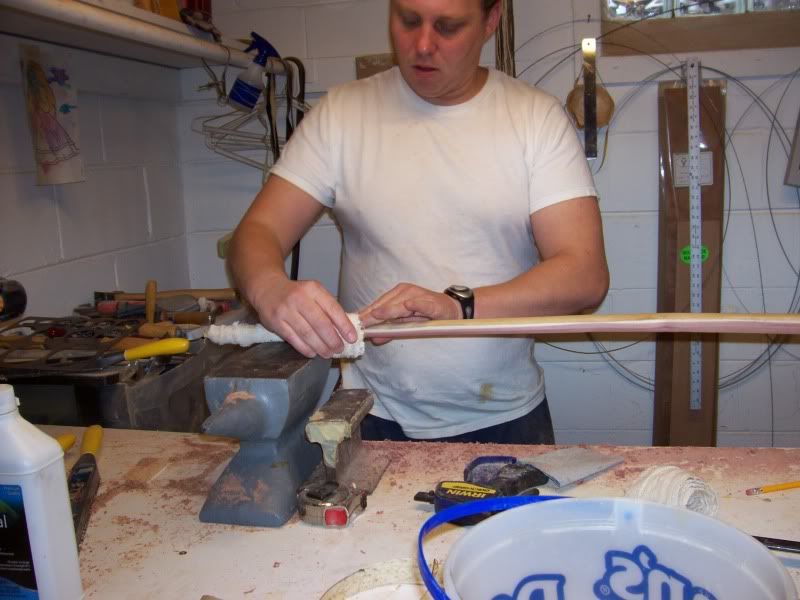
Now we need to leave the bow alone. Do not fear though there are other items that ned taking care of. We need to get our horn nocks set on the carving post before bed time so the glue will dry and we will be able to work on them tomorrow.
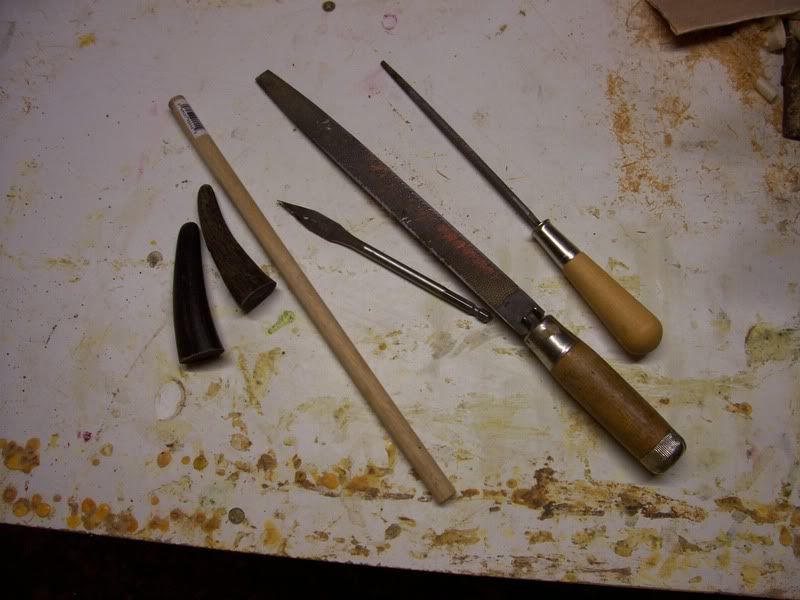
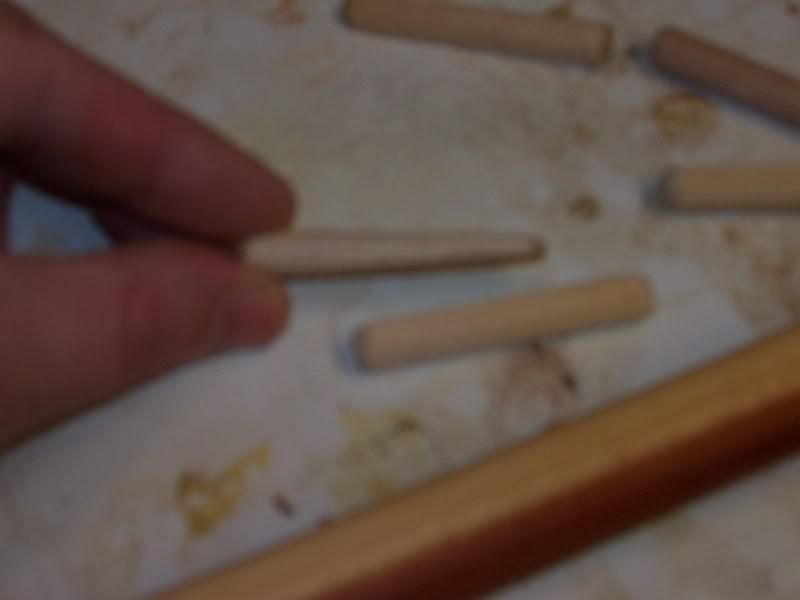
Here is what you need to make a set of horn nock. 2 horn tips (either cow or buffalo or whatever else has a solid tip for about 2”), a ½” Stanley taper bit with the wings trimmed off, a section of ½” dowel that will be your carving post, a chainsaw file, a vice and a drill. :
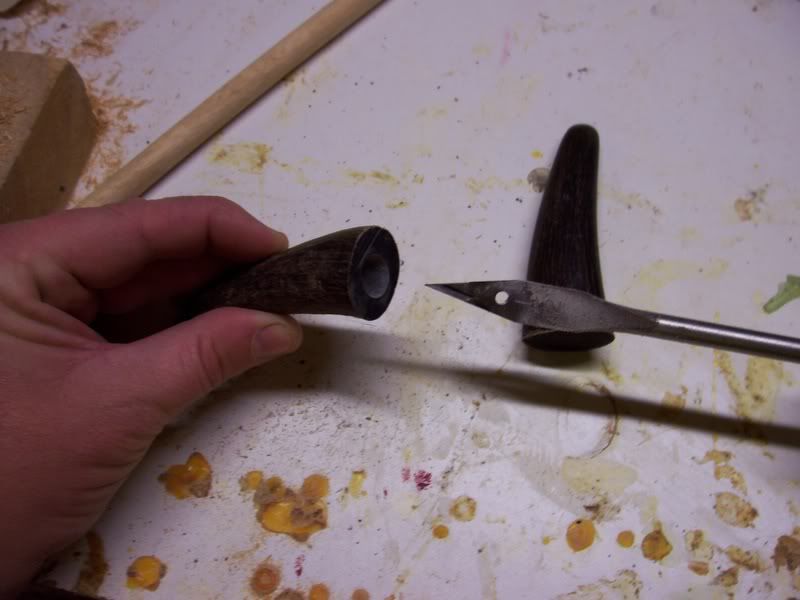
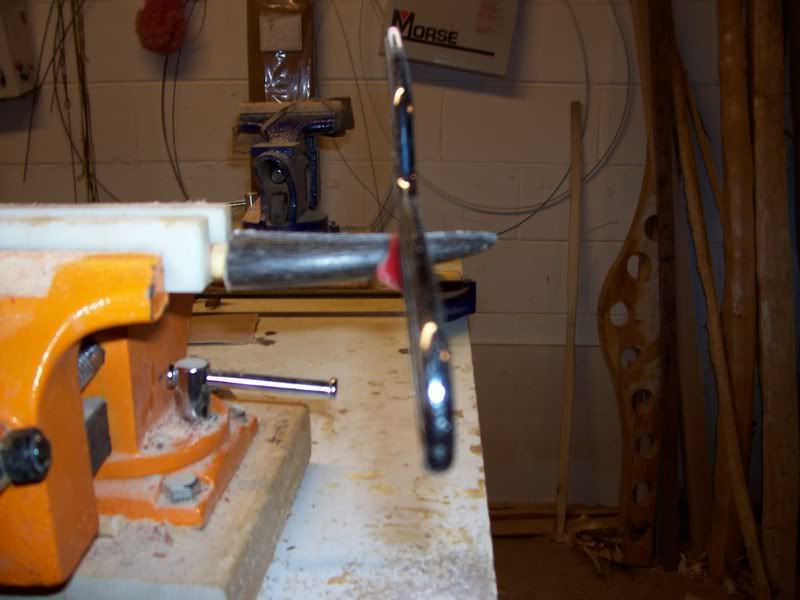
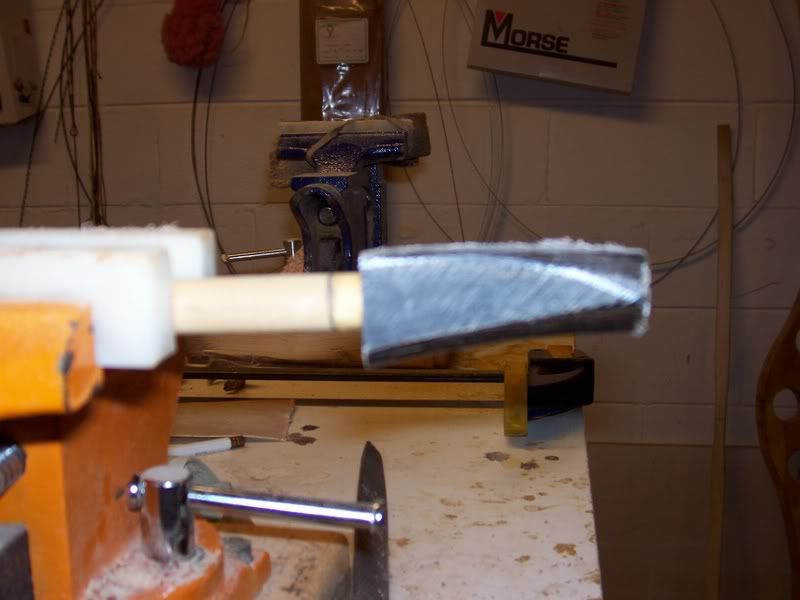
Next you set the horn tip in a vice and bore out the hole with the ½” taper. It SMELLS! All that hard eared good aroma of the ERC just disappears as soon as that bit touches that horn. Its ok, you will get used to it. Wear a mask as horn is nasty stuff to breath directly.
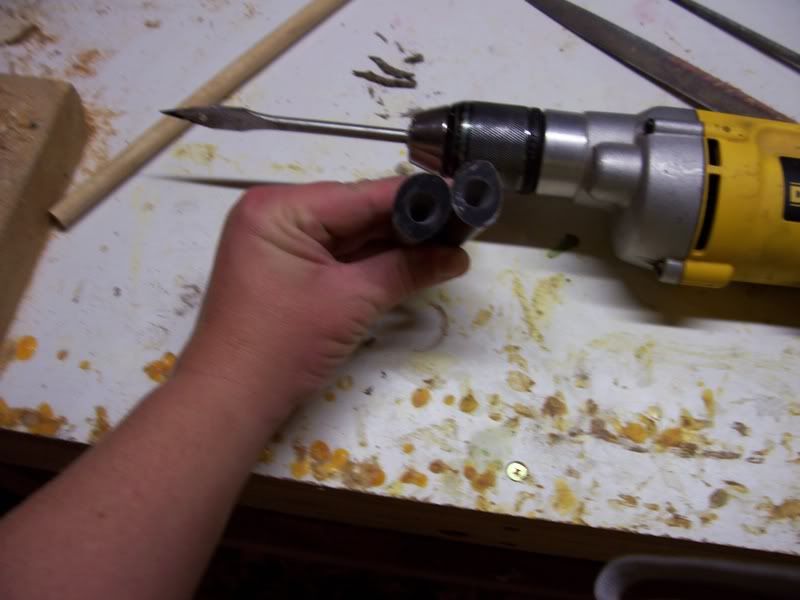
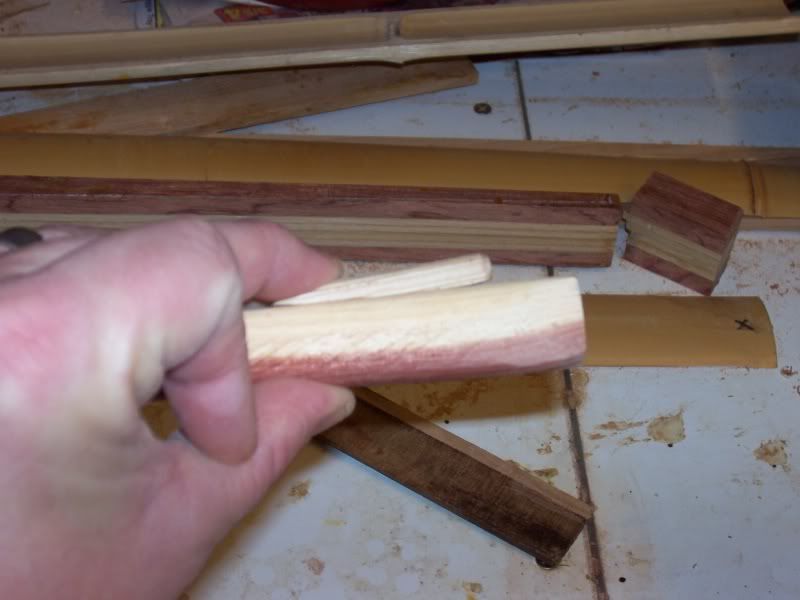
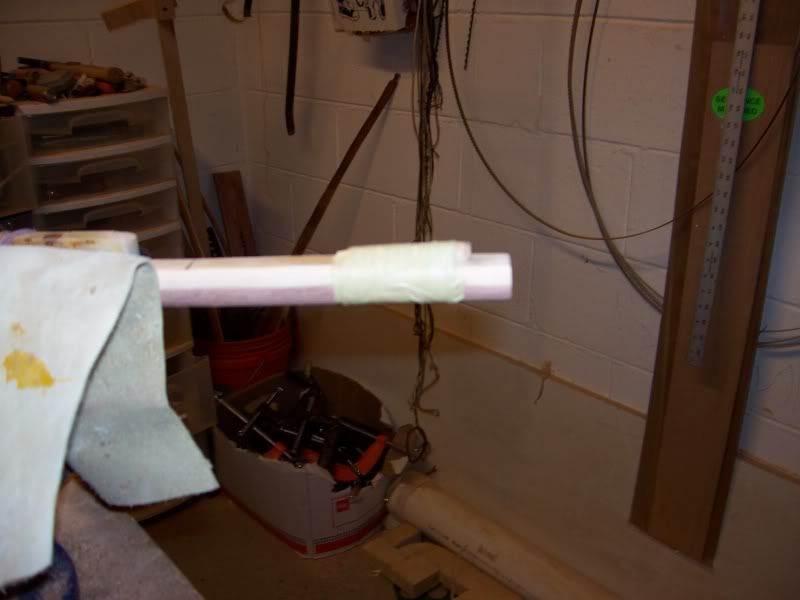
After you have bred the tips out taper the ½” dowel ends to match the Stanley Bore bit as shown. Use TB2 to glue the tips to the dowel. TB2 will release with heat. After carving the nocks on the post we will use the heat gun to get the glue to release. This is a great way to carve horn nocks. You can really work them and get the alignment right using the dowel method. I do not know how others do it but this is how I do it. Its much better then doing it while on the bow as its easy to gouge up the wood and not get a good transition between wood and horn.
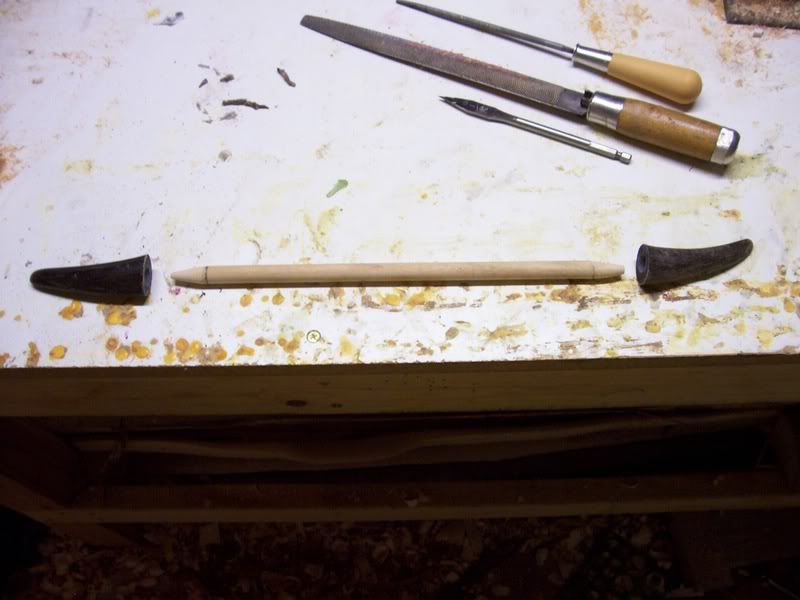
Let the TB2 dry for at least an hour before messing with the nocks.
That’s it for now. Next time we will see how the stave took the heat corrections, make any more if necessary, shape the belly into a D section, floor tiller and get the bow bending to 12” before adding the rawhide backing.
Steve
|
|
| From: ephphatha
|
|
|
|
|
|
|
| Date: 24-Oct-08 |
|
Could you please explain in a little more detail how you get the taper on the dowel to match the hole in the horn?
|
|
| From: Steve Moore
|
|
|
|
|
|
|
| Date: 24-Oct-08 |
|
You trace the taper bit onto the dowel and then remove the wood. I will do another tomorrow and show ya.
Steve
|
|
| From: crow king
|
|
|
|
|
|
|
| Date: 25-Oct-08 |
|
When you followed the ring for the back of the bow did you leave any early wood on the ring?
|
|
| From: Steve Moore
|
|
|
|
|
|
|
| Date: 25-Oct-08 |
|
Nope, all late wood. The early wood is crumbely and real brittle. I left some in a few deep vallys to make sure that I have a flatter glue surface over those as its hard to get the rawhid to take in those real steep vallys common in wood like this.
Steve
|
|
| From: heavybows
|
|
|
|
|
|
|
| Date: 25-Oct-08 |
|
Steve tonight i try to post a picture of the bow i have a crappy camera. Very nice bow steve. Marlon
|
|
| From: Zipperin'
|
|
|
|
|
|
|
| Date: 25-Oct-08 |
|
Steve,
I enjoy watching these, you certainly can chase a ring. I bet the smell is fantastic!
Big Wolverines fan, I take it?
Zip?
|
|
| From: Tommyboy288
|
|
|
|
|
|
|
| Date: 25-Oct-08 |
|
Great Thread man! Keep it up!
-Tommy
|
|
| From: BOB
|
|
|
|
|
|
|
| Date: 25-Oct-08 |
|
Great build along Steve, I think I remember a picture of you making a bow with a baby on your lap that seems like yesterday, now she is holding holding your staves for you.
|
|
| From: ephphatha
|
|
|
|
|
|
|
| Date: 26-Oct-08 |
|
Steve, this is a really good build along, and I wish somebody would put it on the internet somewhere more permanent than a message board--like a web page. Do you have a web page?
|
|
| From: Steve Moore
|
|
|
|
|
|
|
| Date: 26-Oct-08 |
|
I do have a web site. Maybe I will load it on a special page dedicated to build alongs after I complete it here on the Leather Wall. What do you guys think?
www.orangeblossomspecials.com
I certainly enjoy helping people learn about bows.
I did a bunch more today. I will try and get it posted up later today or tomorrow. I have 2 bows to partially tiller and sinew in the next 2 days so progress my be a little slow till wed. I will see what I can fit in.
Steve
|
|
| From: Steve Moore
|
|
|
|
|
|
|
| Date: 27-Oct-08 |
|
Alright, I got my sinew all pounded for the 2 bows that I need to get sinewed tomorrow. I can squeeze a bit in on the build a long.
Here you can see that with the clamps removed that we have removed the propeller twist and have the natural deflex down to about ¾”. We will take it and proceed.

The next thing that we need to do is shape the bows cross section. ELB style bows are known for what is referred to as a “D” shaped crossed section. They are narrow in width and deep in depth. Unlike a flat bow or ALB witch commonly has flat wide limbs.
Here is a sketch that shows the steps in FACETING an ELB.
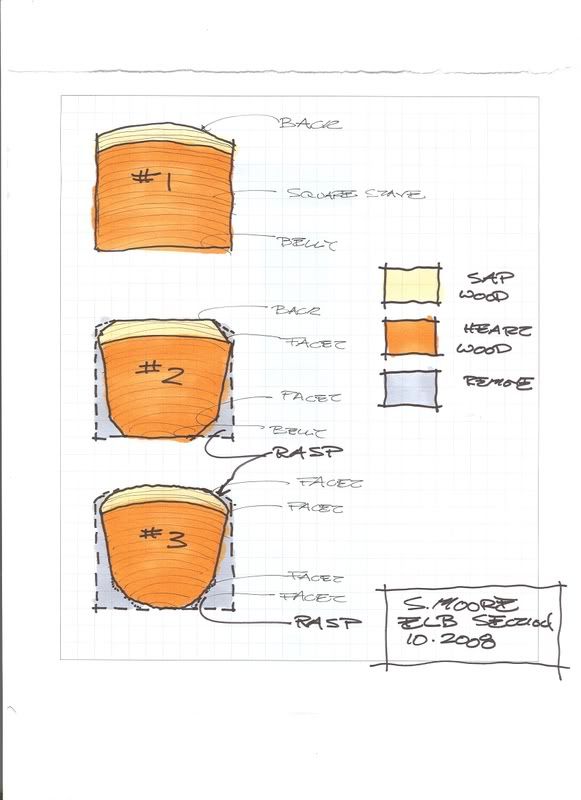
#1 Shows the square stave that we left off with last time #2 Shows the first stpes of faceting #3 Shows the last steps in faceting
All of these steps are done with a rasp. At this point I put down my Nicholson #49 and move to the Nicholson #50. The #49 and #50 are 2 tools that are just awesome for bowyers. They are pricey but well worth the cost. Get them, you will not regret it. Faceting wood into a shape is how to accomplish the curved shape of the ELB profile. You can also use this method on flat bows, grips, fades etc….You do not just round edges. By faceting them you maintain control over the curves and can make them all consistent. Just like plaining square stock into a round dowel, you just keep removing the edges until you get a round surface. I find that after step #3 a rasp is no long necessary and you can move to sand paper.
Here is what the stave looks like at step #1. Notice I have put a pencil line on to mark step #2:
Next we see what the rasp does to get us to step #2:

And then step #3:
Here you cans see the back of the bow being faceted:
After the entire back and belly are faceted you can move to sand paper (36 grit). This is a very important step. You do not want to start bending the bow with the facet edges still visable. I have see cracks and frets start when a bow was bent with the facets still in. It is good practice at this time to just go ahead and remove all the tool marks and get the stave cleaned up. With experience at this point you will be very close to target weight so you might as well proceed with a bow that is close to finished surface.
Here is the bow completely cleaned up with all the facets smoothed. It is ready for floor tillering.
That’s all for this next step. Next time we will get to floor tillering and move right into short string tiller.
Steve
------------------------------------------------------------------------------------------------------------
|
|
| From: Buzz
|
|
|
|
|
|
|
| Date: 27-Oct-08 |
|
Great stuff, thanks again.
|
|
| From: Huntnwruss
|
|
|
|
|
|
|
| Date: 27-Oct-08 |
|
This a great looking bow. like the two-tone of cedar.
Looking forward each and every set of pictures.
Russell
|
|
| From: Steve Moore
|
|
|
|
|
|
|
| Date: 27-Oct-08 |
|
Thanks fellas. She should turn out pretty nice. Should get the next instalment of pics and info on wed if all goes well.
Steve
|
|
| From: Steve Moore
|
|
|
|
|
|
|
| Date: 27-Oct-08 |
|
Ya know, I have been thinking! I do not even shoot ELB's much anymore. I have pretty much been dedicated to the West Coast native bows and the Plains bows and plan to keep it that way so that I can get my shooting proficencey back....(I have lost it over the last year from having to shoot so many difernt bwos all the time).....The last thing I need is another ELB around with my name on it. I have decided to dedicate this thread and gift this bow to Michigans own Cody Roiter. He is an exceptional young traditional archer who has a passion for helping people get into the sport. At this last years GLLI he really helped a new comer get started and I can really respect that. Its guys like him who are the future of this sport. I also know he LOVES ELB's and is just dying for one.
So, Cody, This thred and this bow are dedicated to you bud!
Keep an eye on it and lets all hope she turns into a dandy for him.
Steve
|
|
| From: ephphatha
|
|
|
|
|
|
|
| Date: 27-Oct-08 |
|
What a swell chap you are, Steve! When I read "I do not even shoot ELB's much anymore," I was about to suggest sending the bow to me until I got to the part about Cody Roiter. Talk about an emotional roller coaster! I think you're doing the right thing, though. You should definitely give that bow to somebody who has a passion for getting others into the sport.
Hey, did you know I have a bow building web page? :-) I hope you decide to make another ERCELB sometime.
|
|
| From: Steve Moore
|
|
|
|
|
|
|
| Date: 27-Oct-08 |
|
Yup, I have seen your web site. Good stuff there.
Steve
|
|
| From: Steve Moore
|
|
|
|
|
|
|
| Date: 27-Oct-08 |
|
Yup, I have seen your web site. Good stuff there.
Steve
|
|
| From: HighPockets
|
|
|
|
|
|
|
| Date: 27-Oct-08 |
|
I'll have to say that i'm really enjoying this and am impressed with your technique; you must be an engineer! HA
God Bless
|
|
| From: Steve Moore
|
|
|
|
|
|
|
| Date: 27-Oct-08 |
|
HighPockets,
Close, I am a Design Architect.
Steve
|
|
| From: Buzz
|
|
|
|
|
|
|
| Date: 27-Oct-08 |
|
Great gesture giving the bow to Cody. I'm sure he will cherish it.
|
|
| From: crow king
|
|
|
|
|
|
|
| Date: 28-Oct-08 |
|
Steve, are you going to let the bow dry before tillering, or is it at the right moisture content now?
|
|
| From: Huntnwruss
|
|
|
|
|
|
|
| Date: 28-Oct-08 |
|
"Close, I am a Design Architect."
That explains the circles!
|
|
| From: Steve Moore
|
|
|
|
|
|
|
| Date: 28-Oct-08 |
|
Crow,
Its not ready yet. ERC drys fast and I am hoping to resume wed or tghursday.
Steve
|
|
| From: Paul Newton
|
|
|
|
|
|
|
| Date: 28-Oct-08 |
|
That a great gesture to give the bow to Cody.
|
|
| From: cody roiter
|
|
|
|
|
|
|
| Date: 29-Oct-08 |
|
Wow Steve I don't know what to say Thanks.wow is all I can Say. I will give it a very good home. THANKS so much. See you all later time to get to work. Cody
|
|
| From: George Tsoukalas
|
|
|
|
|
|
|
| Date: 29-Oct-08 |
|
Good stuff, Steve. Thanks for sharing. Jawge
|
|
| From: cody roiter
|
|
|
|
|
|
|
| Date: 29-Oct-08 |
|
Hey guys just got back from work. Steve What kind of horn do you use. Cody
|
|
| From: Steve Moore
|
|
|
|
|
|
|
| Date: 29-Oct-08 |
|
Cool Cody, I think you will like her just fine. Keep watching the build a long. I hope to be back on it this weekend. I have been suoer busy with a few NA bows that need completing.
Thanks Jawge!
I use american buffalo, water baffalo and cow horn. Whatever I can get my hands on.
Steve
|
|
| From: cody roiter
|
|
|
|
|
|
|
| Date: 29-Oct-08 |
|
Steve way is it that ERC is harder to get then yew ??
|
|
| From: cody roiter
|
|
|
|
|
|
|
| Date: 29-Oct-08 |
|
Steve why is it that ERC is harder to get then yew ??
|
|
| From: Steve Moore
|
|
|
|
|
|
|
| Date: 29-Oct-08 |
|
Because not as many people cut it. Its not worth more then yew in dollars. I have just had an extremly hard time locating it. I think that mos people wh cut bow wood dont consider ERC bow wood maybe.
Riley cuts it, Ryano cuts it and I am not sure who else.
I have been searching for it for years and this is the first time i have worked with it. Juniper as well. Dag nab it. I want to make an Ishi bow but still can not find juniper either.
Steve
|
|
| From: Steve Moore
|
|
|
|
|
|
|
| Date: 29-Oct-08 |
|
How many pouds and whats your draw Cody? The stave is laid out for what I belive will be about 50-55#@28". Let me know if you prefer something differnt and I will see what I can do.
Also, start researching horn nocks. If you find some that you like then post them here. I can carve them in any way. If you dont I will just use artistic licence and make them however comes to mind at the time.
Steve
|
|
| From: cody roiter
|
|
|
|
|
|
|
| Date: 29-Oct-08 |
|
Steve 50-55# @ 28 sounds great for me. As for the horn tips I don't care what ever comes to your mind my friend. Cody
|
|
| From: springbuck
|
|
|
|
|
|
|
| Date: 29-Oct-08 |
|
Steve, PM me about juniper. I have located a great place to cut some, but you'll have to be patient with me, because it will end up well down on my current to do list....I have little girls, too....
|
|
| From: springbuck
|
|
|
|
|
|
|
| Date: 29-Oct-08 |
|
Steve, PM me about juniper. I have located a great place to cut some, but you'll have to be patient with me, because it will end up well down on my current to do list....I have little girls, too....
|
|
| From: Buzz
|
|
|
|
|
|
|
| Date: 30-Oct-08 |
|

Steve here are the pics of some knocks off of my Roy Day ELB's. I recall you liked them.
|
|
| From: cody roiter
|
|
|
|
|
|
|
| Date: 30-Oct-08 |
|
Steve I been thinkin about the arrows since it's 50-55 pounds can I still shoot the big 3/8 arrows out of it or should I stay with 11/32 I have some D-firs shafts that are 3/8 I was going to cut self nocks and long 7 or 7 1/2 inc feathers. whats do you think would work the best. cody
|
|
| From: Buzz
|
|
|
|
|
|
|
| Date: 30-Oct-08 |
|

|
|
|
|
| From: cody roiter
|
|
|
|
|
|
|
| Date: 30-Oct-08 |
|
Buzz Nice horn nocks. I thinkin and know steve dose nice work so I cant wait to see what he dose to the horn nocks on the bow.
|
|
| From: ephphatha
|
|
|
|
|
|
|
| Date: 30-Oct-08 |
|

Here's a bunch of nock pictures I collected from the internet.
|
|
| From: Steve Moore
|
|
|
|
|
|
|
| Date: 30-Oct-08 |
|
Spring buck, I will shoot ya a PM.
Cody, I would say the 3/8" shafts will be spined to heavy for ths bow. Save them for when you get a WarBow.I know you like them as well!
Ya Buzz! You remeber right. I LOVE that first horn nock. I think I said that last year! Good memory ya git there.
Sam, Thats a great collection of nocks. Nice transition, best i have ever seen on that one on the lower left.
I just am finishing up sinewing 2 more bows, I have to put the finishing touches on a Sioux Double Curve bow, Finish tillering the Hupa bow and then will be back on the ERC build a long.
Steve
|
|
| From: cody roiter
|
|
|
|
|
|
|
| Date: 30-Oct-08 |
|
Will do steve I am thinkin I will get me some 11/32 pine shafts to make my arrows.TTT Cody
|
|
| From: Steve Moore
|
|
|
|
|
|
|
| Date: 31-Oct-08 |
|
Yes, those should work fine.
Here is a small sample of my horn nocks. I make them lost of differnt ways depending on the bow. On Elb's i usually make them more decorative. On English War Bows (75"long over 80#@32") I make them cone like, alosmt like an extension of the wood.
I really like the center one. Its an elegant design. That is on a Yew/Hickory and Cherry bark bow. She is a looker!
Steve
|
|
|
|
| From: Steve Moore
|
|
|
|
|
|
|
| Date: 05-Nov-08 |
|
Ok Fellas, Tomorrow I have some built in time to do some more work on the bow.First I have to finish painting the Hupa bow then we will do the horn nocks and short string tiller the bow. After we get to maybe 12" of draw we will move into the rawhide backing.
Check back tomorrow!
Steve
|
|
| From: ephphatha
|
|
|
|
|
|
|
| Date: 05-Nov-08 |
|
I look forward to it!
|
|
| From: Steve Moore
|
|
|
|
|
|
|
| Date: 06-Nov-08 |
|
Ok its been a busy week! Lots had to get done before I could resume the build a long. I finished paint the Huppa a bow and boy she is a daisy! I had to get something done for Crow King as well. I bit of a surprise.
Now we resume. We left off last week with a roughed out ELB stave. It was good to let it sit for a week anyways. I broke my moisture meter and have not replaced it but was pretty sure the stave needed some more dry time. Judging by the feel of it now it lost some physical l weight. That’s good! We now need to start floor tillering and short string tillering but first lest get the horn nocks out of the way as I have had a lot of requests for this portion of the build a long.
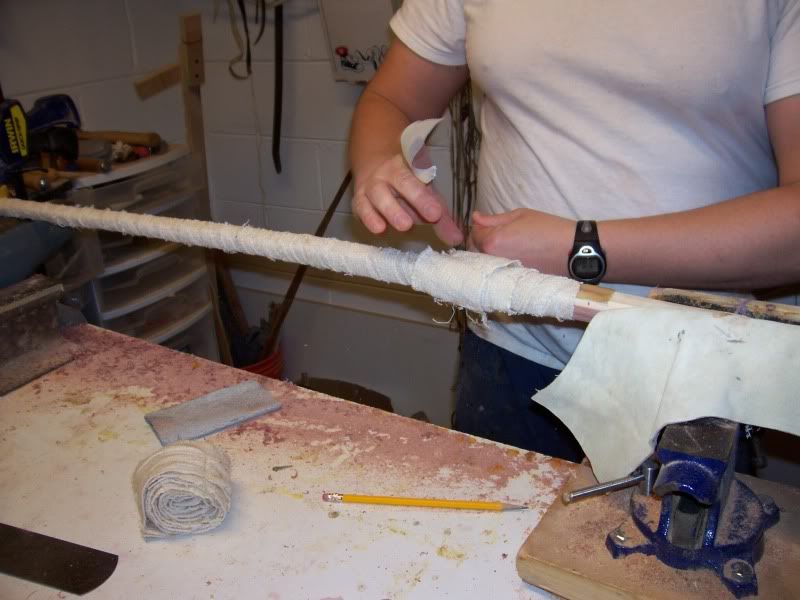
We last put out 2 horns on a ½” dowel to carve them. Here you will see I have the dowel placed in a vice. This is my preferred method of carving horn nocks. I am sure there are lots of other ways. I have developed this way and really like it. I am not really even sure how others do it.
I think that where most people get lost in carving is trying to hard to get the “end result”. The end result is a product of method and technique. Whether it be horn nocks, Algonkian head nocks or bow staves you are removing material. Its an act of subtraction. The subtraction of material does not get done all at once. That is how things get ruined. It happens gradually and globally. Meaning you remove small portions around the whole object you are carving. Now…..don’t get me wrong I am not a carver by any stretch of the imagination. That is just my philosophy and for what its worth……it works for me and will work for you to.
First thing is to trim the tip a bit. These are really ling horns and we do not need it all. Do not throw out your scraps. Little pieces of horn are great for strike plates, Arrow nocks, arrow tips etc….so save them.
I do not really measure these as I go as I work off of proportion and scale. I measured this one after it was done and it is 2 1/8”. I then measured some others of mine and they are all pretty close to that. So cu your nock a bit over maybe……2 ¼”.

Horns are typically crooked or hooked in some way. You will need to straigten the horn out in side profile so that you have something symmetrical to work with:

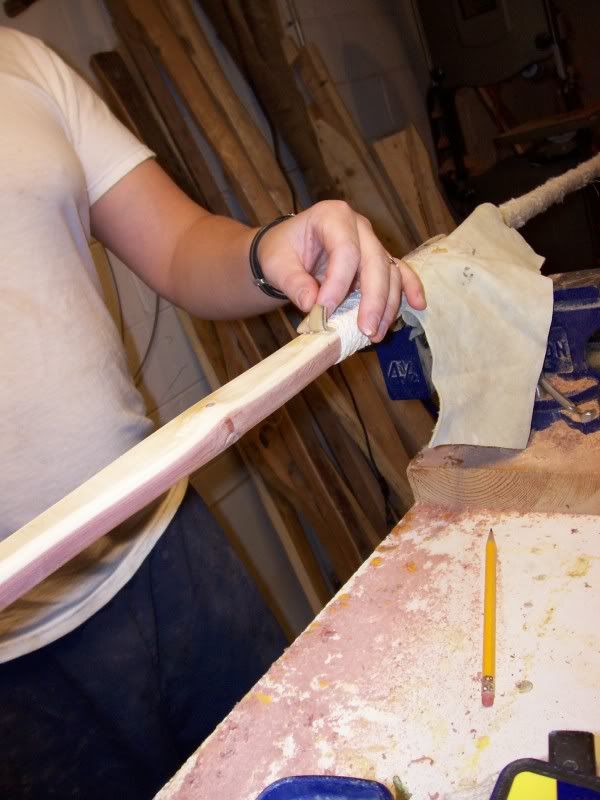
****NOTE****Notice that everything I am doing is in 90degree corners. Just like the bow we are step by step working towards the end goal of a nice round profile. But that profile is a ways away. A
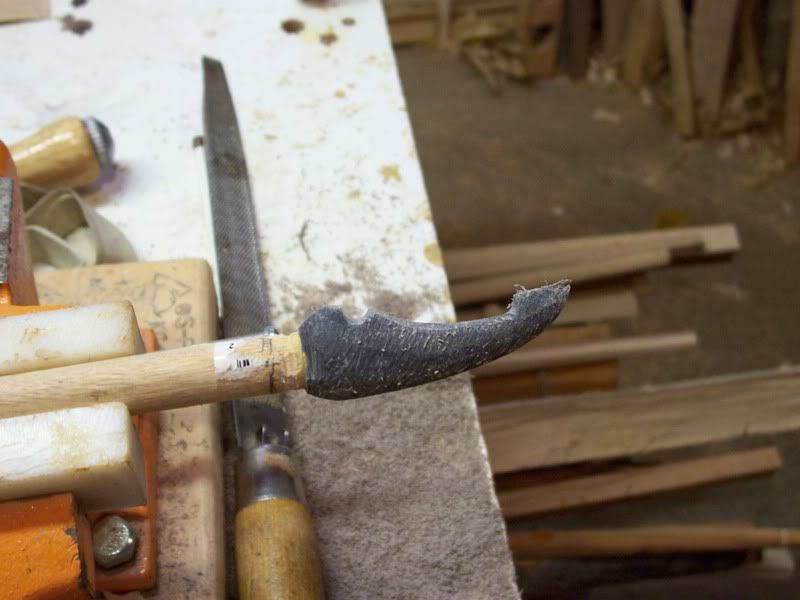
After getting your sides symmetrical turn the nock in the vice so that you can work on the belly side of the nock. Use a white pencil or crayon to give your self a guide. Remove the horn to your line as shown:
After shaping the belly side turn it over and shape the back side. We are going to for the nock that is called “the swooped swept do dad with the curved tapered thing a ma jig at the tip”. That being said you will need to now work on the swooped swept do dad as shown. Meaning curve out the back portion a good bit.
Next you need to locate your string groove. Again, this is not measured just take a look and use your judgment. No need to carve the entire groove, juts a single line across the top for now. This is just a place holder.
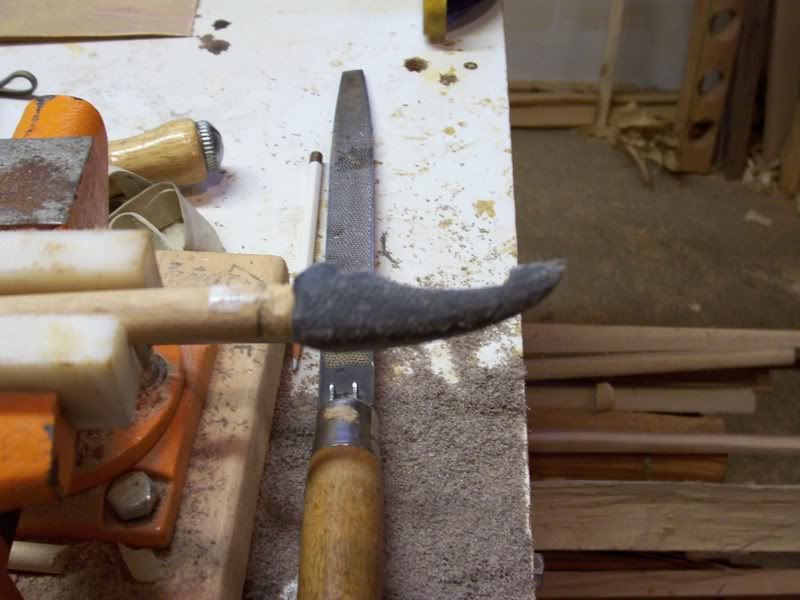
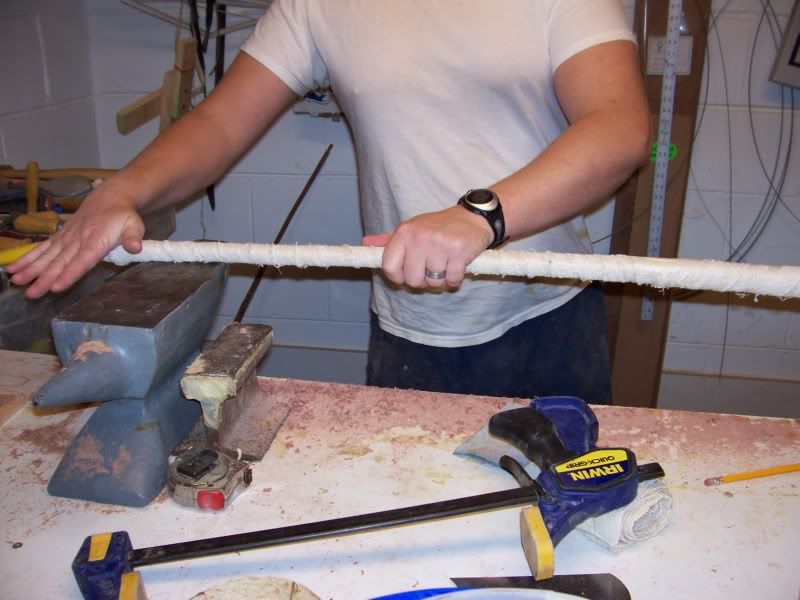
Then work the swept swooped do dad some more. Remember while you are doing this…..horn nocks should look slim, elegant and slight. They should not be clunky things. That in mind work them as you see fit. Back, belly, back belly etc…..until you get them looking sleek.
Back:
Belly:
Back, belly etc……get the taper to look real good.
Next you move to the curved tapered thing a ma jig at the tip. Your swept do dad should be flattened a bit to allow a rat tail file to work the thing a ma jig as shown:

After you have that all in proportion and looking fine examine your nock. Make sure that everything is in proportion and symmetrical. If it is then proceed to rounding all the edges. Use the facet method shown above to remove edge after edge.

Now that the whole nock is rounded, finish off your rough string grooves with your file. These will not really be touched again until the nocks are installed. Then we will fine tune them to the bow.
Next is the transition from nock to wood. I use a dremmel tool for this. Up until this point I use rasps but for this a dremmel works great. You want to actually dig into the dowel so that you can make a razor thin trasition between horn and wood:
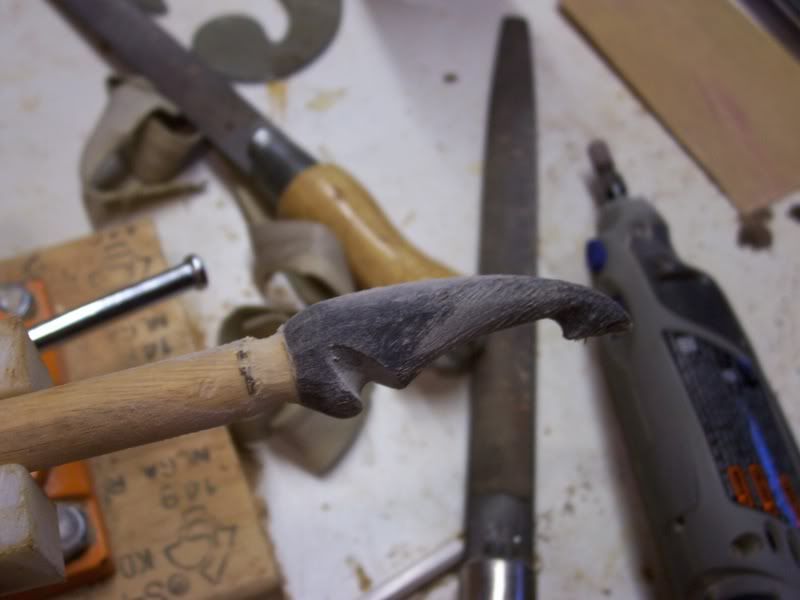
Then use 60 grit, 150, 220 and you should end up with this:

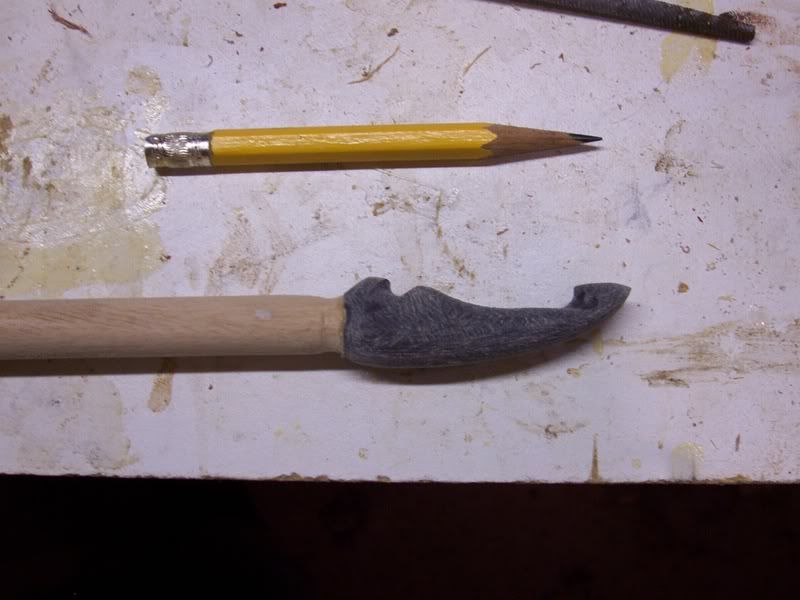
That looks nice!!!
Next move to the bottom nock. All the steps are the same so I will not go through them. The nock is just shaped differently. Here is an assortment of pics of the bottom:
And here you have the final rough set:
I leave them on the dowel until I am ready to install them. It makes them harder to loose that way! They are not complete yet. We have string groove adjustments and polishing left to do. I wait until the nocks are on the bow and all tillering done before I take that step. I put these on as soon as I get the bow to about 20” of draw. The tiller is effected by the nocks so your final tillering should be done with them on.
Now that this is complete I am going to get started on tillering. More to come soon,
Steve
|
|
| From: Buzz
|
|
|
|
|
|
|
| Date: 06-Nov-08 |
|
Great job, looks great. How do you get the nock off the dowel?
|
|
|
|
| From: cody roiter
|
|
|
|
|
|
|
| Date: 06-Nov-08 |
|
Steve I love the looks of them horn nocks nice work. Cody
|
|
| From: Steve Moore
|
|
|
|
|
|
|
| Date: 06-Nov-08 |
|
Thanks guys,
Buzz. I use a heat gun set at 700 degrees. TB2 Release at a certain tempature. I think maybe around 200?? Anyways, you just heat them up with a heat gun and the glue will release and they will slide right off.
Steve
|
|
| From: woodinhand
|
|
|
|
|
|
|
| Date: 06-Nov-08 |
|
Great build-a-long. Thanks so much! Carl
|
|
| From: Steve Moore
|
|
|
|
|
|
|
| Date: 10-Nov-08 |
|
Sorry Guys, I have been VERY busy this past week and have had a real bad cold over the weekend. I hope to be back on on Wed or Thursday. At our current rate Cody should have the bow in hand in about 4 weeks.
Its a slow build!
Steve
|
|
| From: George Tsoukalas
|
|
|
|
|
|
|
| Date: 10-Nov-08 |
|
Steve, excellent horn nock tutorial. Jawge
|
|
| From: cody roiter
|
|
|
|
|
|
|
| Date: 10-Nov-08 |
|
Steve take your time I know you have other bows you need to get done.
|
|
|
|
| From: edmott
|
|
|
|
|
|
|
| Date: 17-Nov-08 |
|
great pics, great job == save this as a classic
|
|
| From: Steve Moore
|
|
|
|
|
|
|
| Date: 17-Nov-08 |
|
I cleaned the shop today to start some glue work in the morning. I needed dust free conditions. I pulled the ERC out and did some floor bending. Feels like it gained about 5-8 pounds since last flexing it. I think it was pretty wet.
Hope to do some more on this build-a-long soon.
Steve
|
|
| From: Bowman0202
|
|
|
|
|
|
|
| Date: 17-Nov-08 |
|
This is absolutely awesome.!!!! Thanks.
|
|
| From: Steve Moore
|
|
|
|
|
|
|
| Date: 17-Nov-08 |
|
Thanks guys, It will get better when we pick up some steam. Here is a list of what will be covered in detail same as above:
Floor tiller, Short string tiller to 12", rawhide backing, horn nock instalation, final tiller, grip, finish.
So get your bows started and catch up!
Steve
|
|
| From: stickhunter
|
|
|
|
|
|
|
| Date: 18-Nov-08 |
|
I saw some lumber that was marked as Tennessee Cedar today. Is it ERC, or something else? Sure smells good. I'm enjoying the buildalong Steve. Thanks!
Travis
|
|
| From: Gaur
|
|
|
|
|
|
|
| Date: 19-Nov-08 |
|
Steve, Enjoyed what you have posted so far. I can tell just from your drawing (let alone your bows) that you are an artist. Look forward to seeing this one completed.
Randy
|
|
| From: Steve Moore
|
|
|
|
|
|
|
| Date: 25-Nov-08 |
|
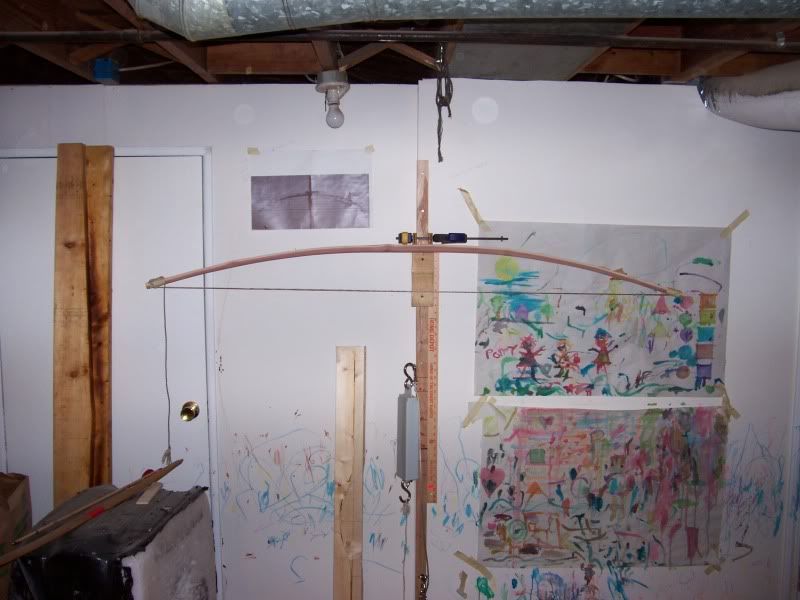
We have now let the bow sit for a few weeks. It has gained an estimated 6 -8. Over the past few weeks while in the shop I would pick the stave up and floor tiller it a bit. That just means using the floor to exercise the limb. As you see here:
I do not make many adjustments during floor tillering. I just make sure the limb is bending even…..if its close then I leave any adjustments for short string tiller. That leads us to a topic that is a debate among bowyers……to long string tiller or not?? I do not long string tiller ELB’s or EWB’s. It is just to hard to keep them stable on a long string unless you make some kind of device to hold the bow in place. I just skip it and go straight to the short string with a low brace height. That being said we will now need a way to string the bow.
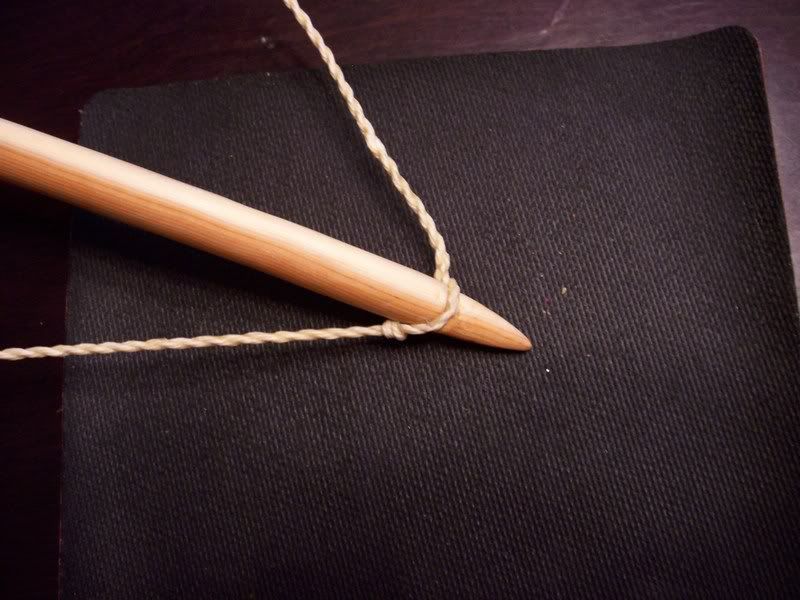
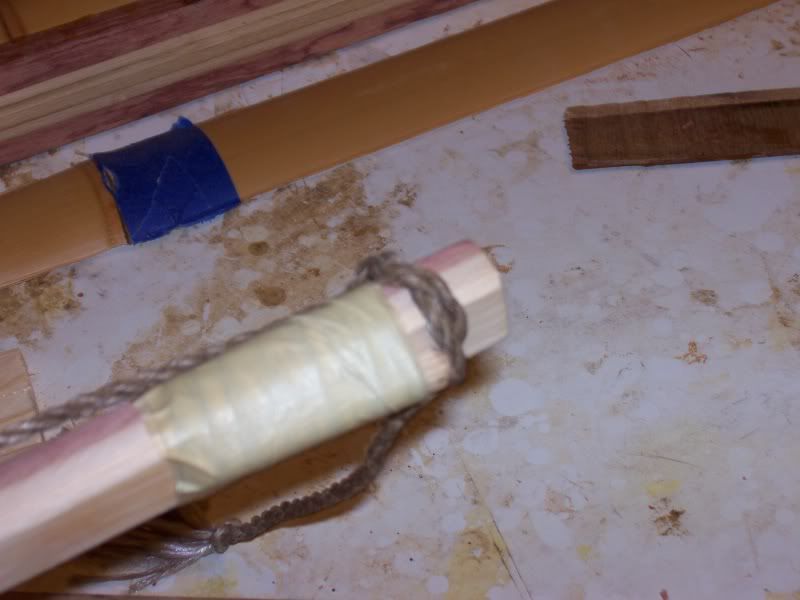
On bows that are getting horn nocks I do not cut even temporary nocks into the bow.It always seems that to get good deep temporary nocks that will actually hold the string you need to cut petty deep. This in turn makes it difficult to fit horn nocks as you sometimes cut to deep! I use wedge nocks. They are easy to tie on, quick and do not effect the tip of the bow at all for later horn nock fitting. I use furniture wood dowels as shown here.
Flatten one side and you are set to go. Then use Dacron or linen or any ther string you have laying about to wrap them on. Remember these are temporary so do not make the pretty:
After they are wrapped on you can put a piece f tape over the string to keep it from unraveling. These can also be used as permanent nocks on bows with real skinny tips. Here is an Osage bow with permenant tied on nocks:
They are neat!
You will now need a tillering string. I have a few made up. This one is a 24 strand Dacron string that is really long. I use this on English War bows and have tillered 130# bows with it. One end is a loop the other 1/3 of the string is a continuous twist as shown here:
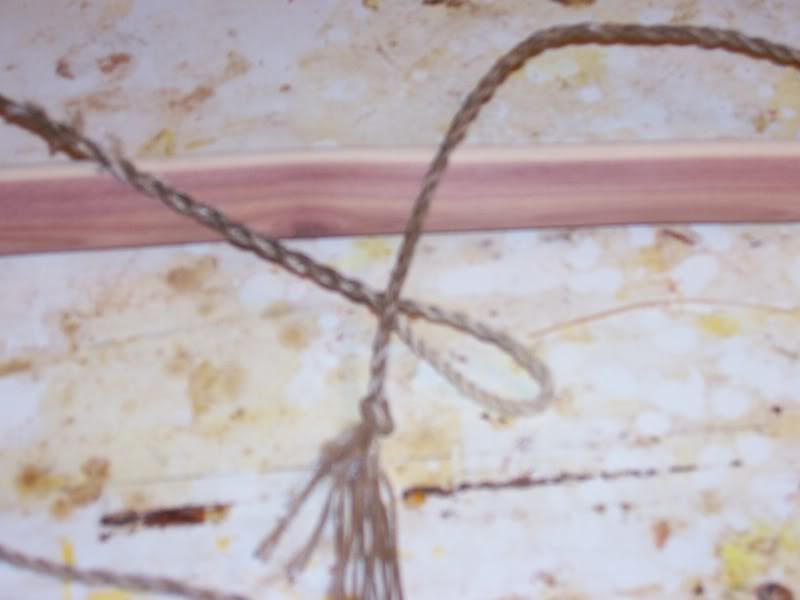
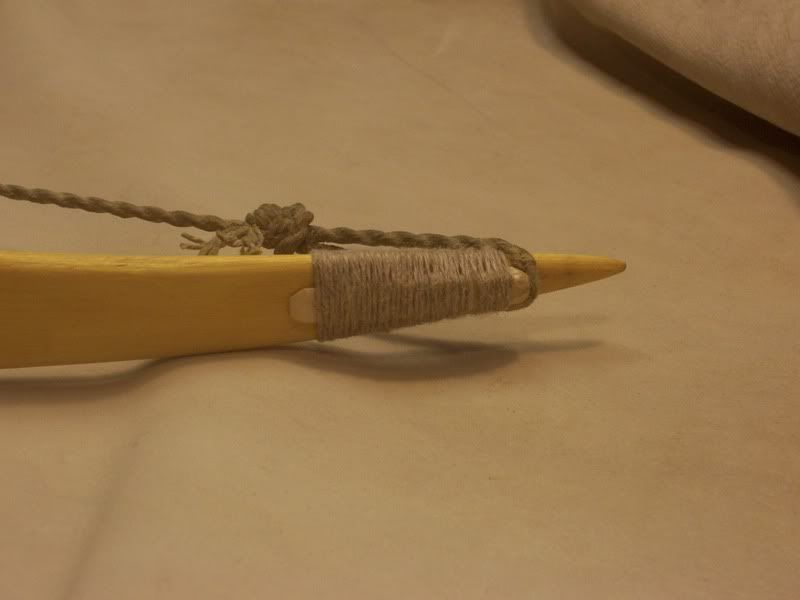
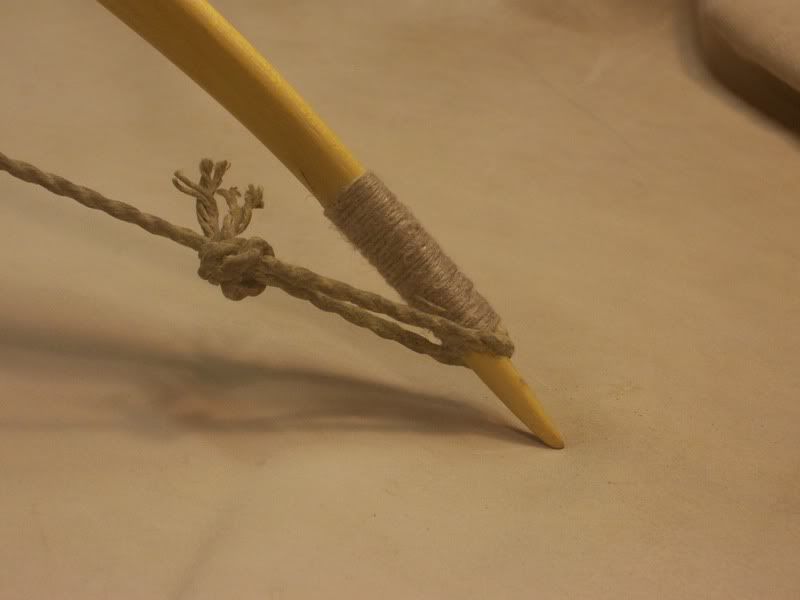
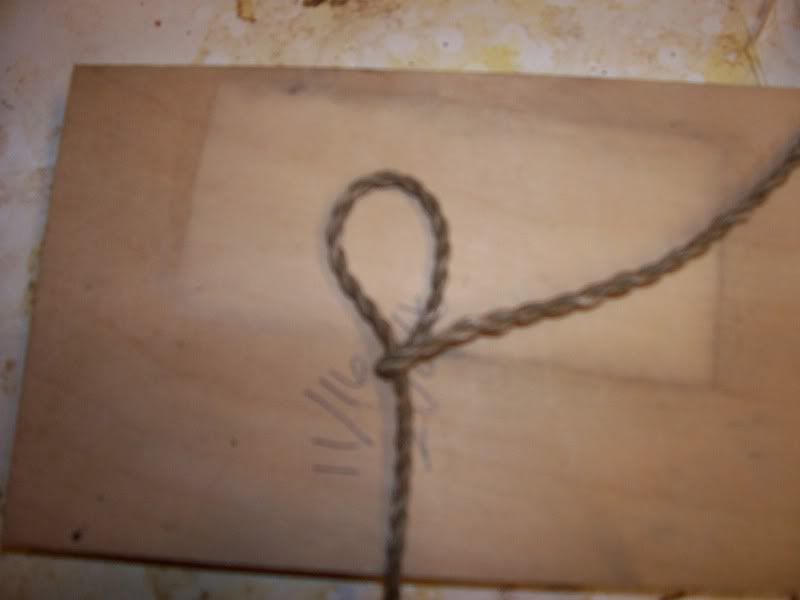
Next you will need to tie a bowyers knot. There are some variation on this hitch style knot. This is the one I use. It is also worth noting that you cn use this knot as a permanent knot to keep your bow string on. I have some bows that I have shot 1000’s of times using a bowyers knot set up. It’s close to the same hitch the English used on War bows. I actually shot my 90# war bow with side nocks and a bowyers knot for many months. They work great. Here is a picture of that set up:
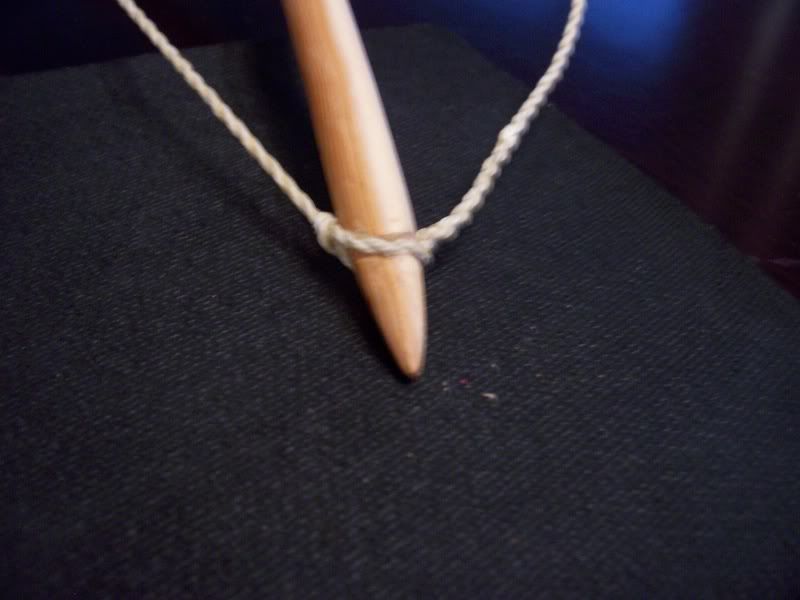
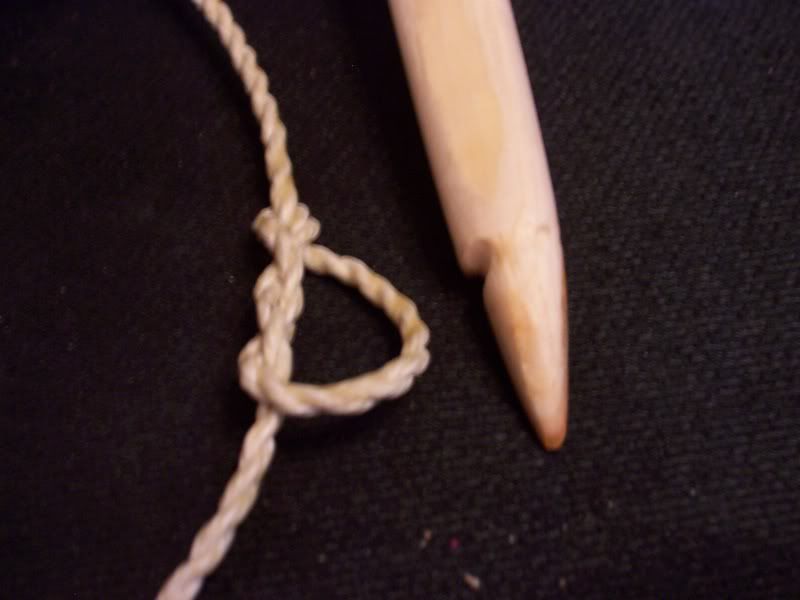
This is how to tie a bowyers knot:
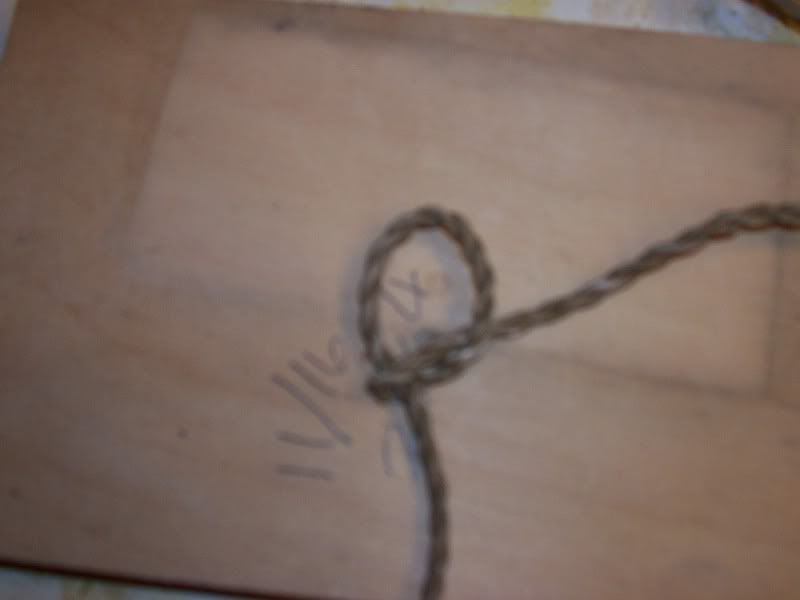
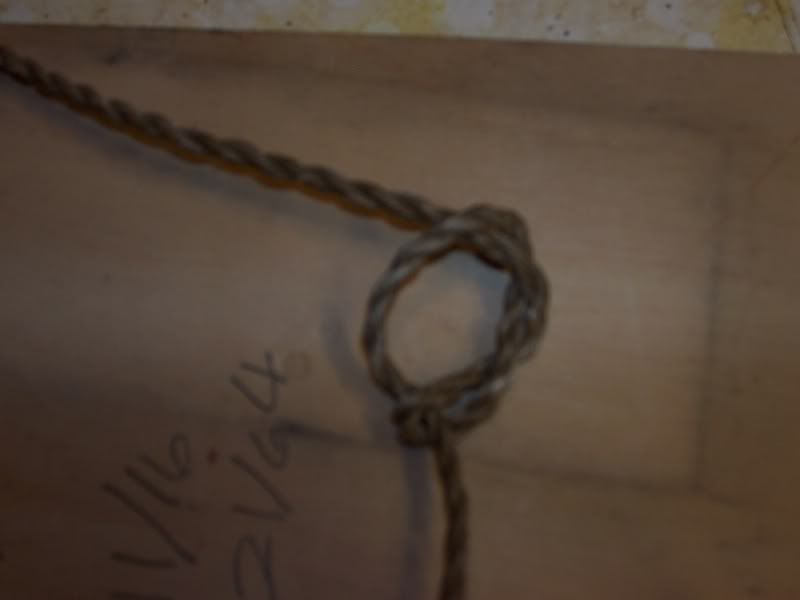
This is it snug on our limb with the wedge nocks:
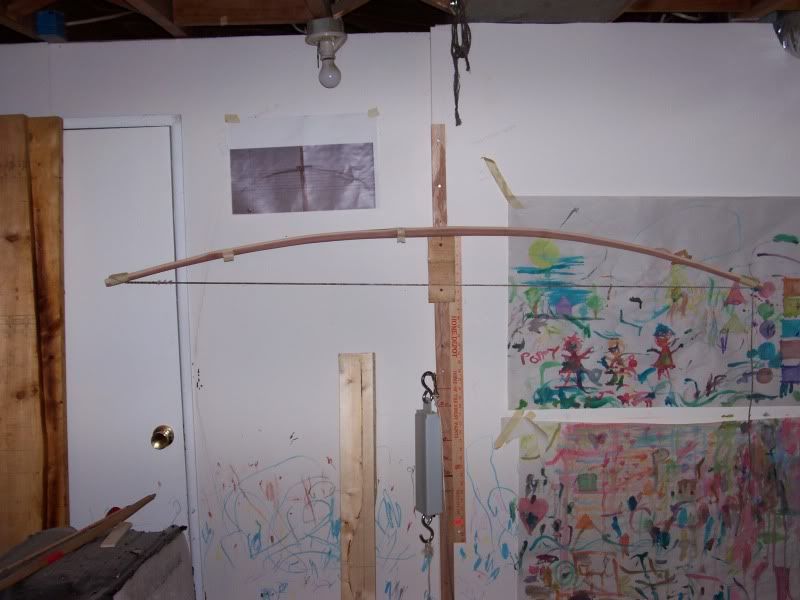
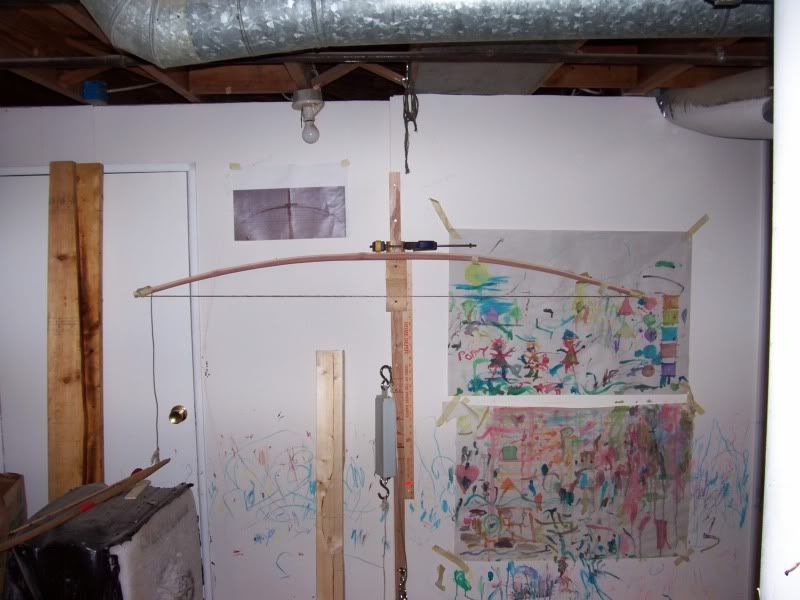
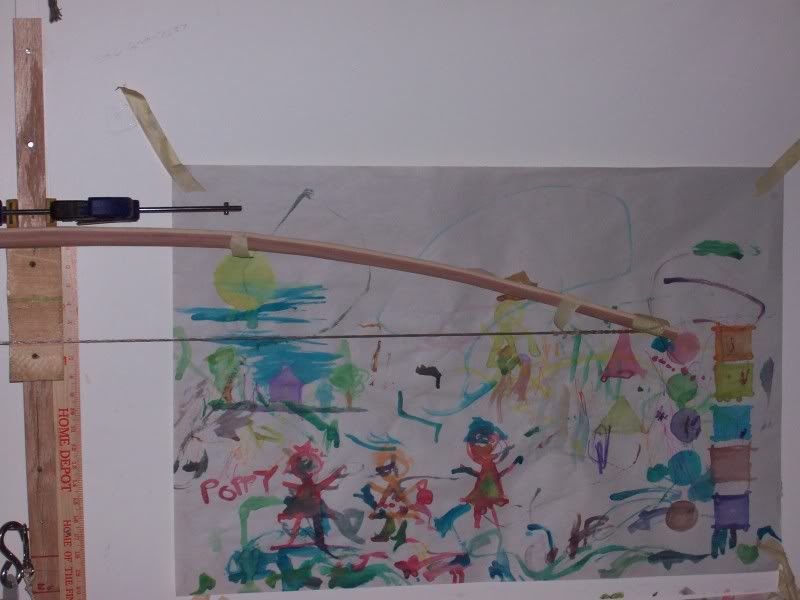
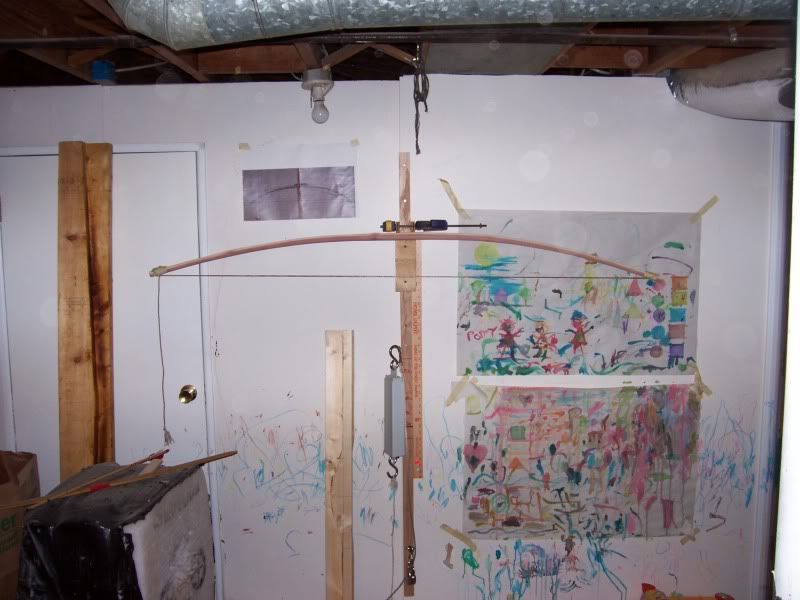
Now we are ready to brace the bow for the first time. If you did your tapers correctly as noted above and your profile is done well then the strung profile should be very close. Lets take a look…………
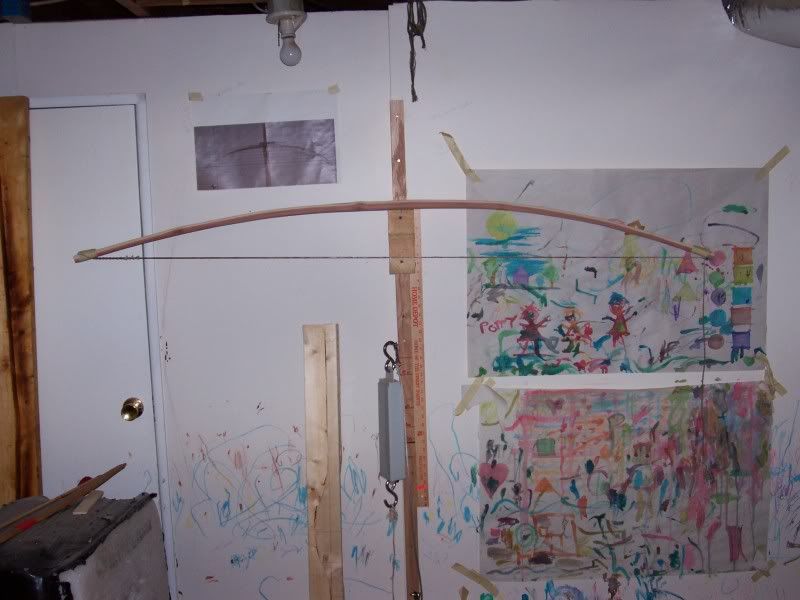
Looks pretty good but not exact. Here you can see I have marked with tape the left limb area that is stiff and needs work:
At this point I use cabinet scrapers and sand paper to do all tillering and wood removal. First scrape the area that is stiff with the scrapers:
Then use 36 grit sandpaper over that spot. This keeps the D profile consistent while removing wood. You do not want to bend the bow with facets of any kind as thee could fret.
Then string the bow back up and see how it looks.
The left limb now looks good and the right limb is looking a tad stiff/ making bend through the handle ELBs reminds me of a dog chasing his tail!!!
Here is the right limb marked with tape:
Cabinet scrapers and sand paper again and here is the result:
Its not there yet but it is close enough to move to the next step. We needed to get the bow braced prior to applying the rawhide. Any time you back a bow it is a good idea to get it braced first. This way if it needs any heat corrections you can do it prior to backing the bow. Once the bow is backed its almost impossible to make corrections unless you remove the backing.
Now we will move to the rawhide backing. You can buy strips of rawhide from all of the archery supply shops, They are usually 2” wide and maybe 36” long. They work just fine if you are making a bow……however…..if you are making LOTS of bows then you can buy a whole rawhide. I make lots of bows and use rawhide for so many things that I buy whole hides.
With a sharply trace your bow limbs onto the hide:
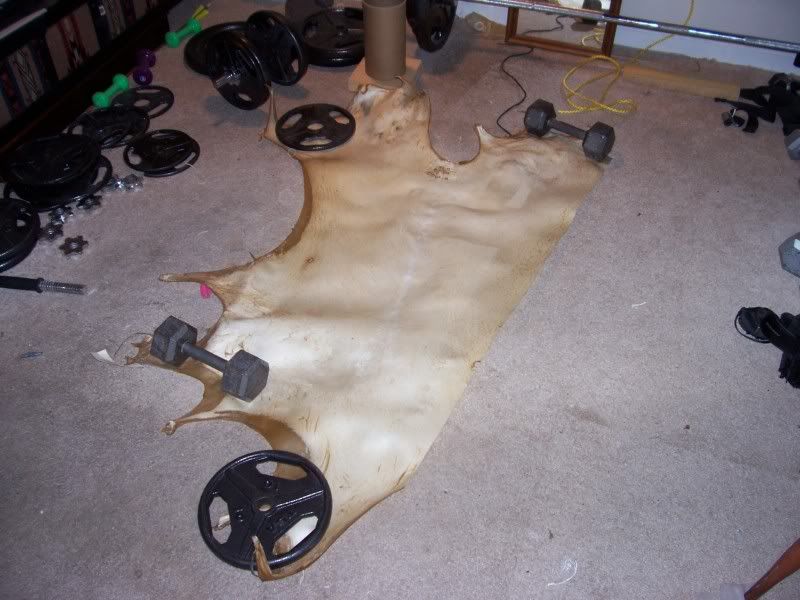

Cut them out. They do not need to be exact. They just need to follow the taper more or less and cover the entire back of the bow. We will trim them after the dry on the bow. These will overlap at the center of the handle. You can use a skive joint to make the joint flush if you want to. If I am putting a grip on a bow then I do not bother with the skive joint I just overlap them.
Soak them in warm water for 30 minutes. Whele they are soaking rough the back of your bow up with 36 grit sand paper. And apply a light coat of glue.
Lay them flat on a clean surface and use TB2, TB3 or Hide glue on the fatty side of the rawhide. The shiny flesh side is your finish side:
Next you put them on. Here is an in action photo group that is pretty self explanatory. Use ace bandages to wrap the bow after the rawhide is on. This will make the rawhide bond to the profile of the back of the bow:
Then with a good amount of pressure rub the back of the bow to press the hide on:
Now the bow will dry for at least 24 hours before bending. I usually wait 24 hours and then remove the ace bandage and then wait another 24 hours before bending the bow.
That’s it for the installment of work. Tune in next time and we will tiller the bow to 24” and then apply the horn nocks.
Thanks for following along!
Steve
|
|
| From: ephphatha
|
|
|
|
|
|
|
| Date: 25-Nov-08 |
|
Thanks Steve! This is great stuff. Where do you get your whole rawhides?
|
|
| From: Buzz
|
|
|
|
|
|
|
| Date: 25-Nov-08 |
|
Ditto, Thanks for your great build along. Awesome work once again.
|
|
| From: Steve Moore
|
|
|
|
|
|
|
| Date: 25-Nov-08 |
|
Great, glad that you are enjoying the thred.
Sam, I get my hides from Moscow hide and Fur. I belive that you can get them from Tandy leather as well.
Steve
|
|
| From: crow king
|
|
|
|
|
|
|
| Date: 30-Nov-08 |
|
Steve, are you going to tiller this bow slightly whip tillered? I read in the TBB that was the correct tiller for an english war bow. I was wondering if that would be the right tiller for a long lighter weight ELB.
|
|
| From: springbuck
|
|
|
|
|
|
|
| Date: 02-Dec-08 |
|
What is "cleaned up the shop"? This I have never heard of.....
|
|
| From: George Tsoukalas
|
|
|
|
|
|
|
| Date: 02-Dec-08 |
|
Good stuff, Steve. Thanks for doing it. Jawge
|
|
| From: LARRY
|
|
|
|
|
|
|
| Date: 11-Dec-08 |
|
HEY STEVE , THAT IS SUCH GREAT STUFF ! ! ! LOOKS LIKE YOUR LOVE FOR BOW BUILDING COULD LEAD TO A BOOK SOME DAY. THANKS VERY MUCH FOR ALL YOUR EFFORT TO BRING IT TO US ALL. LARRY
|
|
|
|
| From: gotta whittle
|
|
|
|
|
|
|
| Date: 14-Dec-08 |
|
took awhile to load in,but it was well worth the wait horn nocks and all .
|
|
| From: heavybows
|
|
|
|
|
|
|
| Date: 14-Dec-08 |
|

Steve heres a picture that i had.
|
|
| From: Chessbum
|
|
|
|
|
|
|
| Date: 17-Jan-09 |
|

I am bringing this thread to the top because Steve hs really impressed me after meeting him at the Great Lakes Longbow Invitational... In fact he impressed me so much I asked him if he would not mind doing something like he has done here for our yearly banquet the Michigan Longbow Association holds each year in mid-lower Michigan. He has agreed to be our guest speaker and I think we will be having one heck of an evening with Steve and his bows there. Tickets will be sold up to the weekend of the Kalamazoo Traditional Expo and if you are a an Iraq or Afghanistan Vet that has returned home I would like to offer two free dinner tickets paid for by the Camp Cuervo Archery Club to one of you who can make it there to have a fun evening and meet Steve and several of us. I need to know if you are interested and if I get several request I will draw a name on Sunday at the Kalamazoo Expo...This is my way of trying to say thank you to our vets who serve our country. Information is on the Michigan Longbow Association banquet thread floating around here with pictures of Steves auction bow. That evening we will be raffling off a Thunderstick Arrow bow and several Norhern Mist bows one of which is a Camp Cuervo Archery Club Northern Mist that was won and donated back by my wife at last years door prize drawing. This is a night you do not want to miss if you can make it up to Michigan the second weekend of February but hurry and get your tickets before they are all sold out... For God and Country, John D. Vasos MLA President-Camp Cuervo Archery Club
|
|
| From: Martin Farrent
|
|
|
|
|
|
|
| Date: 17-Jan-09 |
|
Thanks for bumping this one up, John. It would have escaped my attention otherwise. And thanks to Steve for the excellent explanation and pix.
I really have no desire to own a wooden bow, much less an ELB. But this thread is really intriguing and offers insights into the way others enjoy this hobby - quite different to my own approach, but enormously interesting.
Best,
Martin
|
|
| From: Chessbum
|
|
|
|
|
|
|
| Date: 17-Jan-09 |
|
Maybe, I can find someone that is willing to film Steve's talk at the dinner and produce it. I have a couple of talented guys in mind I will be asking if they would be interested in taking this project on. We need more talent like Steve's available in the traditonal circles to pass the tradition on to others to learn from. JohnV>
|
|
| From: Chessbum
|
|
|
|
|
|
|
| Date: 17-Jan-09 |
|
Some more pics of previous MLA banquets posted here:
http://leatherwall.bowsite.com/tf/lw/thread2.cfm?forum=23&threadid=186210&messages=12&CATEGORY=9
|
|
| From: Chessbum
|
|
|
|
|
|
|
| Date: 17-Jan-09 |
|
http://leatherwall.bowsite.com/tf/lw/thread2.cfm?forum=23&threadid=181950&messages=108&CATEGORY=4
|
|
| From: Wombat
|
|
|
|
|
|
|
| Date: 23-Apr-09 |
|
I've really enjoyed this thread, but was hoping to see the rest of the build along. Was this finished on another thread (this one is getting pretty big, especially with all the great pictures)?
Thanks!
|
|
| From: Cody R
|
|
|
|
|
|
|
| Date: 23-Apr-09 |
|
Nope I have not seen much more on it... But steve most likey busy with other thing....
Cody
|
|
| From: Phil
|
|
|
|
|
|
|
| Date: 24-Apr-09 |
|
Steve I just wanted to say as an Englishman who only shoots longbows thanks for taking the time and trouble documenting the build of your bow and for an excellent thread. You should be very proud of your achievements and skills once again many thanks Phil Rees Derbyshire England
|
|
| From: Longbowsmith
|
|
|

|
|
|
|
| Date: 17-Mar-12 |
|
I am so glad I saved this because it was an awesome build along! Does anyone remember if there was a follow on thread for the rest...or why this one ended?
Chris
|
|
| From: Gaur
|
|
|
|
|
|
|
| Date: 17-Mar-12 |
|
I've wondered a few times what happened to Steve. Seemed he disappeared and his website was down when I looked a while back.
|
|
| From: heavybows
|
|
|
|
|
|
|
| Date: 18-Mar-12 |
|
Same here I was wondering what happened to steve Moore? Great person!i Hope he's well!
|
|
| From: Buzz
|
|
|
|
|
|
|
| Date: 18-Mar-12 |
|
Agree.
Good guy.
Fine bowyer.
|
|
| From: dire wolf
|
|
|
|
|
|
|
| Date: 18-Mar-12 |
|
An excellent build along on the Tennessee Red Cedar stave.
The tutorial work on the horn nocks is also good..and the rawhide backing.. I missed the original build-a-long thread..and also wonder how Steve is doing..
Also wonder how the bow came out in draw weight, finished length, draw length and how it shot.. I have made some good bows from the ERC years ago..Even the best and cleanes staves are somewhat fragile.. Sure os fun to work with tho..:)Jim
|
|
| From: squirrelslayer
|
|
|
|
|
|
|
| Date: 27-Jan-13 |
|
cool build along. i may try this if i get some yew. i wonder if it will work on ash?
|
|
| From: woodshavins
|
|
|
|
|
|
|
| Date: 27-Jan-13 |
|
It's really funny that I actually remembered that first pic in the thread from years ago. I remember thinking how lovely looking those staves were. I always mean to get around to building an ELB.
|
|
| From: ephphatha
|
|
|
|
|
|
|
| Date: 27-Jan-13 |
|
I finally decided to start on one today. I got a log three or four years ago and split it into quarters. I finally split one of those quarters in half today and started on a bow. I'm following Steve Moore's method. I hope it works out. I'm going to leave it 78" or so just to make sure it doesn't break. I'm probably not going to use a rawhide backing either. Deer rawhides are too expensive. I'm going to back it with fiberglass cloth and epoxy. I know that's cheating, but I like the fact that it cures transparent, and you can still see the wood through it.
|
|
| From: miketron
|
|
|
|
|
|
|
| Date: 27-Jan-13 |
|
not the pretty drywall tape? where do you get the clear fg cloth and whar epoxy will u use?
|
|
| From: Selfbowman
|
|
|
|
|
|
|
| Date: 30-Jan-13 |
|
Nice bow and good info on the build along.Arvin
|
|
|
|
If you have already registered, please sign in now
For new registrations Click Here
|
|
|
|


